Light and Easy: DIY Spring Dress

This gathered tiered dress is the perfect easy DIY spring dress. It’s comfortable, light, and the perfect color for those cool spring evenings. It's also soooo easy to throw together! Check out my tutorial below to learn how!
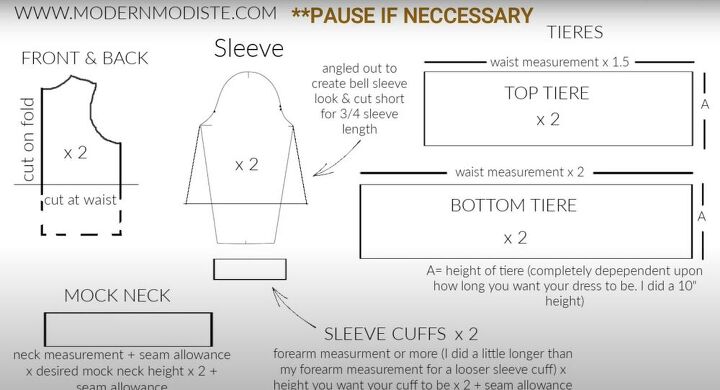
Tools and materials:
- Sewing machine
- Fabric
- Pins
- Scissors
- Pattern
- Seam ripper
Build the top
Start by placing the front and back (of the top of the dress) together, right sides facing and sewing along the shoulders. (I will be using zigzag stitching throughout this whole project). Next, lay the top of the dress out flat and place the sleeve over it, right sides touching. To do this, fold the sleeve in half to find the center point and line up the center point with the shoulder seam. Pin in place. Continue pinning the rest of the sleeve onto the armhole and sew it in place. Repeat with the other side.
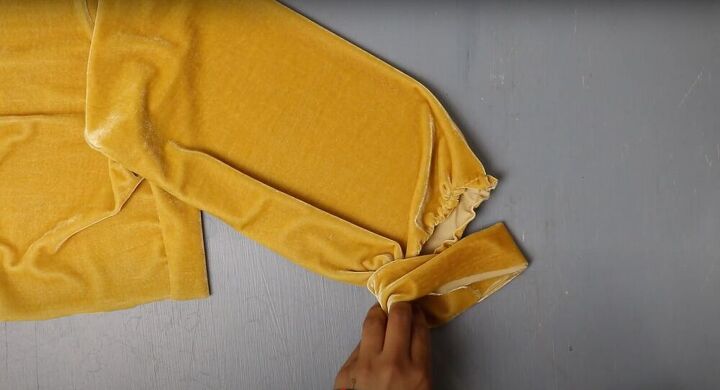
Create the sleeves
Fold the dress over so the right sides are touching. Line up the armpits, sleeves, and sides. Pin the sides and sleeves and sew from the armpit down the sides. Do this on both sides. Next, take the sleeve cuffs, fold them in half so the right sides are touching and sew along the short side. This will create a circle. After that, fold them in half again, wrong sides together so they resemble cuffs. Now, we need the bottom of the sleeve to match the size of the sleeve cuff. Go do that, sew the bottom of the sleeve with the longest stitch your sewing machine will allow. Once that’s done, pull the top thread to gather the fabric until the size of the sleeve and the cuff match. Finally, pin the cuff to the sleeve (right sides facing) and sew it in place.
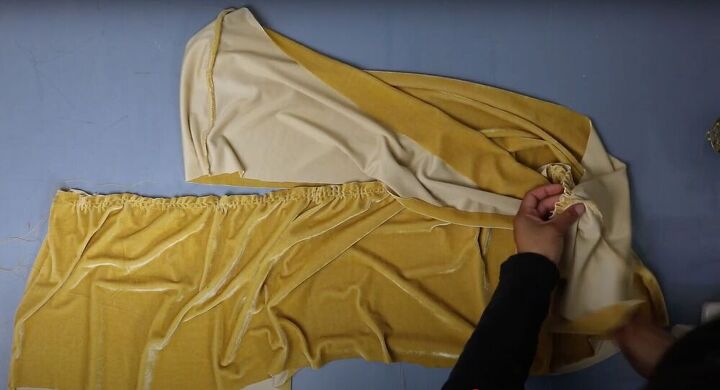
Make the tiers
To make the tiers of the dress, take the rectangles you cut out for the top tier and put them together, right sides facing. Sew along the sides to connect them. Repeat this for the bottom two tiers as well. Next, gather the bottom tier by sewing two straight long stitches and gathering the fabric. Sew these lines about a quarter-inch apart. Gather until the length of the gathered edge is the same length as the top tier. Next, turn the top tier inside out and place it onto the bottom tier, pinning the edge together, right sides touching. Sew the two together. Repeat the gathering process with the top tier and then gather it until it is the same size as the bottom of the top of the dress. Finally, turn the skirt inside out, slip the top of the dress into the bottom so they’re touching with the right sides together. Line up the side seams, pin the edges together and sew.
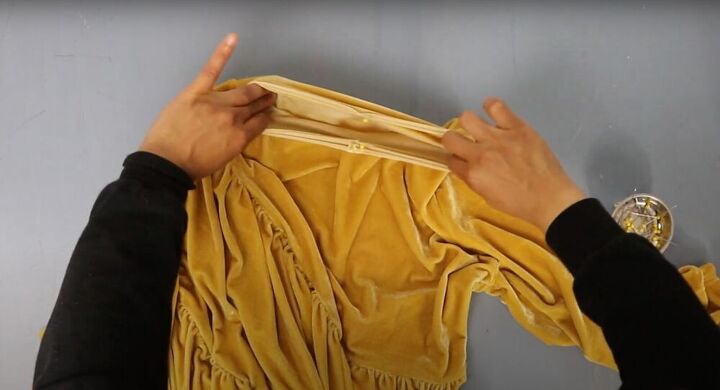
Add your mock neck
Grab a seam ripper and rip out the stitch that was used to gather the fabric. This will make the dress look neater. Next, cut out the fabric for the mock neck (making sure the stretch runs side to side and not up and down so that you will be able to get the dress over your head). To get the right size for your mock neck, measure around your neck, add seam allowance, and double your desired height. Now, fold the fabric in half (right sides touching), and sew it together along the short side. After that, fold it in half again, mark the center front, back, and two sides, and align these markings with the shoulder seams on your dress. Finally, stretch in between the pins to sew (since the mock neck is a little bit smaller than the neckline).
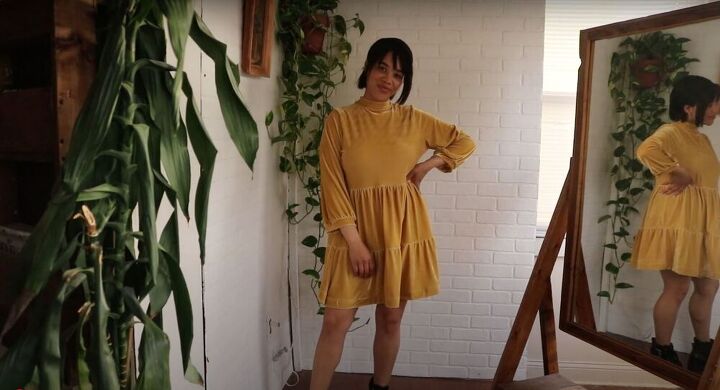
Finish the dress by hemming the bottom with a double fold and enjoying! This tutorial on how to sew a DIY spring dress is the perfect project to embrace the warmer weather.
The author may collect a small share of sales from the links on this page.


Comments
Join the conversation