How to Make an Easy DIY Wrap Dress You Can Wear Different Ways

Have you been looking at how to sew a wrap dress for beginners? Here’s an easy wrap dress sewing pattern that uses your own blouse, straight stitching, and basic cutting so you can make a DIY wrap dress that looks beautiful.
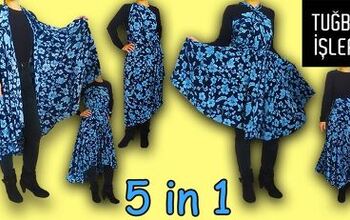
This wrap dress is a 2-in-1 with a simple sheath dress and a wrap skirt that goes on top so you’re not worried about gaping at the bosom or bottom if it’s not tied perfectly tight.
Let’s get started with this tutorial on how to make a wrap dress.
Tools and materials:
- Fabric - 2½-3 yards of 60” width
- Your own loose-fitting blouse
- Scissors
- Measuring tape
- Tailor’s chalk
- Sewing machine
- Pins
- Safety pin
1. Make the pattern
Fold the fabric in half. Lay your own well-fitting loose-fit blouse to serve as a template, folded in half with the fold of the blouse laying right on top of the fold of the fabric.
Use your measuring tape and mark the fabric 11 inches down from the top for the armhole, in line with your blouse.
Measure your desired width, making sure the top isn’t too tight.
Measure your desired length. Here I’ve marked 45 inches.
On the other side of the fabric mark down 11 inches for the sleeve width.
Join the armhole to the sleeve width and mark.
Then join the armhole to the length and mark. Draw a small curve under the armhole.
Carefully cut out the dress pattern. Pin the sides together.
At the top of the folded edge, measure 7 inches for the neckline and mark.
Cut a small slit to mark the neckline.
Lay your pinned piece on top of another piece of folded fabric as a pattern. Cut out a mirror piece. Mark at the neckline to measure 7 inches on the second piece.
Open up the patterns and place them right sides together. Pin the sides of the dress. Pin the shoulders up to the neck point to mark the neck width.
2. Make the wrap skirt pattern
Fold another piece of fabric in half. Measure your desired length. In this tutorial, I measured 46 inches. Cut the piece out. Fold the fabric in the other direction.
On the open edge, measure down 15 inches and mark.
At about 3 inches from the top, draw a slight curve down to the 15 inch mark. Carefully cut this piece out. Place to the side for now.
3. Sew up the dress
Begin sewing at the inner sleeve seam down around the curve through the end of the side seams on both sides.
With just the inner sleeve seam sewn, hem the sleeve with a ½-inch single fold.
Hem the neckline with a ⅛-inch double fold around the entire neckline.
After those are done, stitch up both shoulders up to the neckline.
Double fold the hem at ½-inch to finish.
4. Hem the wrap skirt
Hem the entire skirt pattern all the way around by double folding and hemming at ¼ inch.
5. Make the belt
Cut a piece of fabric 4 inches wide and 20 inches long. Fold in half with the right sides together, leaving one short end open. Sew up as close to the edge as possible. Turn the tie inside out with a safety pin.
6. Sew up the wrap skirt
Fold the belt in half, cutting on the fold so each piece is about 10 inches long.
Pin the open end of each tie to the top corners of the skirt. Sew in place.
7. How to wear the dress
Put the dress on and take the wrap skirt and wrap it around your waist.
You can wear it in many different ways.
DIY wrap dress tutorial
Please let me in the comments which look is your favorite and if you’ve made the dress!
Enjoyed the project?
Suggested materials:
- Fabric - 2½-3 yards of 60” width
- Your own loose-fitting blouse
- Scissors
- Measuring tape
- Tailor’s chalk
- Sewing machine
- Pins
- Safety pin
The author may collect a small share of sales from the links on this page.


Comments
Join the conversation
Love this dress & skirt! What type of fabric did you use? I think this is a timeless style and appropriate for any age. My granddaughter will be staying with me this summer and I thought this would be a good project for us both to make. I've been sewing for more years than I will admit and she's a beginner but I think this is easy enough for her to follow. Thanks!
Ellyn