How to: Make a Houndstooth Dress

Houndstooth is one of those patterns that are so exciting to work with that you are forced to try something new. Today, I am going to sew a houndstooth dress and try to turn this fabric into something unbelievable!
Tools and materials:
- Fitted top or dress
- Skirt or dress
- Measuring tape
- Houndstooth fabric
- Elastic
- Sewing machine
- Elastic thread
- Bobbin
- O ring
Measure your fabric
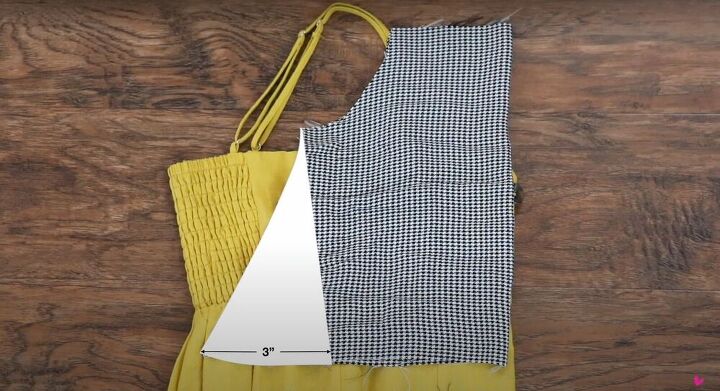
Start with a fitted top or dress and lay it flat (make sure to take any darts or details into consideration). Then take your dress and fold it in half to lay it on its side. Trace out the front of the dress. Additionally, remember to keep those darts in mind - I chose to make three-inch wide darts so I made sure to have enough extra fabric on my top. With your fabric folded in half, cut out your top piece.
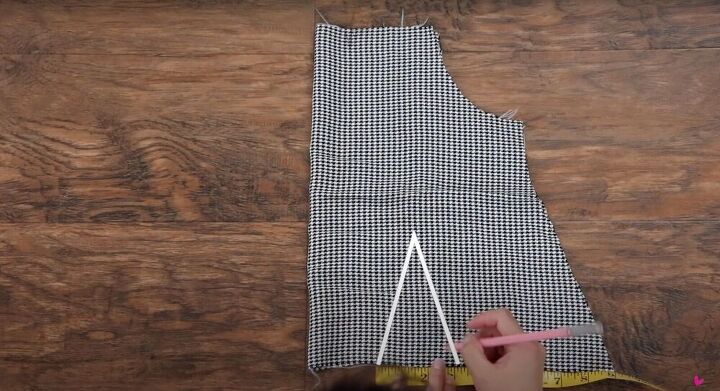
Create your darts
Lay the dress flat again and measure the distance between the two front darts. Next, divide that measurement in half and mark it off on your cut-out fabric. Draw in the shape of the dart (a triangle as pictured above) and repeat this on the other side of the bodice. Once you’ve done that, pinch the fabric together where your darts will go and pin them in place. Finally, sew the darts in place. Don’t backstitch when you’re done, instead, leave about five inches of thread and tie a few knots to secure. Snip off any remaining thread to finish.
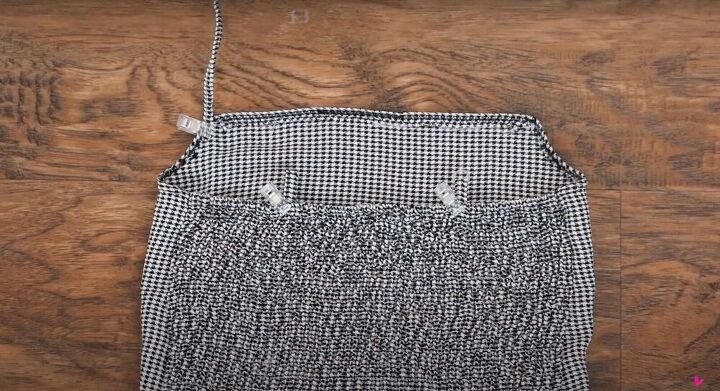
Create your casing
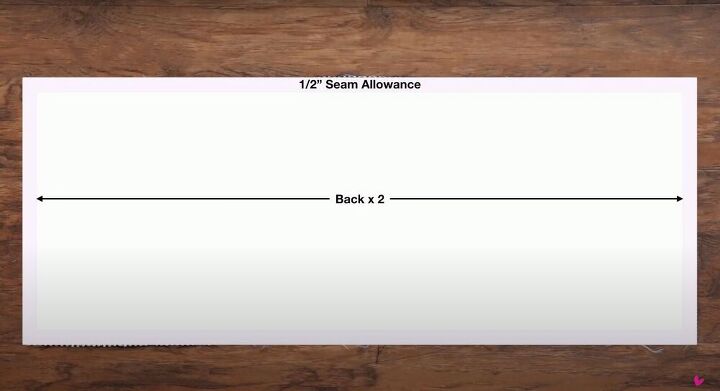
For the back bodice, cut out a really long rectangle. The height should be the same as the side seam on the front bodice and the width will be two times the measurement of your back. Next, create a casing at the top of the back bodice by folding the fabric inward twice and pinning it in place. Make sure to check the size of your elastic before sewing the casing closed as it will have to fit through.
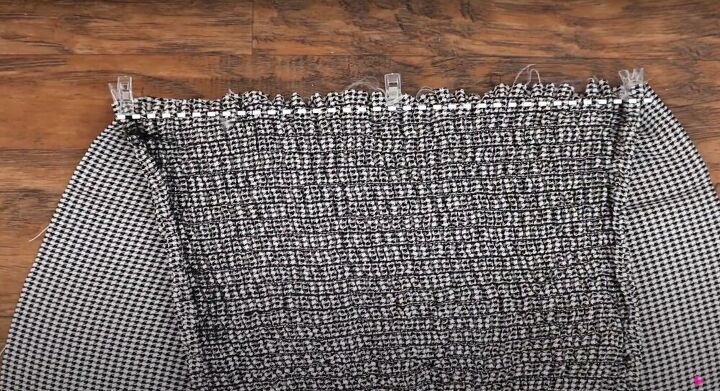
Make the back bodice
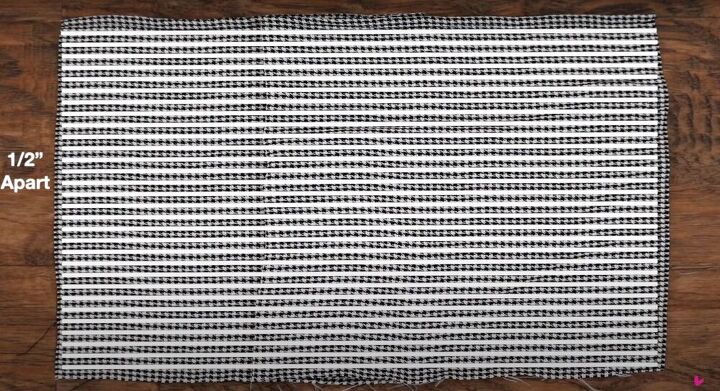
Take some elastic thread and wind it around your bobbin. Make sure to pull the elastic slightly, but not too tight (I estimate pulling about 70% of the elasticity). Turn the tension all the way up, increase your stitch length and then run a whole bunch of parallel lines all along the back bodice that are about half an inch apart. The end result should be wavy and stretchy. Steam out the back bodice and see the shirt slowly start to shrink to your desired size.
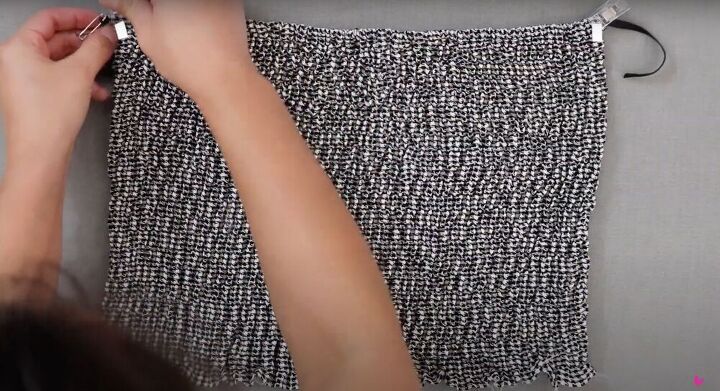
Insert the elastic
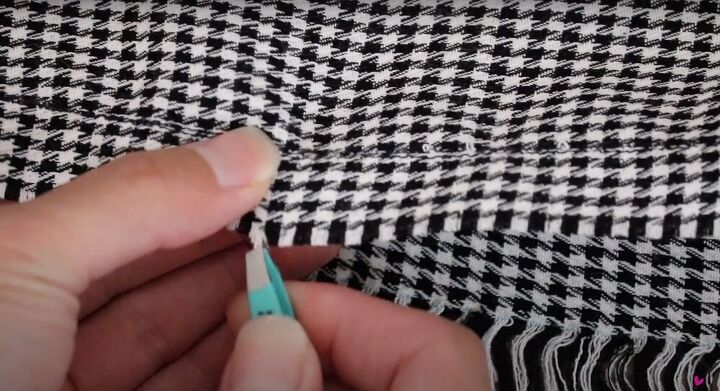
Take a quarter-inch elastic and thread it through the casing at the top (do this using a safety pin as a guide). Sew the ends closed.
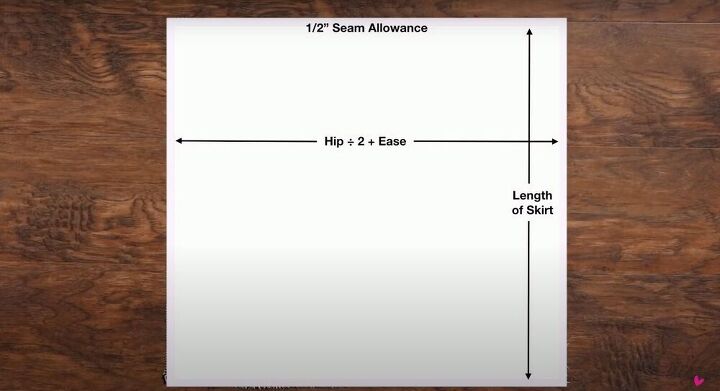
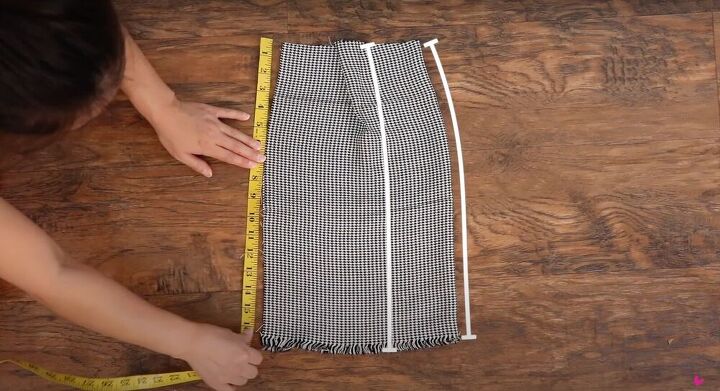
Cut out your skirt
For the back of the skirt, follow the measurements pictured above. The width should be the width of your hips divided by two (making sure to leave a few inches for ease) and the length is left up to your own personal preference.
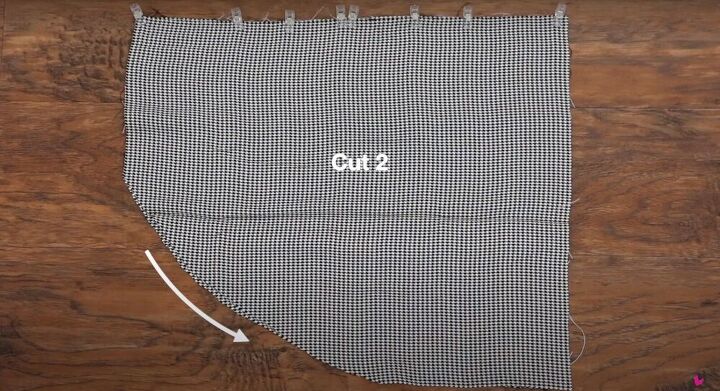
For the front, follow the same pattern, however, curve out one side of the pattern and you’re going to need two pieces.
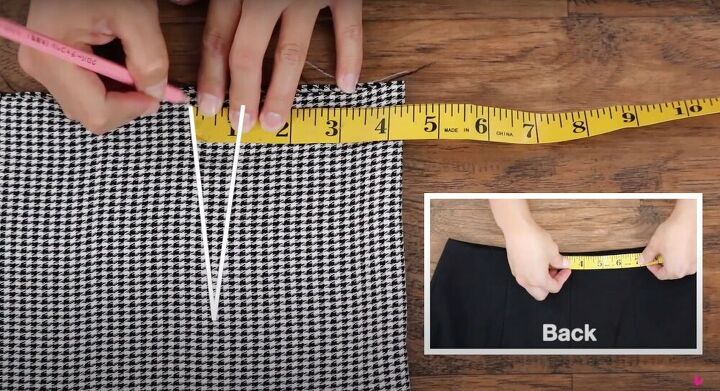
Make your skirt darts
Using an existing skirt or dress, follow the pattern until you find the darts. Same as before, measure them out with a measuring tape and mark them off on your fabric. Remember to shape out the triangle shape for the dart, pinch, pin, and sew.
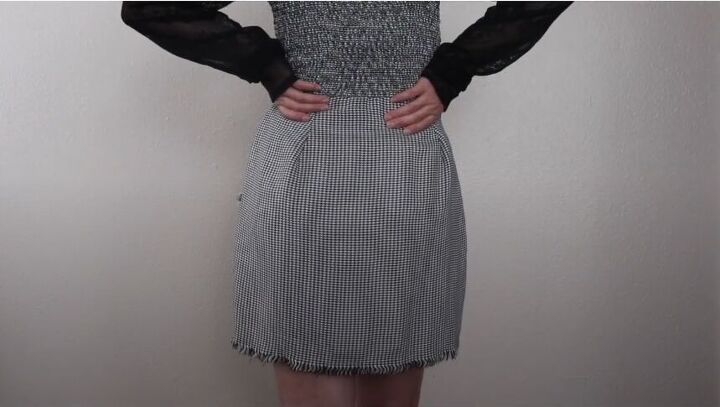
Even out the waistline
To complete the skirt we will need to even out the waistline. To do so, take the measurement of the skirt (from top to bottom and make sure it is even all around). Snip off any excess fabric.
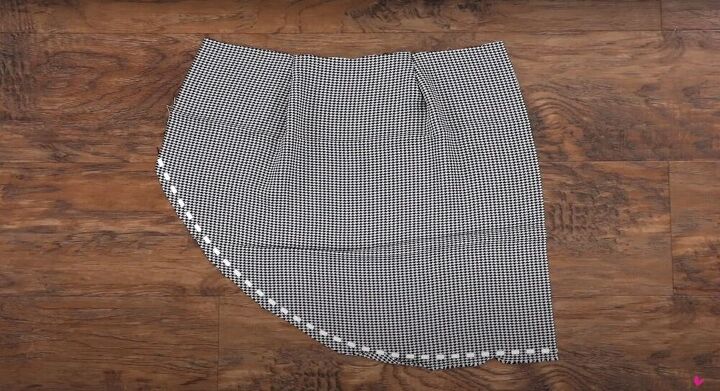
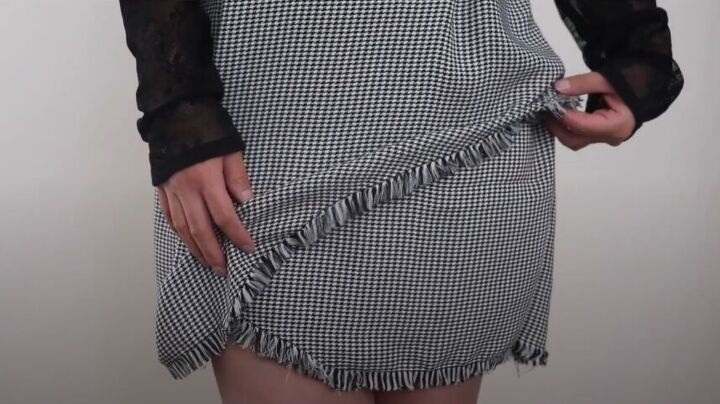
Prepare for fringe
Because my fabric came with a fringe on the bottom (and because it adds a nice touch of detail to the outfit) I am going to add fringe to the front of the skirt where there isn’t any. To do this, I am going to sew a straight line all across the curve on the bottom (about an inch from the edge). I am going to sew it twice to make sure the fabric is 100% secure.
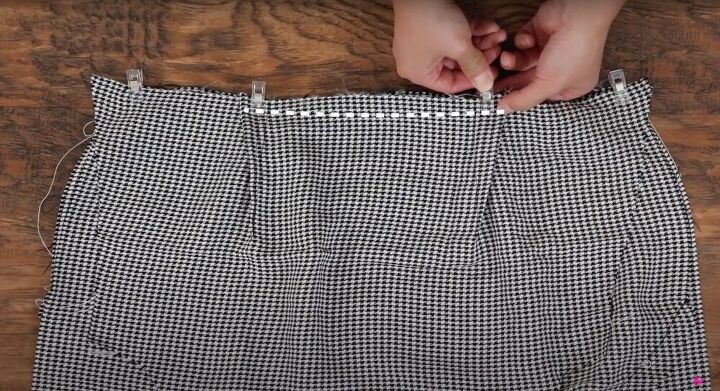
Connect the front pieces
Lay all your pieces together with the bodice to make sure all the darts match up and then pin the edge of your skirt with the darts folded outwards. Now to connect the pieces sew over the darts so that there isn’t any bulging at the dart area.
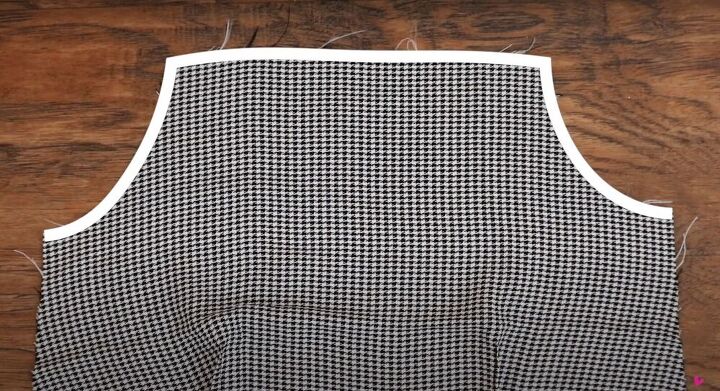
Finish the bodice
To finish the bodice, secure the frayed edge with a zigzag stitch. Next, fold the edges under one time and secure it with a straight stitch.
Connect the back pieces
To connect the back pieces, match up the top to the skirt at the center and sides. Use a sewing machine to connect the pieces and don’t mind any extra fabric that forms - that can be snipped off after.

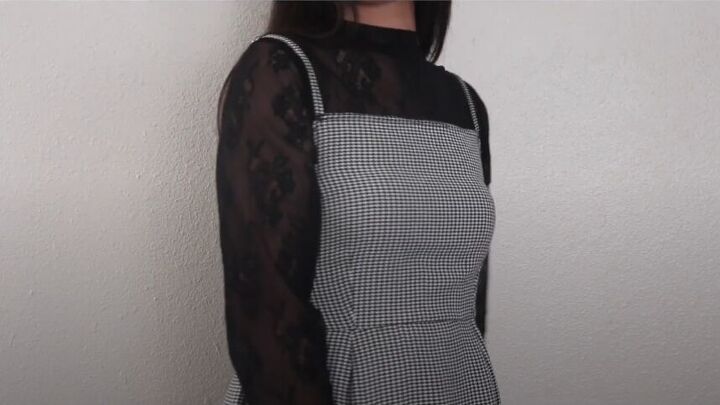
Connect the front and back pieces
Lay the front and back pieces right sides together and pin the side edges. Make sure to match up the underarm point, waistline, and skirt. For the best sewing, I started at the waist, sewed down the skirt, and then returned to the waist to sew up to the upper arm.
Create your shoulder straps
For the shoulder straps, cut out two one-inch strips. Fold them in half (lengthwise), pin, and sew them to secure. Next, use a safety pin to turn your straps right side out and topstitch along the edge (to keep the strap flat). Create two more short straps that can be looped through O-rings and attached to the back of the bodice. Then attach the long straps to the front of the bodice and sew all four pieces in place. Finally, add a slider onto your long strap, weave your strap through, then through the O-ring, and back again until it’s secure.
Create your fringe
Moving back down to the skirt, we can go back and create the fringe by pulling the horizontal threads from the bottom of the skirt. To do this, I used the sharp tip of the seam ripper. In the end, you will have to even out the fringe with some scissors to keep it even!
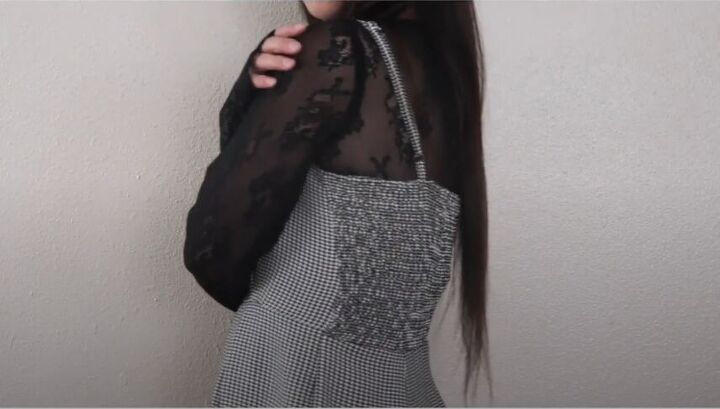
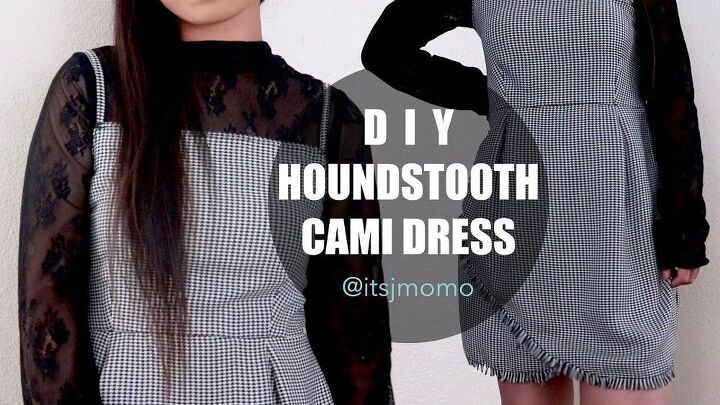
There you have it, a DIY houndstooth dress. I love how this turned out, I think it’s super unique and flattering. If you guys recreate it (houndstooth or not) I would love to see your creations so post them down below!
The author may collect a small share of sales from the links on this page.


Comments
Join the conversation
Awesome dress!