How to Sew an A-Line Dress Without a Pattern in 4 Simple Steps

Want to learn how to sew an A-line dress? I have this super-easy tutorial for you! This is an excellent project for beginners and anyone who wants to make a DIY A-line dress.
I’m so excited to show you all the steps, and just wait until you see the results! Let’s get started.
Tools and materials:
- Fabric
- Sewing machine
- Scissors
- Matching thread
- Elastic
- Measuring tape
- Ruler
- Chalk
- Pins
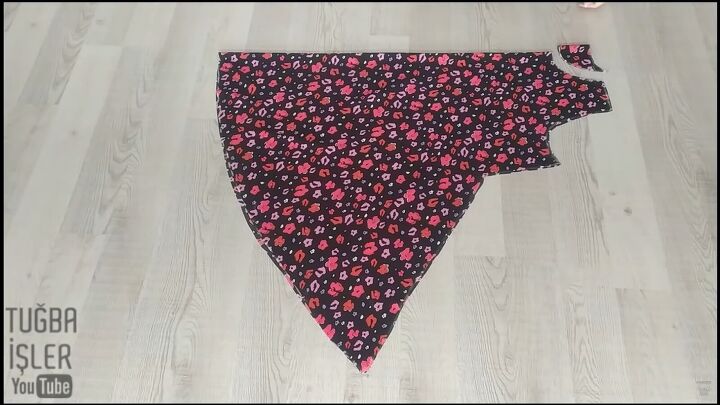
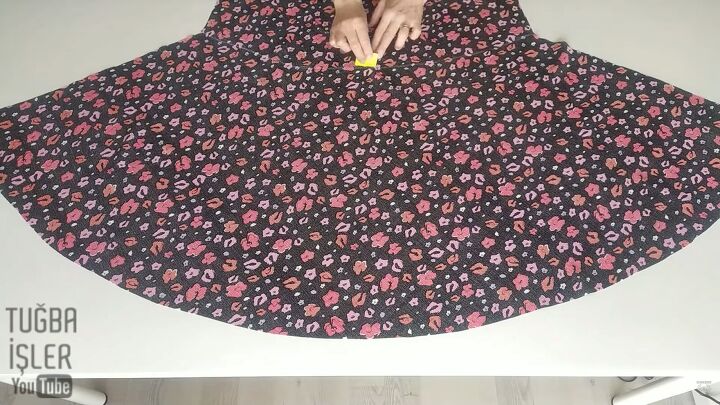
1. Make the DIY A-line dress pattern
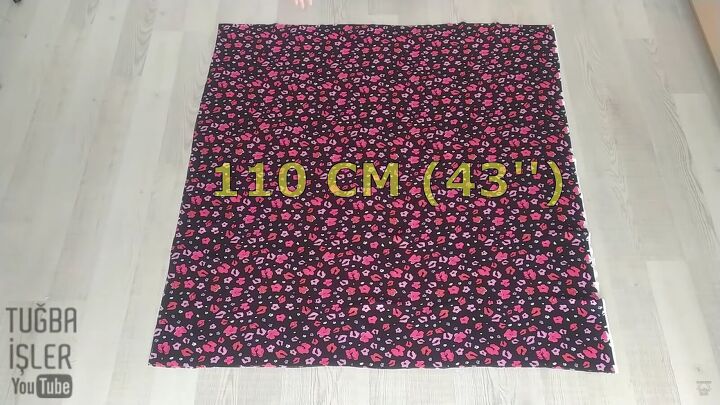
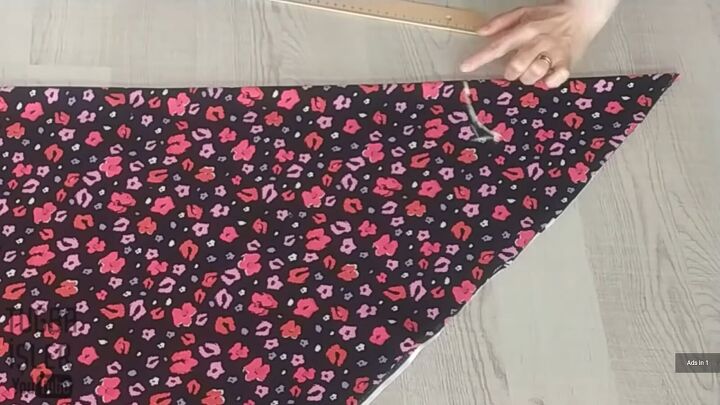
Fold your fabric in half into a 43” square.

Align the opposite corners to make a triangle.
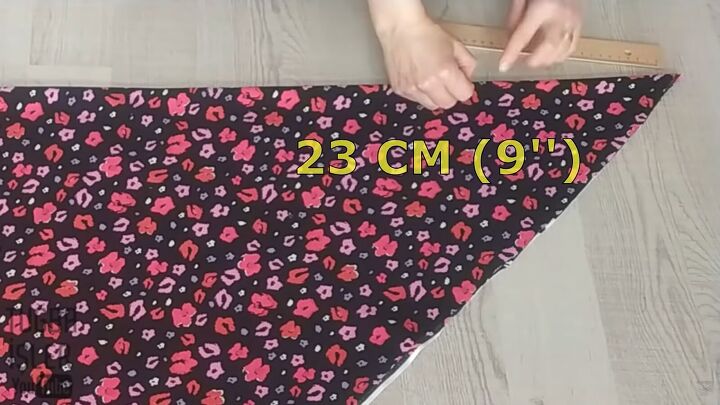
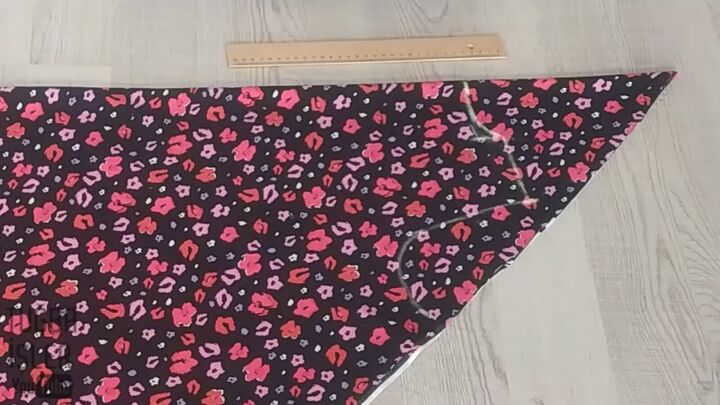
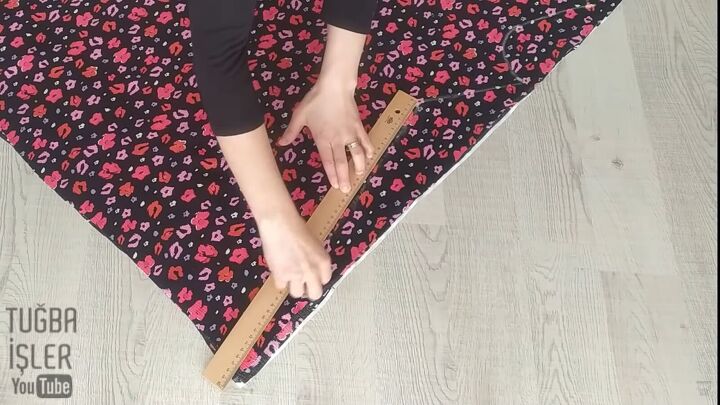
Smooth out the fabric and measure 9” from the side.
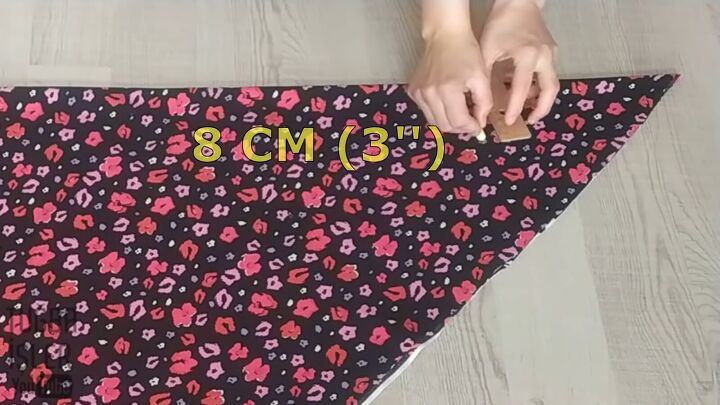
Then, measure 3” down and make a mark.
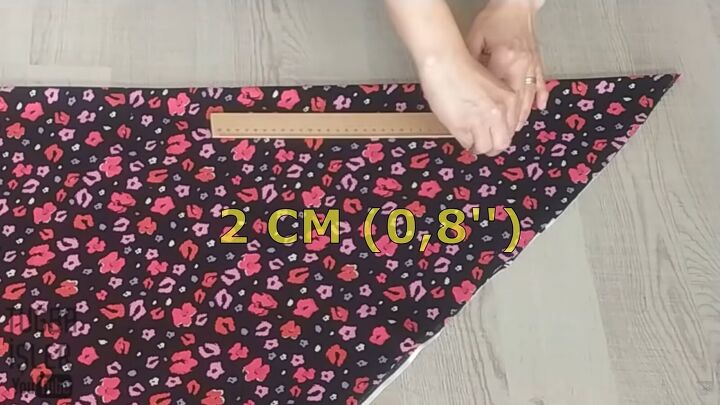
From that 3” mark, measure 0.8” toward the end and make a mark.
Connect the 0.8” point to the 3” line with a curve. You should have a mini curved triangle. This will be the neckline.

Measure 3.5” from the 0.8” mark.
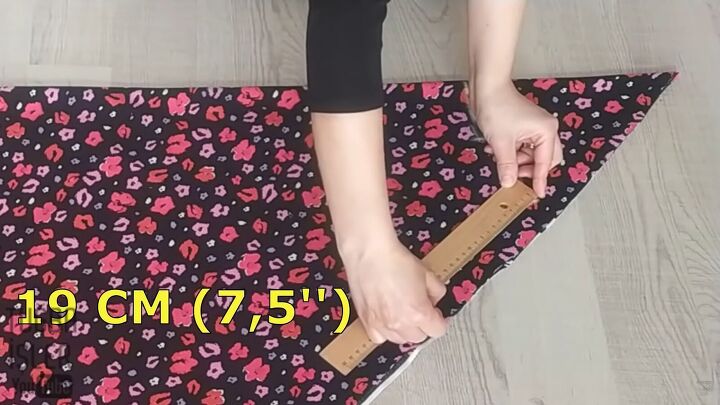
Then, measure and mark 7.5” down, along the side of the triangle.
Connect both points with a half-curve line, as shown. This will be the armhole.
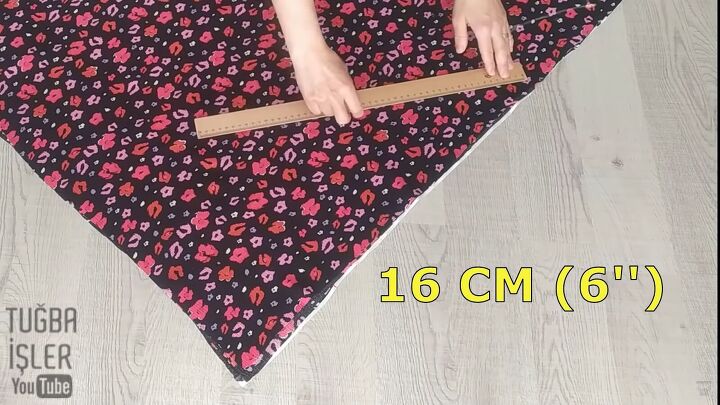
Measure and mark 6” outward from the last point.
Then, 20” down toward the bottom point.

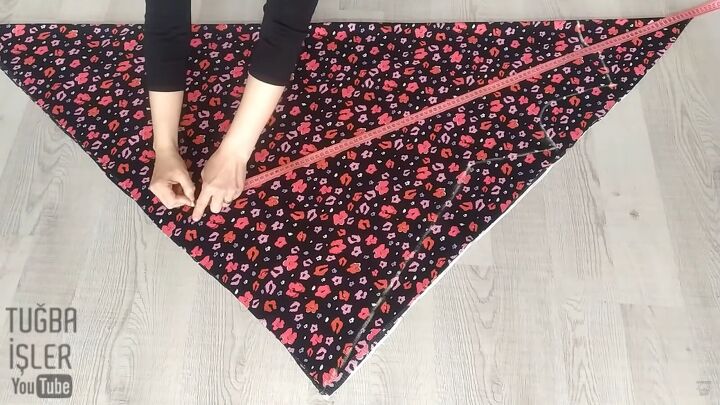
From the tip, measure 43” across and make a mark. Then, mark the same at different angles, down the fabric until you reach the bottom point.
Then, draw a line from the bottom point to connect these markings.
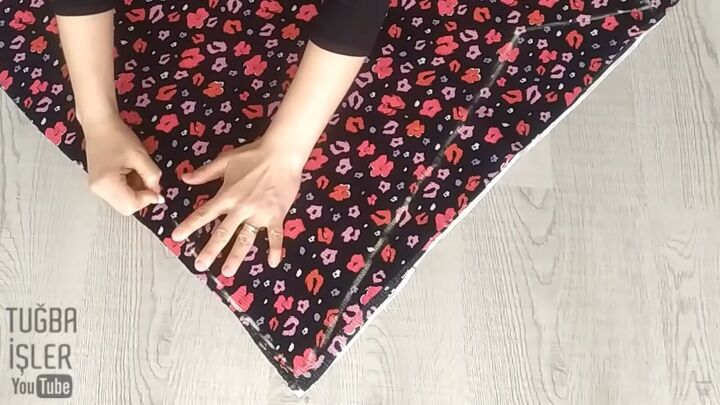
2. Cut the fabric
Finally, cut out your DIY A-line pattern. Remember, because we worked on four layers, you’ll have two main pieces.

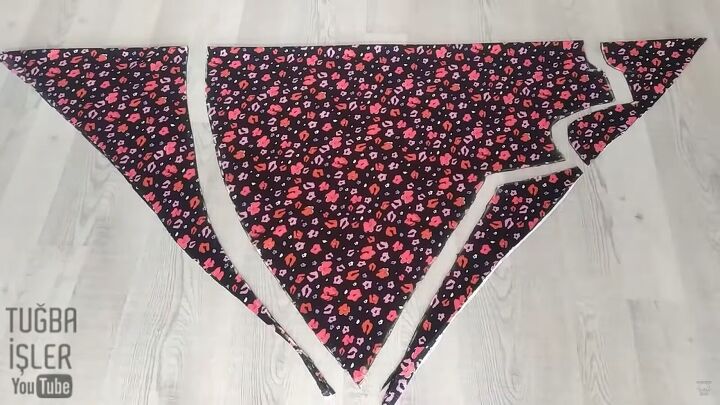
To amend the front piece’s neckline, simply measure 2.7” down from the centerfold.
Then, curve the line from the top and cut.
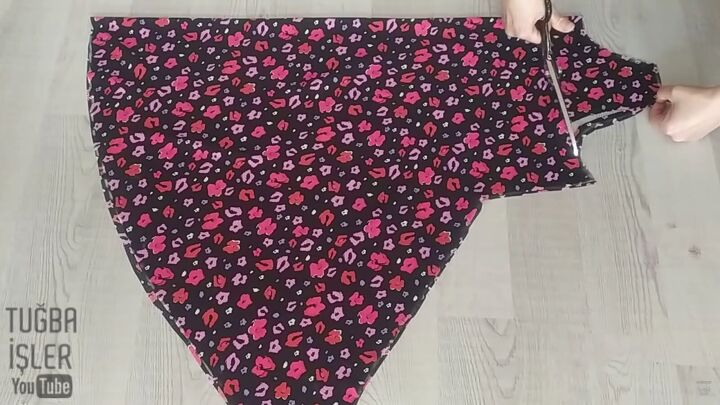
Cut around the armhole area to smoothen out the curve.
This is what you should have.
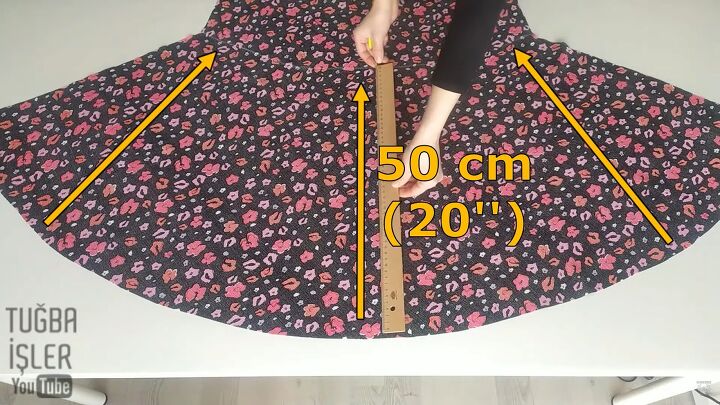
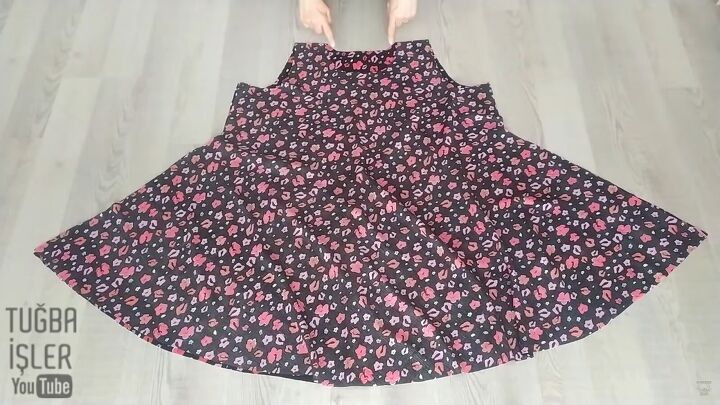
3. Create pleats & ruffles
The DIY A-line dress is pretty big if we leave it as is. So, let’s create some pleats. Measure 20” up from the bottom in three increments, as shown.
Connect the marks on top with a curved line.
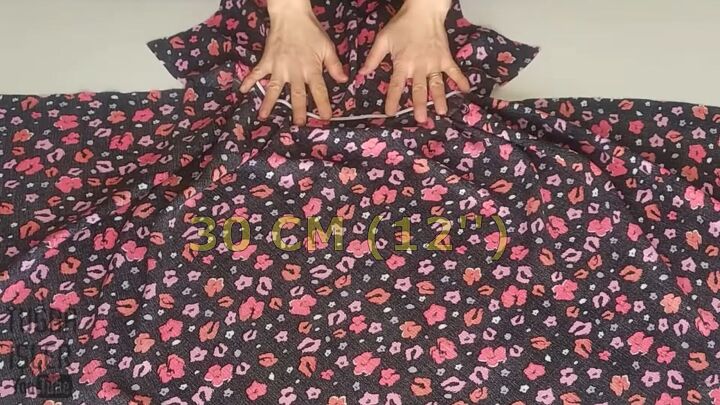
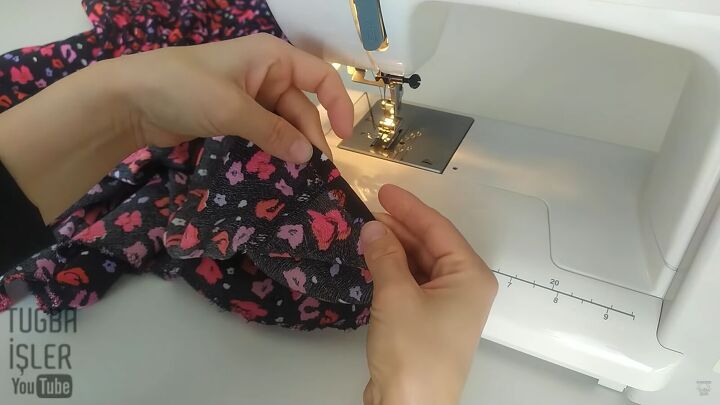
Next, cut a 12” elastic. We will be sewing it to this line to ruffle the DIY A-line dress.
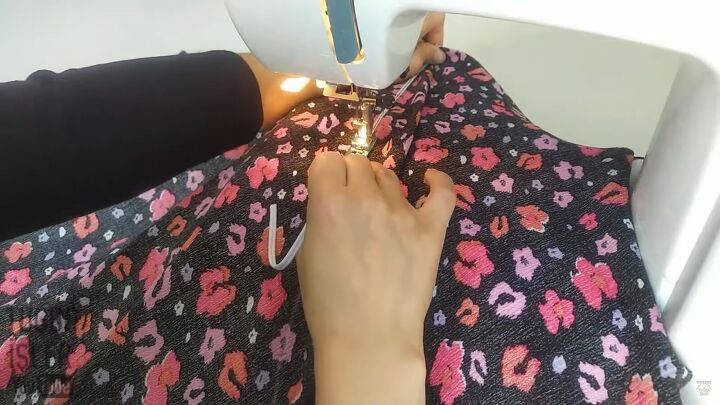
Sew the elastic along the curved line, stretching it as you go along. Be sure to sew through one layer and not two. Then, repeat for the second piece.

4. Sew the DIY A-line dress
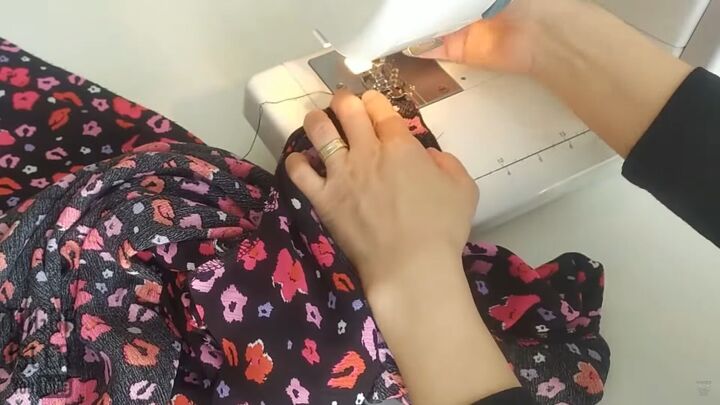
Layer the front and back pieces, right sides facing, and sew one of the shoulder seams. Be careful not to sew the armhole areas.
Hem the neckline area with a single fold.
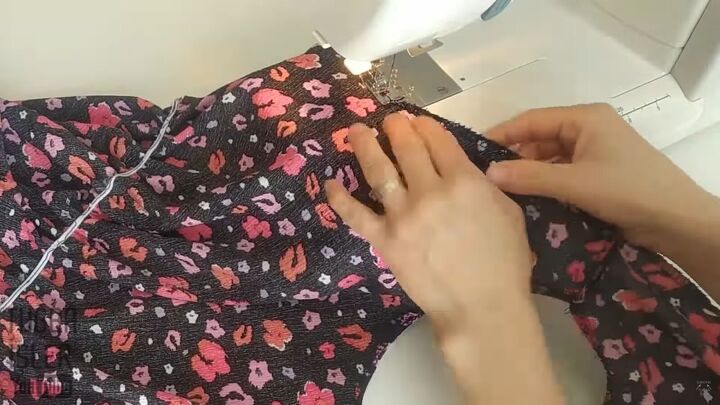
Then, sew the other shoulder seam.
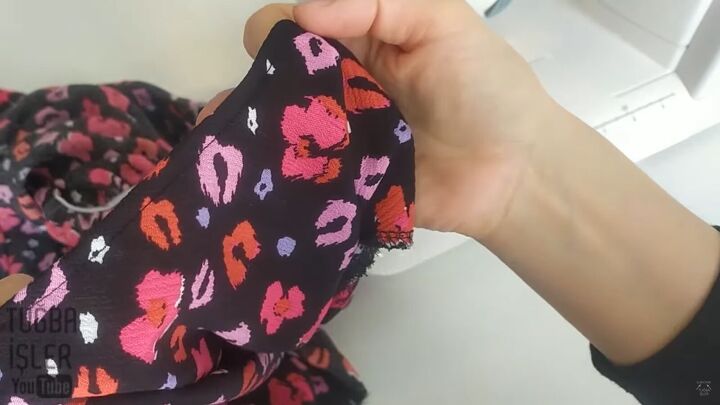
Before sewing the side seams, be sure to hem the armholes.
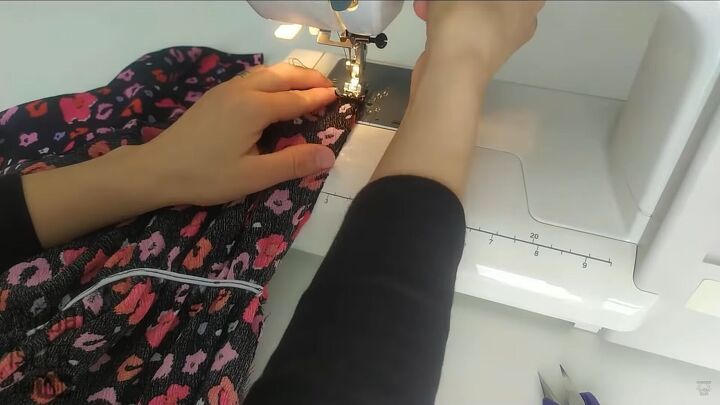
Now, go ahead and sew the sides.
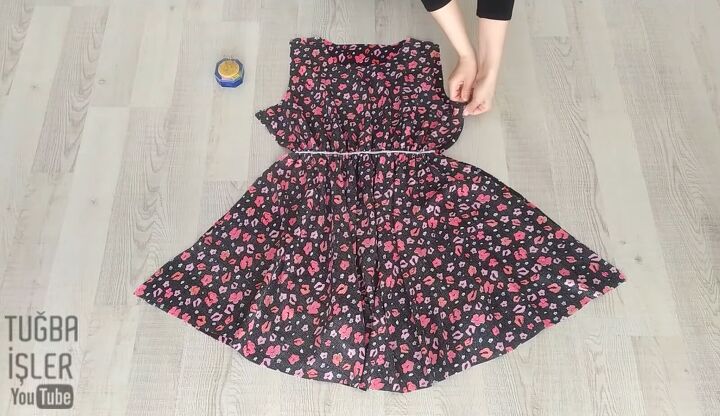
You’re almost done! You just need to hem the bottom of this exquisite DIY A-line dress, and you are good to go!
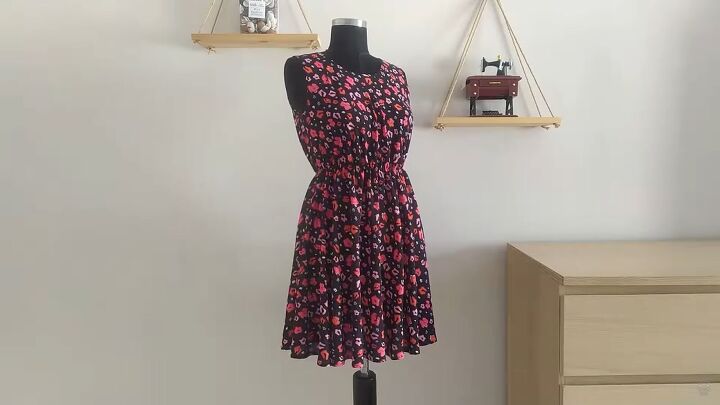
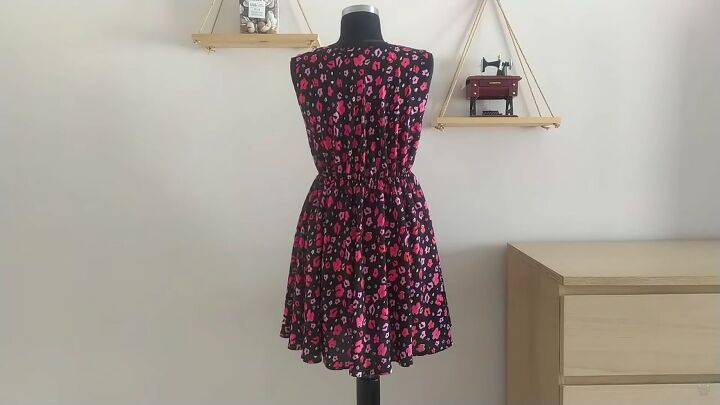
How to sew an A-line dress
See? That’s how to sew an A-line dress easily! There’s really nothing to it, just a few measurements and placing the elastic in the right area!
I’m sure you will agree that this DIY A-line dress is so flowy and chic, perfect for lunch dates or even for the office. Thanks for joining me, and I hope you have fun doing this project.
To see more of my DIY sewing tutorials, follow me on TikTok @tugbaisler.
The author may collect a small share of sales from the links on this page.


Comments
Join the conversation