DIY Tiered Dress With Oversized Bow Shoulder Straps

In this tutorial, I’m going to show you how to make a really cute tiered dress with extra-large shoulder straps. I love how this dress turned out, with its unique and eye-catching style, and I’m so excited to share how I made it with all of you.
Tools and materials:
- 2.5 yards of cotton fabric
- Elastic ¼ inch wide
- Bobby pin
- Pins
- Scissors
- Measuring tape
- Fabric chalk
- Knitting needle or another long, thin stick
- Thread
- Sewing machine
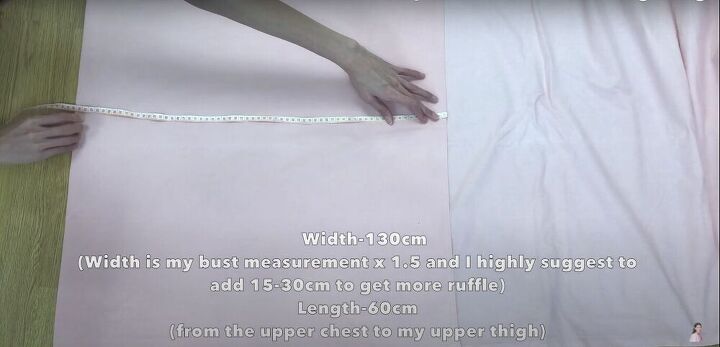
Measure and cut fabric for the body of the dress
For the main part of the dress, I cut a piece of fabric 130 centimeters (51 inches) wide and 60 centimeters (23.5 inches) long. These dimensions were based on my own measurements. The width is one and a half times my bust measurement, and the length is the measurement from my upper chest to my upper thigh. I suggest adding 15-30 centimeters (6-12 inches) to the width for more ruffles.
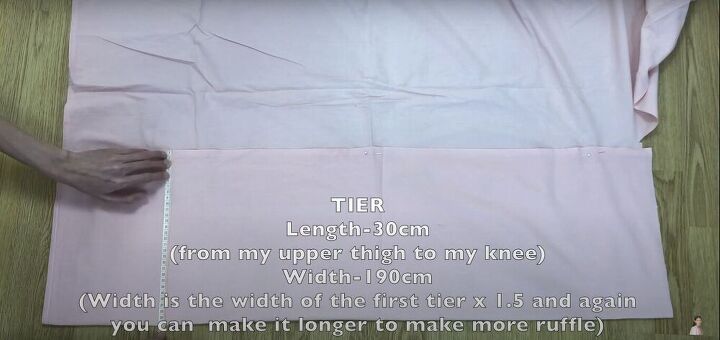
Measure and cut the fabric for the tier
For the measurements of the tier, I measured from my upper thigh to my knee, which was 30 centimeters (12 inches) for the length, and one and a half times the width of the first piece of fabric I cut, which was 190 centimeters (75 inches) for the width.
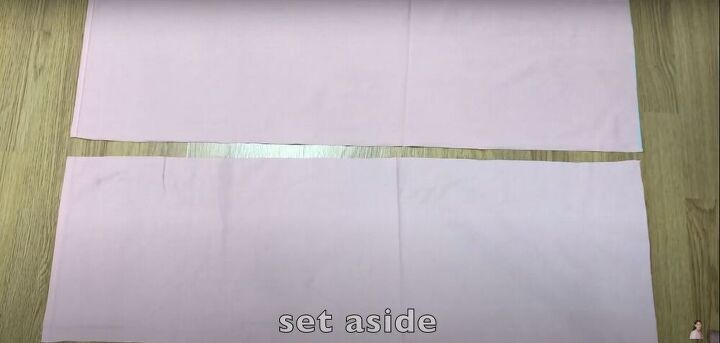
Instead of cutting one 30 cm x 190 cm (12 in x 75 in) piece, I cut two 30 cm x 95 cm (12 in x 37.5 in) pieces and set them aside to attach in a later step.
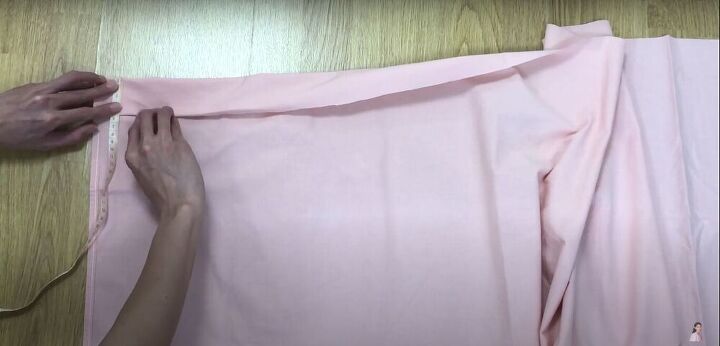
Fold and pin the top hem
On the first piece of fabric I cut, I folded the long edge down one centimeter (half an inch), and then another five centimeters (two inches), and pinned it down. I used a measuring tape as I moved across the fabric to make sure my hem stayed even.
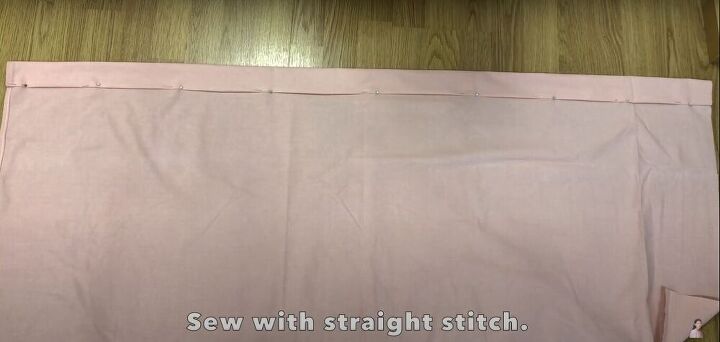
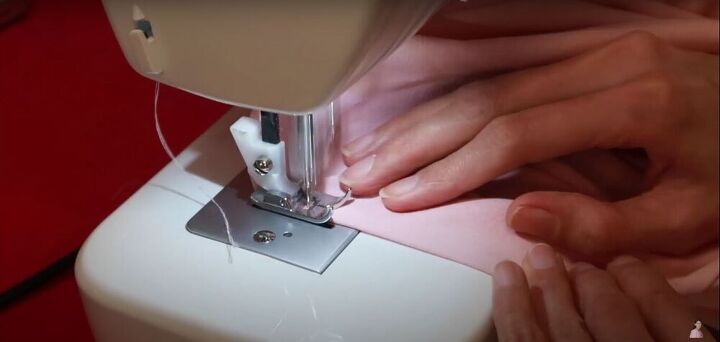
Sew the top hem
Then I sewed across the top hem with a straight stitch.
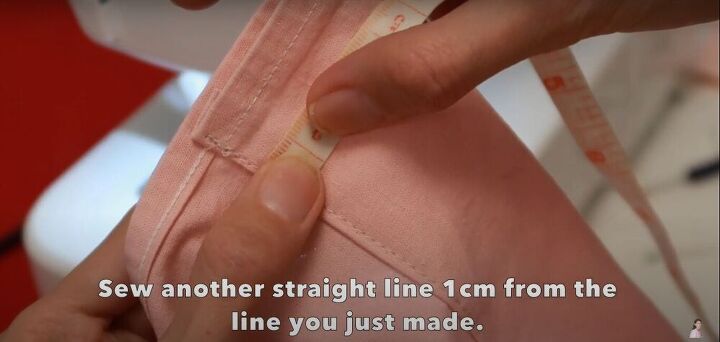
Sew a tunnel for the elastic
Once the top hem was sewn, I sewed a second line of stitches one centimeter (half an inch) above the first line of stitches.
This created a tunnel for the elastic.

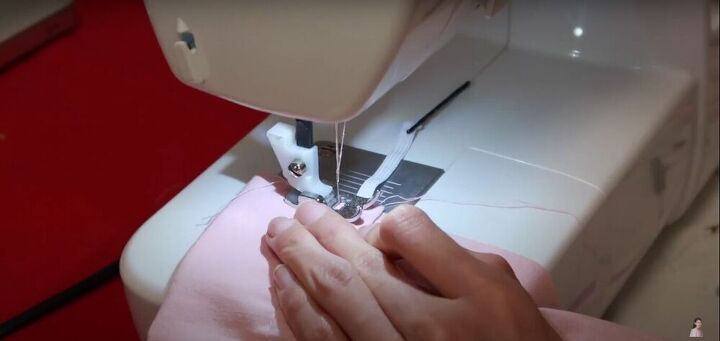
Thread the elastic through the tunnel
I cut a piece of elastic equal to my bust measurement and attached a bobby pin to one end. Then I inserted the pin into the tunnel I created in the fabric, and worked it through to the other end, pulling the elastic through with it.
Sew the elastic into place
Once the elastic was pulled through the tunnel, I sewed the ends of the elastic down at the edges of the fabric to hold it in place.

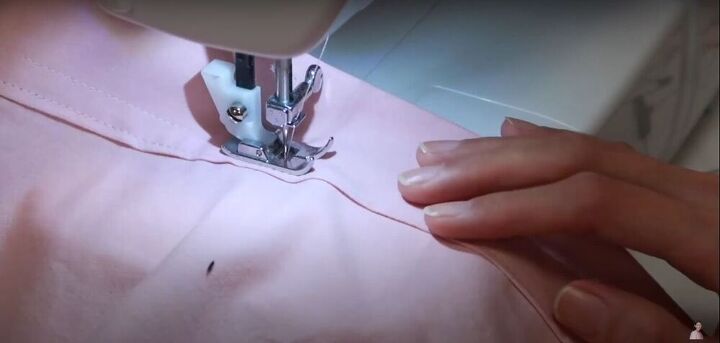
Pin and sew the tier pieces together
Taking the two pieces I had set aside in the beginning, I laid them one on top of the other, and pinned them together along one short edge, and sewed them together.
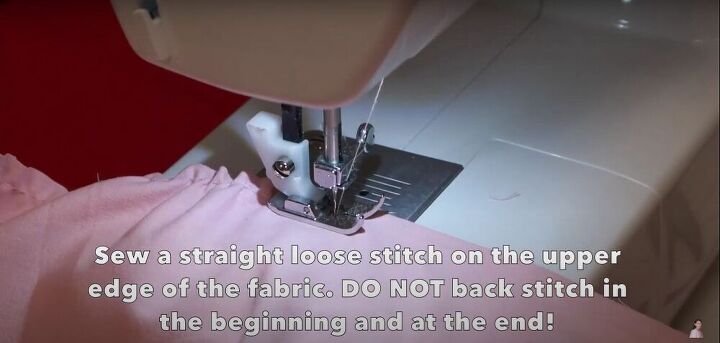
Create the ruffles for the tier
To create the ruffle effect on the tier, I ran the entire length of one edge of the sewn-together tier pieces through the sewing machine using a wide, straight stitch. To allow for adjustment of the ruffles as I attach them to the body of the dress, I did not backstitch at the beginning or the end.
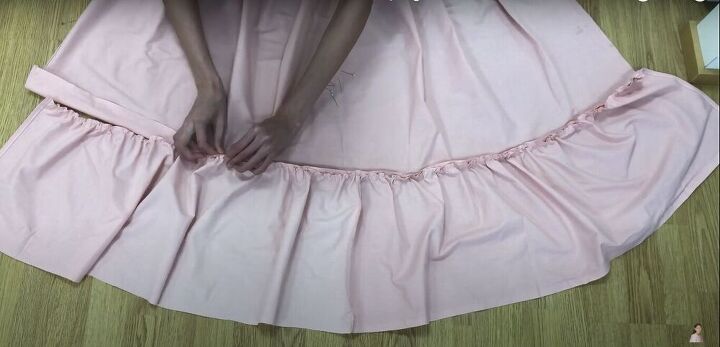
Pin the ruffled edge
Next, I laid the body of the dress and the tier next to each other, wrong sides facing up, and pinned the ruffled edge of the tier to the bottom edge of the dress.
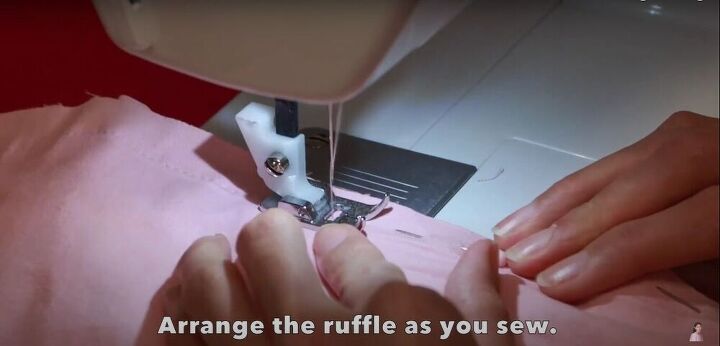
Sew the tier onto the dress
I sewed the tier onto the dress using a straight stitch, arranging the ruffles as I went.
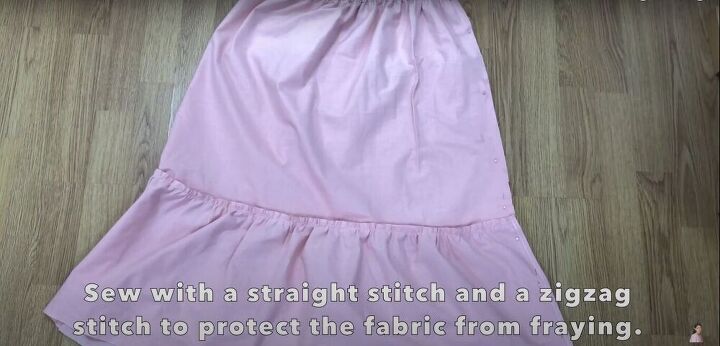
Sew the side seam
Once the tier was attached to the dress, I folded the dress in half, wrong side facing up, pinned the side seam together, and sewed it together with a straight stitch. Then I went over the edge of the seam with a zigzag stitch to prevent fraying.
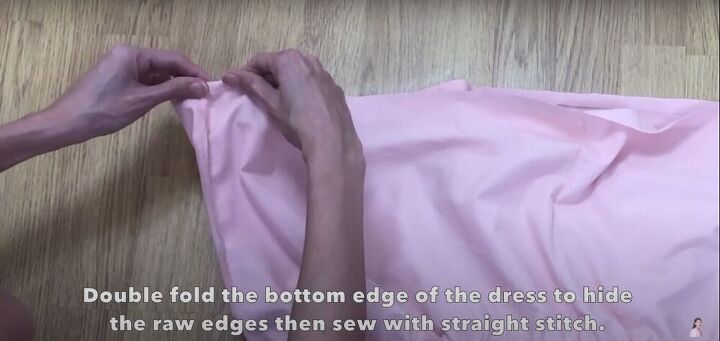
Hem the bottom
To create the bottom hem, I folded the bottom edge over twice to hide the raw edges.
I sewed across the bottom edge with a straight stitch, folding the edge in as I went.
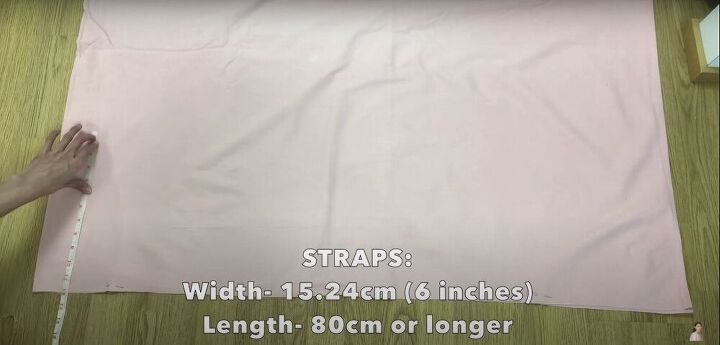
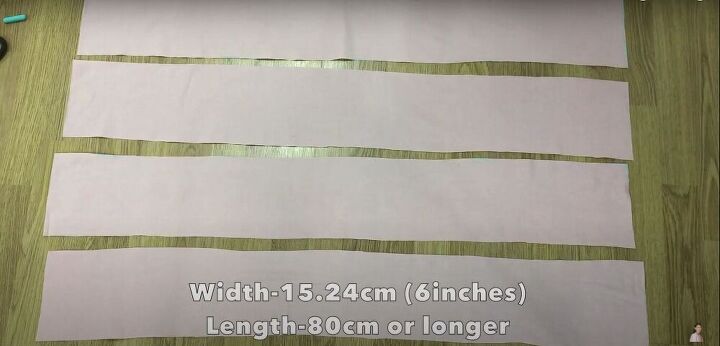
Cut fabric for the straps
To prepare the straps, I folded a length of fabric and measured out 30 centimeters (12 inches) width, and 80 centimeters (31.5 inches) length.
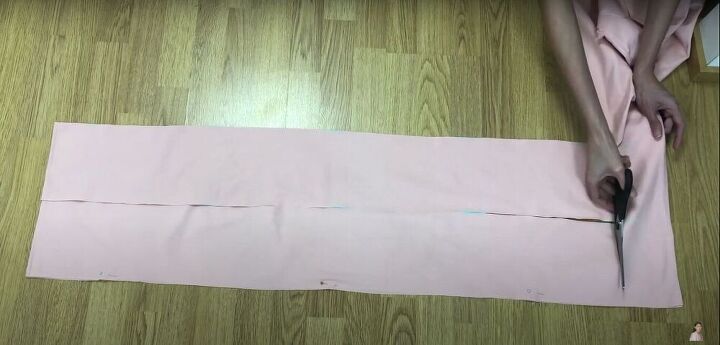
Then I cut the fabric down the middle lengthwise. Since the fabric was doubled over, this created four 15 cm x 80 cm (6 in x 31.5 in) strips.
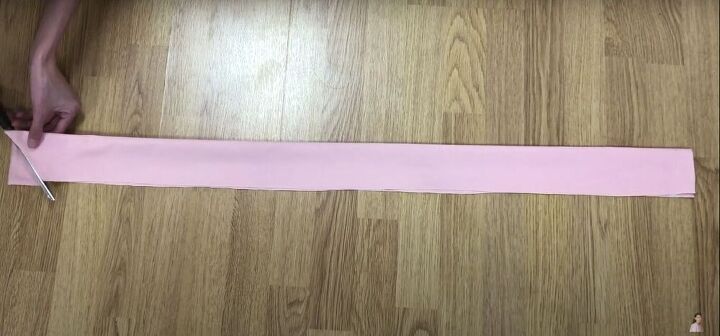
Fold and trip the straps
I folded each strip of fabric in half lengthwise and made a diagonal cut on one end of each strip.

Sew the straps
I sewed the long edges and the diagonal ends closed, leaving the short, straight end of the strap open.
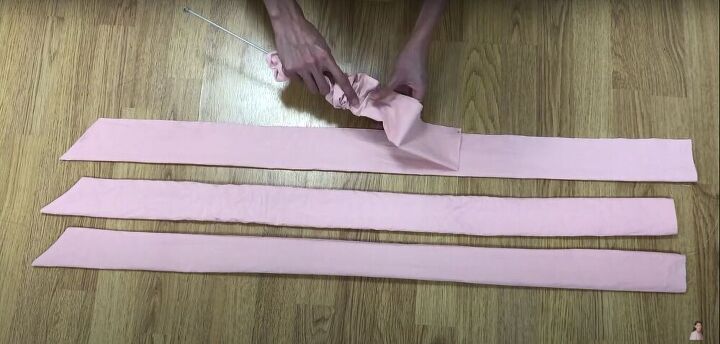
Turn the straps right side out
Using a knitting needle, I pushed the closed end of the strap into the fabric, pushing the fabric down the knitting needle until the closed end came through to the other side.
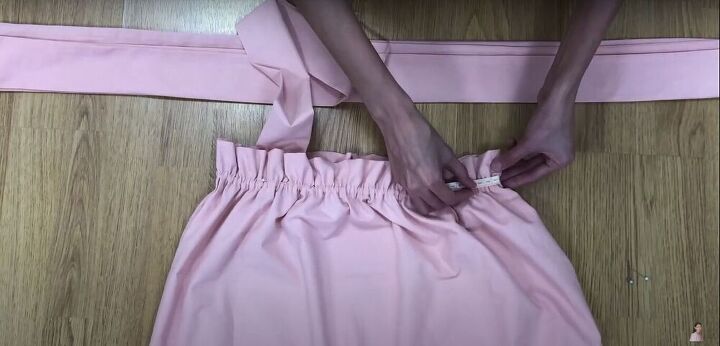
Attach the straps
Along the top seam of the dress, I pinned the straps in place--two straps in the front and two straps in the back--each strap eight centimeters (three inches) from the side of the dress.
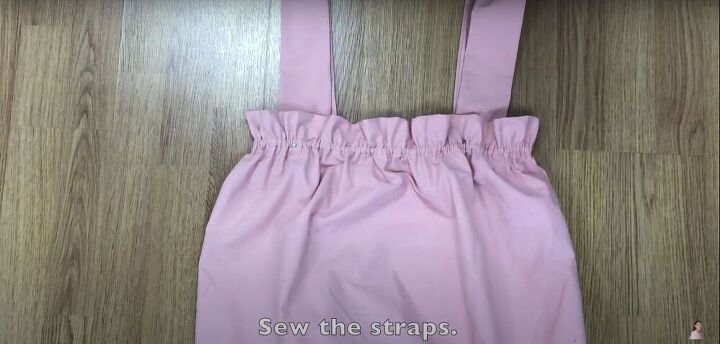
Then I sewed each strap down with a straight stitch.
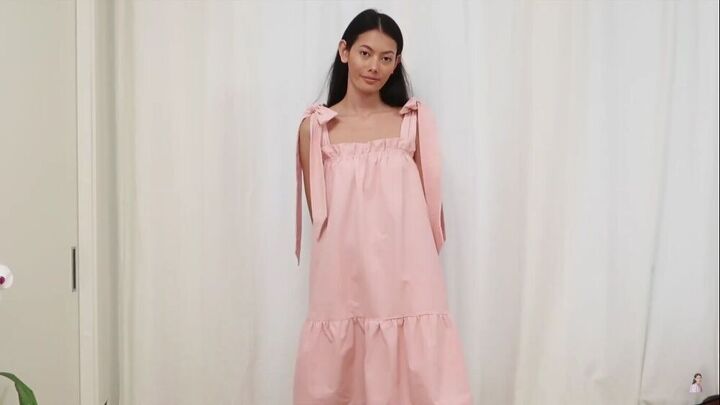
This dress is gorgeous, and I can’t wait for an opportunity to show it off.
I hope you found this tutorial helpful. If you use my instructions to make this dress, I’d love to see your results!
The author may collect a small share of sales from the links on this page.


Comments
Join the conversation
Obsessed with these shoulder straps :)
Reminds me of the summer dresses of the ‘80s.
particularlly my daughters little sun dresses.
Would not as a senior citizen wear them now.