3 Easy Eyeshadow Tutorials for Beginners

Even if you’re a pro at doing makeup, you'll love this easy eyeshadow tutorial for beginners. This quick eye makeup technique creates three looks including smoky eyes, spotlight eyes (great for hooded eyes), and foxy eyes.
Tools and materials:
- Eyeshadows
- Concealer or eyeshadow primer
- Larger concealer brush
- Smaller concealer brush or blending brush
- Sponge tip applicator
- Highlighter
- Highlighter brush
- Eyelash curler
- Eyeliner pencil
- Mascara
- Sticky tape
- Makeup sponge
- Angled brush

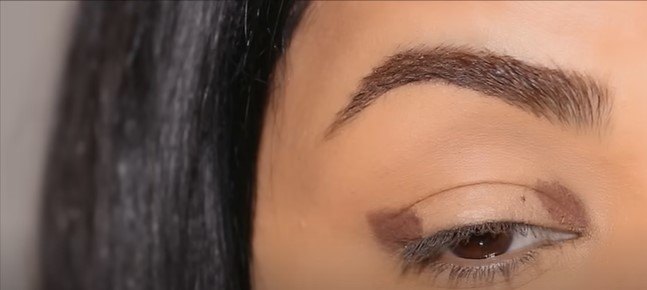
Classic smoky eyes
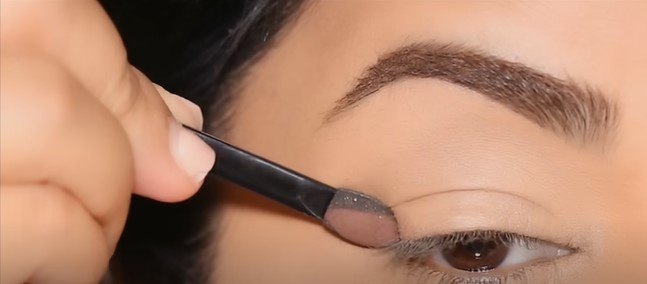
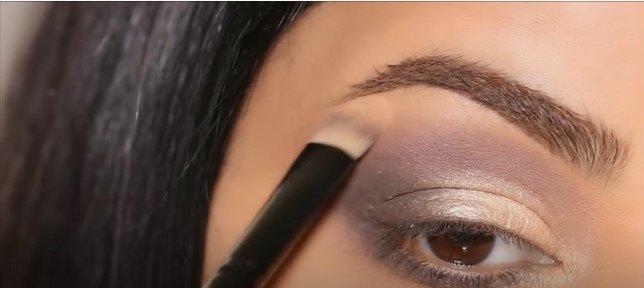
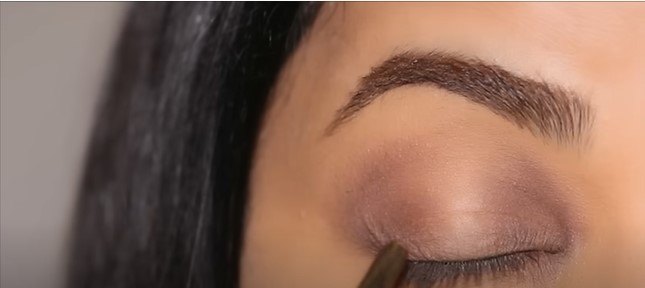
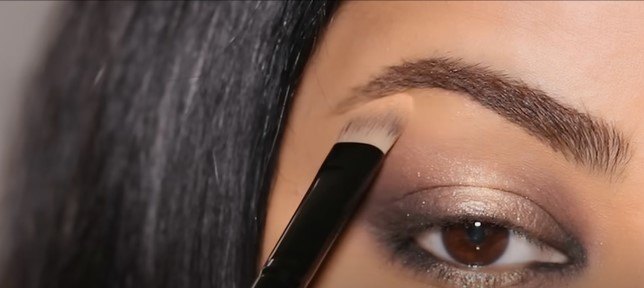
1. Prep with concealer
I’m using the larger concealer brush to prime my eyelids. You can also use an eyeshadow primer. Buff out the concealer with a concealer brush.
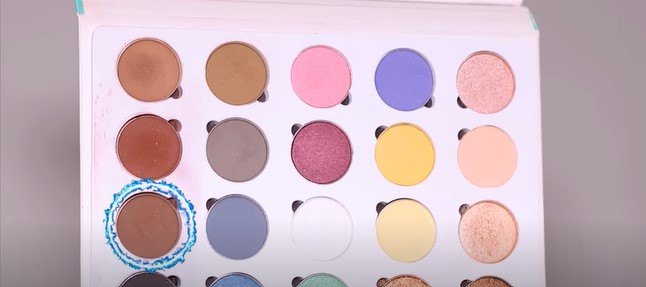
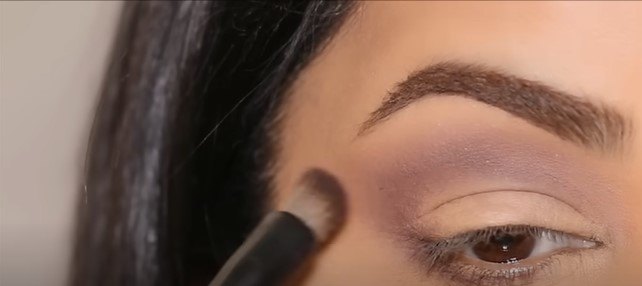
2. Use a deep brown
Dip a sponge tip applicator into a deep brown shade of eyeshadow.
3. Apply to outer corner
Stamp the deep brown on the outer corner of your eye.
4. Carve upward arc
From the corner, carve an upward arc up the crease of your eye. The eyeshadow won’t sit right in the crease, but just above it.
5. Apply underneath the eye
Use the shadow underneath the outer half of my lower lash line.
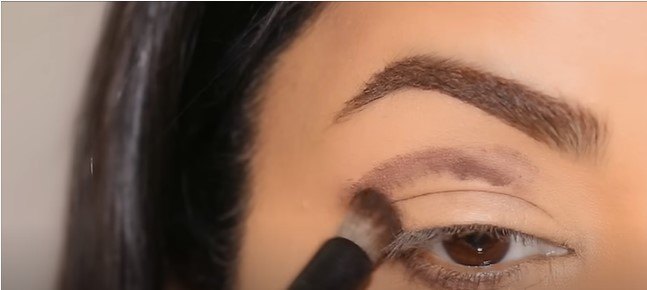
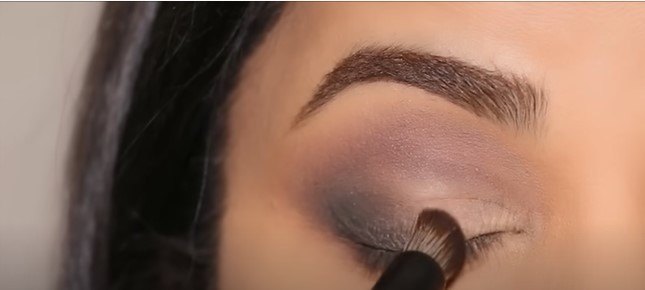
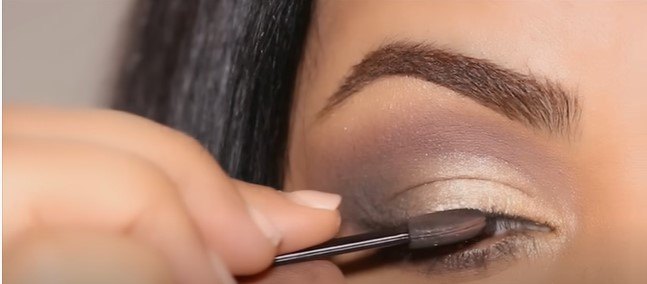
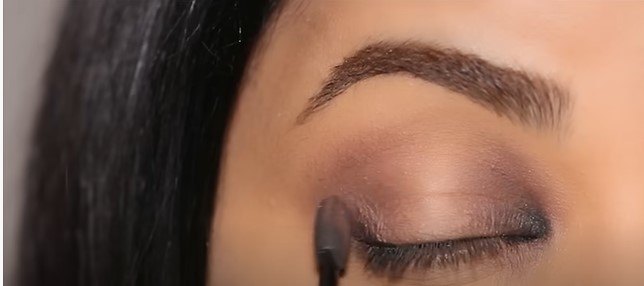
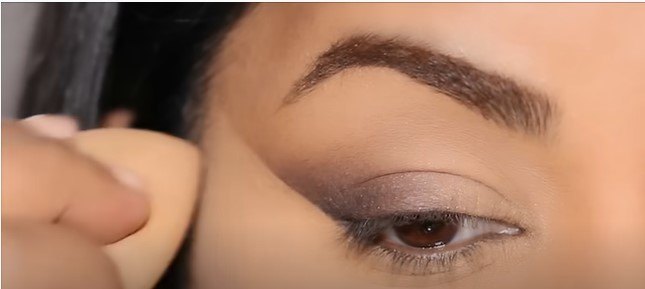
6. Dab to blend
Using the smaller concealer brush, dab the eyeshadow on the upper lid to blend. Use very light pressure.
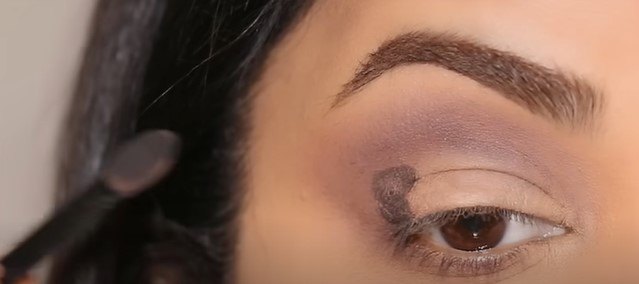
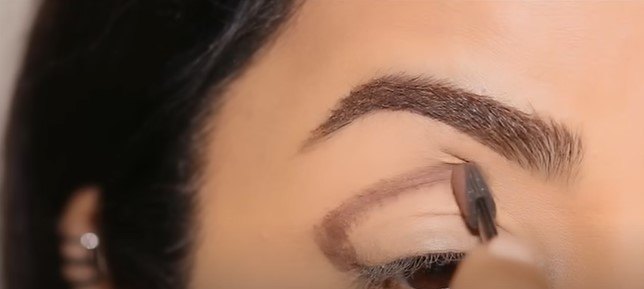
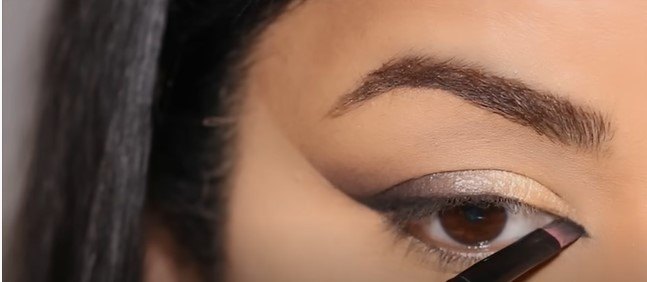
7. Add black eyeshadow
Dip the sponge applicator into the black eyeshadow. Stamp it onto the outer V of your eyelid. Dab the black eyeshadow to blend with the first eyeshadow.
8. Spread across lashes
Dab the black eyeshadow along your upper lash line very close to the lashes.
9. Apply under lashes
Using the sponge tip applicator, apply the black eyeshadow along your lower lash line.
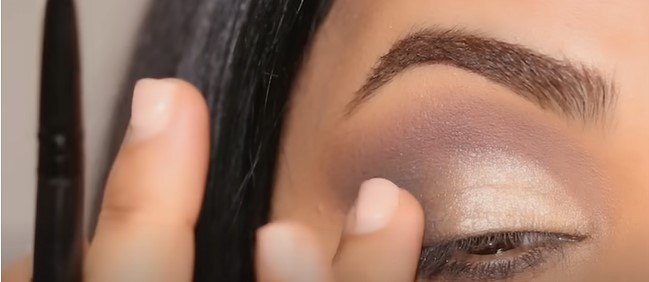
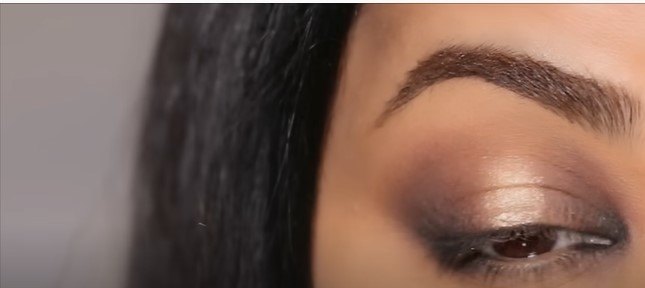
10. Use highlighter
Use highlighter and a small highlighter brush to add a flash of color. Apply highlighter to the inner half of the lid. Use your finger to blend it into the darker eyeshadows.
11. Add more highlighter
Add some highlighter into the inner corner of your eye and blend.
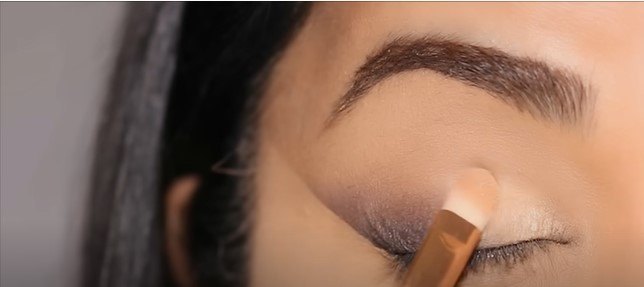
12. Add highlighter under brow
Add highlighter on your brow bone, right under your brow.
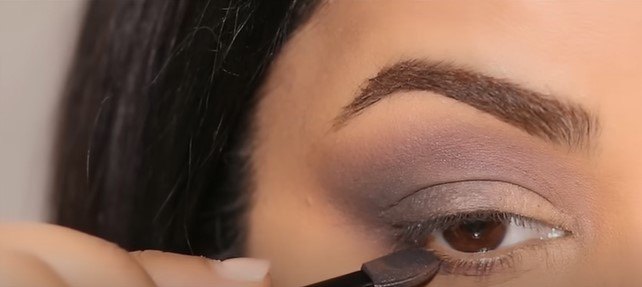
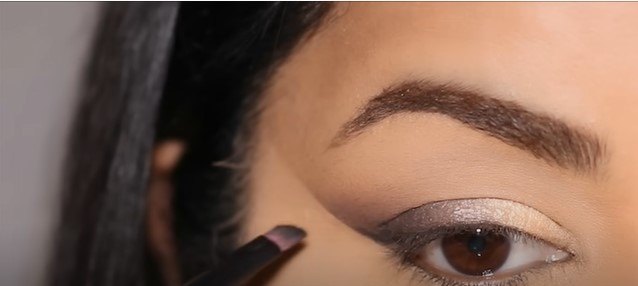
13. Add more black eyeshadow
Use your sponge applicator to add a little more black eyeshadow on the upper rim of your lashes.
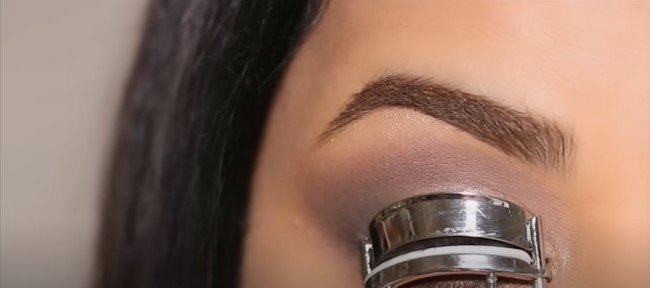
14. Curl lashes
Curl your lashes with a curler.
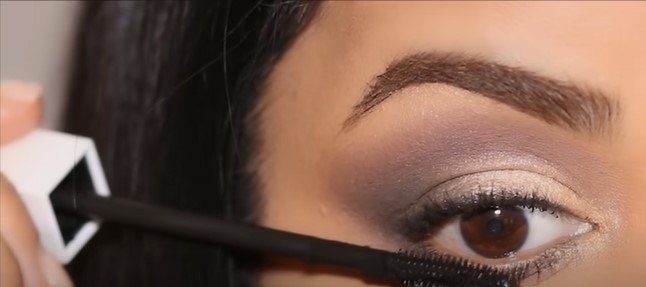
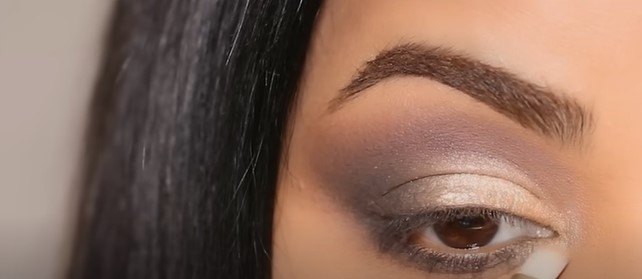
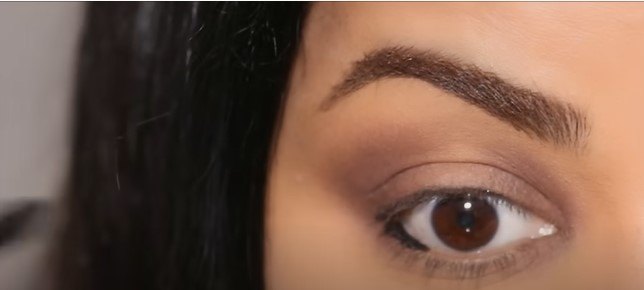
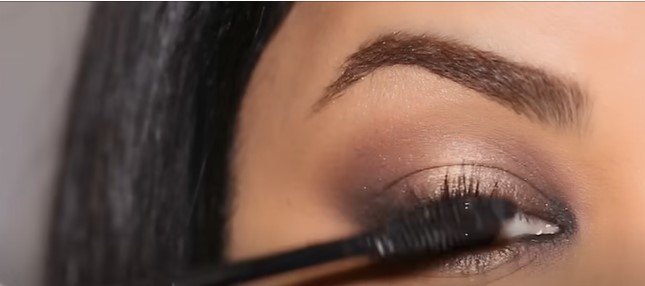
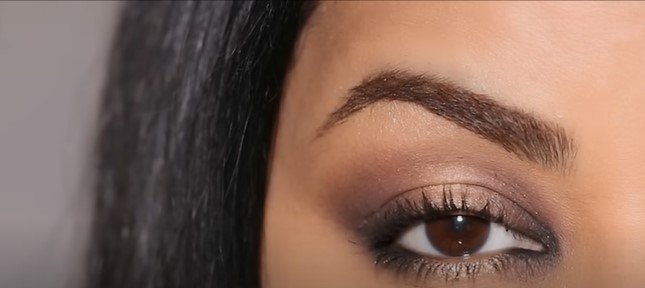
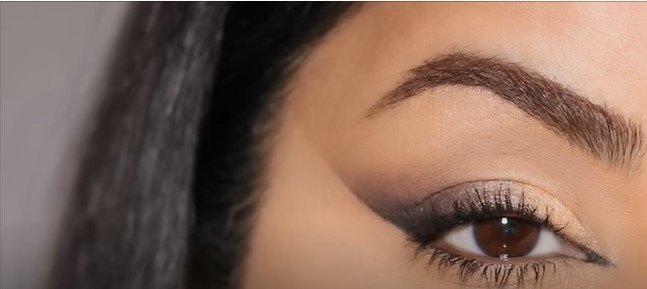
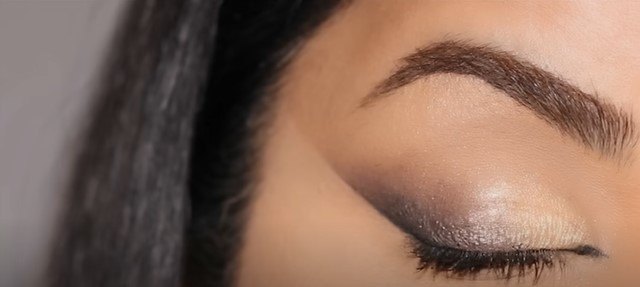
15. Add mascara
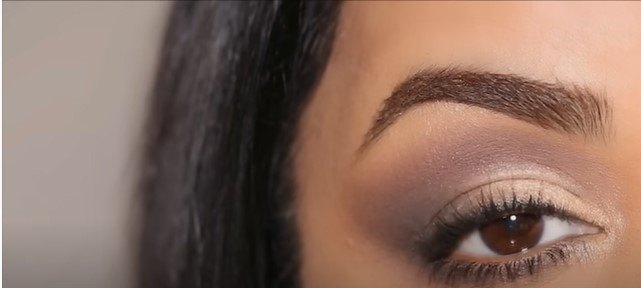
Here’s the final result, a stunning, big smoky eye that gets done in less than five minutes!
Spotlight eyes
1. Start with deep brown
Dip the sponge tip applicator into a deep brown shade of eyeshadow.
Stamp the eyeshadow two places: the inner and outer corners of your upper lid. Add a little bit under the lower lash line, too.

2. Dab to blend
Blend the shadow in with the small concealer brush to soften and diffuse the eyeshadow.
3. Keep the middle lid clear
But leave the center of the eyelid open without any blended shadow.
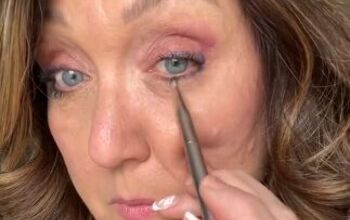
4. Add black eyeliner
Use a black eyeliner pencil in the corners of your eye. Add to the outer corners of your lash lines.
5. Smudge
Use the sponge tip applicator to smudge the black eyeliner.
6. Create the spotlight
For the spotlight effect in the center of your upper eyelid, add highlighter with your finger. Blend it out with your fingers.
7. Apply spotlight under eye and brow
Apply the highlighter in the middle of your lower lid with a sponge tip. Apply highlighter with a brush on the brow bone.
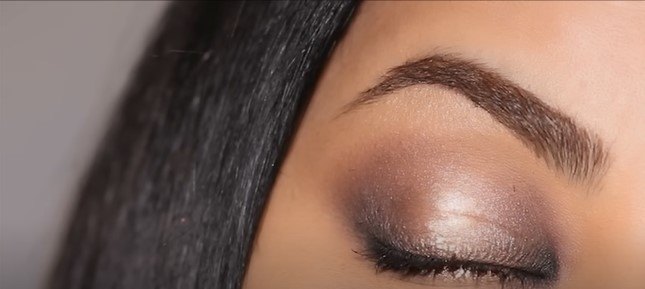
8. Curl lashes and add mascara
Here’s the final and sultry result.
Foxy eyes
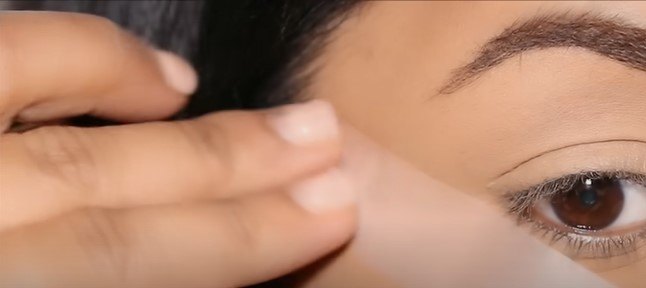
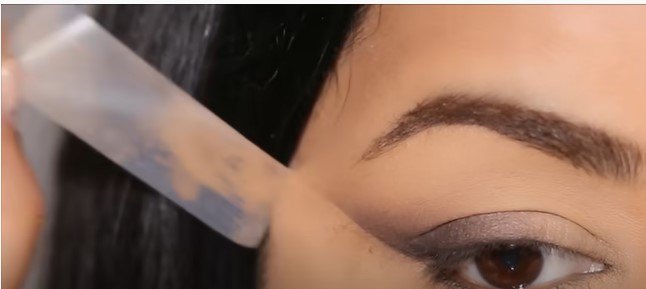
1. Apply sticky tape
To make this technique easier, put sticky tape on the outer corner of the eye to the end of your brow line. The tape acts like a stencil.
2. Swipe brown shadow
Use the sponge tip to swipe dark brown shadow. Or use a bronzer if you prefer.
3. Swipe black shadow
Right underneath that, swipe black eye shadow.
4. Blend
Dab and blend the brown and black shadows for an ombre look.
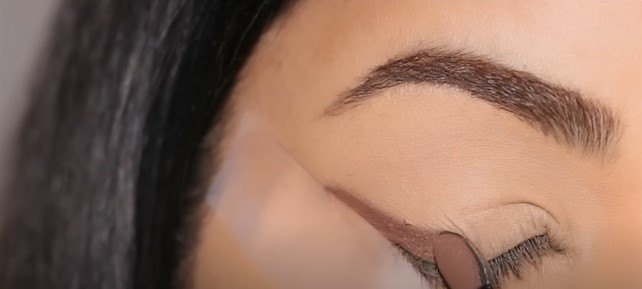
5. Remove tape
Take off the tape. You’ll have a beautifully elongated eye look.
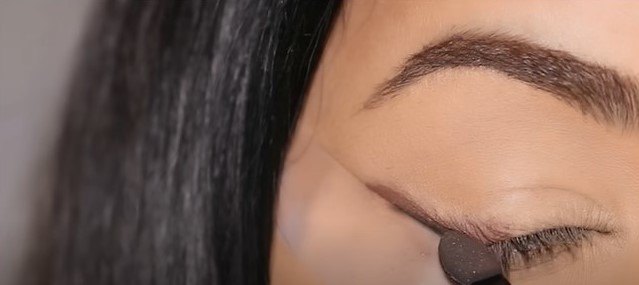
6. Add concealer
Add concealer under the line and blend with a sponge.
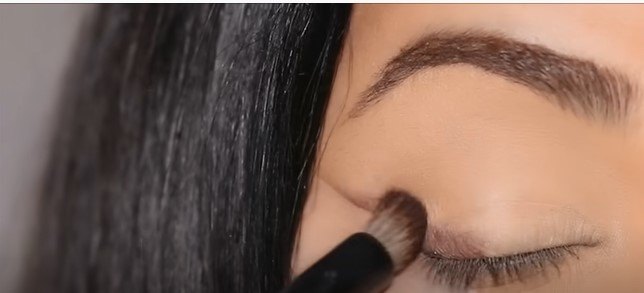
7. Add highlighter
With a brush, add highlighter to the inside corner and half of your upper lid. Blend the highlighter in with your brush and your finger.
8. Use an angled brush
Use an angled brush to pull out a small, sharp wing in the outer corner of the eye with some black eyeshadow.
9. Apply black eyeshadow
Use the angled brush to apply black eyeshadow in the inner corner of the upper lashes and outer corner of the lower lash line.

10. Curl lashes and add mascara
Here’s the final result of the stunning foxy eye.
Eyeshadow tutorial for beginners
Which one is your favorite easy eyeshadow technique? Do you have any tips on how to make these techniques easier? Let me know in the comments below.
Products used:
- Brushes: Rose and Ben beauty https://roseandbenbeauty.com/
- milani concealer 145 warm beige https://amzn.to/3Btj0Pg
- sponge tip applicator https://amzn.to/3BsbC6E
- ofra pro palette https://bit.ly/3BSeF9C (Use code SMITHA for $$ off)
- OFRA x SmithaDeepak FLASH Highlighter: https://bit.ly/3qKD1Mb (Use code SMITHA for $$ off)
- OFRA HD Volumizing Mascara https://bit.ly/3BsXCK2
- HAUS LABORATORIES by Lady Gaga: EYE-DENTIFY GEL KOHL EYELINER, Punk https://amzn.to/3BQOhgi
The author may collect a small share of sales from the links on this page.


Comments
Join the conversation
I love them all! They're so pretty
looks gorgeous and the instructions are easy to follow. thanks for sharing