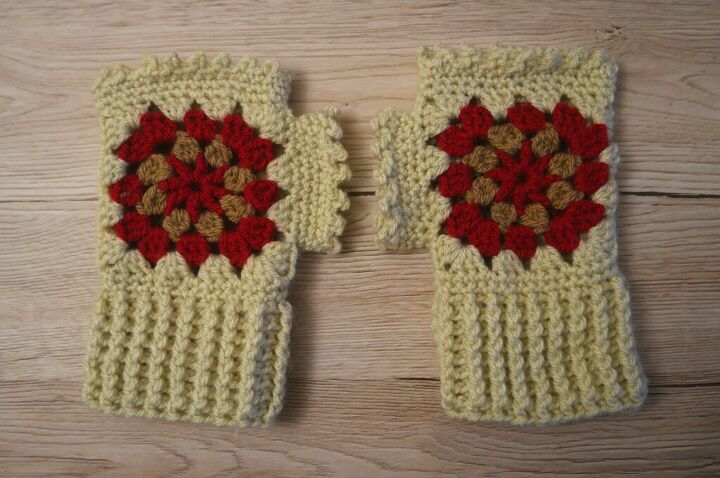
Granny Square Fingerless Mittens Pattern
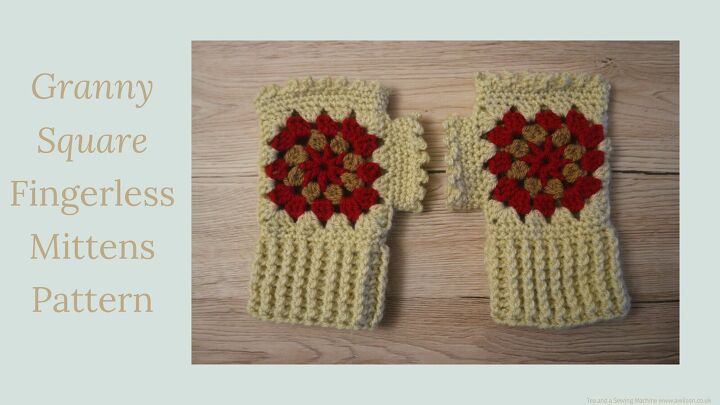
Granny Square Fingerless Mittens Pattern
Back in the early autumn when the leaves were first starting to turn, I had an overwhelming desire to crochet things in autumnal colours.
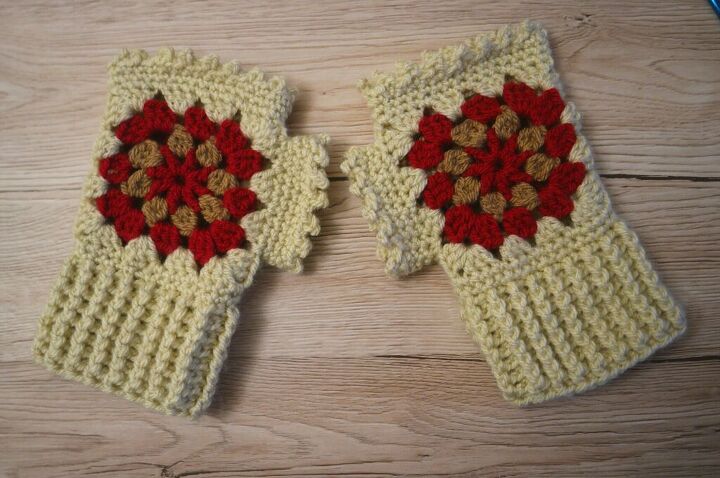
I had some yarn left over from another project which included cream, red and brown. So I used this to make some granny squares.
Unsurprisingly I had lost interest by the time I had made about 10 squares! This was obviously not nearly enough for a blanket, not even a small one, so they’ve been sitting in a pile awaiting their purpose.
When I went out for a walk the other day, I realised that my hands were cold. Then I remembered that I lost my gloves last winter and never got round to replacing them.
So I decided that one way to use up some of the granny squares and sort out the chilly hands problem was to make some granny square fingerless mittens.
As with anything that doesn’t have proper fingers, the granny square fingerless mittens don’t keep your whole hand warm. But they have the advantage that you can have warmer hands than if you’re not wearing gloves and still use your phone!
If you’re prone to chilliness, you can wear them indoors because they don’t restrict movement of your fingers at all. And if your hands get very cold, you could even wear them over a normal pair of gloves.

Fingerless Mittens Pattern
You Will Need
Yarn and a hook. I used this in vanilla cream, wine red and soft fudge. Because the yarn is aran weight, the squares were bigger than if I’d used double knit, but I don’t think it’s worth worrying about. The squares will stretch if they’re smaller.
Making the Mittens
Please note that as I am English I have used British crochet terms!
The first thing to do is to make the granny squares. You’ll need 4 of them.
I used this pattern, but you could make a traditional granny, or any one that you like! The only requirement is that it needs to be a square, otherwise the rest of the pattern won’t work!
Once you have your granny squares, take 2 of them. Join them along one edge. If you don’t know how to do this, there are instructions here. This will be the outside edge of the mitten.
On the opposite side, you’ll need to leave a space for your thumb. So at the top, crochet from the corner down to the bottom of the first cluster. Then from the bottom corner, join together 3 stitches.
Crocheting the Ribbing
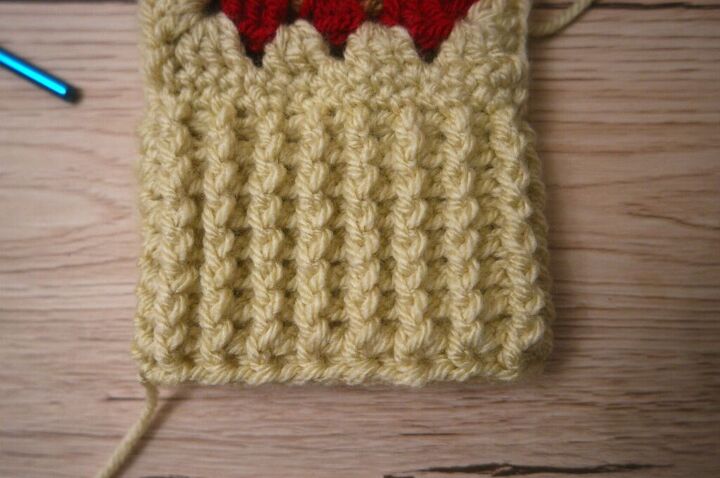
This is more of a rib effect than actual ribbing!
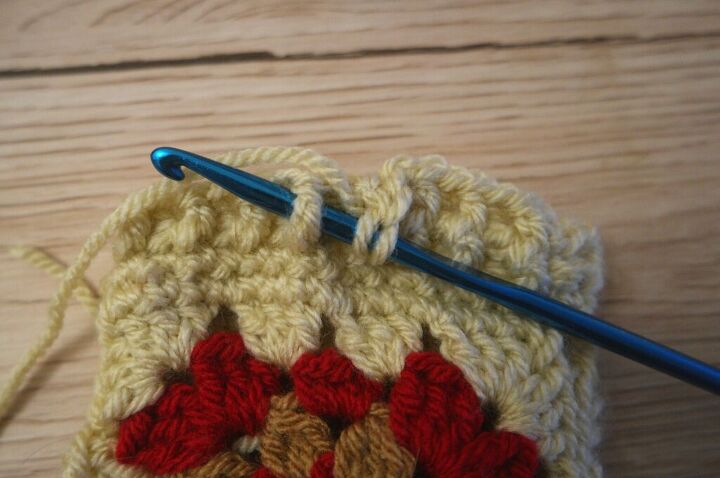
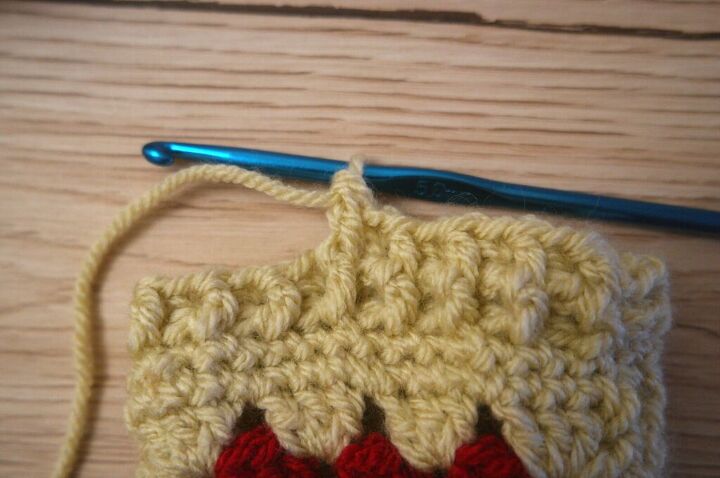
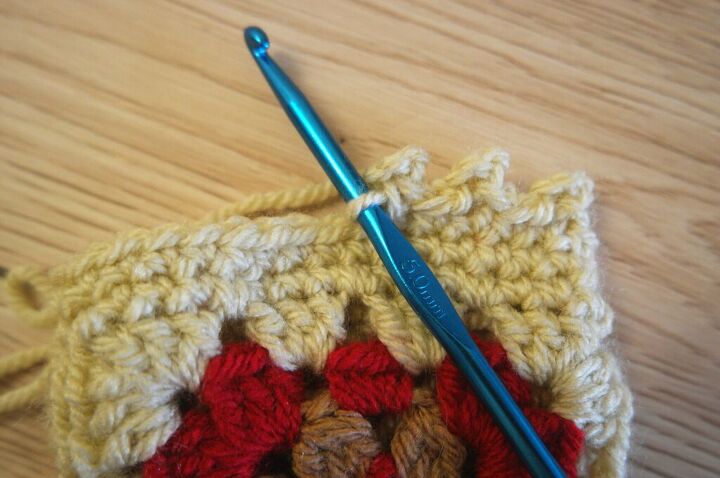
Around the bottom edge of your now joined granny squares, do 2 rounds of double crochet. Join each round with a ss.
The following rounds will be worked in trebles. But instead of working into the v of the stitch of the previous round, you’ll be crocheting around the post of the stitch. For the first stitch, crochet round the front of the post, then for the second, round the back.
If you haven’t done this before, this is how to do a treble round the front of the stitch post.
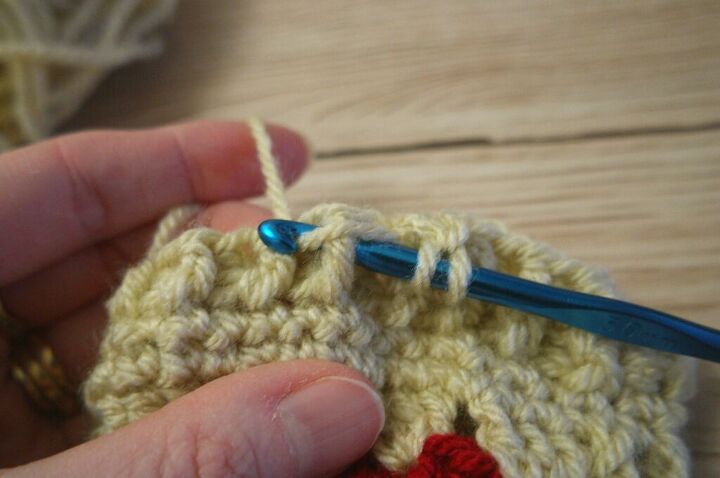
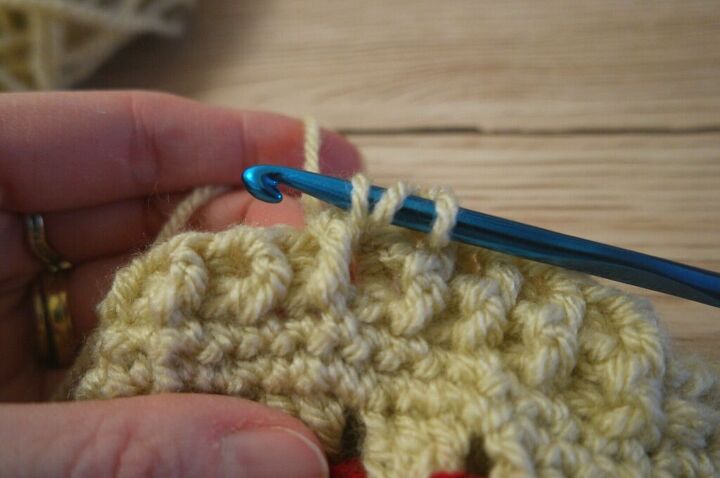
To crochet round the back of the post, put the hook in the other way, like this.
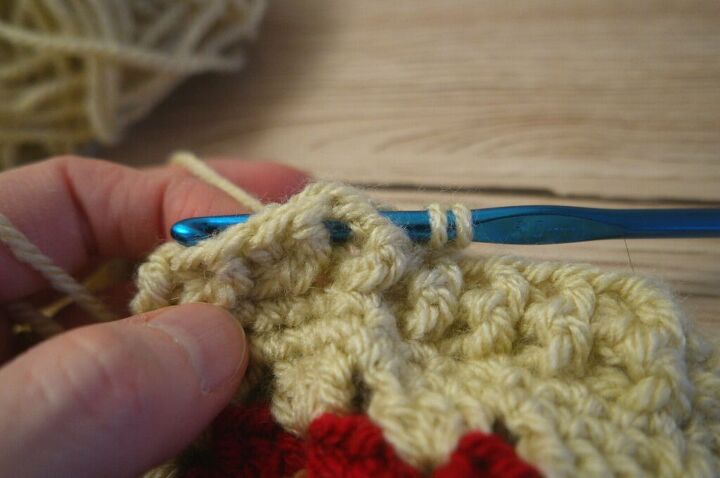
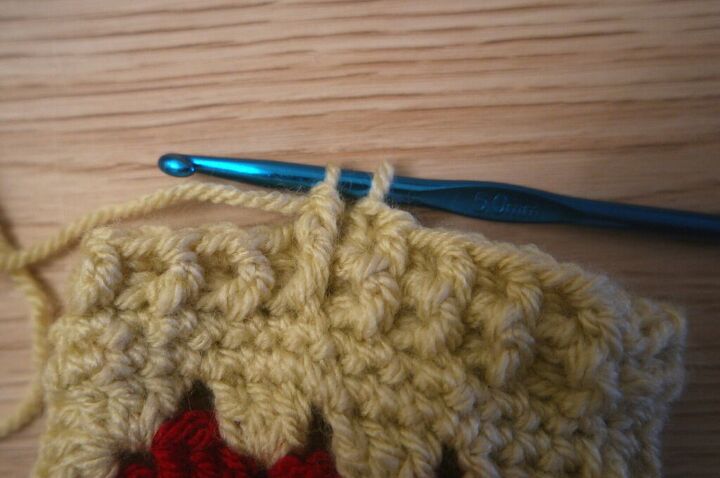
Alternate in this way until you get all the way round, then join with a ss.
You might find that you have an odd number of stitches, in which case you’ll need to have 2 fronts or 2 backs next to each other somewhere. It will be less obvious if it’s on the inside of the mitten cuff.
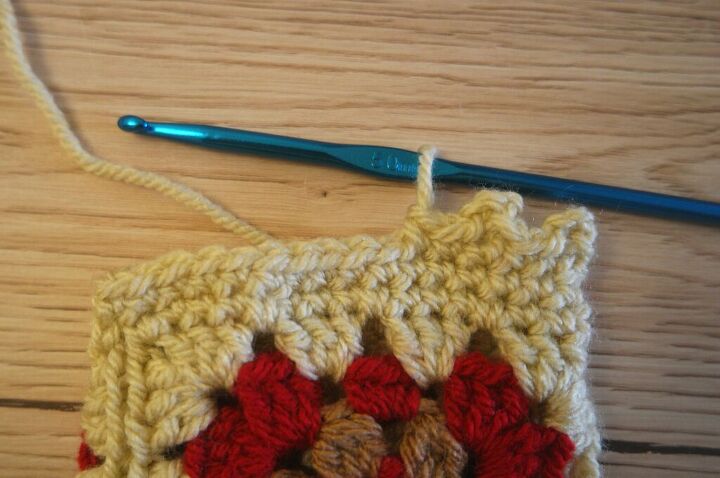
Work 9 rounds in this way, making sure that you alternate the same each round. This will give the ribbed effect.
If you’d like your mitten cuffs to be longer, then just work more rows!
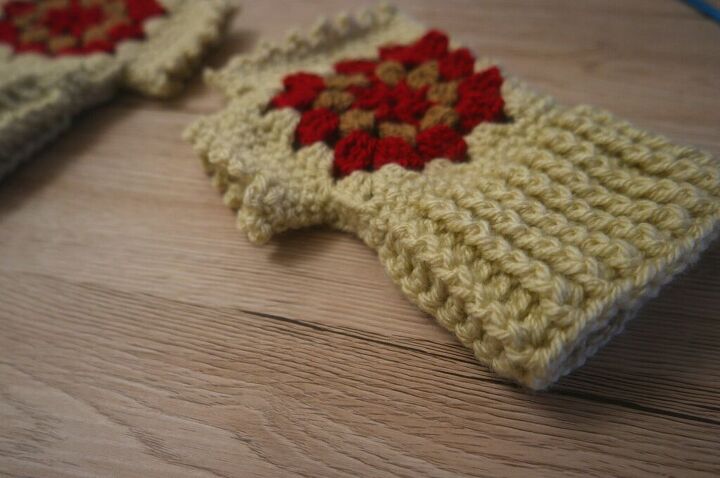
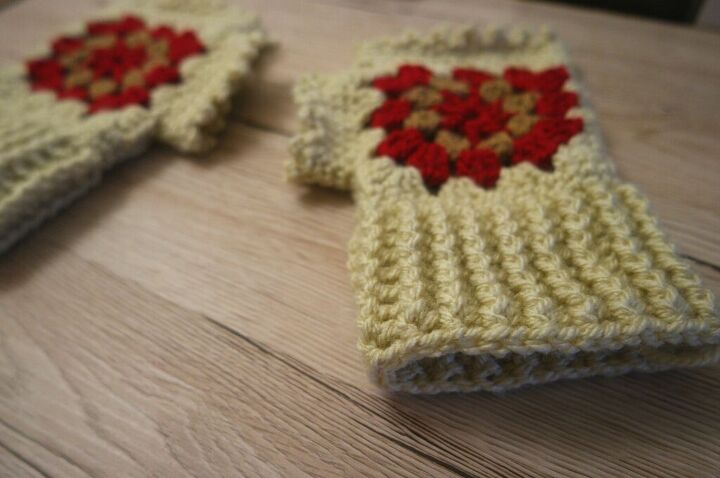
Mitten Top
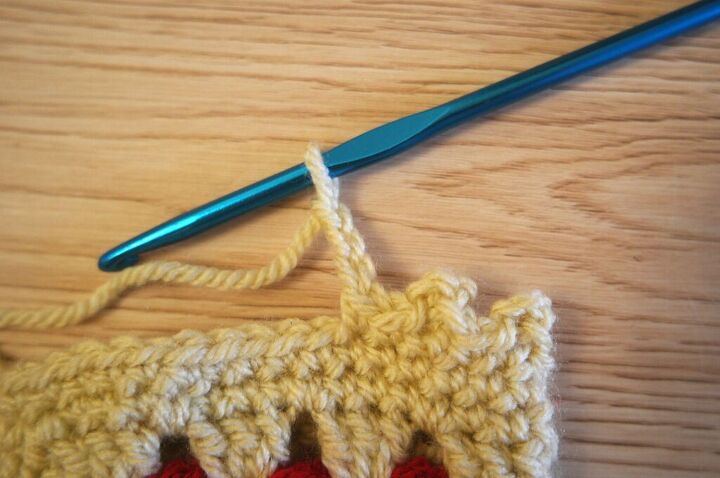
Rejoin the yarn at the top of the mitten at one of the side seams. Work 2 rounds in double crochet, joining each round with a ss.
Work a third round of picot edging. If you have your own way of doing a fancy edging, then do that!
Otherwise, this is what I did.
1 ch, then dc into next stitch, then dc into the stitch after that one. 3 ch, then ss through the base of the stitch. 2 dc as before, then 3 ch, ss into base of stitch again. Keep going in this way until you get back where you started.

Thumb
Rejoin the yarn at the side seam. Work 3 rounds in double crochet and join each round with a ss.
Work a 4th round of picot edging in the same way as the top.
Weave in all the ends.
Now you need to make another one for the other hand!
The author may collect a small share of sales from the links on this page.


Comments
Join the conversation
Very cute🙂❤️