5 Spooky Halloween Nail Art Designs

If you have your Halloween costume ready but you want to add something extra to your Halloween look, then follow this easy Halloween nail art tutorial. I will show you five different Halloween nail art designs, and there’s surely one that will compliment your costume!
In this tutorial, I will show you how to create these nail art designs on false nails. But, of course, you can do them on your natural nails too.
Happy designing!
Tools and materials:
- Soak-off UV/LED nail gel in multiple colors
- Clear false nails
- Line and dot nail tools
- Clear gel base coat
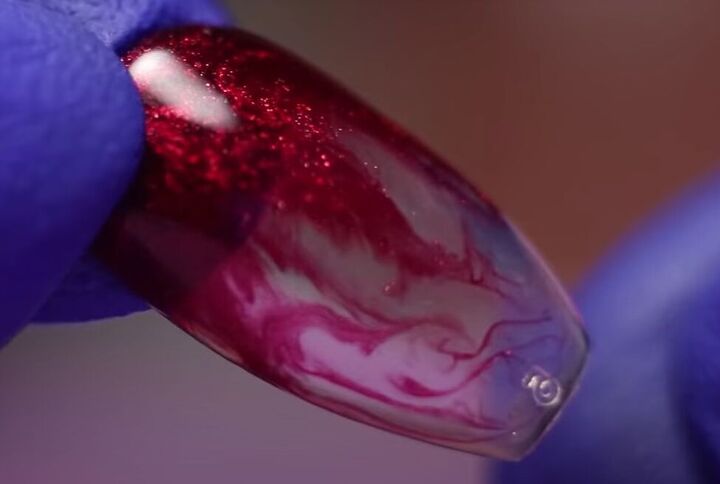
1. Dripping blood nails
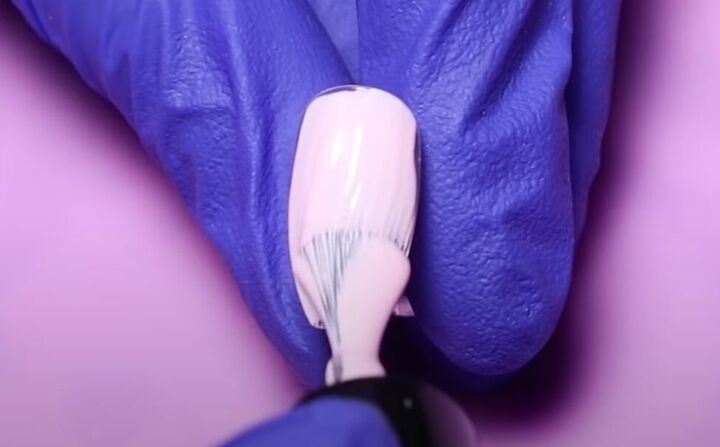
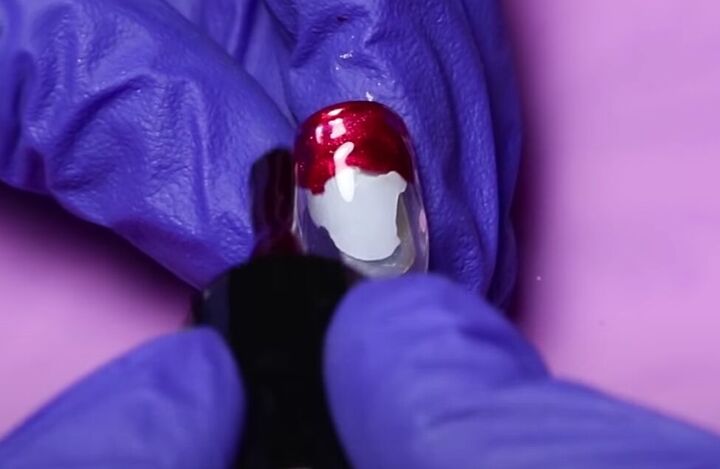
Start this nail art design by applying a base coat of light pink gel polish to your nails.

Use a nail polish dropper tool to place three drops of dark red gel on each nail, in the pattern shown above.

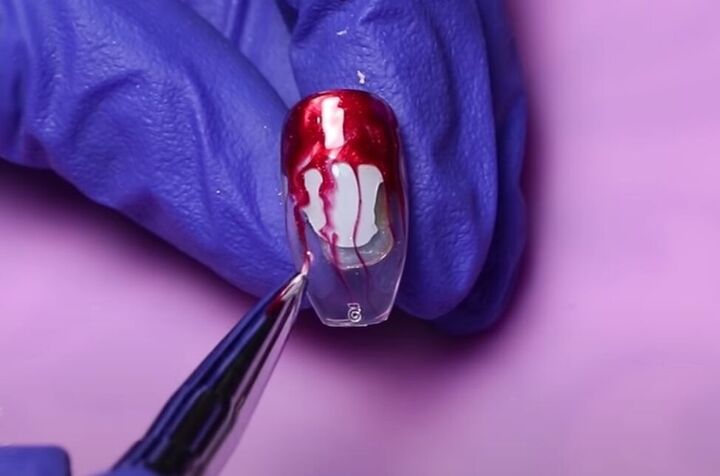
Use the same tool, with a bit more dark red gel polish added to pull the drops up in lines to the top of your nails, making a dripping-blood effect.
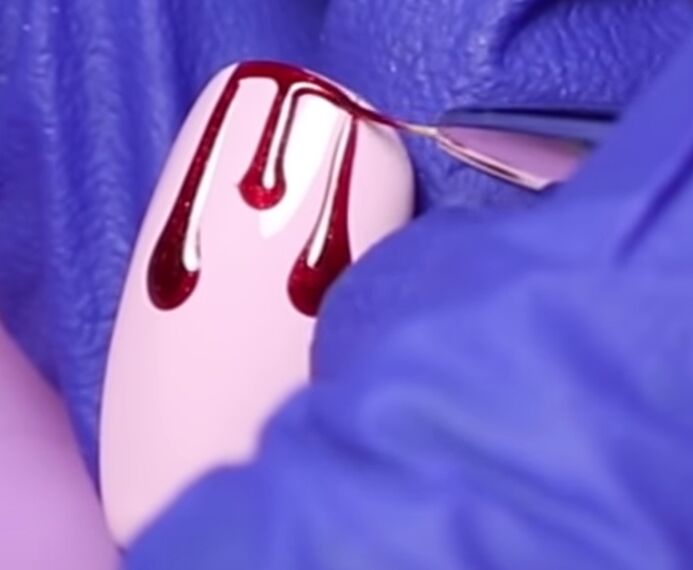
Paint the tip of your nails with the same deep red gel polish, connecting the tops of the dripping blood lines.
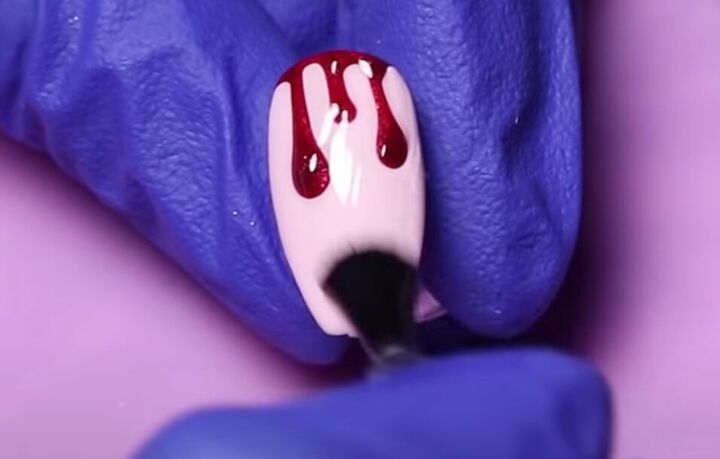
Apply a gel top coat over the polished nails.

2. Halloween spiderweb nails
Apply one coat of black gel polish that has colorful sparkles in it to your nails.
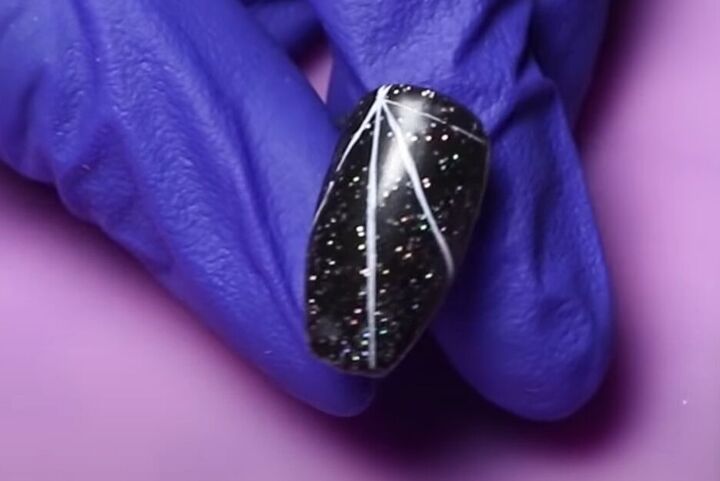
Use a thin nail tool with white gel polish to draw lines from one side of the nail tip to the base and sides of the nail.
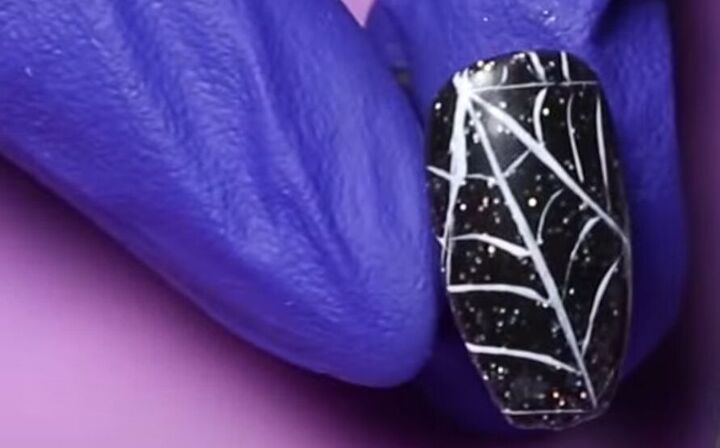
Then add slightly curved horizontal white lines between the vertical lines, to complete the spiderweb effect.
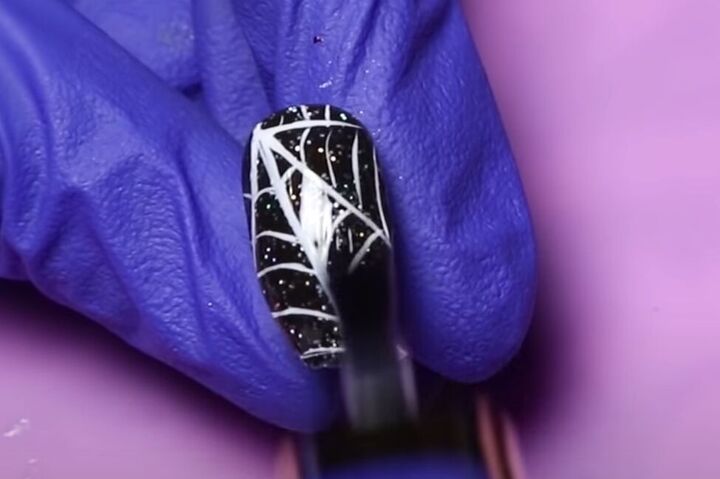
Finish your spiderweb nails with a clear gel top coat.
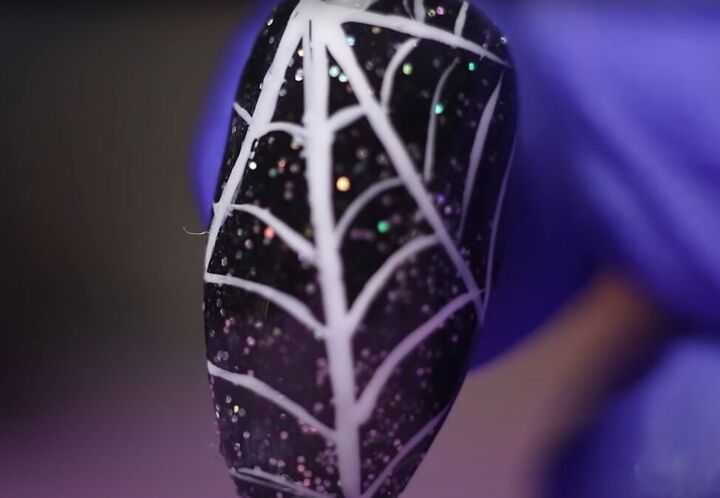
This look is especially striking with all the colored sparkles shining through.
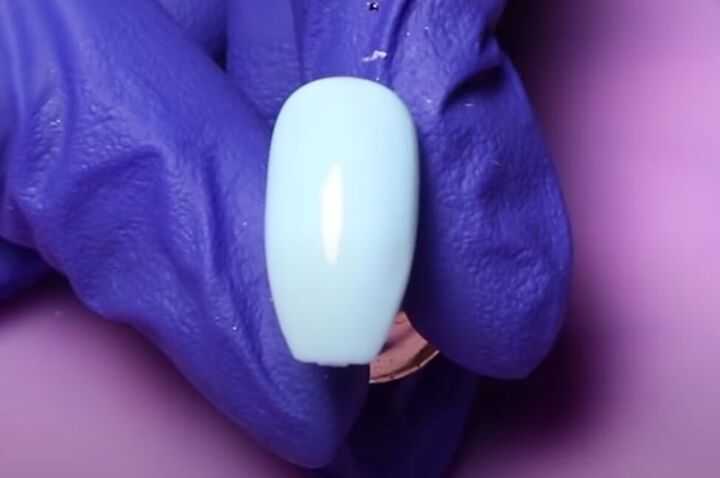
3. Colorful “beaded” nails
Apply a pale blue gel polish base coat to your nails.
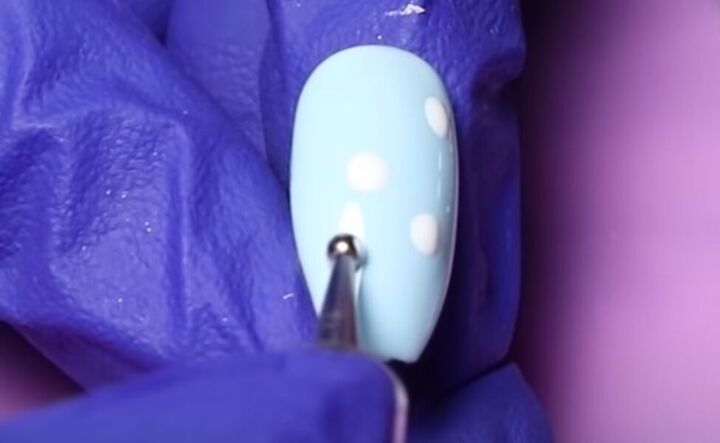
Use a dropper tool to add white dots.
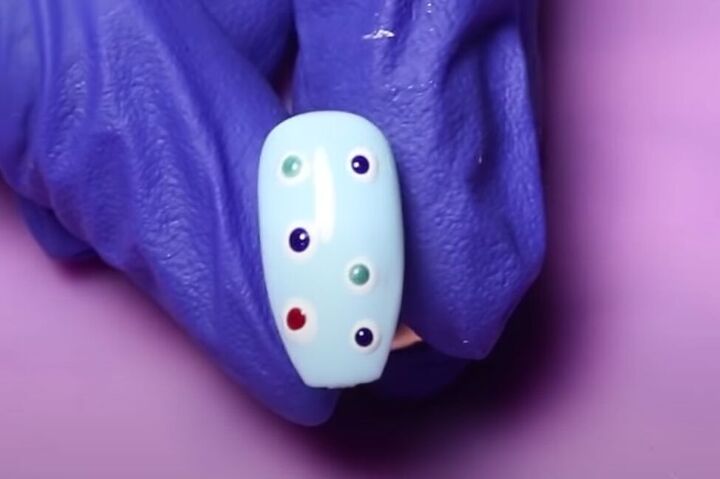
Then add smaller dots in different colors to the center of the white dots.

Finally, add a tiny black dot just off-center on the colored dots for depth and dimension to create the bead look.
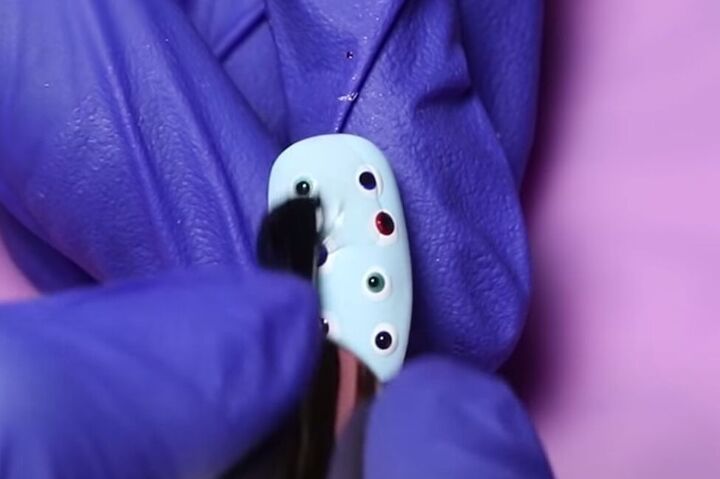
Finish with a clear top coat.
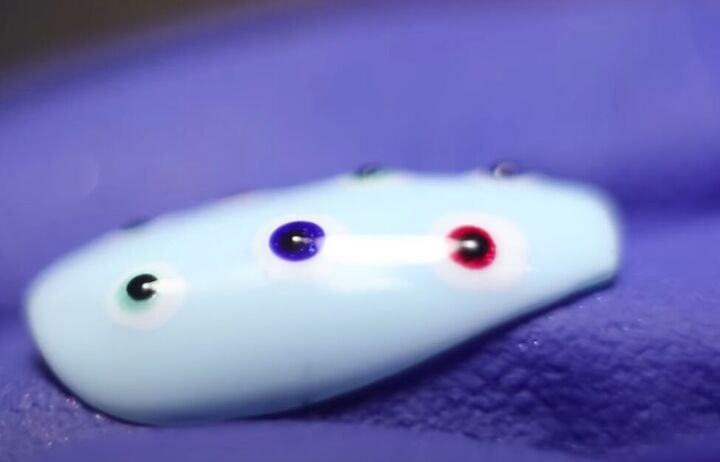
You can see how these “beads” look almost three-dimensional now.
4. Red marble nails
For this nail art design, start with a clear base coat on your nails, and then apply a layer of deep red gel polish to just the top third of your nail.
Use a fine nail tool to pull down thin lines of red polish towards the base of your nail.

Then use the same tool to widen and blur the lines a bit, creating a marbled effect.
Finish with a clear top coat.
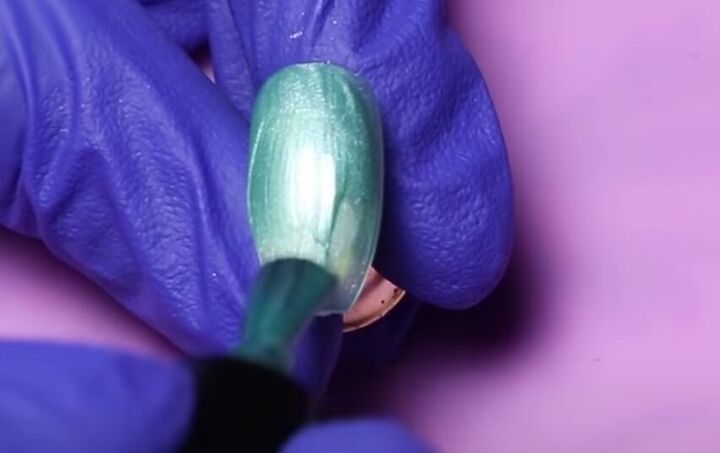
5. Halloween Frankenstein nail art
Start this nail art design with two coats of light green gel polish.
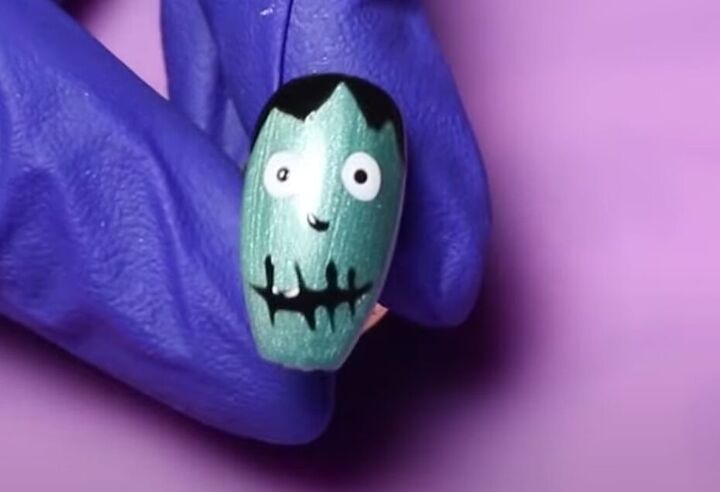
Use line and dot nail tools to draw a Frankenstein face on your nail, and finish with a clear top coat.
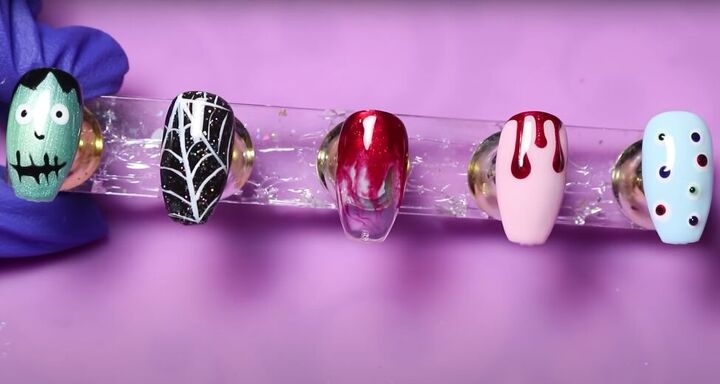
Halloween nail art
Here are all five gorgeous Halloween nail art designs. They are all unique, but easy to create.
I hope you leave a comment to let me know which Halloween nail art design you like best and will add to your Halloween costume. Happy Halloween!
The author may collect a small share of sales from the links on this page.


Comments
Join the conversation