Spooky Halloween Nail Art Tutorial

Looking for spooky Halloween nail art? These festive, Halloween pumpkin nails are perfect, no experience necessary!
Tools and materials:
- Base coat
- Orange nail polish
- Black nail polish
- Clear nail polish
- Dotting tool
- Acetone
- Cotton pads or cotton swabs

1. Apply base coat
Don’t use too much, you need the base to be smooth.
2. Apply orange polish
Apply two coats of orange polish for a deeper shade, waiting for the first coat to dry in between.

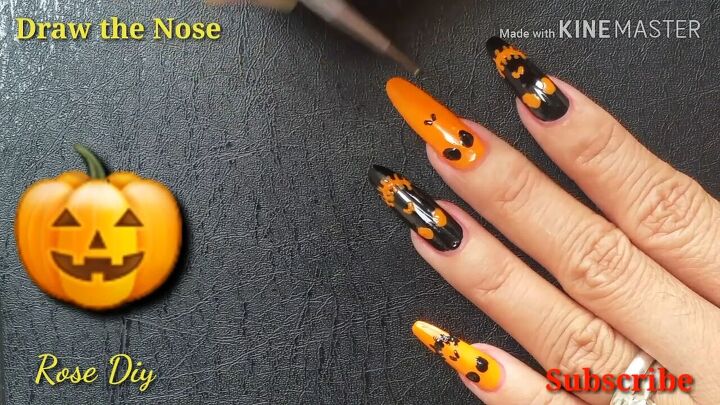
3. Draw the face
Once the orange polish is completely dry, draw the eyes using black polish and a dotting tool. Next, use the same tool to draw a nose and mouth. Be careful not to smudge the eyes.


4. Apply top coat
Once the face details are dry, apply a clear, top coat. Use the acetone and cotton swab for any touch-ups.

5. Repeat on your other nails
You can switch base colors for every other nail, as I’ve done, or choose your own pattern. The key is to make sure all layers are dry before adding the next layer.
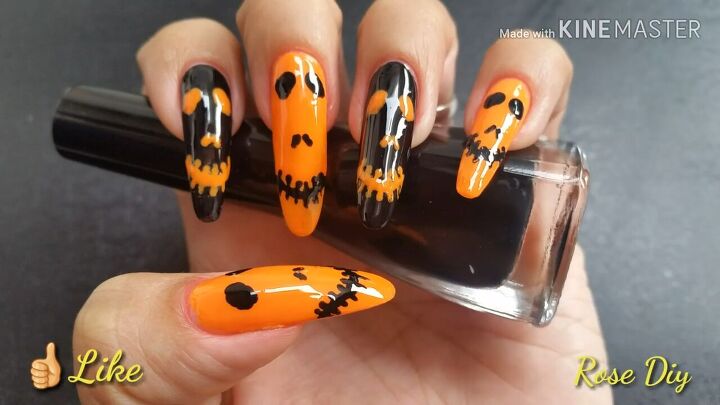
Halloween nail art
Make sure your Halloween pumpkin nails are completely dry before taking a pic and showing us how they turned out in the comments below. Happy Halloween!
The author may collect a small share of sales from the links on this page.


Comments
Join the conversation