Easy Galaxy Nail Art Tutorial

Hi everyone. In this nail tutorial, we’re doing galaxy nail art. Let’s get started!
Tools and materials:
- Midnight blue nail polish
- Blue nail polish
- Purple nail polish
- Isopropyl alcohol
- White nail polish
- Thin nail brush
- Dotting tool
- Top coat
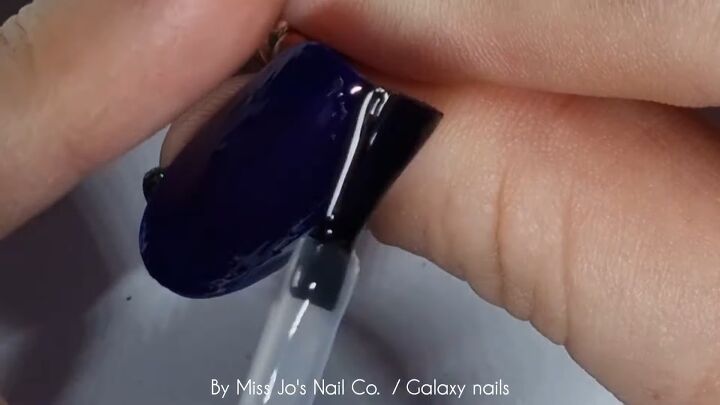
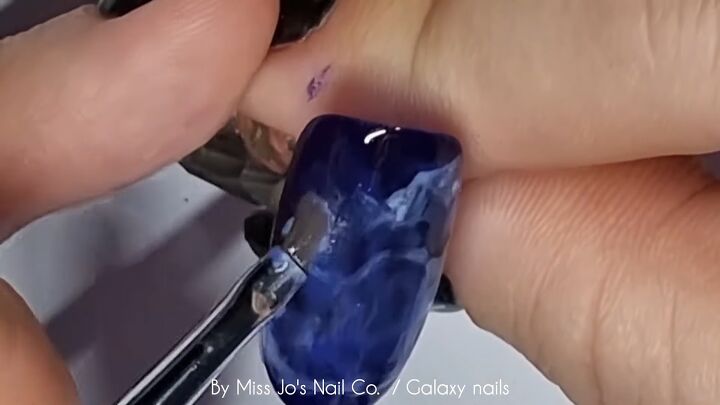
1. Apply midnight blue as a base coat
Apply two coats of midnight blue to your nails by dry brushing, so there’s barely any product on the brush and you can see it resisting.
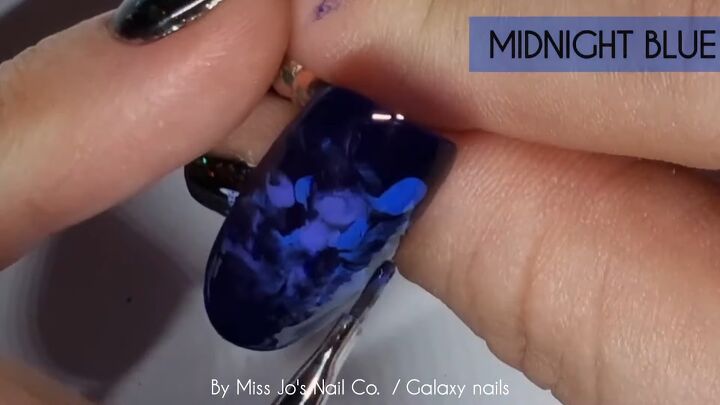
2. Apply midnight blue, a lighter blue, and purple polish
Next apply a lighter blue, purple, and more midnight blue polish onto the wet, dry brushed base coat.
3. Pat and spread out the wet polish with isopropyl alcohol
Use isopropyl alcohol to pat the polish and spread out and disperse the nail polish to create an illusion of distant far-off space. Cure.
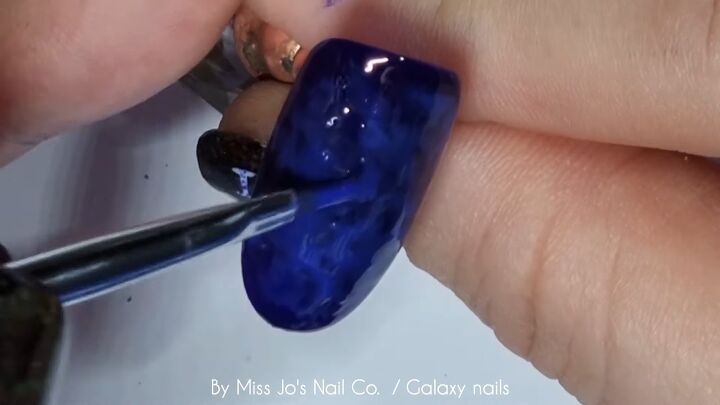
4. Spread out white nail polish with isopropyl alcohol
Apply white nail polish and repeat step 3, patting the polish with isopropyl alcohol.
Spread it out enough so you don’t lose too much of what’s going on underneath.
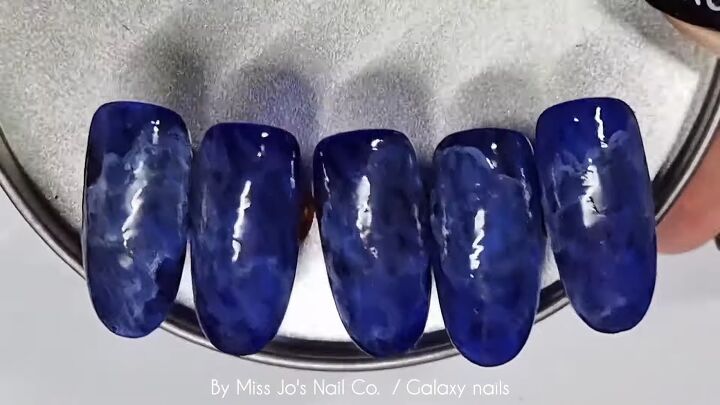
This is what all of the nails are looking like so far. It looks a bit of a mess right now, but once it’s top-coated, it’ll all come together.

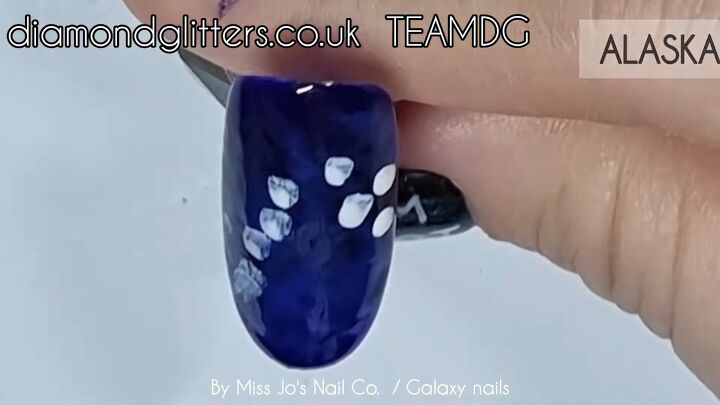
5. Add white dots
These dots are going to be constellations and also galaxy stars.
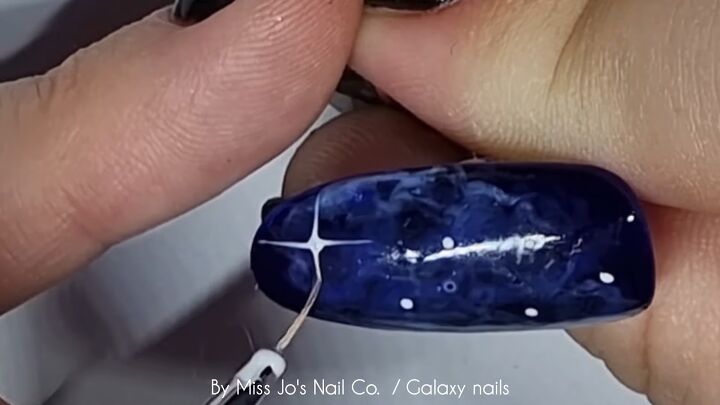
6. Add lines for the stars
To create the stars, use your brush to pull up and down, left and right.
Use only the product from the dot and release the pressure as you pull away to get a slight fade out. I added a few more dots and then cured.
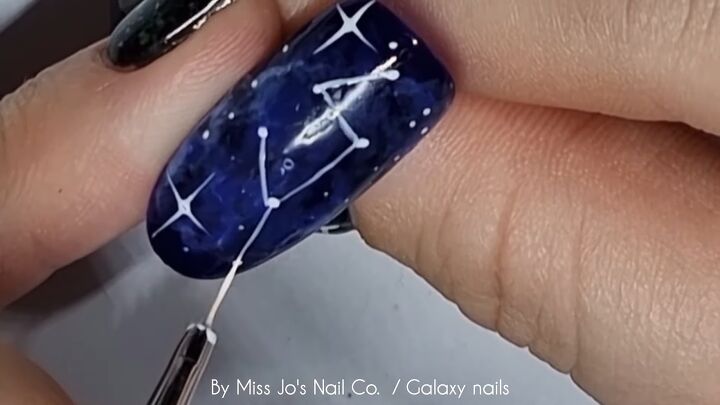
7. Add lines for the constellations
Join up the constellations with lines. I’m just making up the constellations as I go.
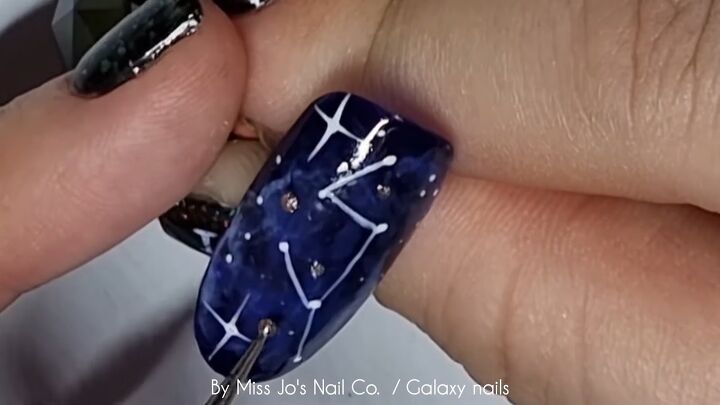
8. Add honey gold dots
I’m taking a honey gold color and doing random dots with a dotting tool to complete the nail design.
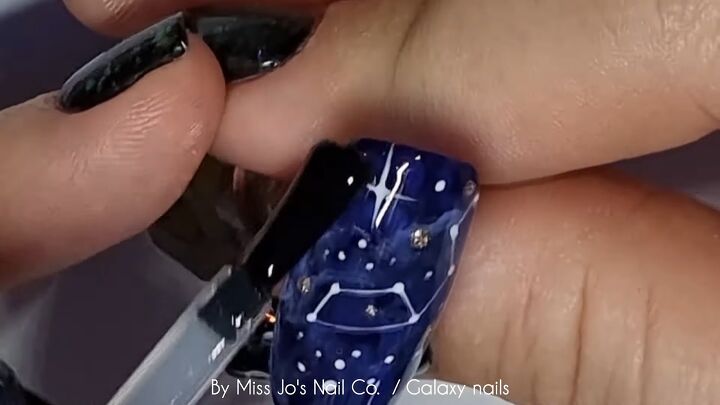
9. Apply a top coat and cure
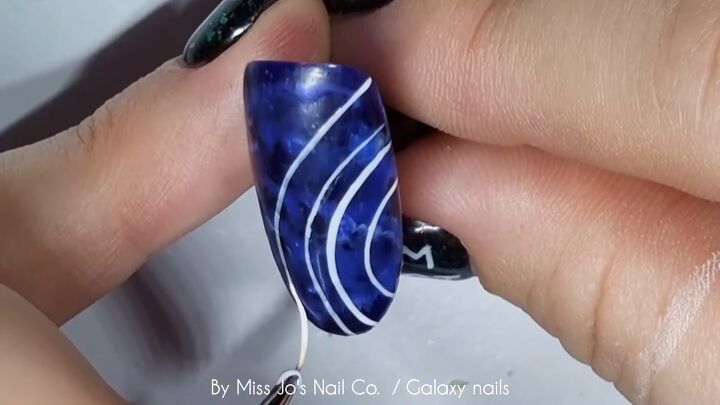
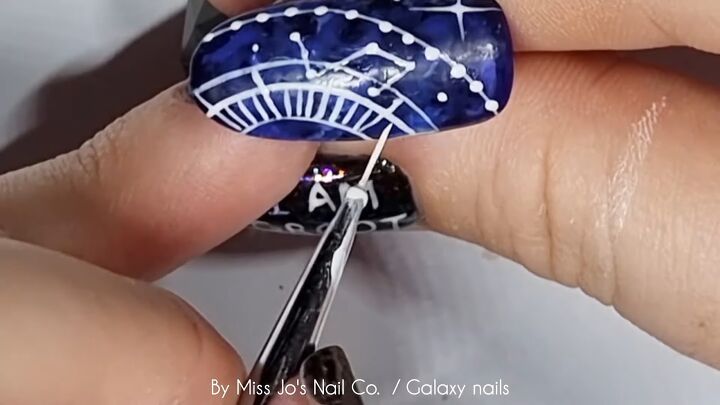
10. Draw parallel curved lines on the nail
Here’s how I did the more detailed nails. I started by drawing these curved white lines to create a cosmic circle.
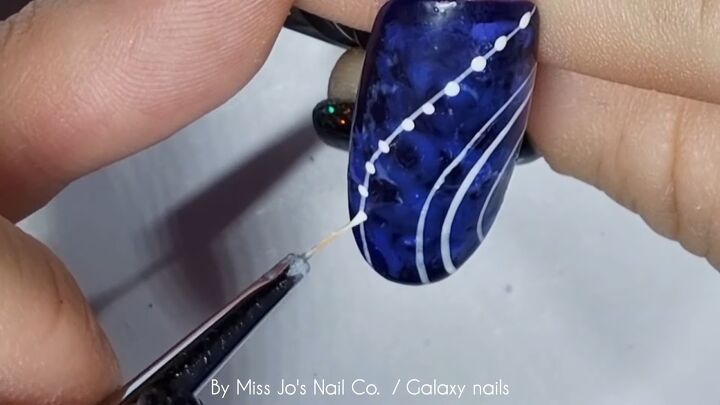
11. Dot the outer line
Add small white dots to the outer lines.
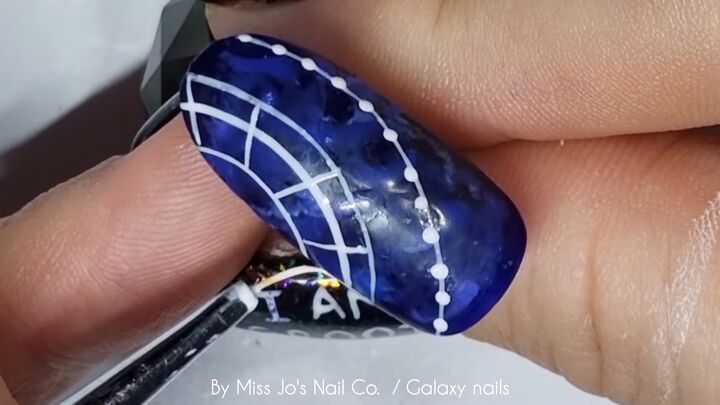
12. Add lines
Add lines to the cosmic circles.
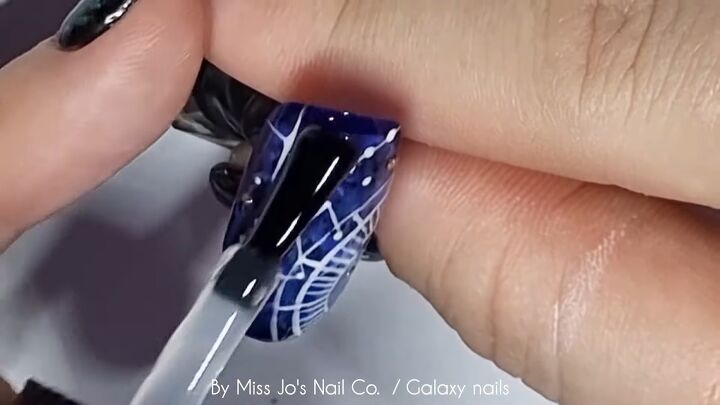
13. Add more details like stars, constellations, and planets
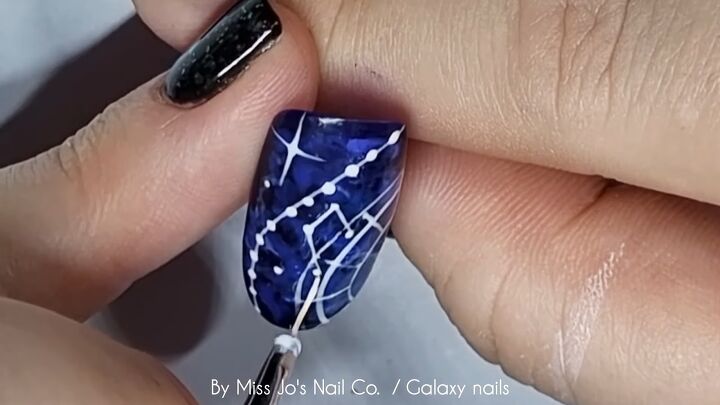
Add more dots and create more stars and constellations. I made up the details as I went.
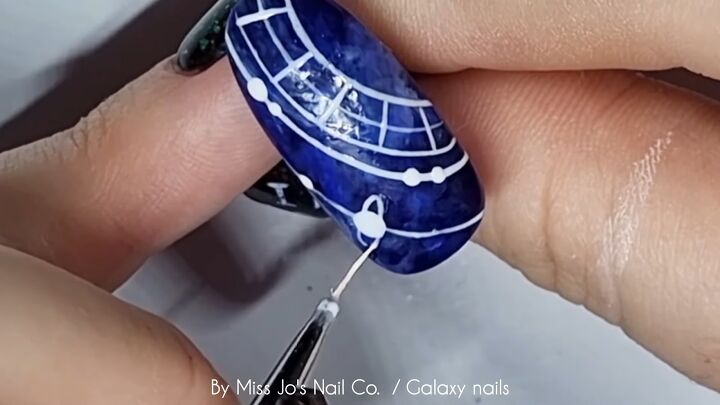
I made one of the dots Saturn by adding a U on either side to make the ring.
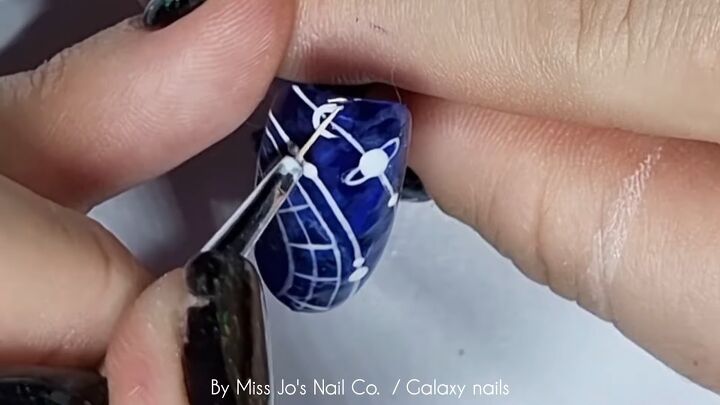
I also made a little moon.
I didn’t want any of the cosmic circles to be the same, and I wanted them to be intentionally different so I added more lines.
14. Add a top coat
Apply a top coat and cure the detailed nails.
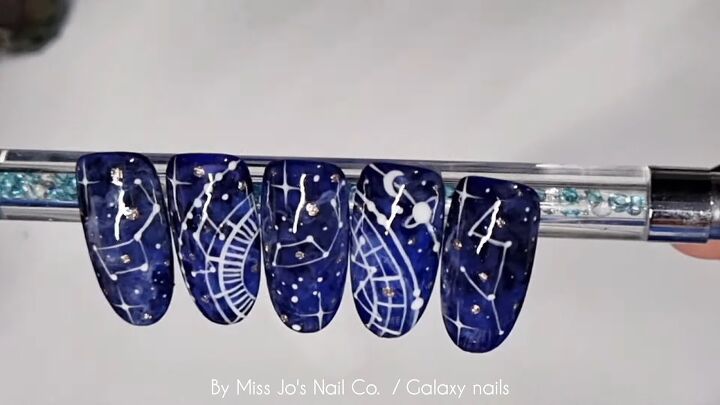
Galaxy nail art
Here are the finished acrylic galaxy nails! Let me know what you think about these galaxy nail designs down below.
For more nail content, check out my post on How to DIY an Awesome Sun and Moon Nail Design.
The author may collect a small share of sales from the links on this page.


Comments
Join the conversation