Jeans Upcycle: Cute and Easy DIY Belt Bag

In this recycling crafts tutorial, I’m going to show you how to make a DIY belt bag. We’re going to be taking an old, unwanted pair of jeans and using some of the material to make this mini-belt bag.
The bag is handy for storing small things, looks super cute, and is very easy to make. Let’s get started!
Tools and materials:
- Jeans
- Ruler
- Tailor's chalk
- Scissors
- Lining fabric
- Elastic
- Button
- Clips
- Needle and thread
- Glue
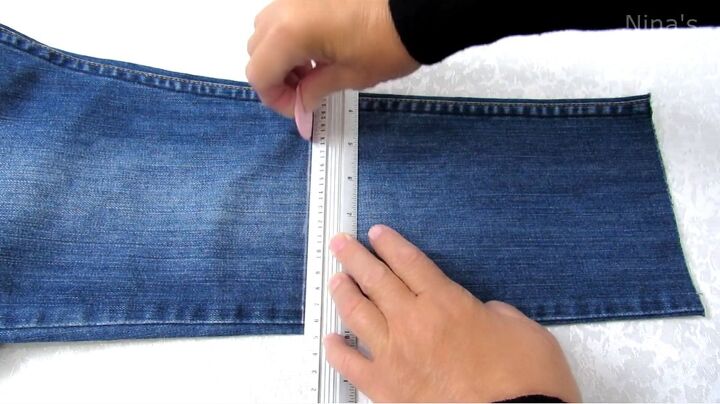
1. Cut the denim
Mark 25cm (9.8 inches) in from the bottom of one of the legs on your pair of jeans. Draw a line at this point for the whole width of the jean leg and cut it out.
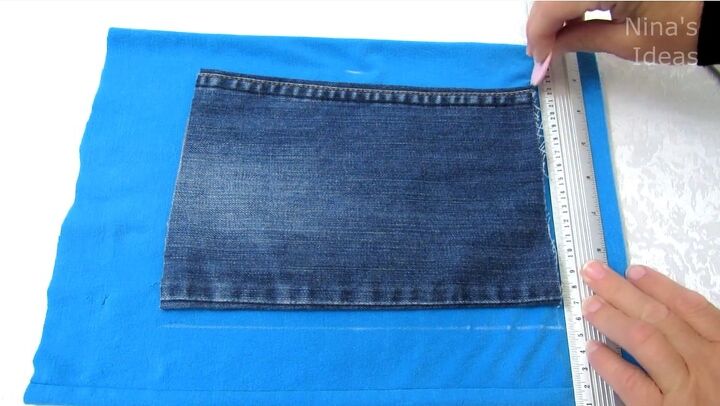
2. Cut the lining fabric
Fold your lining fabric in half. Place the cut-out denim on top of your lining fabric and mark 1cm (0.4 inches) of seam allowance on the lining on either of the long sides. Proceed to cut the lining out, not adding any seam allowance on either of the width sides. You will end up with two pieces of lining fabric.
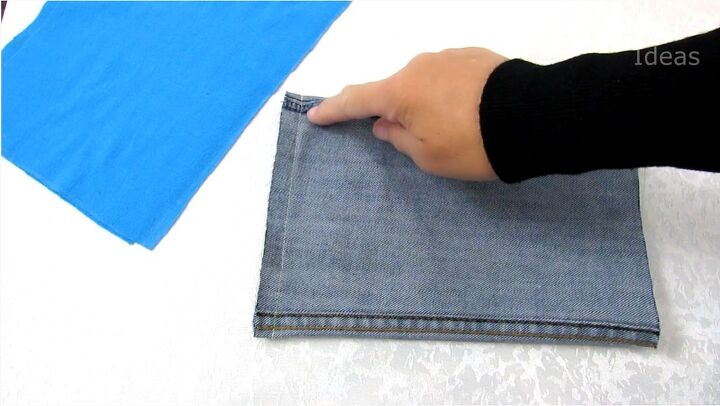
3. Sew one side of the denim
Turn your denim inside out and sew one of the width sides closed.
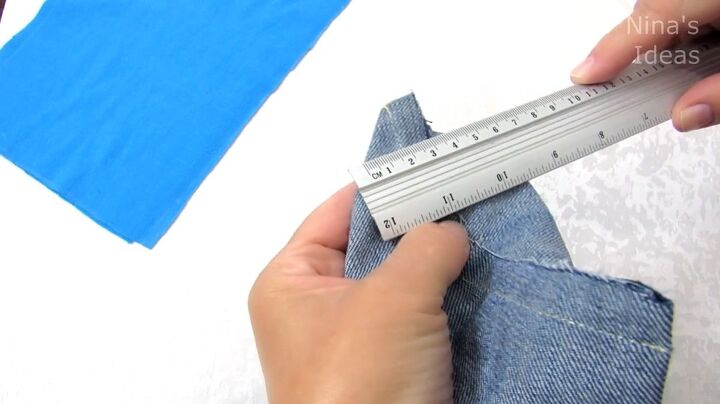
4. Mark the sewn side
Press the sewn side down flat as shown, then measure and mark a 3.5cm (1.4 inches) line. Do this on either end of the sewn side.
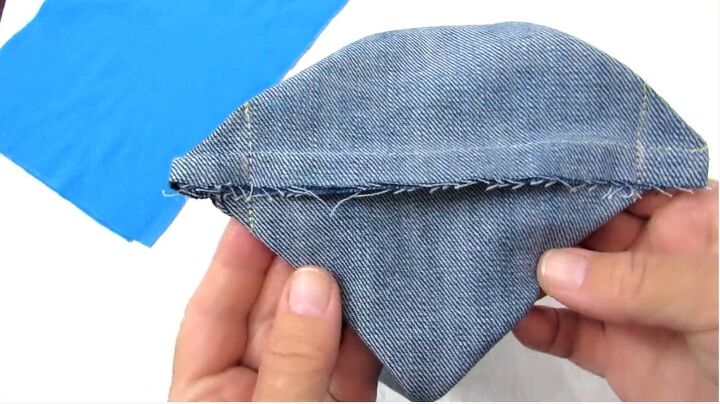
5. Sew and cut the corners
Now sew the lines you’ve just marked. Proceed to cut off these corners, leaving a little space so you don’t cut too closely to the sewn lines.
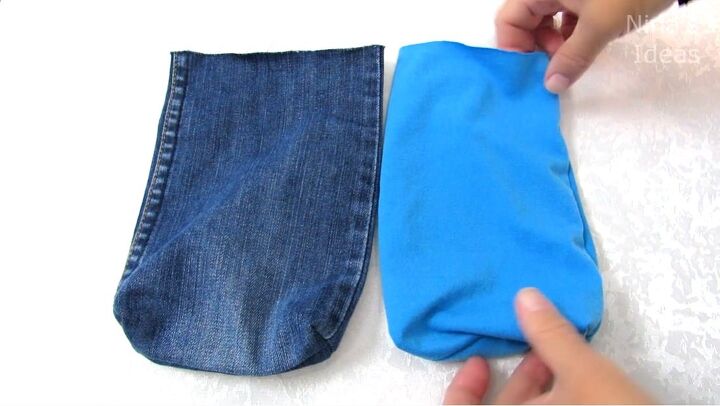
6. Sew the lining
Sew around three sides of the lining to create a pocket.
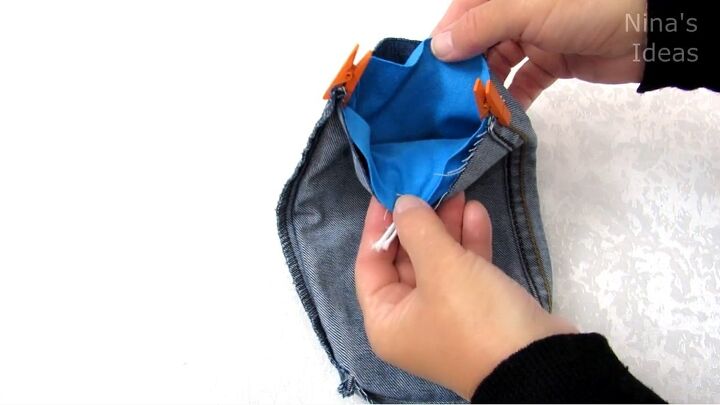
7. Attach the lining to the denim
Place the lining inside the denim pocket so that the right sides of both of the materials are facing one another.
Fold the elastic so that it creates a loop and pin it in between the denim and the lining. Use clips to keep the two layers in place.
Sew around the top, leaving a gap of 6cm (2.4 inches).
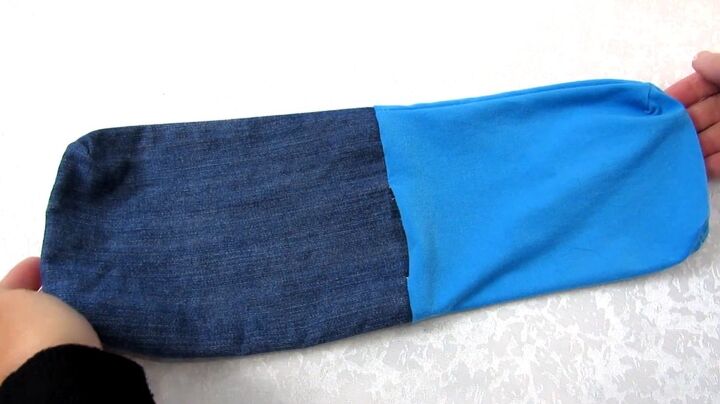
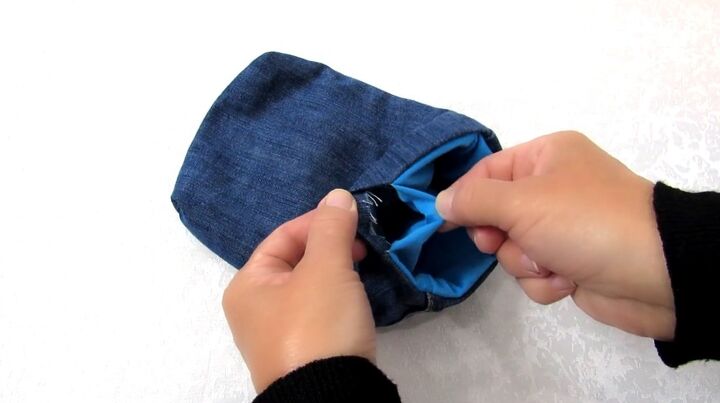
8. Turn right-side out
Snip off the additional elastic. Then pull the lining out and turn the denim right-side out through the hole that you left.
When done, push the lining down inside the denim.
9. Sew the gap
Sew up the open gap.
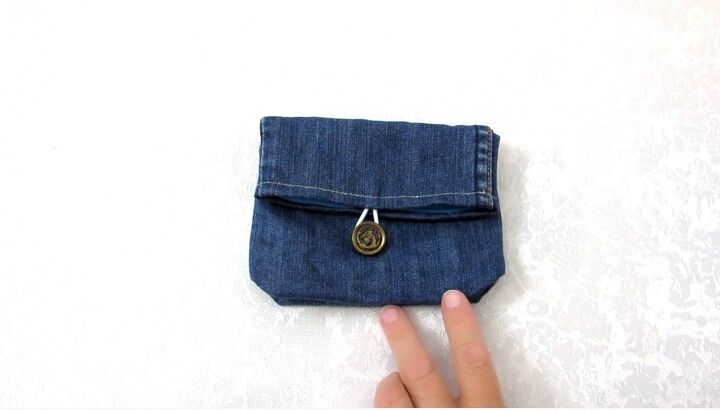
10. Sew on a button
Fold the top of the purse over and sew on a button.
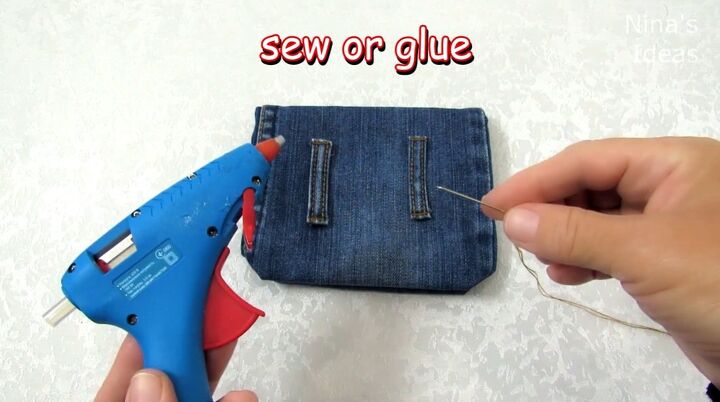
11. Sew on belt loops
Now to attach the purse to a belt.
Take your jeans and cut off two of the belt loops. Sew or glue these belt loops to the back of your purse. Simply run a belt through the loops on your purse and you are done.
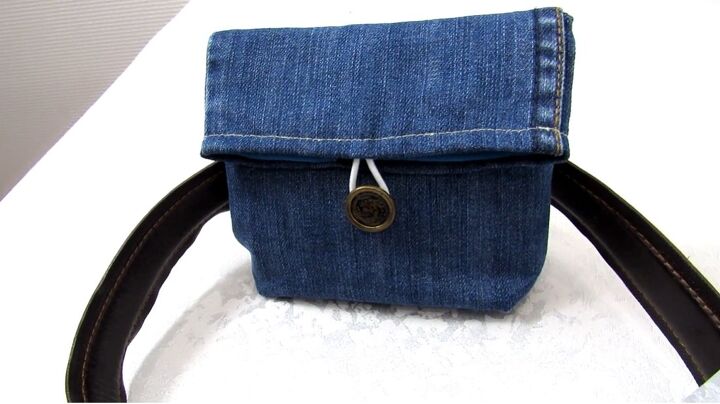
Completed DIY belt bag
Here is the finished mini purse bag. It is so cute and handy for storing small things.
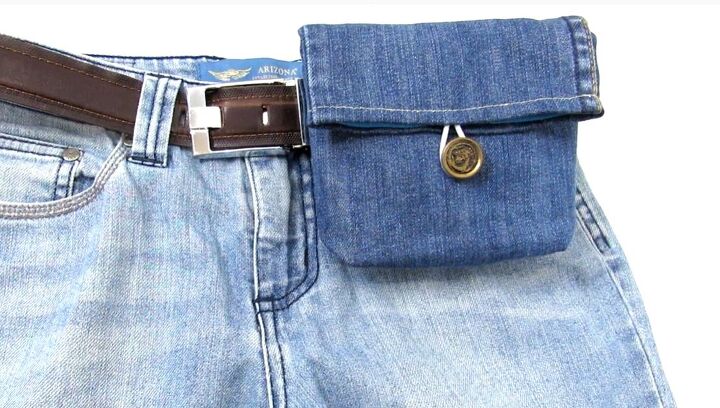
This is also a great way to upcycle an old pair of jeans or any unwanted bits of denim that you have lying around. I hope you’ll make one for yourself!
The author may collect a small share of sales from the links on this page.


Comments
Join the conversation