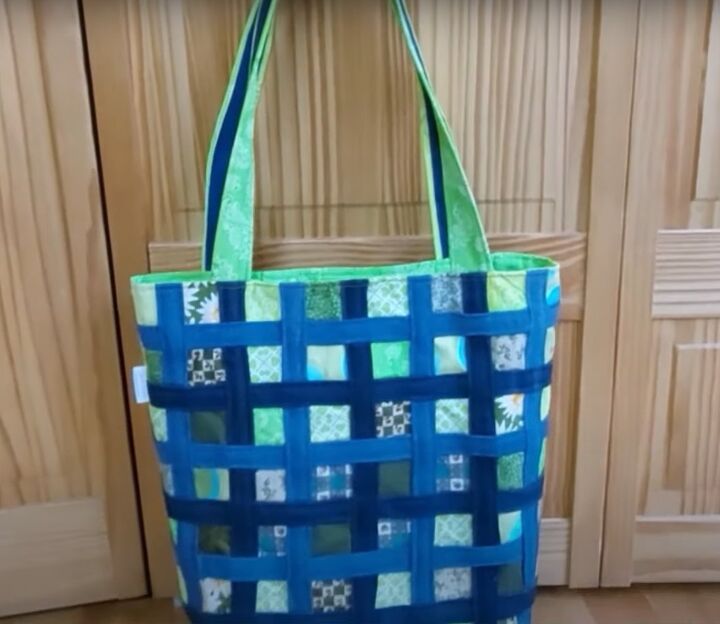
Denim Upcycle: Cute and Easy Braided Tote Bag Tutorial

Today, I’m making an upcycled tote bag from fabric scraps and a couple of pairs of jeans.
This DIY tote bag design takes a little longer than some of mine because of the patchwork effect.
I used the same design for the front and back of the bag, but you could have a plain back if you prefer.
Tools and materials:
- Fabric scraps
- 2 pairs of jeans in different colors
- Lining fabric
- Fusible interfacing
- 2 inch by 2 inch template
- Ruler
- Pins and fabric clips
- Scissors
- Sewing machine
- Iron
1. Patchwork bag front
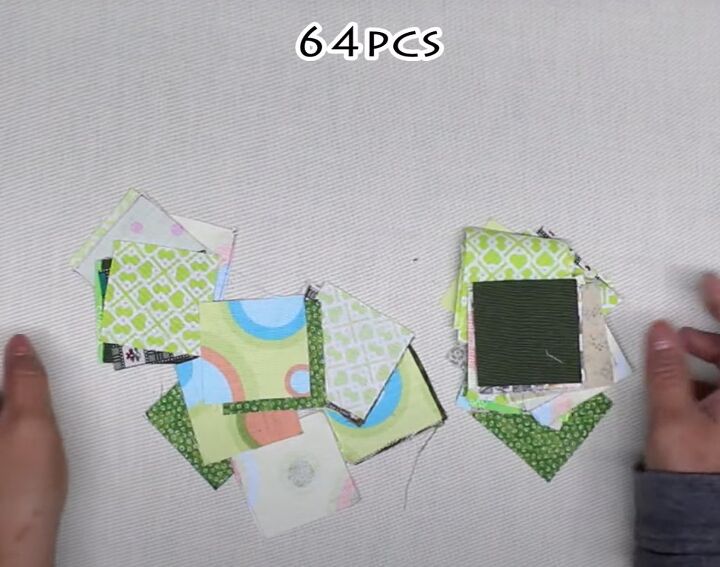
Cut your fabric scraps into 64 2 inch squares.
Cut a piece of interfacing 16 inches by 16 inches.
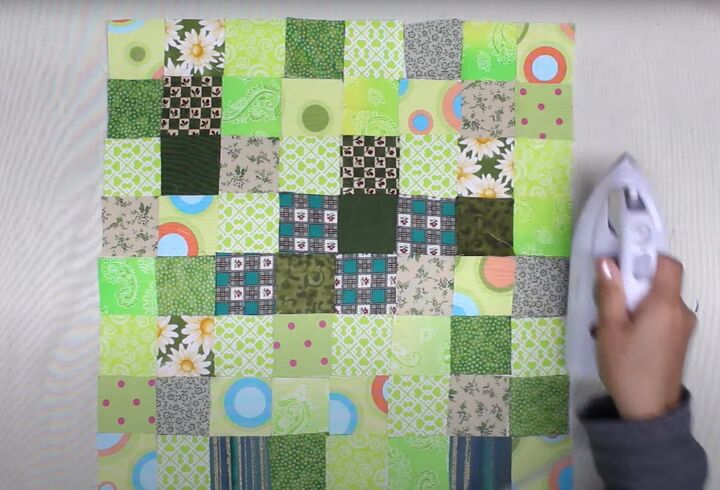
Arrange the fabric squares to cover the fusible side of the interfacing.
Press with a hot iron to fuse them in place.
2. Denim strips
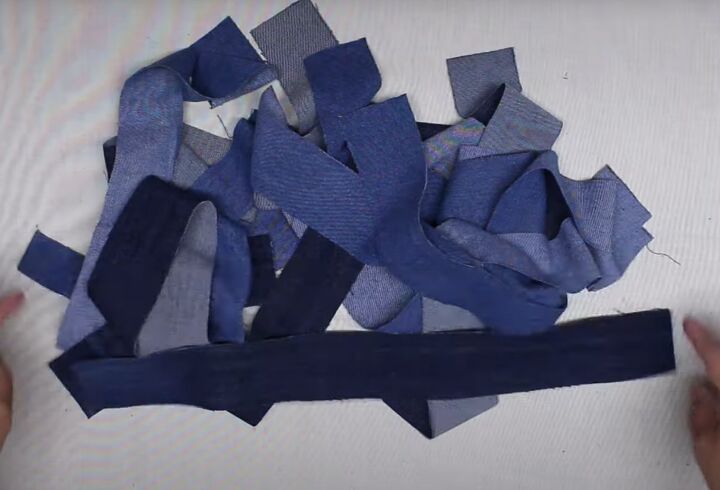
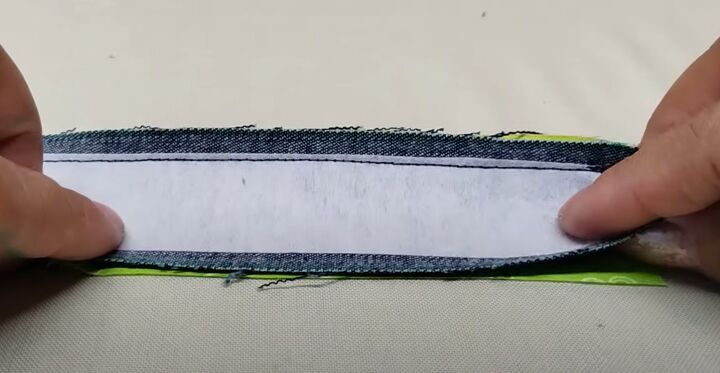
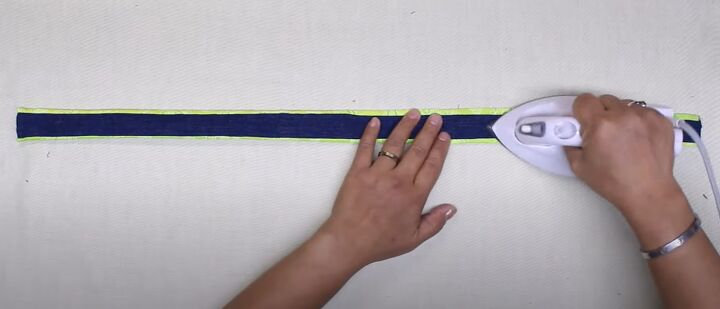
Cut 14 strips of denim 18 inches long by 2 inches wide. I cut half from dark denim and half from a lighter shade.
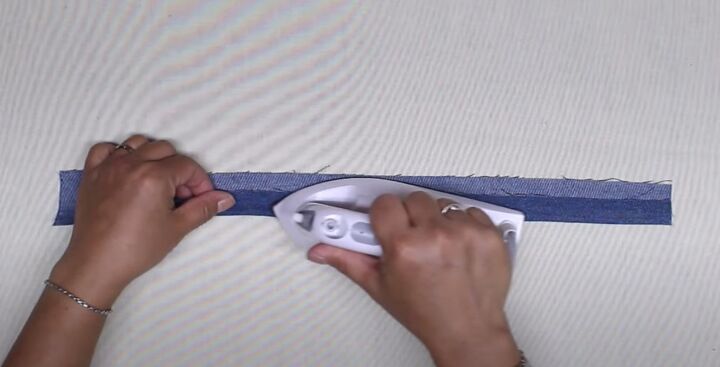
Fold one long edge of each piece to just past the center line and press in place.
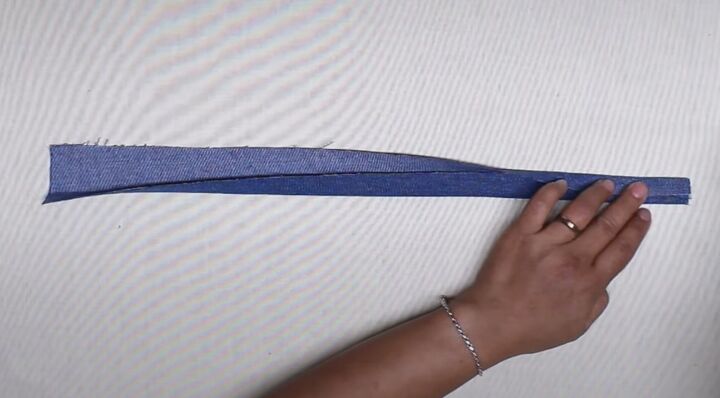
Fold the other long edge over it and press firmly.
Repeat for all the denim strips.
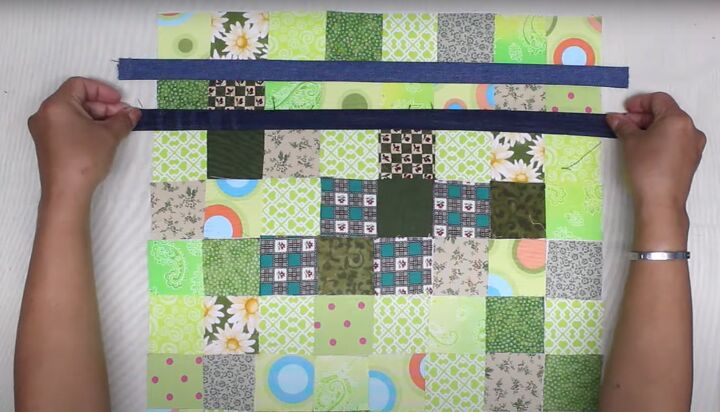
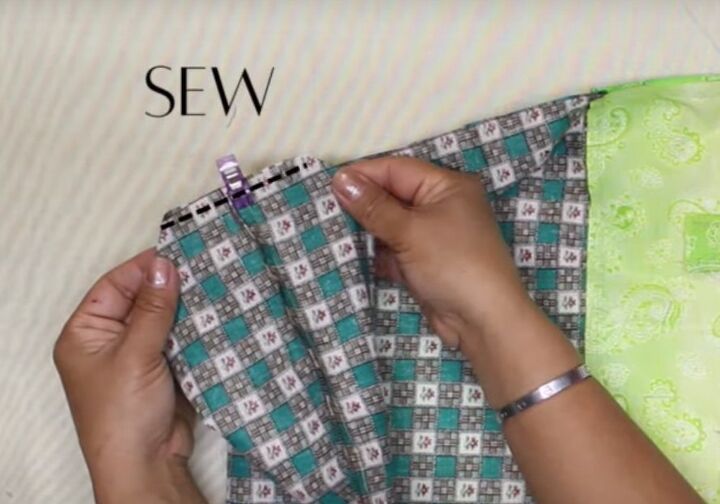
3. Weaving
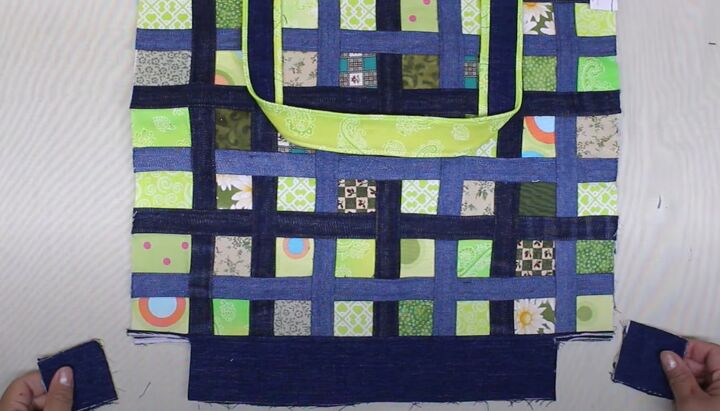
Place alternate colors of the denim strips horizontally across the bag.
Center them over each row patchwork at the point where they join the next.
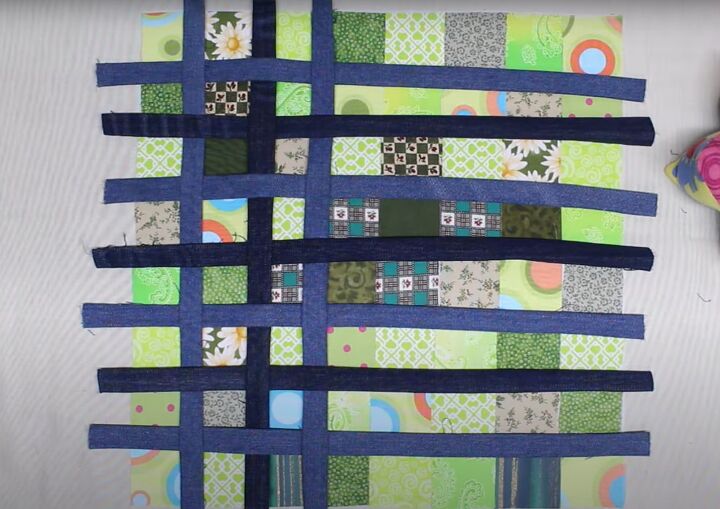
Weave the other strips vertically over and under the horizontal ones to cover the vertical joins in the patchwork.
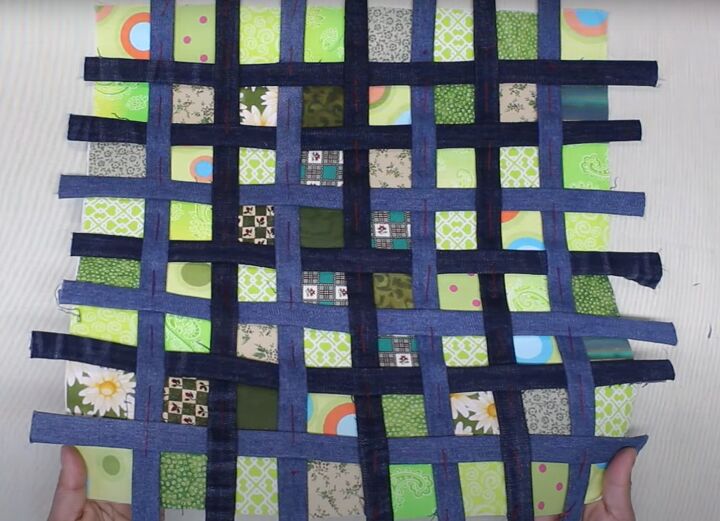
When you’ve used all the strips, baste them in position with a contrast thread.

Sew all the strips in place along each edge only on the sections where they are uppermost in the weave, skipping the sections where they run underneath another strip.
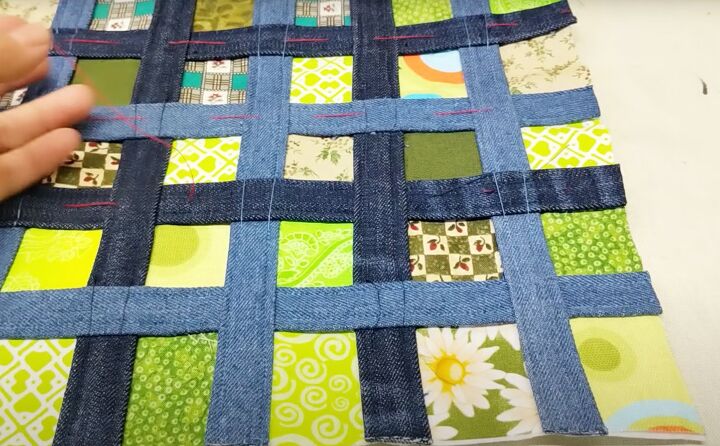
Trim the edges and remove the basting thread.
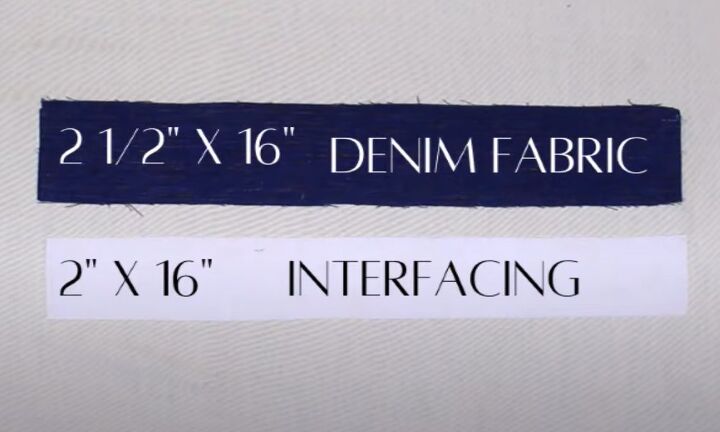
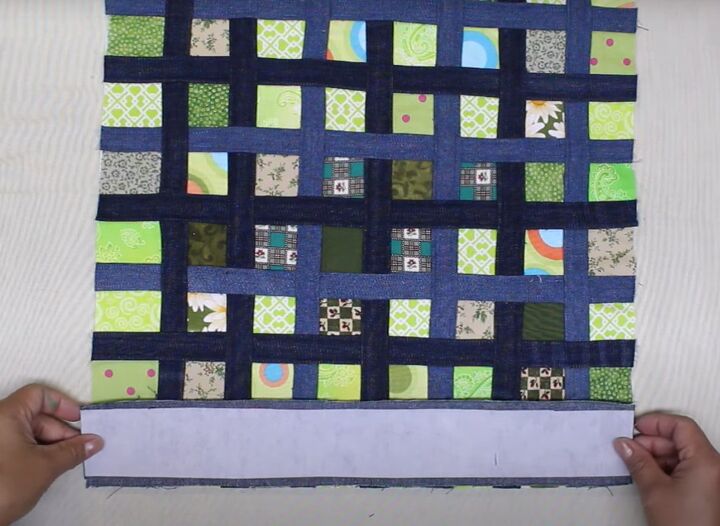
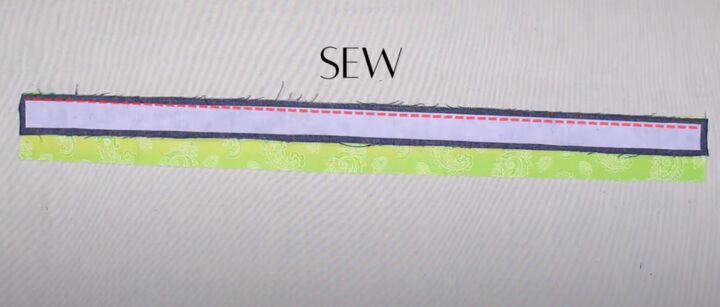
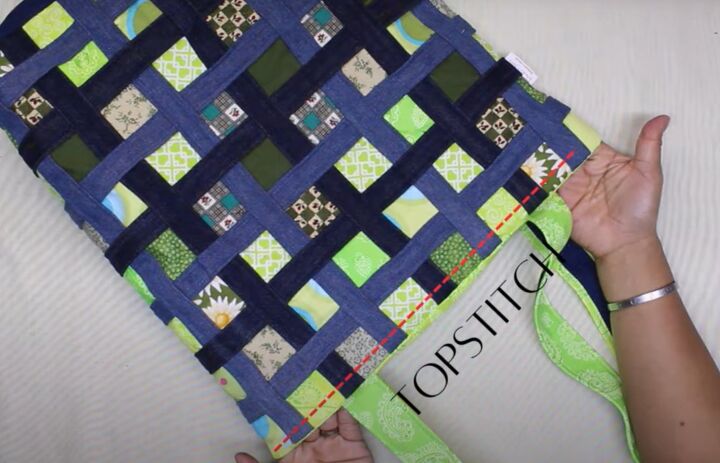
4. Base
Cut a strip of denim 16 inches long by 2.5 inches wide and a strip of interfacing 16 inches long and 2 inches wide.
Press the interfacing centrally to the wrong side of the denim.
Attach the strip to the bottom of the bag front, with the right sides facing.
Press the strip down and topstitch close to the seam.
Duplicate all the above steps to make the bag back.
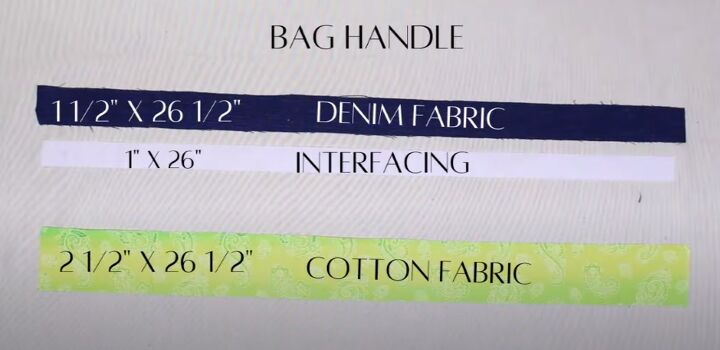
5. Bag handle
Cut one strip of denim 26.5 inches long by 1.5 inches wide.
Cut a strip of cotton fabric 26.5 inches long by 2.5 inches wide and a piece of interfacing 26 inches long by 1 inch wide.
Press the interfacing to the wrong side of the denim strip.
Place the denim on top of the cotton strip with the right sides facing and the top edges aligned, and sew.
Bring the bottom edge of the denim down to meet the free edge of the cotton strip and sew them together.
Turn the handle right side out and press.
Repeat for the second handle.

6. Attach the handle
Find the center of the top edge of the bag.
Pin the ends of one handle 4 inches either side of the center and extending 1 inch above the top of the bag. Sew in place.
Attach the second handle to the bag back.

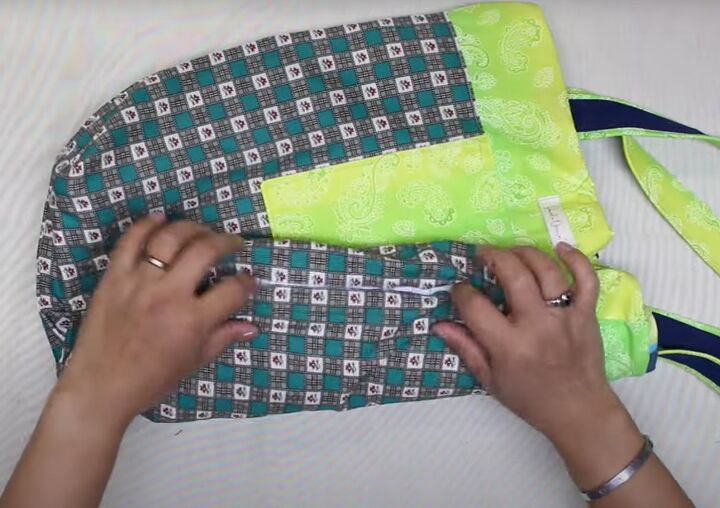
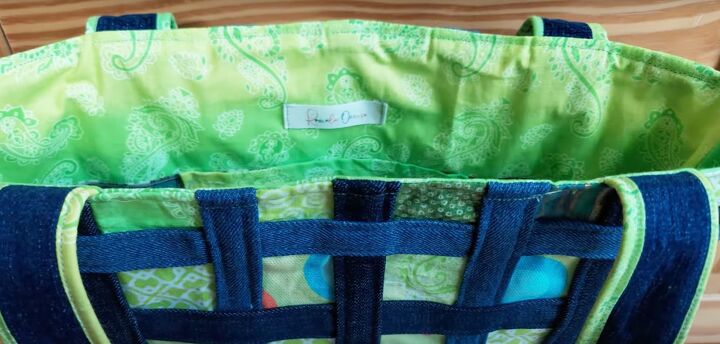
7. Lining
Cut a piece of lining fabric 14.5 inches by 16 inches and a strip of cotton fabric 4 inches by 16 inches.
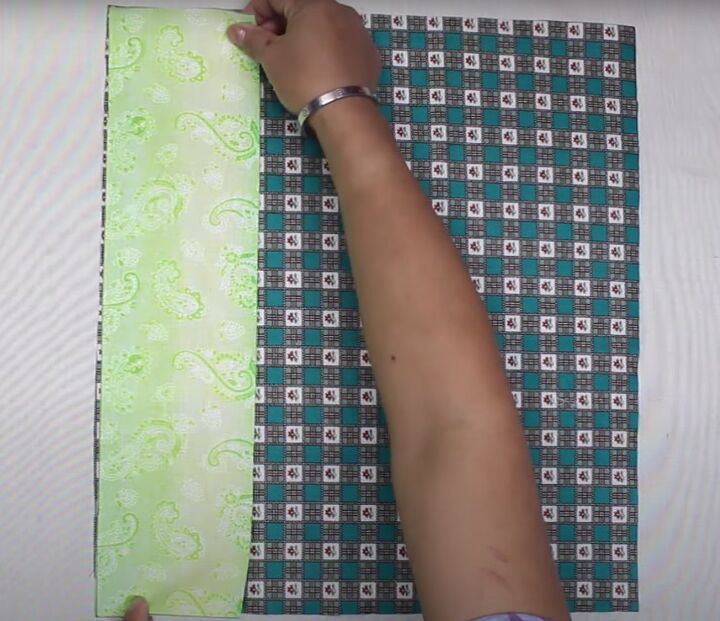
Attach the strip to one of the 16 inch sides with the right sides together.
Open the strip flat and press on the right side.
8. Inside pocket
Cut a piece of fabric 7 inches wide by 14 inches long.
Fold in half widthways with the right sides together.
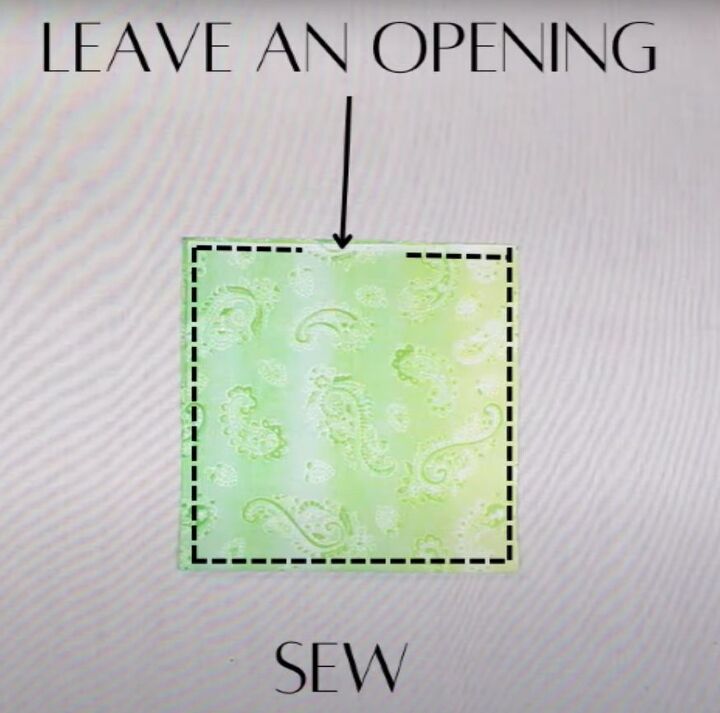
Sew together around the edges, leaving a small opening at the top.
Snip the corners and turn the pocket right side out. Top stitch the folded edge.
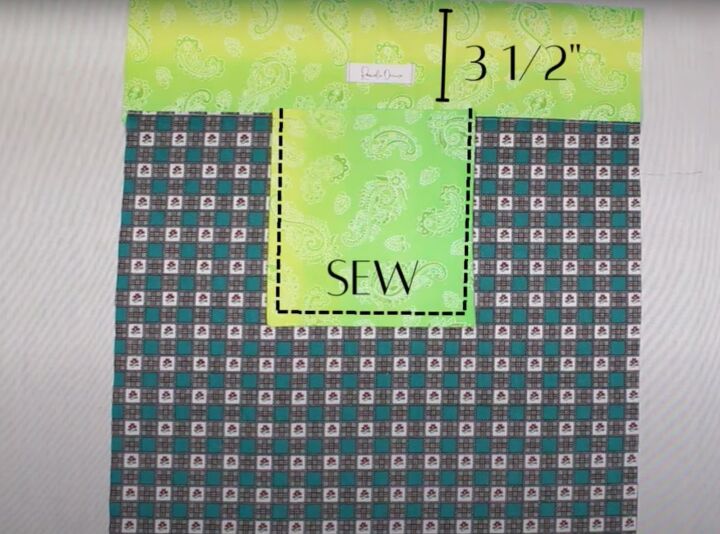
Place centrally on the lining with the opening at the bottom and the top stitched edge 3.5 inches from the top of the lining.
Sew in place around 3 sides.
Repeat for the second lining piece.

9. Gusset
Place the two lining pieces together.
Cut a 2 inch square from each of the bottom corners.
Repeat for the front and back of the bag.
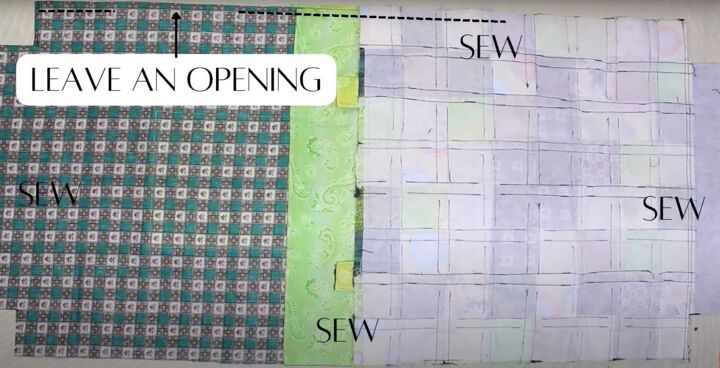
Join one lining and one bag piece together at the top edge, with right sides together.
Place the two joined sections with right sides facing.
Sew around the side and bottom edges, leaving an opening in one side edge of the lining.
Join the sides of each cut-out diagonally.
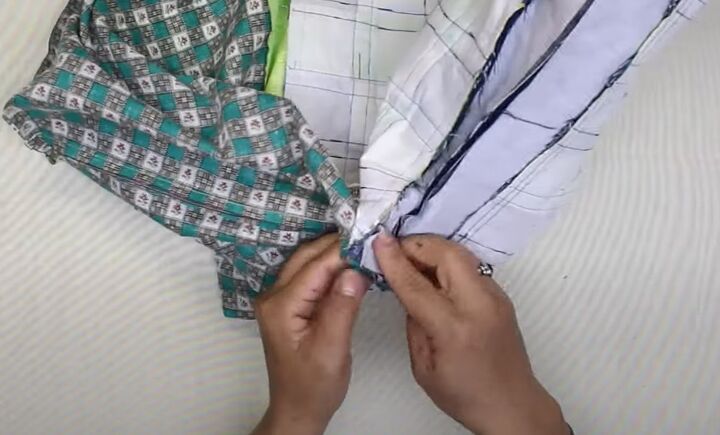
Join the lining corner to the bag corner on each side.
10. Finishing
Pull the bag through the opening in the lining. Sew the opening closed.
Turn the bag right side out and top stitch along the upper edge.
DIY upcycled tote bag
I hope you enjoyed this very different DIY tote bag project. It would work for many different fabric and color combinations.
I’d love to know if you give it a try - please drop a comment below.
Next, check out this Fun and Easy DIY Tote Bag Tutorial.
The author may collect a small share of sales from the links on this page.


Comments
Join the conversation