Quick and Easy Upcycled Tote Bag Tutorial

I have a brand new DIY tote bag design for you today. I love hunting around in thrift shops, especially the clearance section.
I made this upcycled tote bag from items I found there and it turned out really well. So let’s get going!
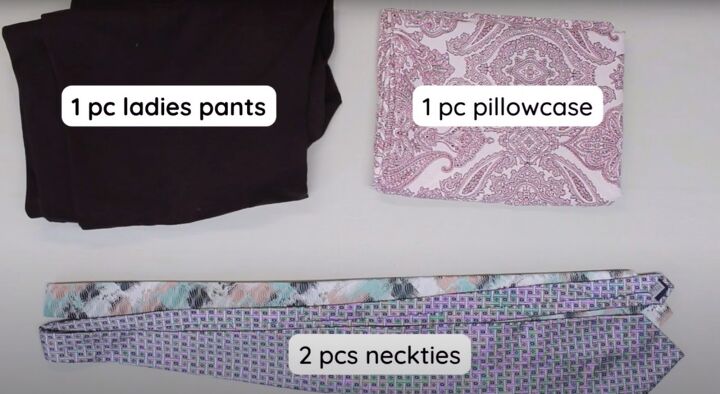
Tools and materials:
- 1 pair ladies’ pants
- 2 men’s ties
- 1 pillowcase
- Ruler
- Fabric marker
- Pins
- Scissors
- Sewing machine
1. Make the bag front
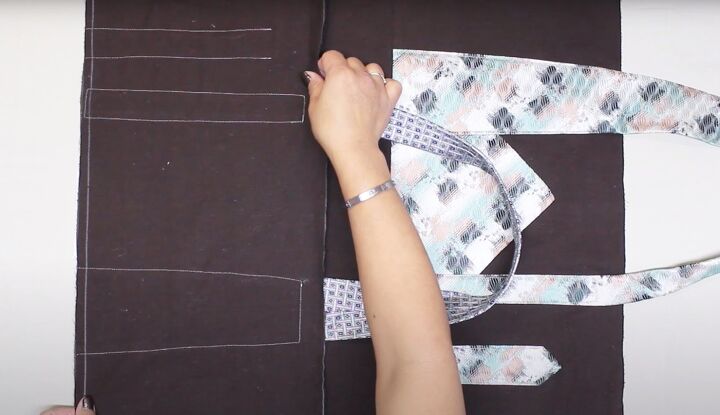
Cut open one of the outer leg seams of the pants.
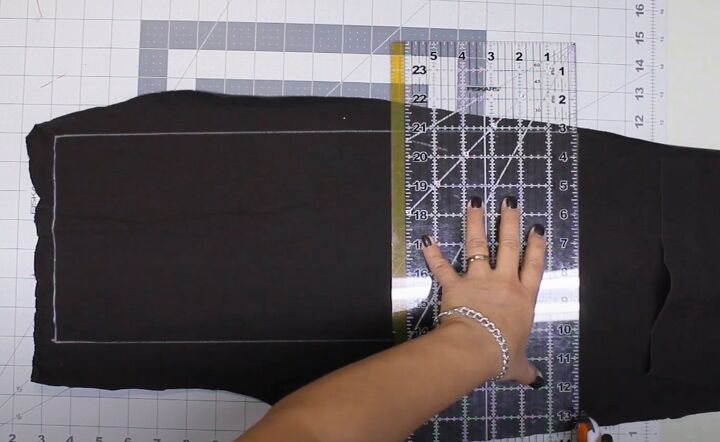
Measure and cut two pieces of 10 inches by 18 inches for the sides of the bag and one piece 13 inches by 18 inches for the base.
Put the base aside.
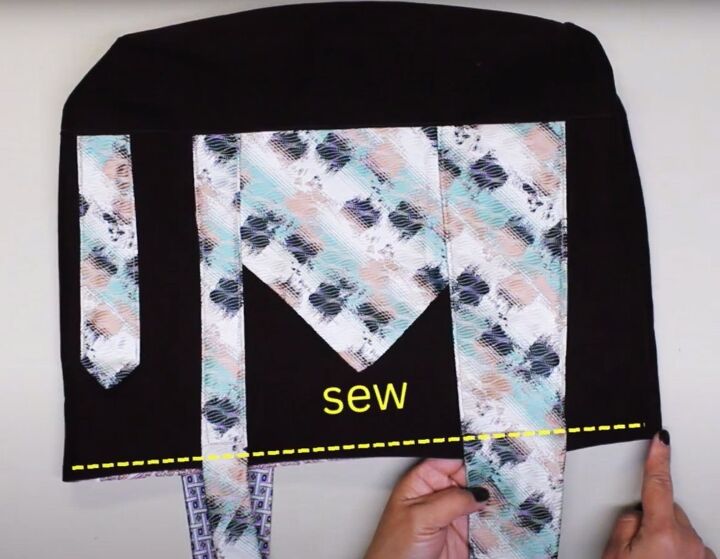
Find the center of one of the long edges of the bag and mark it with a pin.
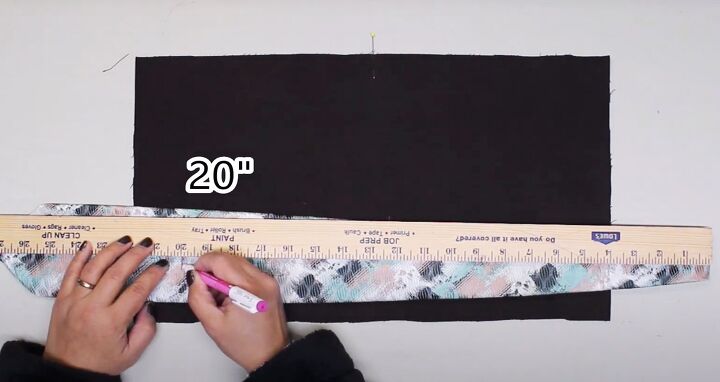
Fold one of the ties in half, matching the pointed ends.
Measure 20 inches along the tie from the fold and cut through both layers at that point. Remove any labels on the back of the tie.

Pin the longer section of the tie to the bag as a handle.
Place it 3 inches either side of the center and align the cut edges with the lower edge of the bag.
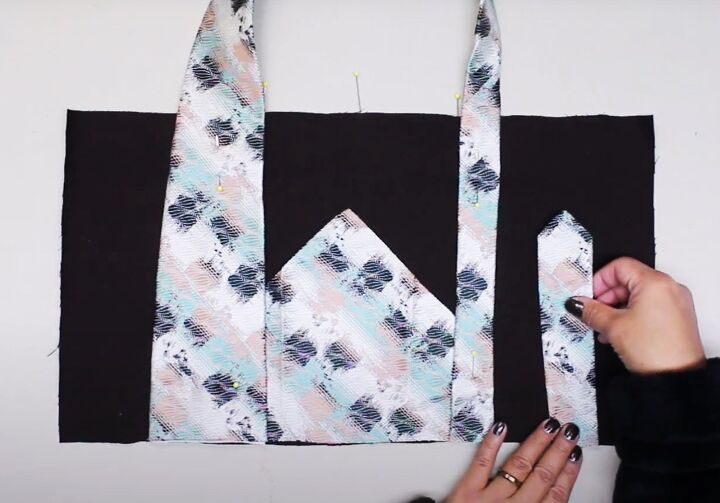
Open out the wider pointed end of the tie and pin it under the handle at the bottom of the bag.
Pin the folded narrow pointed end to the bag, outside one of the handles.
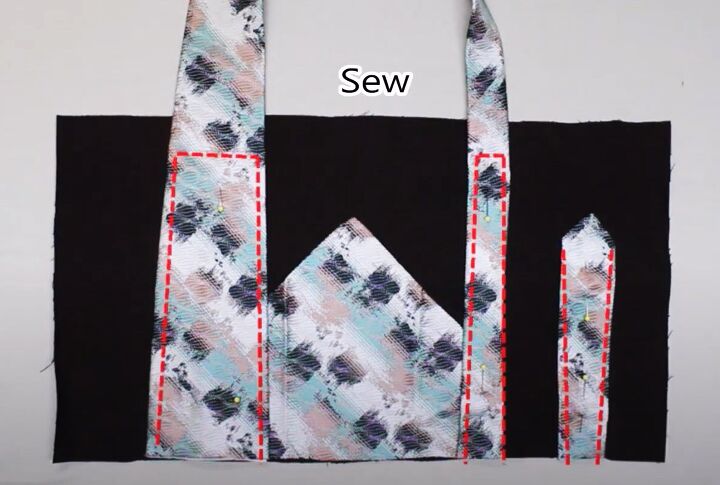
Measure 1 inch down each handle from the top edge of the bag.
Sew across each handle at the 1 inch mark and down each side to the bottom of the bag.
Sew down each side of the narrow pocket.
Make the back of the bag in the same way.
2. Make the bag base
Join the long edges of the base to the back and front of the bag, with the right sides facing.
Top stitch along both seams on the right side.
Place the two sides of the bag together with the right sides facing and sew both side seams.
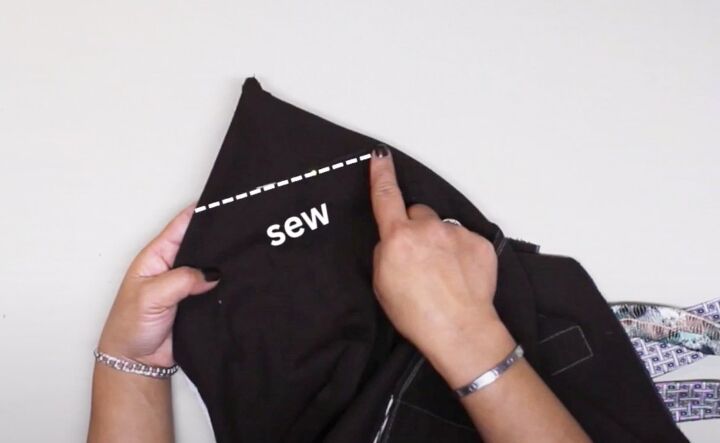
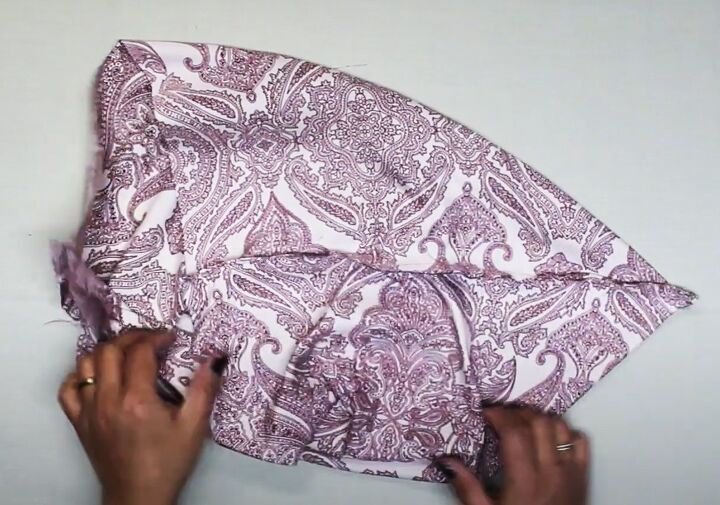
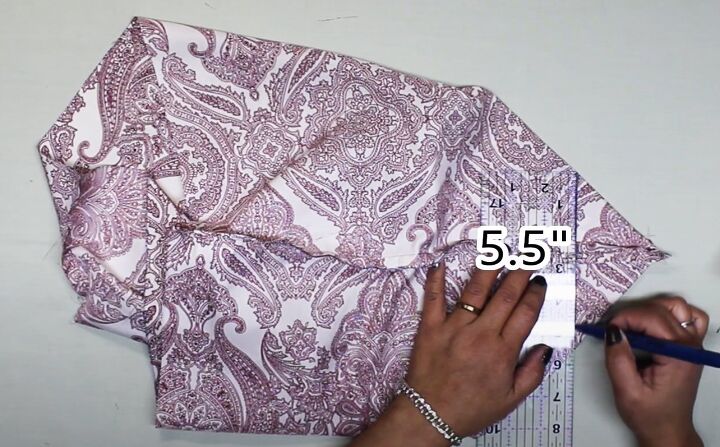
Open out the base and fold the corners into points.
Mark and sew a 5.5 inch seam across each point.
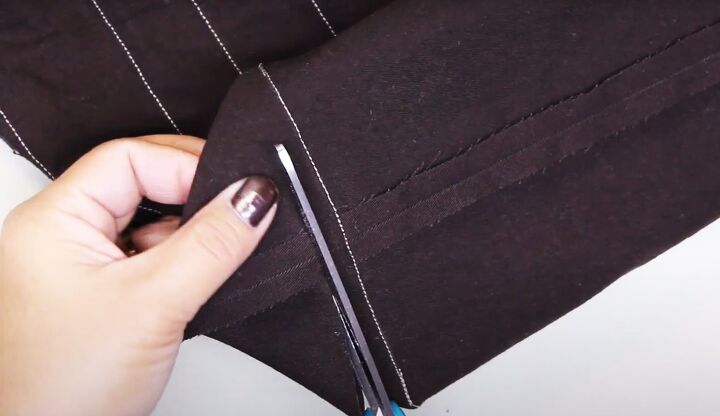
Trim the point close to the stitching line.
Turn the bag right side out.
3. Make the lining
Cut one piece 18 inches by 32 inches from the pillowcase to make the lining.
Fold it in half with the right sides facing and sew the side seams, leaving an opening in one of the seams.
Fold the bottom corners of the lining into triangular points and press the seams open.
Sew a 5.5 inch seam across each point and trim the excess, as you did for the outer bag.
4. Insert the lining
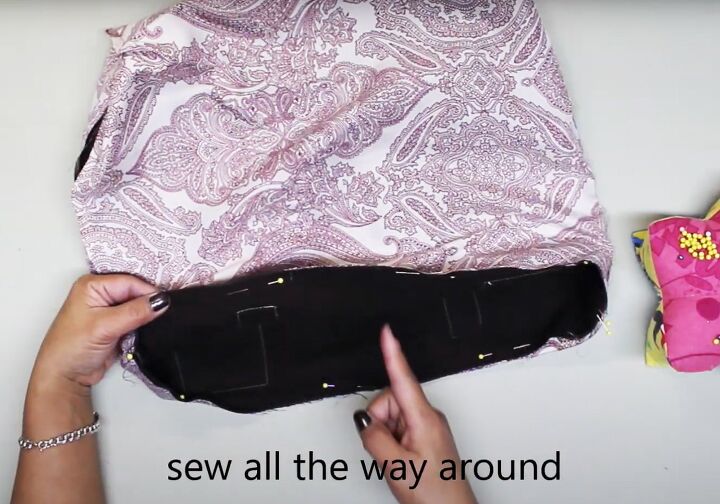
Place the bag inside the lining, so the right sides are together.
Matching the side seams, pin and sew the bag and lining together around the top edge.
Pull the bag out through the opening in the lining.
Sew the opening closed.
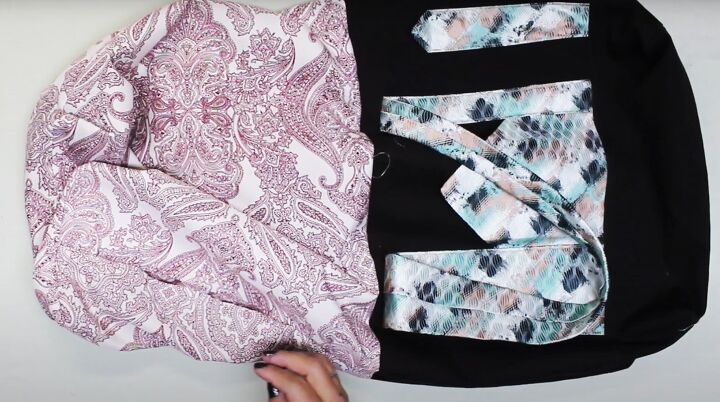
Tuck the lining inside the bag.
Sew one or two rows of topstitching around the top edge.
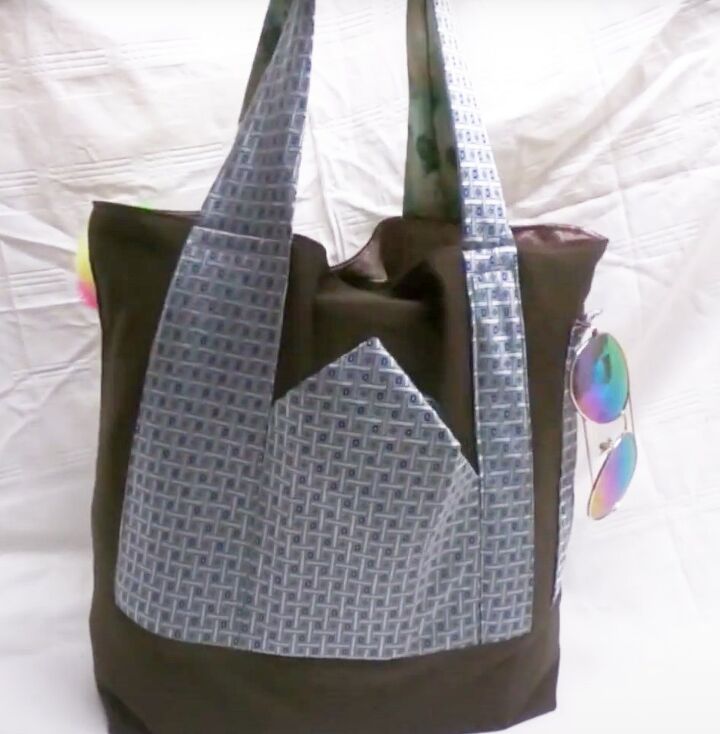

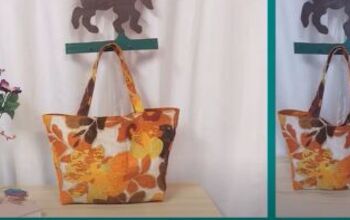
Upcycled tote bag
You can mix and match the items you use. As you can see, none of my thrift shop finds match exactly but the black pulls them all together.
You can be as creative as you want with DIY tote bag ideas like this.
I hope you enjoy making it. I’d love to read any comments or questions you may have.
The author may collect a small share of sales from the links on this page.


Comments
Join the conversation