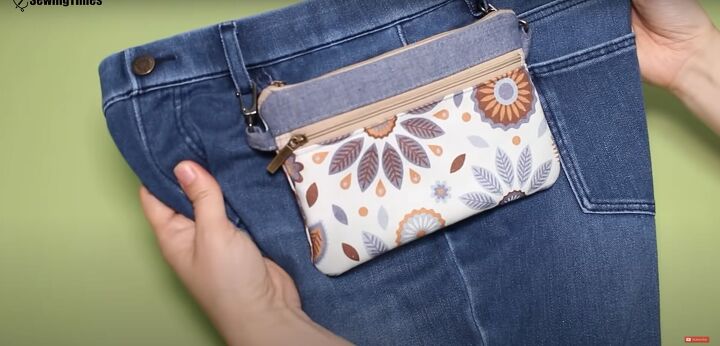
How to Make a Practical DIY Belt Bag That Can Clip Onto Jeans

No pockets? No problem! This DIY belt bag will help you create an adorable pouch that can be worn around your waist, or attached to your belt loops for a cute and convenient way to store your phone, keys, wallet, and other paraphernalia on the go.
Tools and materials:
- Cotton fabric
- Contrastic cotton fabric
- Interfacing
- 2 7-inch zippers
- 2 Swivel lobster claw clasps
- 30 inches of 1-inch wide webbing strap
- 2 D-rings
- Iron
- Scissors
- Pins
- Sewing machine
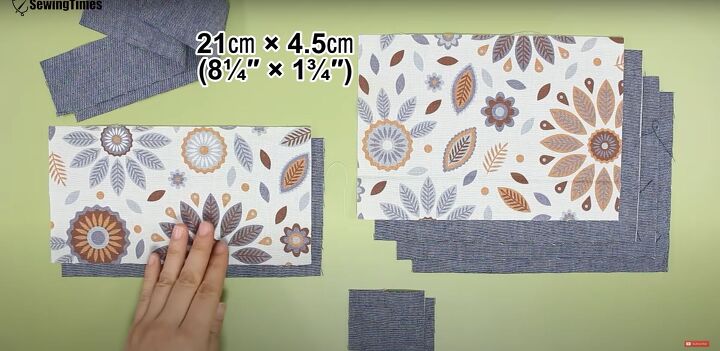
1. Cut the fabric
Cut all the necessary pieces to construct your belt bag as shown in the video from 0:47-1:00.
Also cut three pieces of interfacing, measuring 21 cm x 14.5 cm (8¼ x 5¾ in), 21 cm x 11 cm (8¼ in x 4⅜ in), and 21 cm x 4.5 cm (8¼ in x 1¾ in).
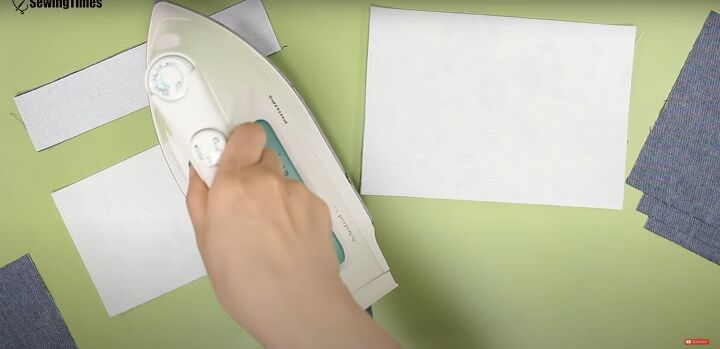
2. Iron the interfacing
Iron the interfacing pieces onto the wrong side of the fabric. The two larger pieces should be attached to the main fabric, and the narrow piece should be attached to one of the contrasting fabric pieces of the same size.
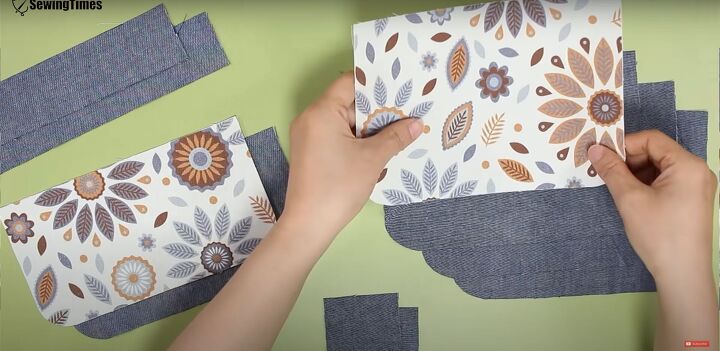
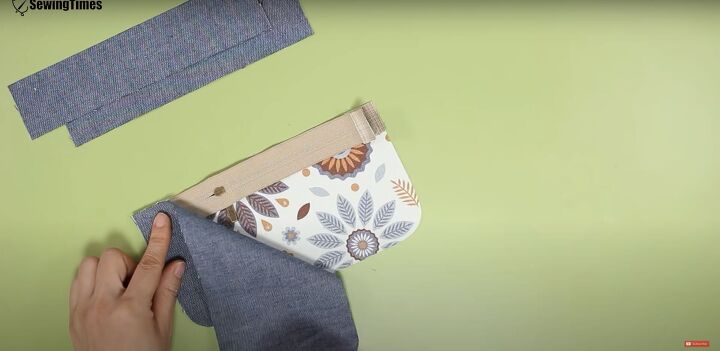
3. Round the edges of the fabric
Use scissors to round the edges of the larger pieces of fabric.
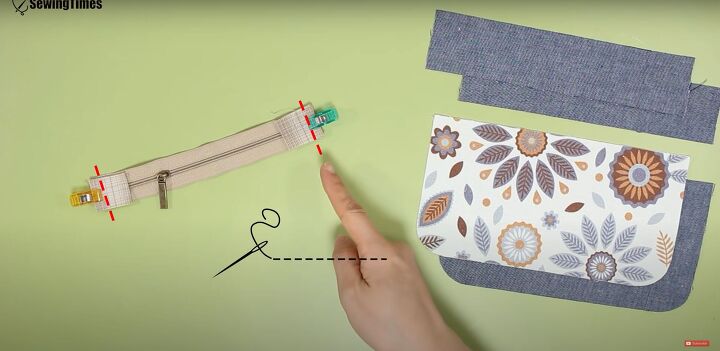
4. Cut, pin, and sew the zippers
Cut four small squares of fabric, each measuring 3 cm x 3 cm (1¼ in x 1¼ in). Pin two squares on either end of one zipper, with the right sides of the fabric facing each other, and sew them down.
5. Insert the zipper
Pin and sew the zipper so it is sandwiched between the main fabric and lining fabric.
6. Pin and sew the front pouch
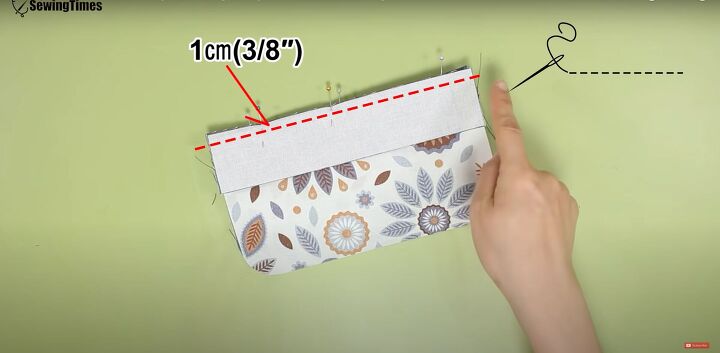
Unfold the sewn pieces so the main fabric and zipper are in front, and the contrasting fabric is in the back. Sandwich the top edge of the sewn pieces between two contrasting fabric strips.
The strip with interfacing should be the top layer, with the right side of the fabric facing down. Pin all the layers together, and sew across the top edge, leaving a 1 cm (⅜ in) seam allowance.
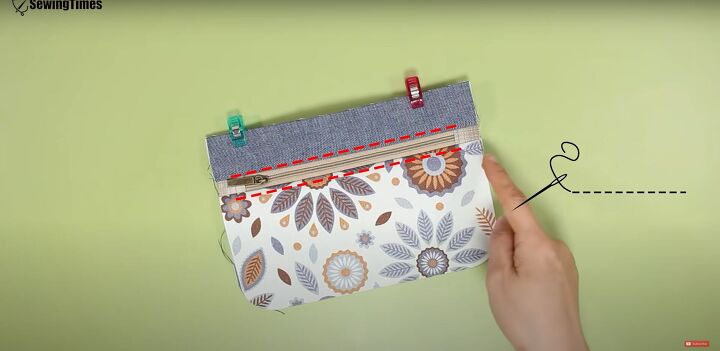
7. Topstitch
Flip the strips up, and topstitch along either side of the zipper.
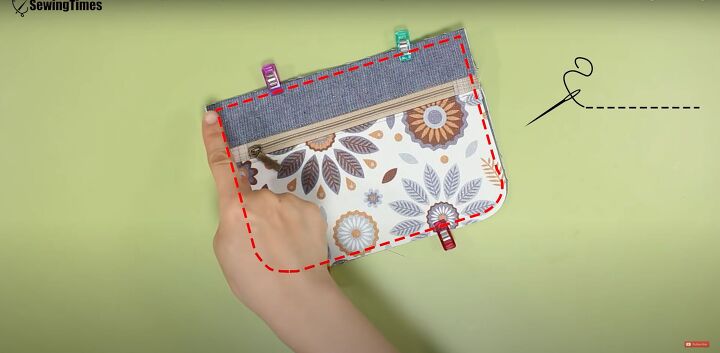
8. Pin and sew the two fabrics together
Pin the pieces you’ve already sewn to one of the larger pieces of contrasting fabric, and sew all the way around.
9. Fold, pin, and sew the bag tabs
Fold the smallest pieces of contrasting fabric as shown in the video from 4:23-4:31. Then pin and sew.
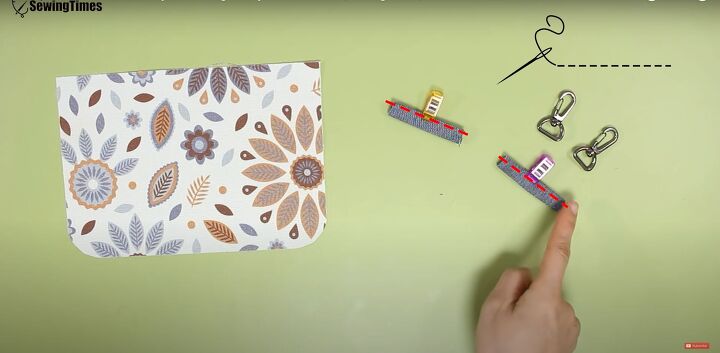
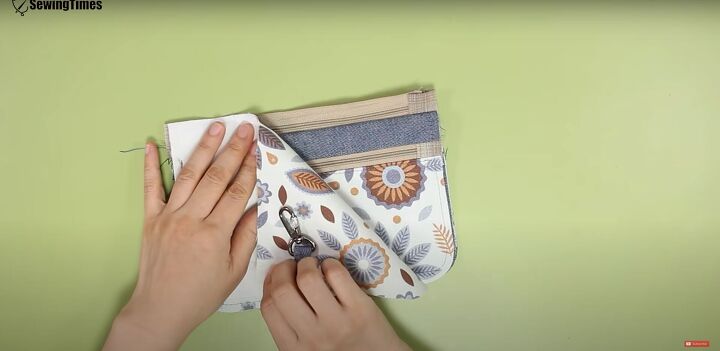
10. Attach the D-rings and lobster clasps
Slip the small fabric strips through the D-rings of the lobster clasps. Pin them to either side of the largest piece of main fabric, about 1 inch from the top edge. Sew them in place.
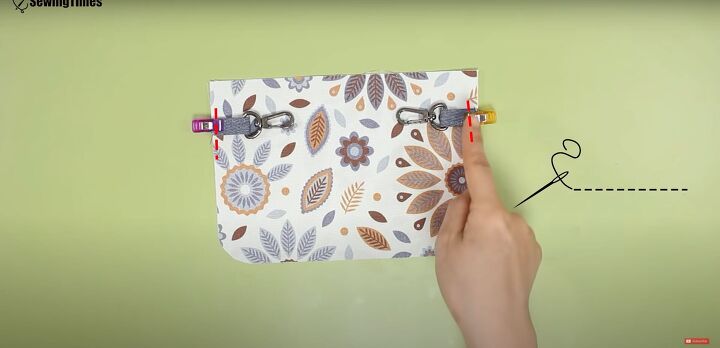
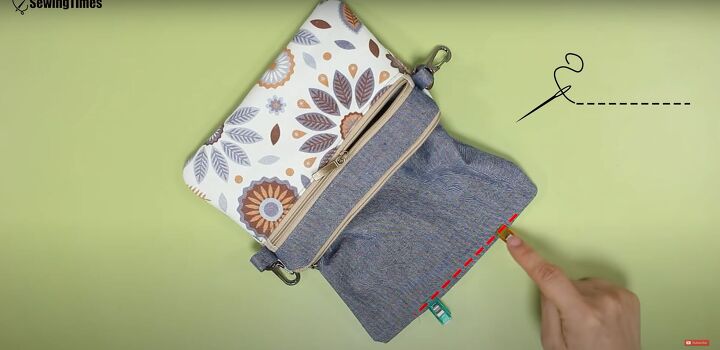
11. Cut, pin, and sew the second zipper
Cut four more 3 cm x 3 cm (1¼ in x 1¼ in) pieces of fabric, and attach them to the second zipper using the same steps shown above for the first zipper.
12. Attach the second zipper
Lay the zipper across the top edge of the sewn portion of the pouch, with the right side of the zipper facing down. Place one of the large contrasting pieces on top, so the zipper is sandwiched in between. Pin and sew along the top edge.
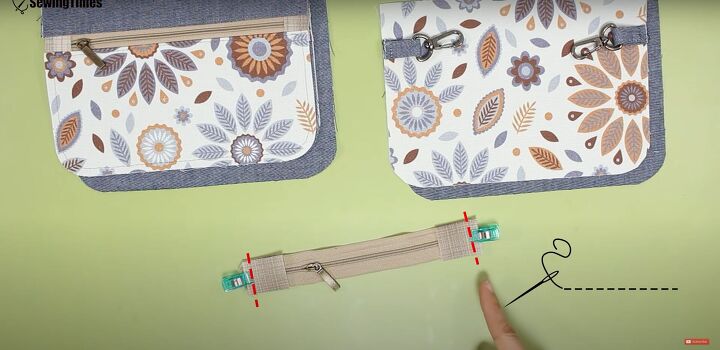
13. Assemble the belt bag
Layer all the pieces together as shown in the video from 5:20-5:40, and then pin and sew along the top edge.
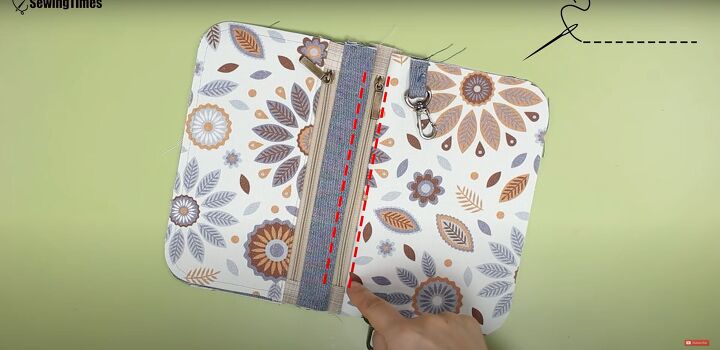
14. Topstitch the second zipper
Topstitch along either side of the second zipper.
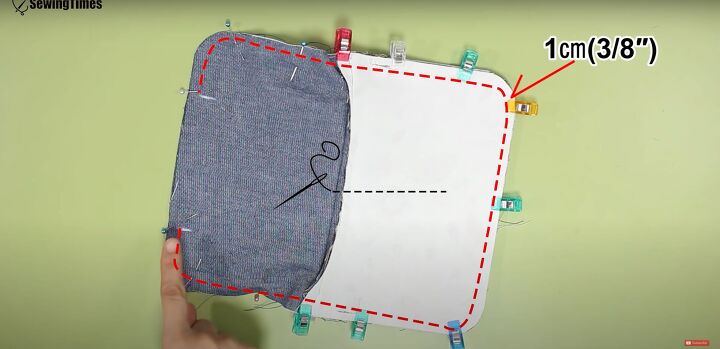
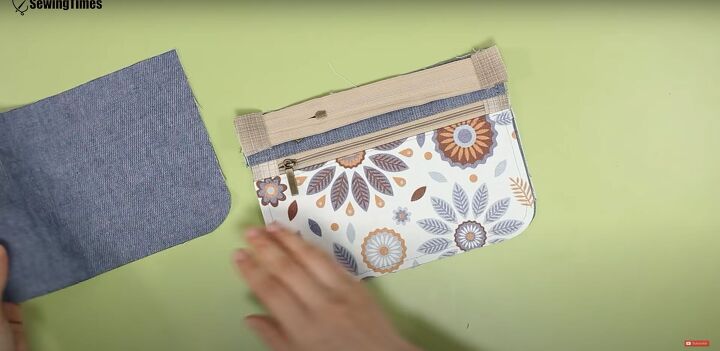
15. Pin and sew
Flip the fabric so the two main fabric pieces are together, right sides facing, and the two pieces of contrasting fabric are together. Pin and sew all the way around, with a 1 cm (⅜ in) seam allowance, leaving a 3-inch gap on the long edge of the lining fabric.
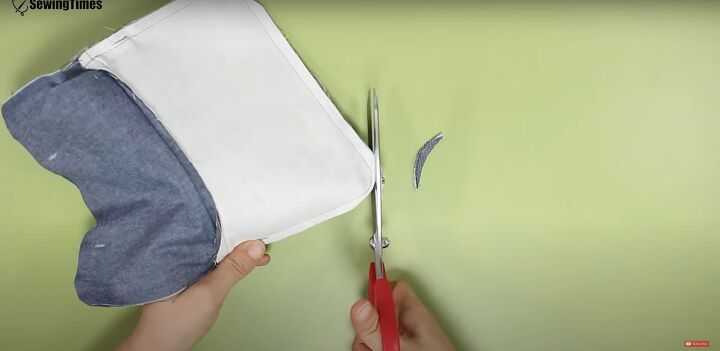
16. Trim
Trim the seam allowance at the corners of the main fabric, and at the point on the seam allowance where the two different fabrics connect.
17. Flip, pin, and sew
Flip the pouch right side out through the gap left in the lining. Fold the raw edges of the lining inward, and sew the gap closed.
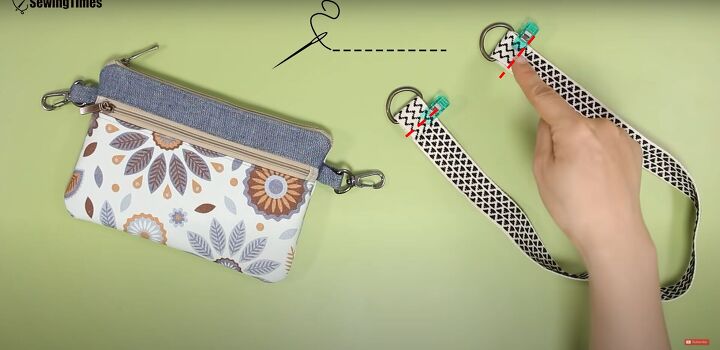
18. Attach the strap
Attach the strap to the D-rings as shown in the video from 7:42-7:59.
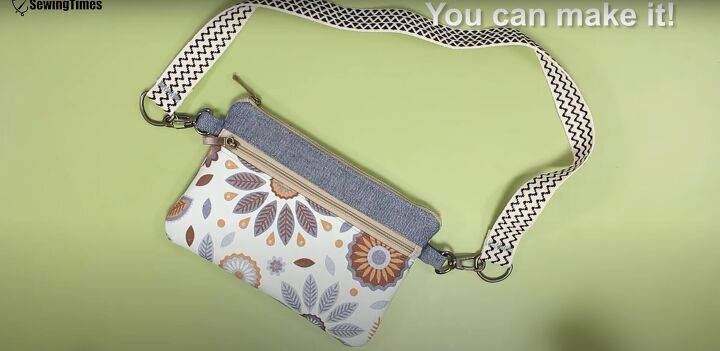
DIY belt bag tutorial
Your DIY belt bag is complete! Attach the strap and wear it as a fanny pack, or clip it directly to your belt loops.
If you use this pattern to make one of these cute pouches, we’d love to see your results!
The author may collect a small share of sales from the links on this page.


Comments
Join the conversation
Wow! That's so cute! I'd love to try it but not sure my sewing skills are at that level. Thanks for sharing!
That’s so cute!!!! I haven’t sewed in awhile hope I can try this and succeed