How to Make a Cute Boho-Style DIY Fringe Purse Out of Old Jeans

Hello, my unique queens! Today, we’re going to do another cute DIY with this little DIY fringe purse. I’m going to be showing you how to make a fringe purse out of an old bag and jeans.
This DIY denim fringe purse is so fun and so retro, and can go with just about anything if you try hard enough. Keep reading to learn how to make a fringe jean purse.
Tools and materials:
- A bag
- Ruler
- Rotary cutters or fabric scissors
- E6000 glue
- Denim
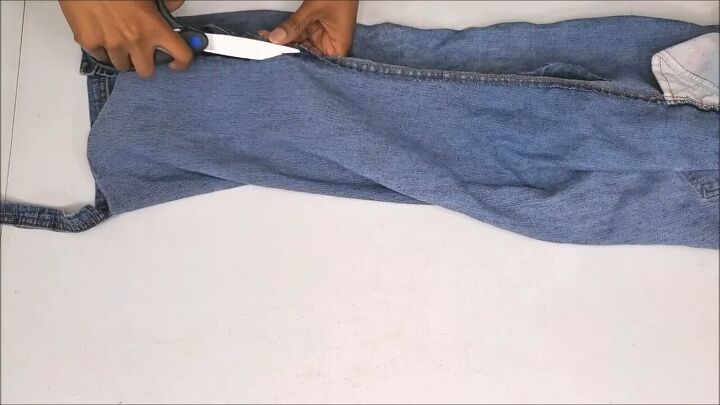
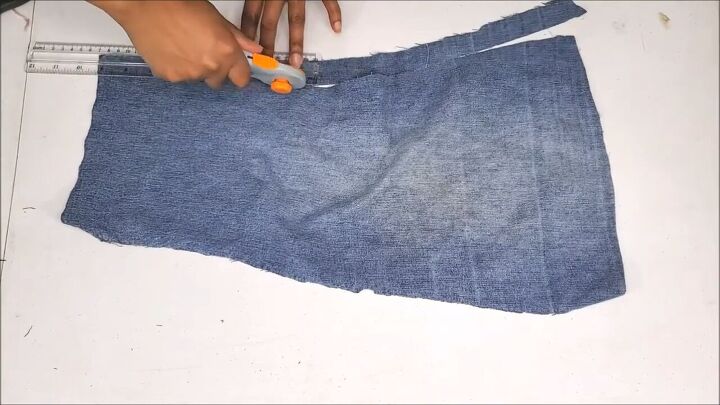
1. Prepare your denim
If you have denim fabric, then you don’t have to worry about this step. I’m cutting up an old pair of jeans.
To prepare the jeans for this project, I’m starting by cutting out the seam lines so I can get as much fabric as possible.
This includes the hem along the bottom of the pants and the hem that goes up the side.
You can use scissors or switch to seam rippers. Seam rippers seem to preserve the fabric way better as I ended up realizing.
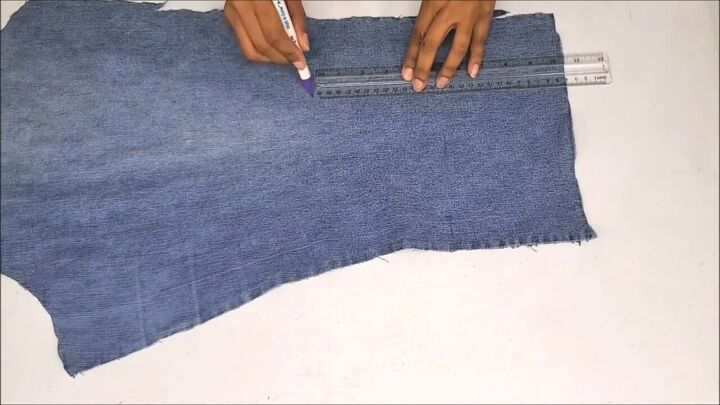
2. Measure and cut out your strips
For the fringe on the purse, I decided I wanted to do five-inch strips. So, with all of your fabric laid out, use the ruler to measure out the strips.
You can make them shorter or longer as you please, but the longer the better! Mark every five inches until you run out of fabric.
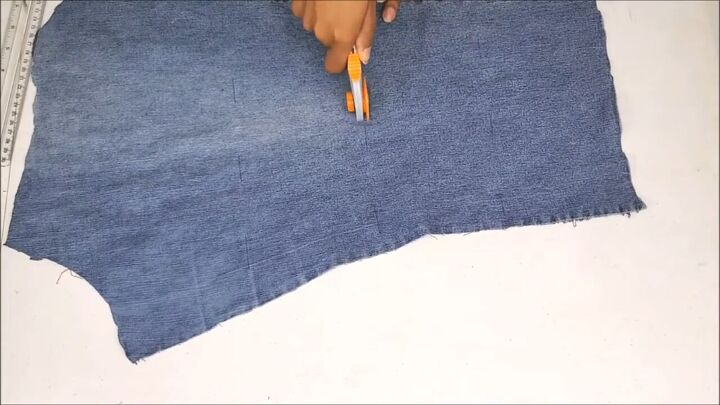
Then, use a rotary cutter to cut the denim into strips.
It’s preferable to use a rotary cutter because you can lay the fabric flat and it’s just more accurate, but if you don’t have one, fabric scissors work just as well.
I ended up cutting about ten 5-inch strips to start.
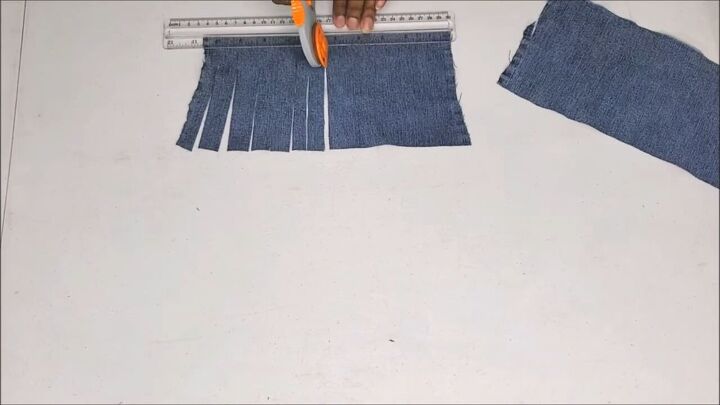
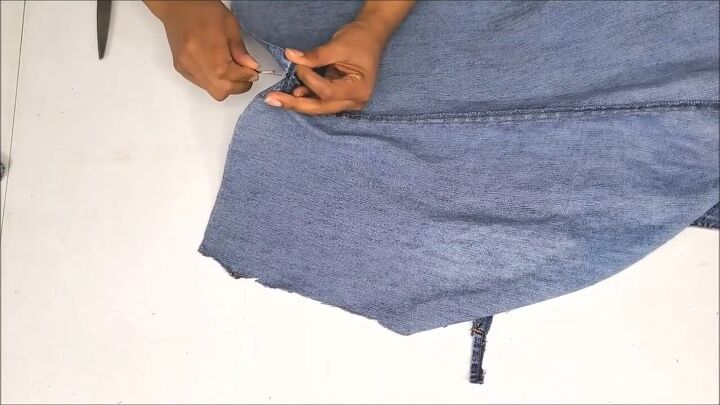
3. Cut your fringe
Next, cut the strips for the fringe. Use your ruler to block off the part of the fabric you don’t want to cut into. This is the part you’re going to glue to the actual bag, so you’ll want it to be fully attached.
You can also use the ruler to measure how wide you want the fringe strips to be.
For a more interesting fringe, you don’t want them to be the same size but you don’t want them to be drastically different from the other pieces.
4. Cut your strap
For the strap of your bag, measure it about 1-inch thick and cut it to your desired length. I didn’t measure how long it was, and instead used up the rest of the fabric I had left.

I cut two long strips and used the first one I cut as a pattern for the second strip so they were equal in size.
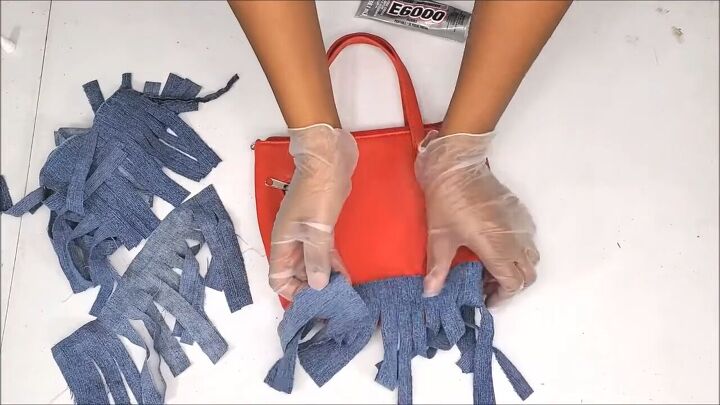
5. Glue down the fringe and straps
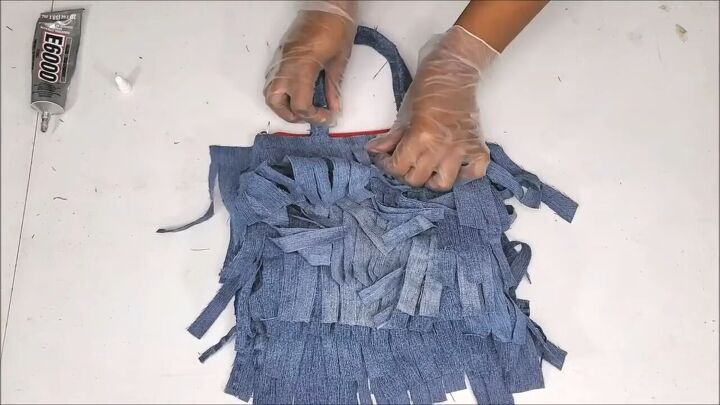
Now that we have all of our denim cut and prepared, it’s time to add it to the bag.
Using the E6000 glue, I’m going to work in small sections and carefully place down the first fringe piece that I have at the very bottom of the bag to make the first row.
Make sure you hold on to the sections you just placed the glue so it can set before you move on to the next pieces.
Take your time and secure it in place so the fringe doesn’t slide around as you guide it down. Do this with the rest of the fringe pieces until you reach the straps of the original bag.
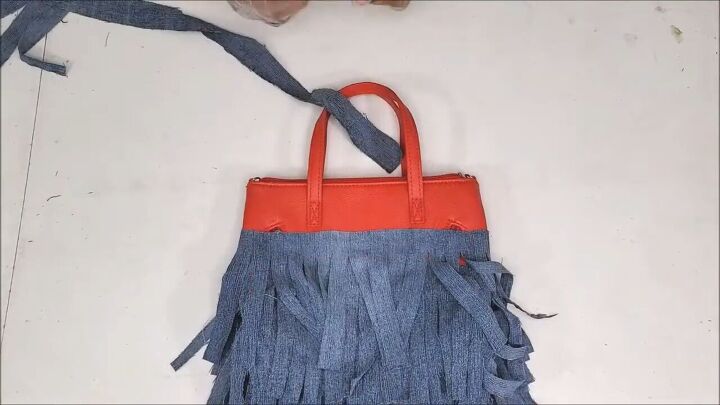
Once you get close to where the straps are, we’re going to cover the original straps with the fabric straps that we cut out.
To do this, add a bit of glue to one handle and place the end of the strap at a bit of a diagonal.
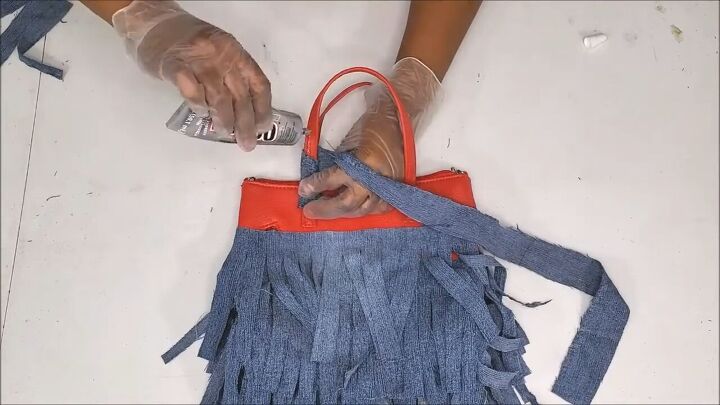
Then, wrap it around. Add a bit of glue just above the strap and then wrap the fabric around. You’re going to keep doing this, adding glue and wrapping the precut straps, all around the handle. Do this for both straps.
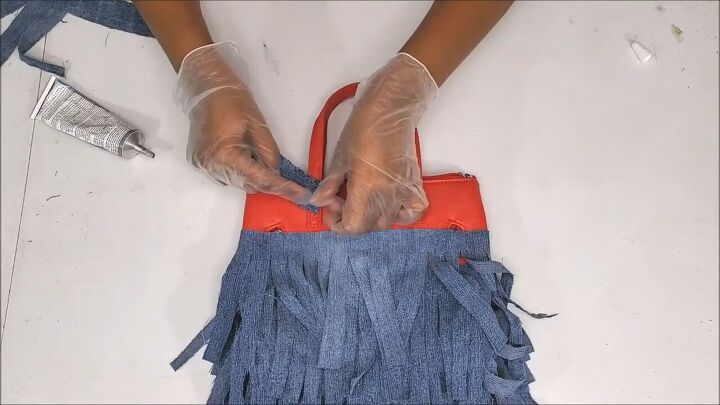
Once the straps are completely and fully covered, you can go ahead and finish adding the rest of the fringe to the bag until it’s fully covered.
When you’re applying the final piece, make sure it doesn’t overlap the fabric on the inside of the bag. It should align evenly with the zipper or outermost seam.
One thing to keep in mind is that the color of the zipper isn’t going to be covered up by your fringe, so consider that when choosing the color of your bag or fringe fabric.
I purposefully chose the red bag with the blue fringe because I really wanted the zipper to pop and stand out.
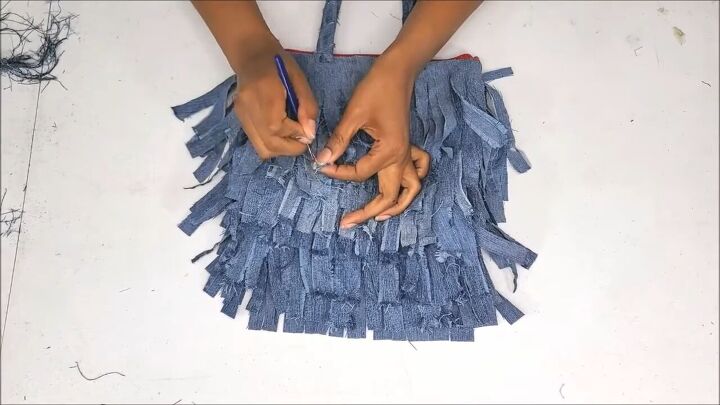
6. Distress the strips
The final step to finishing the DIY fringe purse is to distress your fringe! What I’m doing here is using a seam cutter to tear at the threads at the bottom of each strip to give it a distressed look.
It can be time-consuming to do them all, so I chose every other strip to rip up until I liked how it looked.
Alternatively, you can throw them in the washer and dryer; I opted not to do this because I worried about over-stressing the strips, but it’s definitely an option!
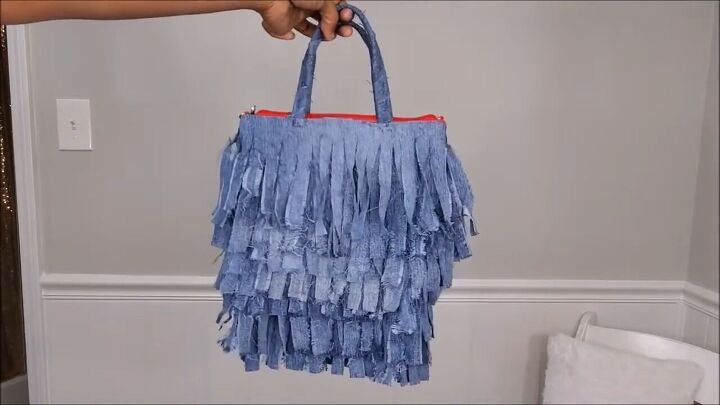
DIY fringe purse tutorial
We’re all done! This is the finished bag. I’m so obsessed with this purse! It’s super cute and so easy to make. I’m going to be wearing this with everything I can get away with.
Are you going to make this DIY denim fringe purse? Let me know!
The author may collect a small share of sales from the links on this page.


Comments
Join the conversation