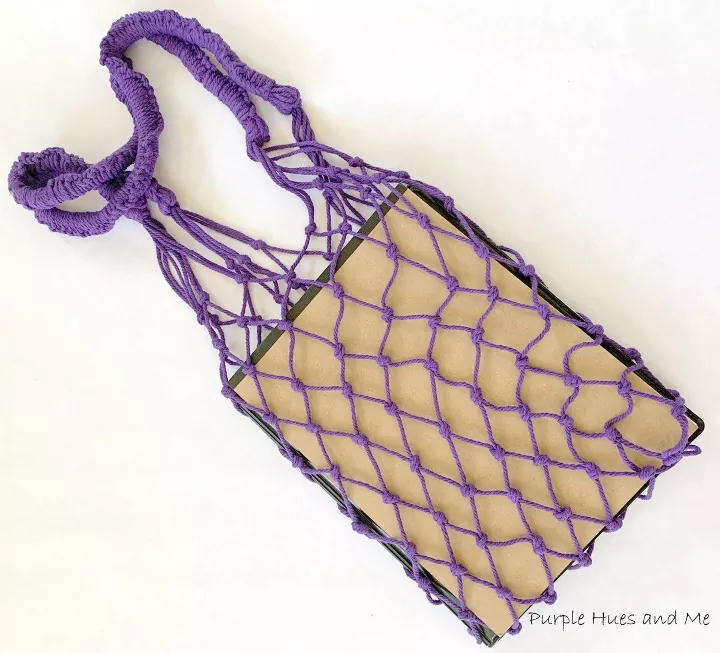
DIY Knotted Tote Bag

How often do you wish you had a stylish reusable tote bag to use for carrying groceries? Don't you just hate those paper or plastic bags they offer at the store! Why not make your own using a simple knotted technique! Perfect to carry groceries, or whatnots! And you won't believe how easy it is to make one! This bag is made by tying just a basic overhand knot - over and over - a knot most of us learned as a child.
So for this bag, you just take a cord and make a loop and insert one end of the cord into the loop. Pulling both cord ends in opposite directions so that the knot is tight - making knots over and over again. How easy is that!
Decide how wide and deep you want the bag to be. I measured 4 times the length of the bag (20"x4) I should have doubled the 20" to 40" (front and back)
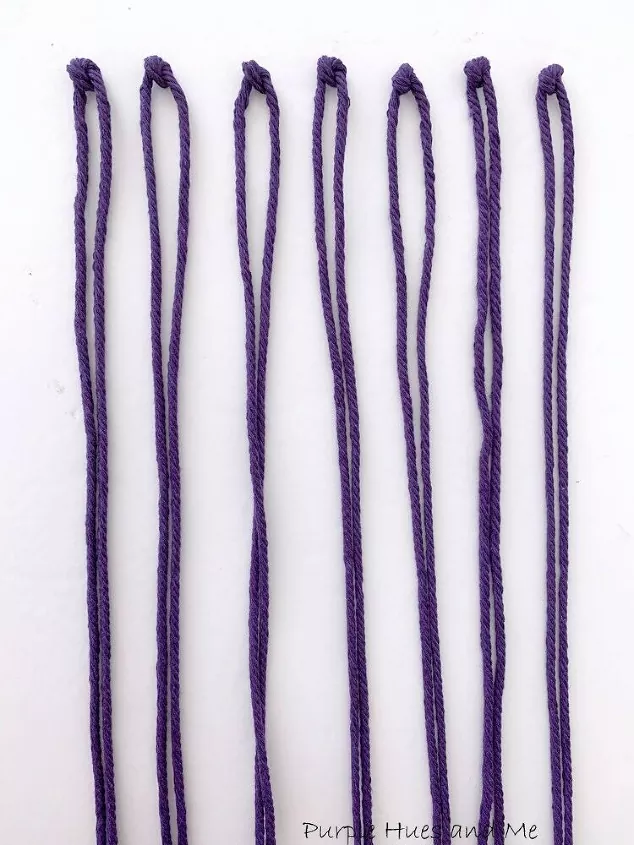
Cut 7 cords 80" long and fold in half to get the center. Then tie a simple overhand knot in the center of all the cords. This will be the bottom of the bag.
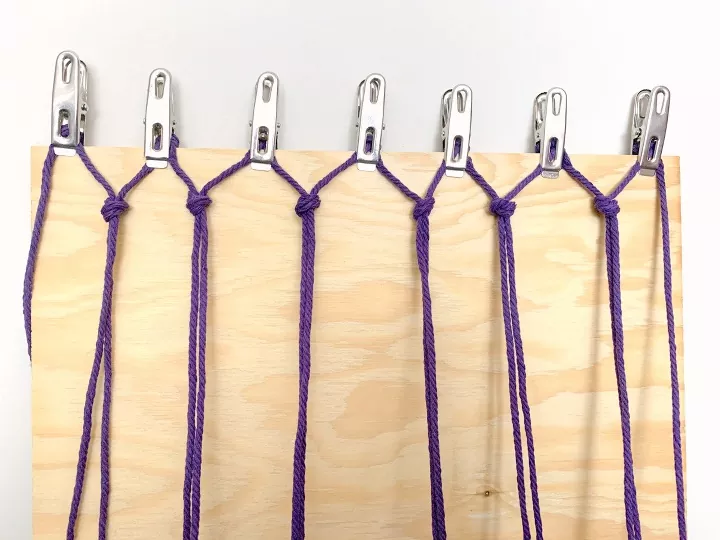
Drape the cords over a board or cardboard approx. 13"x20" to hang cords on for easy tying and place the knots at the top. Secure knots with clips to keep in place. Begin tying knots alternating cords using the right/left cords first.
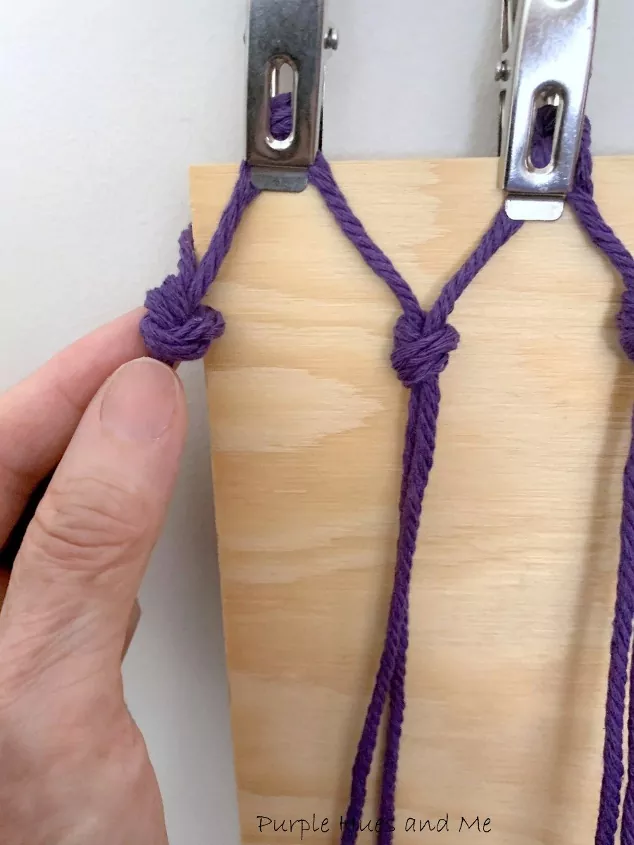
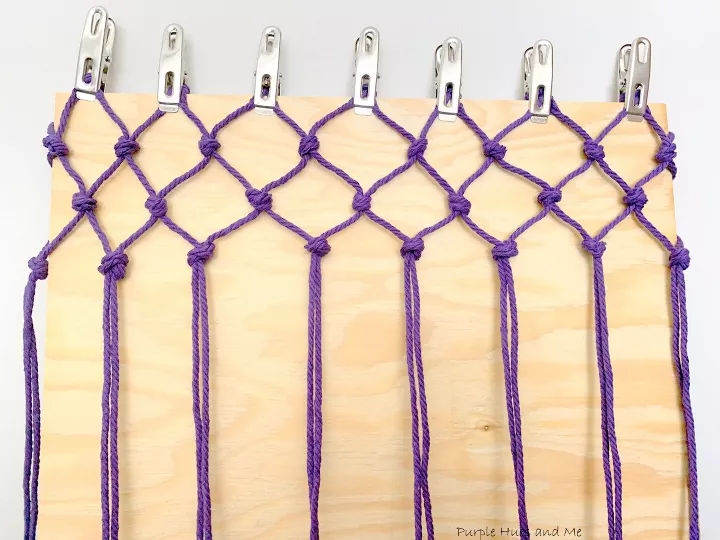
Once the first row is tied, turn the board over and tie the cords on the back, making sure to tie the side cords (one from the front and one from the back) together.
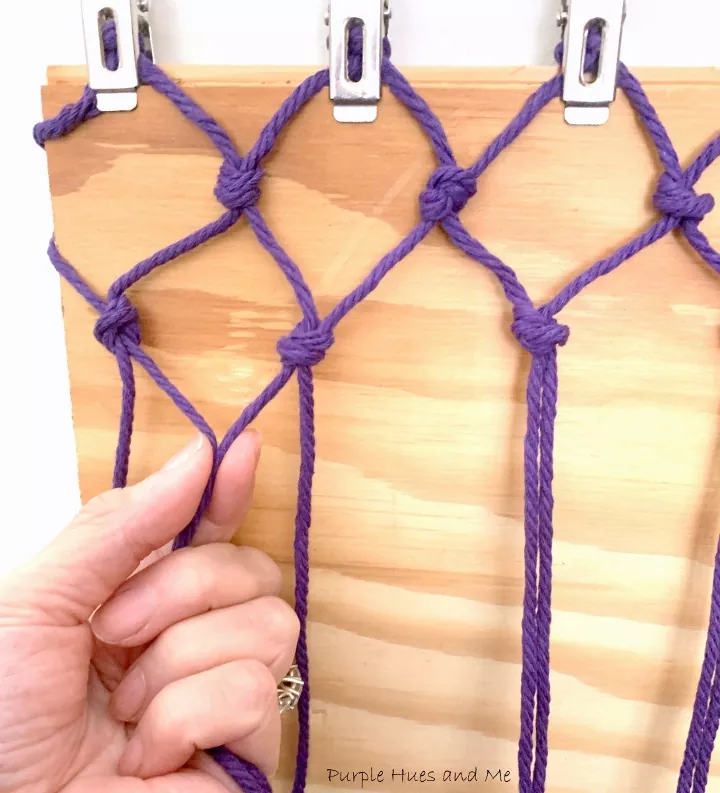
Begin alternating cords . . .

tying simple knots . . .
front side . . .
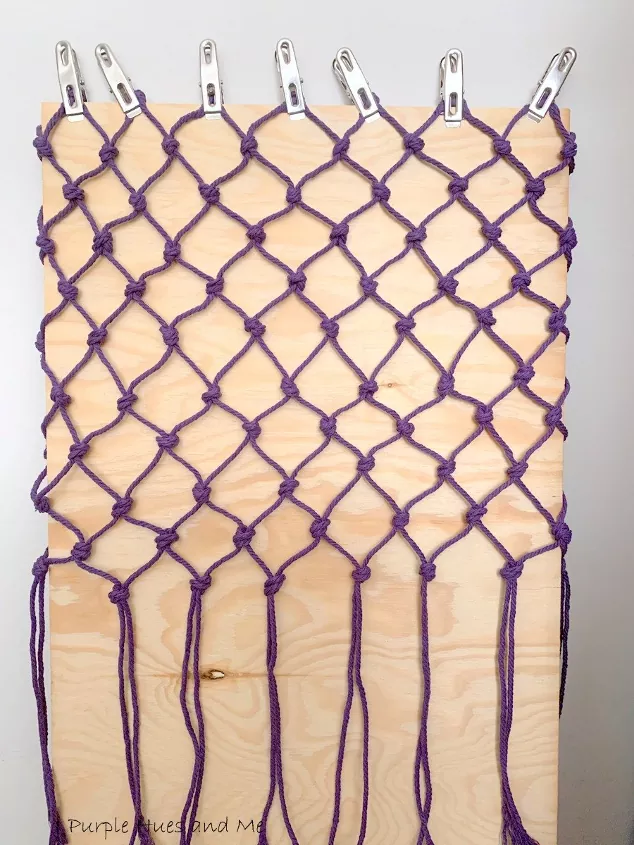
and back for the next ten rows.
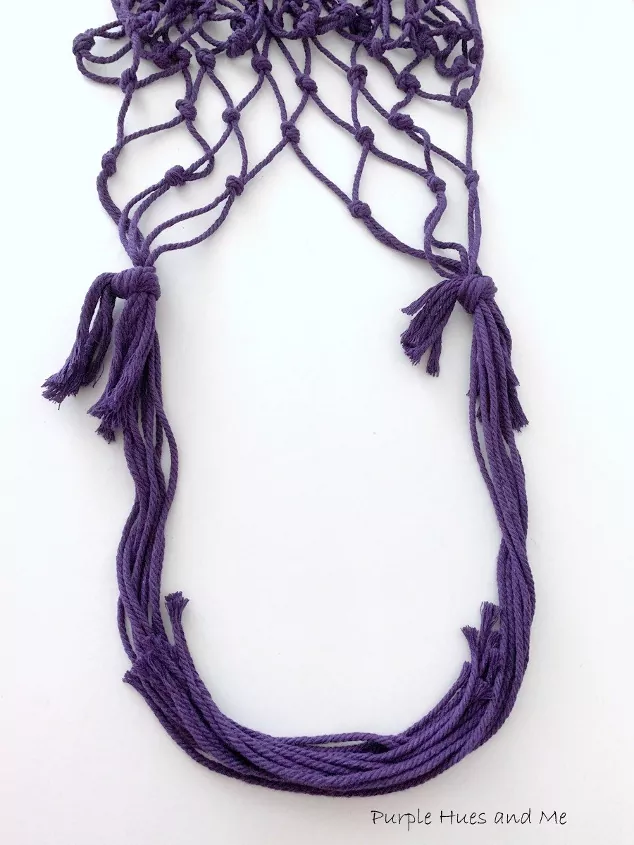
Then, gather the cords in two groups to make handles, tying together in a knot. At this point I realized I didn't have enough cords to make a shoulder length handle. So I cut more cords and tied them together on each side. Overlapping ends in a u-shape for handles.
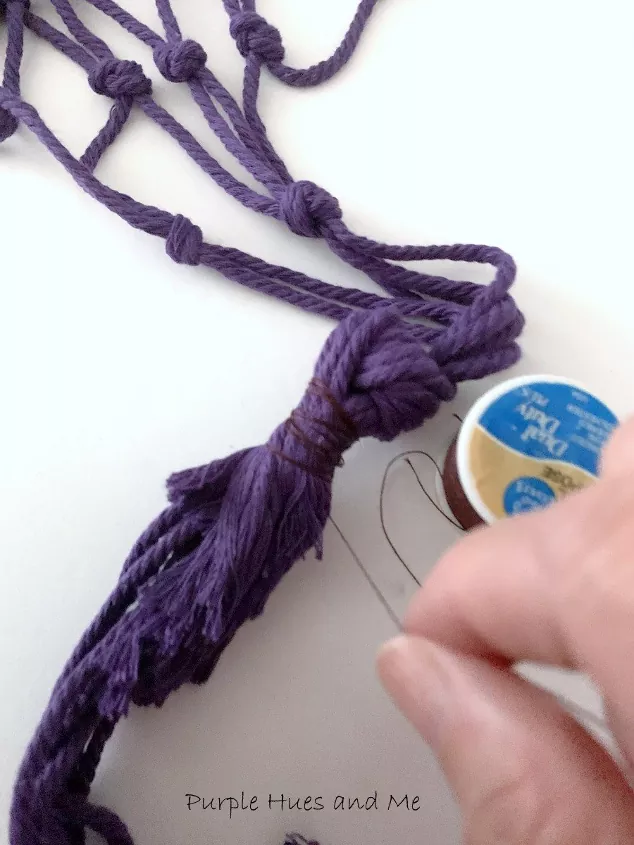
Use thread to wrap around the cords where they are tied and overlapped together.

Next, cut two cords, 24ft long to wrap the handles by creating half slip knots the entire handle length. Make a loop with one cord and use finger to grab the opposite cord and pull through the loop . . .
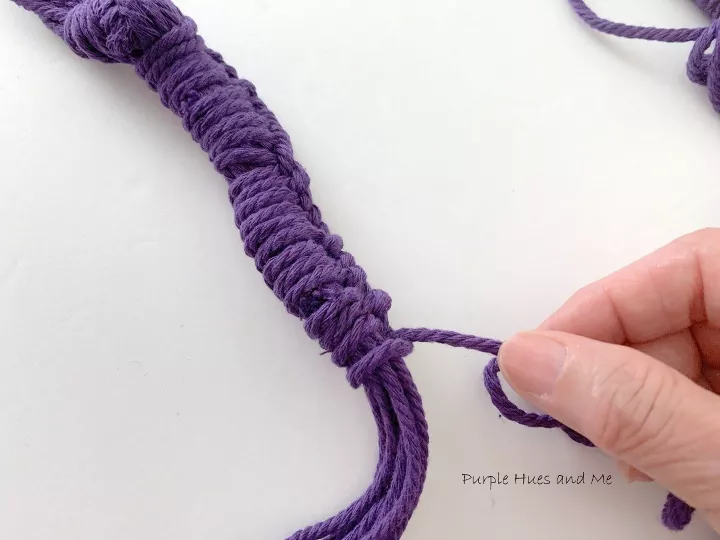
creating a slip knot. It's quite time consuming making these - pulling the long cord through - so sit down and watch a tv show, lol! Continue making slip knots . . . along the entire length of the handle . . .making sure to push the loops together along the handle to keep it neat.

When finish knotting, use a wide eyed needle to thread the cord ends down through the loops . . .
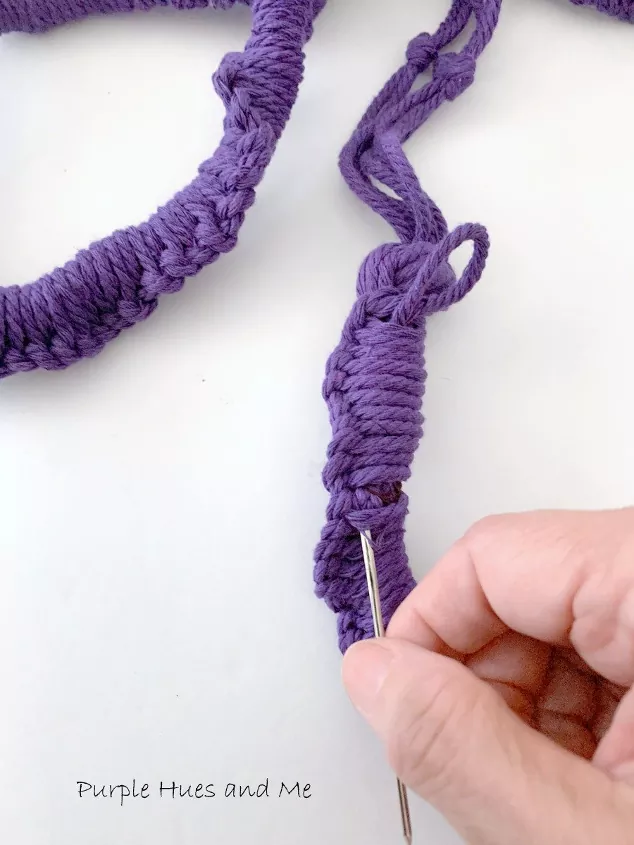
to secure. Cut off excess cords.
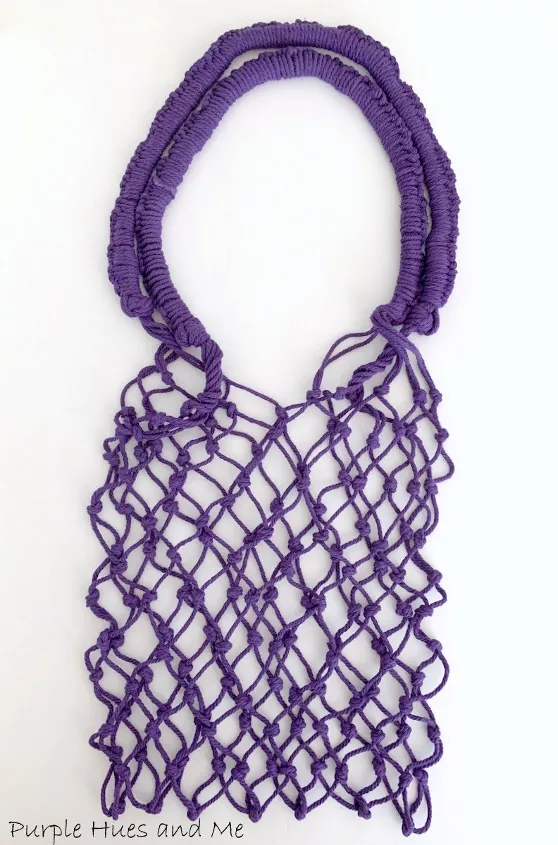
Talk about looking stylish! You bet!

Perfect for groceries . . .
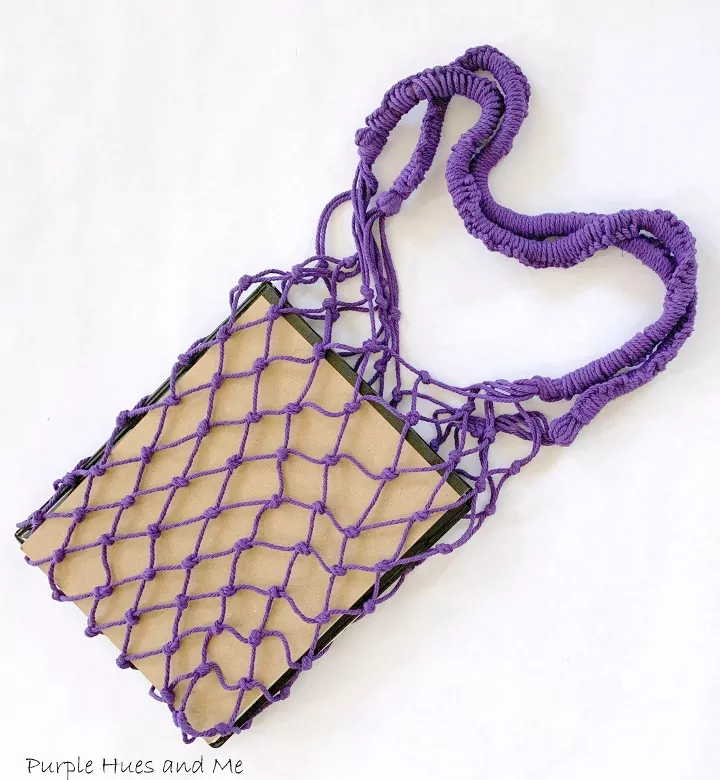
or holding a few books!
The author may collect a small share of sales from the links on this page.


Comments
Join the conversation
What material are you using?