Slim + Simple Leather Wallet - DIY Curious Creator
3 Materials
$15
3 Hours
Easy
So it's been a while since I made a leather wallet. I had a few people comment on my last leather wallet saying there was no way to carry notes. I don't usually carry any notes, but thought I would make a wallet that could. This is a super simple and slim wallet that has an interesting design. Watch the full video for a detailed guide on how to make your own!
{
"id": "4655323",
"alt": "",
"title": "",
"video_link": "https://www.youtube.com/embed/Qmz3aO4wYiI",
"youtube_video_id": "Qmz3aO4wYiI"
}
{
"width": 634,
"height": 357,
"showRelated": true
}
Check out the full video on how to make your own!
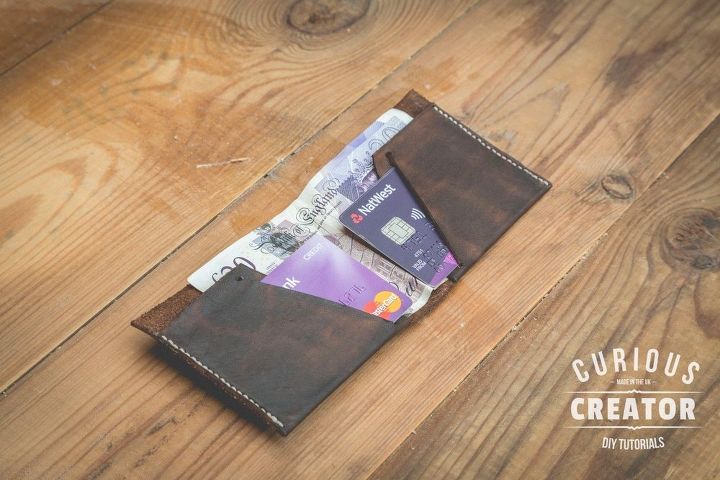
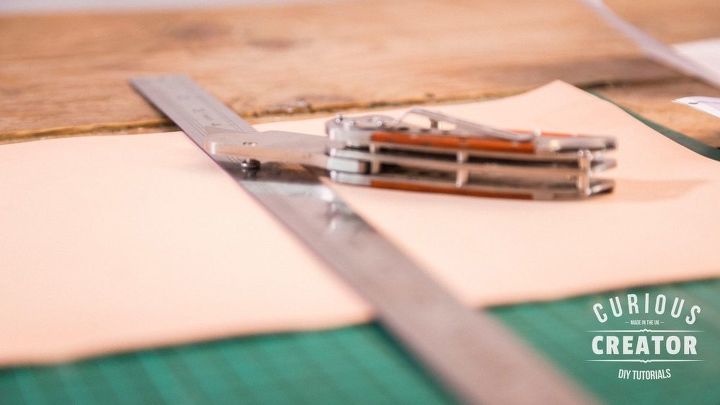
I started with a beautiful piece of veg tan or tool leather. I always buy it undyed so I can dye it myself. I used a ruler and sharp knife to cut. I designed this template on the computer and printed it out. It's important with this design to make sure the cards fit in nicely.
Using the sharp knife I made several light cuts to get a really clean cut through the leather. Make sure you have a cutting board underneath.

I then took the edge beveller to smooth out the edges all around the wallet. I did this front and back. This step is optional but it's one of those things you can do to take your wallet to the next level and make it look really professional.
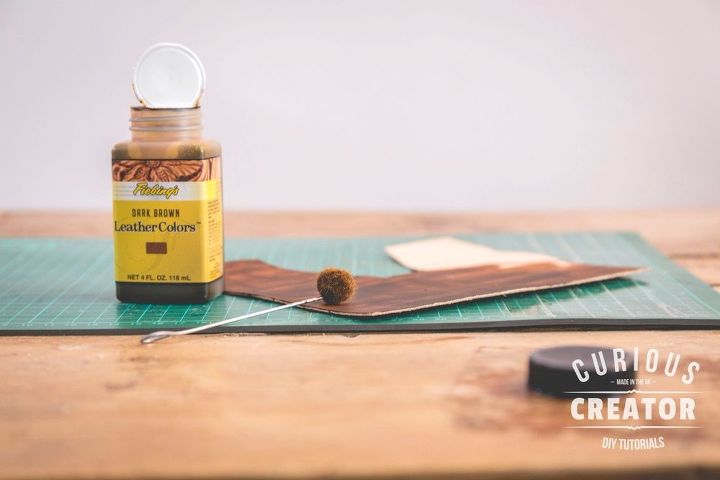
I really like this Feibings Waterbased Leather Dye. I love the way you can put it on slightly unevenly and give it a rustic look. Some might say that I should give it fully even coverage. But I like this look. I covered it front and back, you need to go on extra thick with the back side, or the flesh. I also made sure to get all the sides of the wallet.
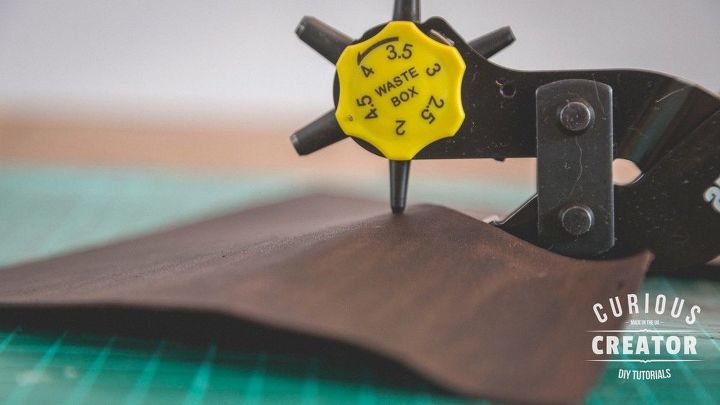
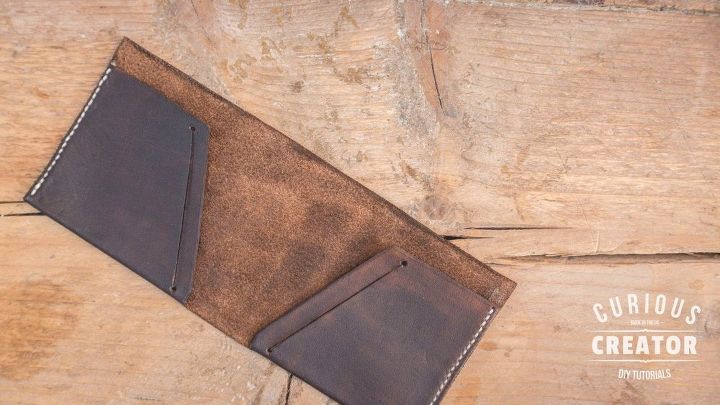
I left the dye for about 10mins to dry and gave it a quick buff with a clean cloth. Next, I had to cut the slots for the cards. I could have just cut straight lines, but this would possibly run the risk of tearing out further in use. So I used the hole punch at either end of the cut. This also gives a nice clean cut. I use a ruler to make sure it was a perfectly straight line. I used a piece of cardboard as a guide and ran some contact cement along the full length of one side using a lollypop stick. I gave it around a 2mm width. I let the glue dry a bit and get tacky. Then I folded the flap over and firmly pushed it down. The glue is just a temporary hold, but also will add more strength. You need to be extra careful not to get any glue onto the faces of the leather. This stuff is super sticky and can damage the look of your wallet.
I used the edge groover to cut a small groove about 1mm from the edge. I use a multi-tool that has lots of adaptors, so I swapped out for the groover with a guide. Again, you don't need to do this but it does help make sure your holes are perfectly straight. It also ensures that your stitching sits flush to the face of the leather.
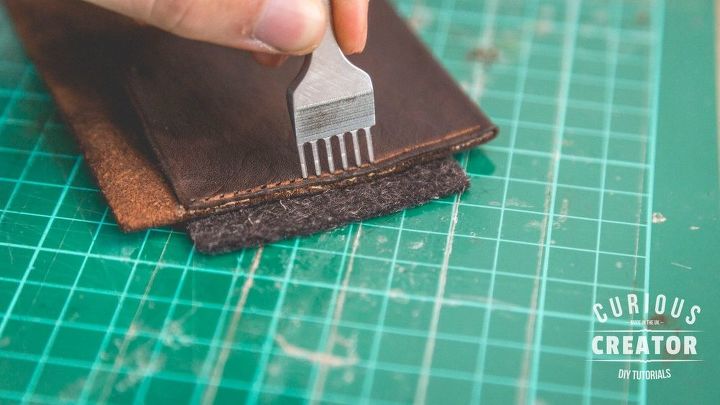
I push a scrap piece of felt underneath the leather to prevent damaging the cutting matt too much. It's best when hammering with forks to use one clean blow to try and get through in one clean hit.
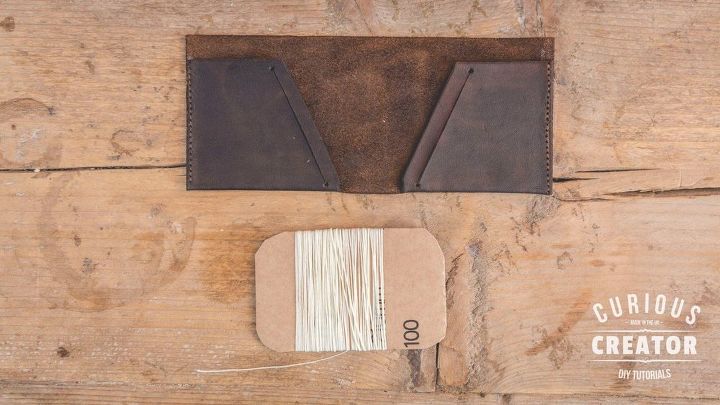
I used this off-white waxed thread. I measured out the thread. Usually, you need around 3/4 times the overall length, so I measured this out along the edge of the wallet. Using 2 x leather stitching needles and threaded both of them and started to saddle stitch. Again there are loads of different types of stitch you could do here, but I like saddle stitch, it's strong, sits small and is easy to do.
To saddle stitch you start off with two needles at either end of the thread. You thread it all the way through the end hole and pull through till it is in the middle. Then put one of the needles through the next hole up, and pull all the way through. Then take the other needle, and put back through the hole you just threaded. Continue doing that all the way back up to the end. Then do a few backwards, and trim the edges. I then took a light and just burnt the edges to stop them unravelling.
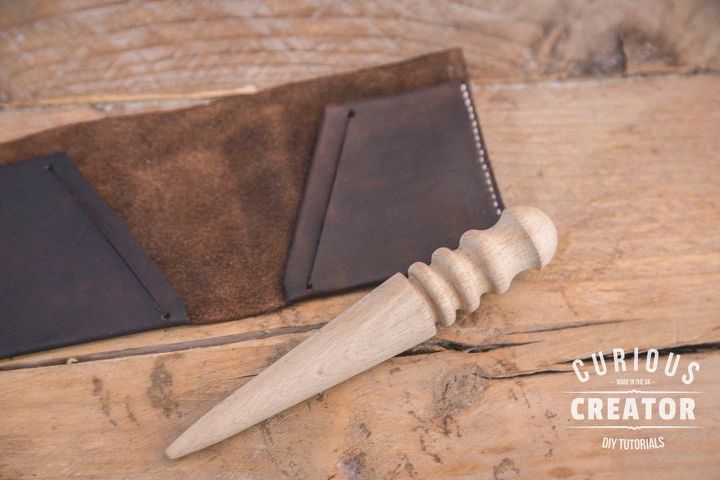
The next sort of optional step, but massively improves the quality of the wallet, is slicking. I wet the edge with some water and rubbed with the edge slicker. It smooths out the edge and makes it look like one piece.This can take a couple of mins so just stick with it.
I then used some more water and wet the middle fold of the leather. The beauty of this veg tan leather is when it's wet you can form it really easily. I got the hole middle damp and folded it over and pressed it down.
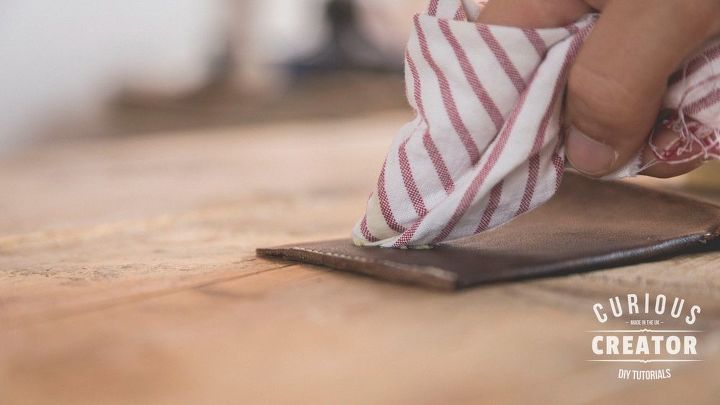
To add a layer or protection and a nice matt finish to the wallet I used my homemade wax polish. This is actually available from my Etsy Store if you are interested. I rubbed a small amount straight onto the wallet and then buffed it clean.
Resources for this project:


Any price and availability information displayed on [relevant Amazon Site(s), as applicable] at the time of purchase will apply to the purchase of this product.
Hometalk may collect a small share of sales from the links on this page.More info
The author may collect a small share of sales from the links on this page.

Want more details about this and other fashion and style ideas? Check out more here!


Comments
Join the conversation