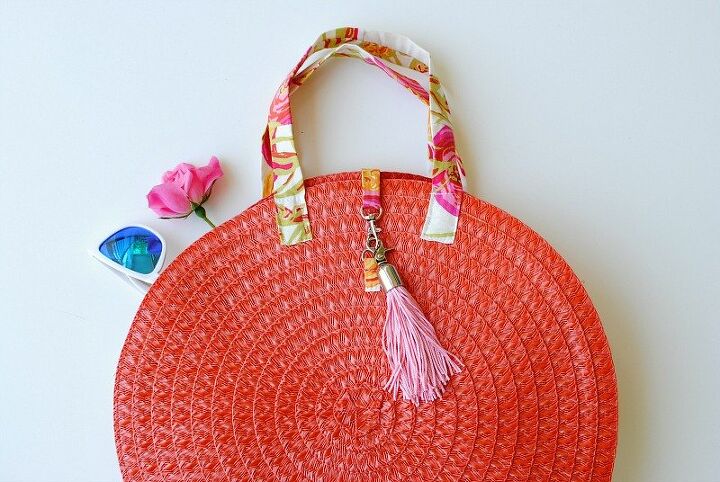
DIY Wicker Roundie Bag From Placemats
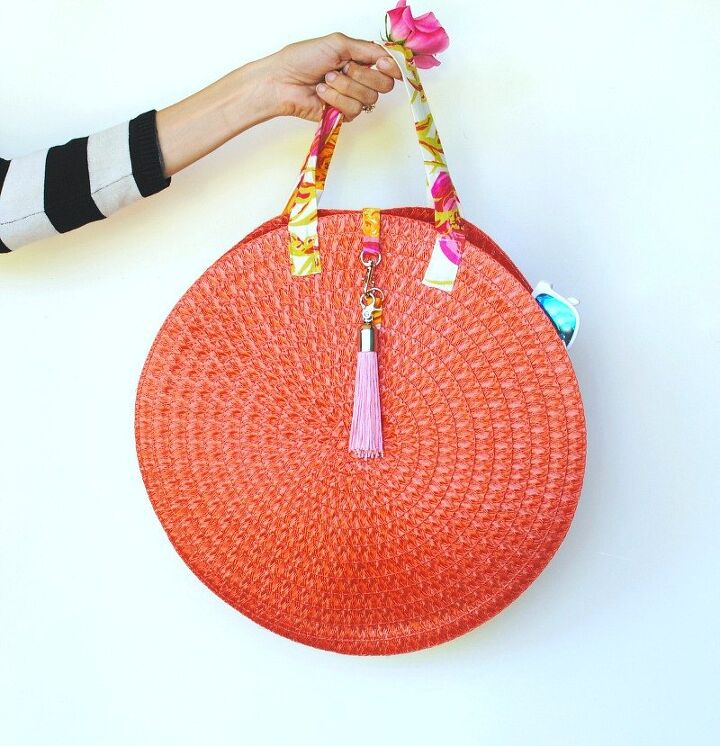
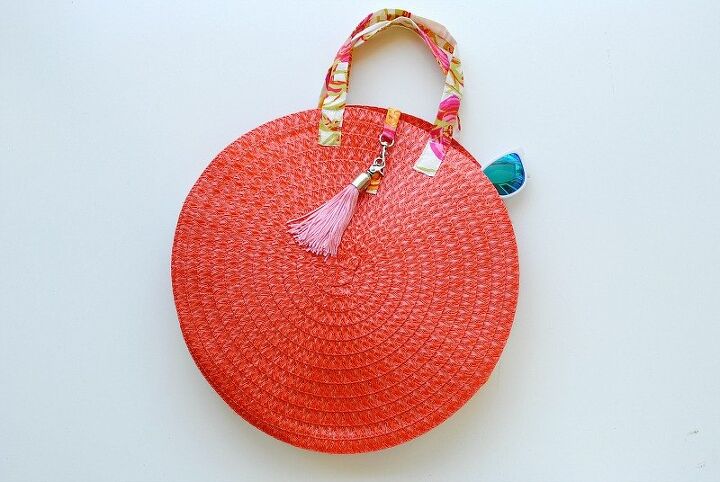
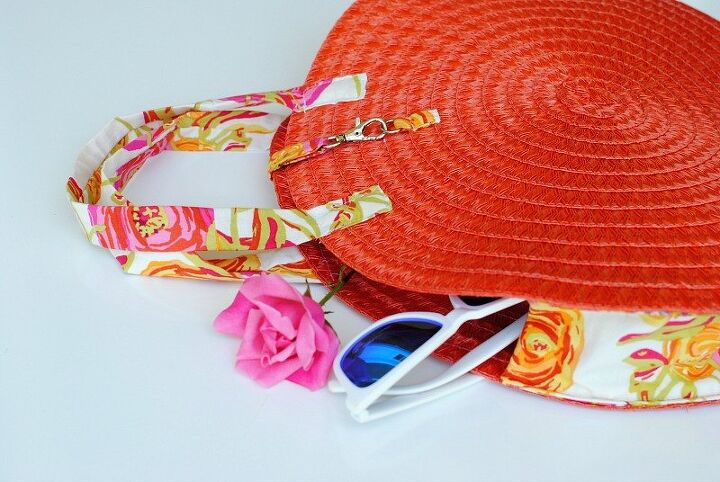
Maybe this is just how my thrifty mind works but everytime I see those round wicker bags I think placemats! So I decided to go ahead and make my own trendy roundie using a set of placemats I got for a dollar each! I also wanted something with color instead of the typical natural to stand out a bit. To tie the overall finish together I needed to add some Dritz hardware. They really have everything you can think of when it come to making bags from fasteners to accents. For this bag I used the Small Swivel Hook & D-Ring set along with the Tassel Cap to add some more FUN (who doesn't love tassels?). These hardware details made all the difference in turning these placemats into a wicker worthy bag.
Get the details below on how to make your own:
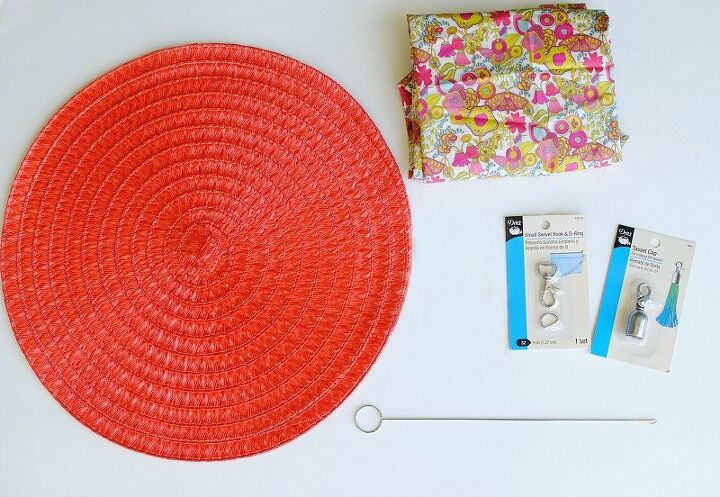
Supplies:
- 2 Placemats (I got mine from the dollar tree).
- Dritz Small Swivel Hook & D-Ring
- Dritz loop turner
- Tassel Cap
- Double Cap Rivets (optional)
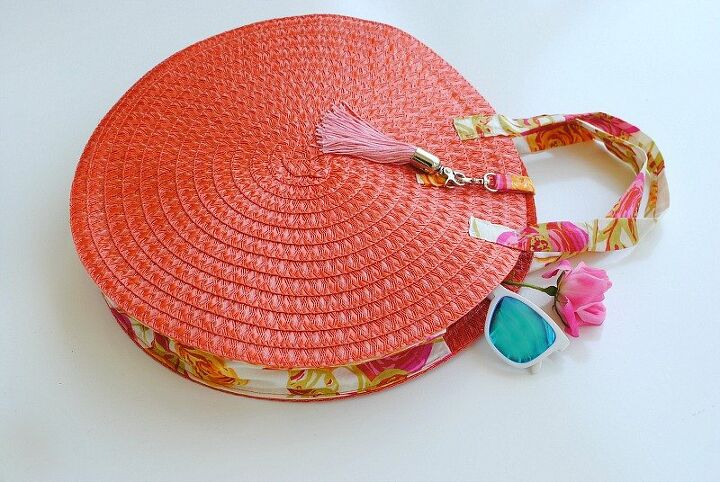
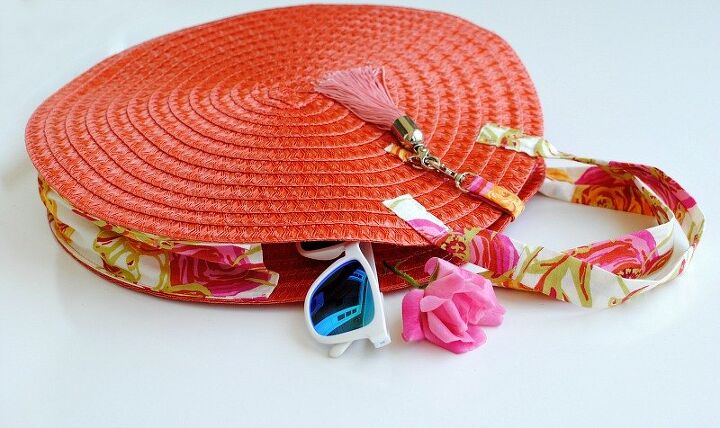
- 1/2 yard of fabric (preferably medium weight to canvas). I am using a floral cotton.
- 1/4 yd. fringe trim
- Brother Sewing Machine
DIY Instructions:
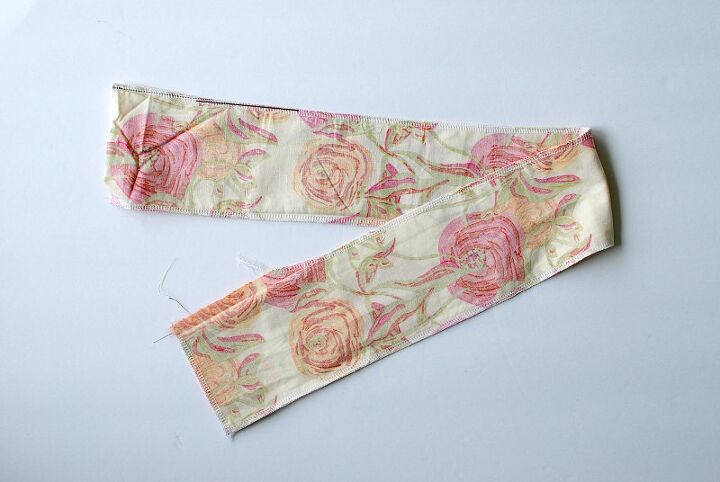
Cut 2 rectangles of fabric that measure 4.5" x _. You will want to measure this according to the placemats you use. Make sure it's long enough to fit about 3/4 around the placemat.
Place the 2 rectangles right sides together, pin, and sew (1/4" seam allowance) around leaving a 2" gap about 2" in from one of the corners.

Clip corners, flip right side out, and press.
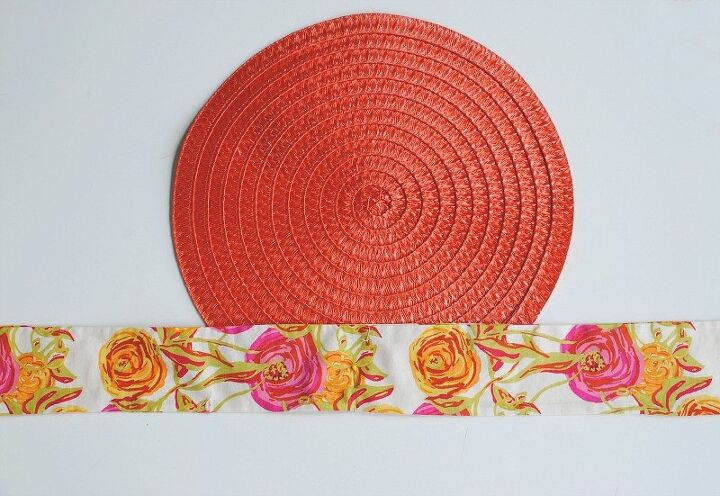
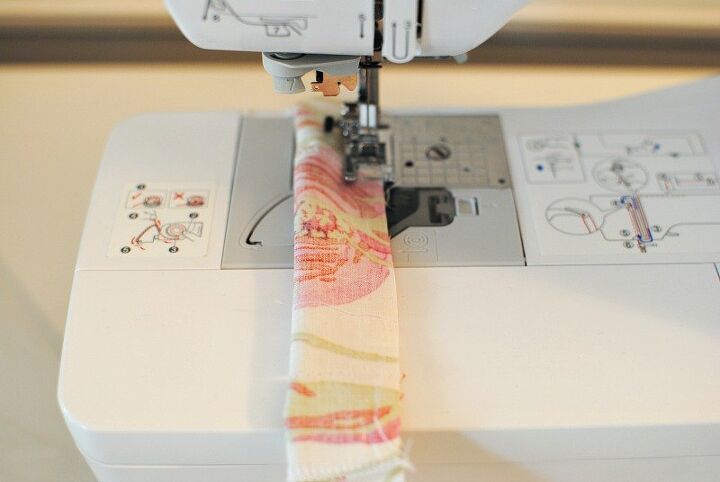
Find midpoint of strip (fold in half) and place in the center of one of the placemats. Wrong sides together.
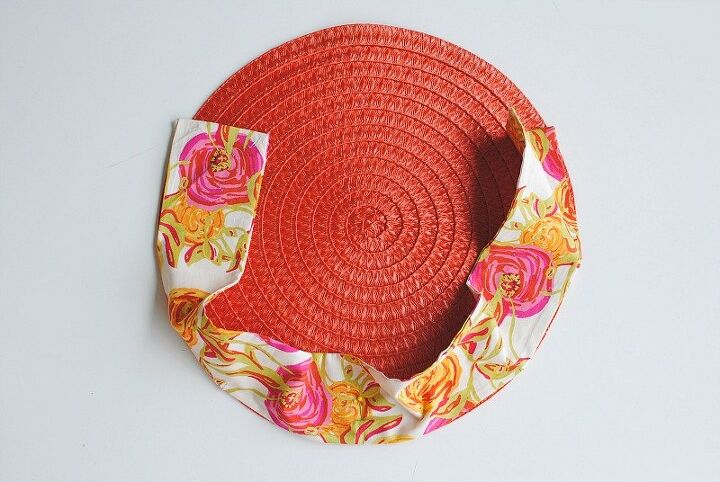
Wrap around the placemat and pin as you go.
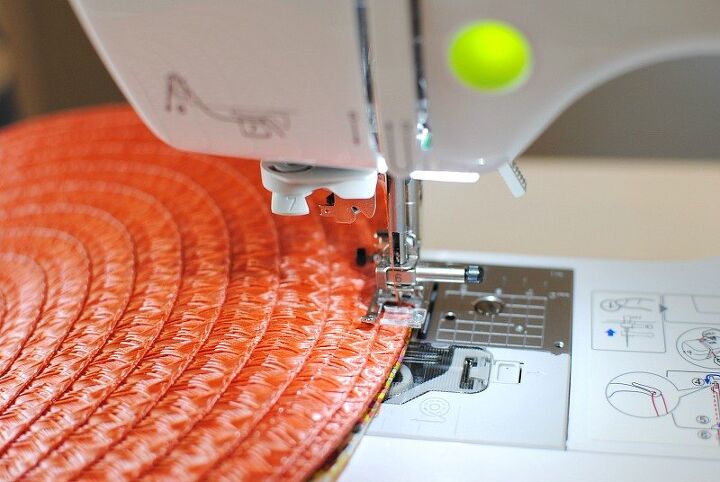
Sew into place right along the edge with a top stitch. My Brother sewing machine did not have a problem sewing the wicker material and I used a standard needle.
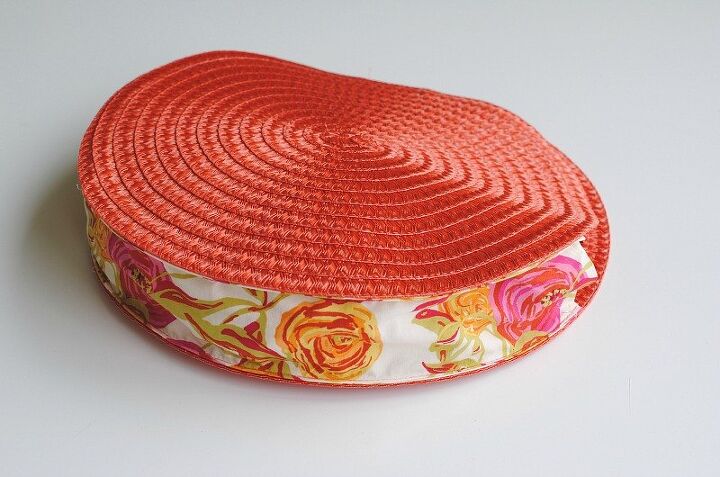
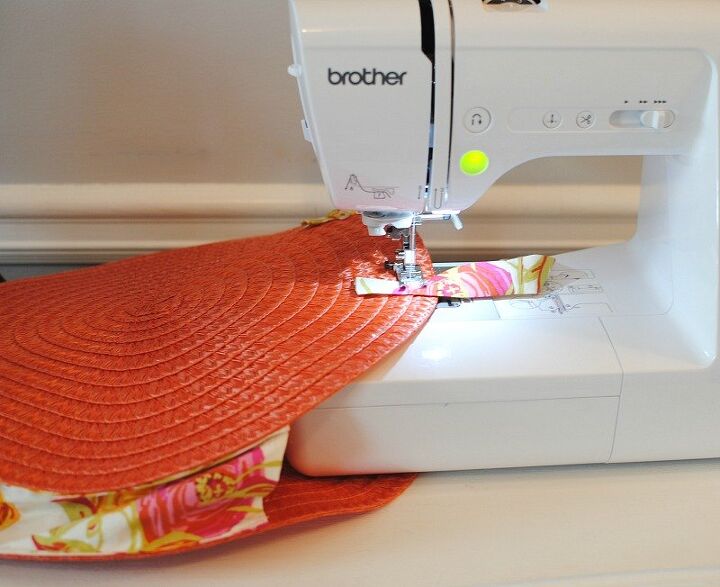
Pin the other place mat on the alternate side and sew like before.
You will have to position the materials like this to get them to sew around the other side properly. It takes a little maneuvering and lifting your presser foot up and down but it works just fine.
For the Handles:
You can use fabric or leather for this. If using leather try Dritz Double-Cap Rivets and Double-Cap Rivet Tools.
I wanted my handles to match the fabric around the bag. Make these straps to be long enough for a cross body bag or short enough to be a purse.
Cut 2 strips of fabric 1.5"x 12" (or your preferred length).
Fold the strips of fabric in half right sides together and sew along the edge.
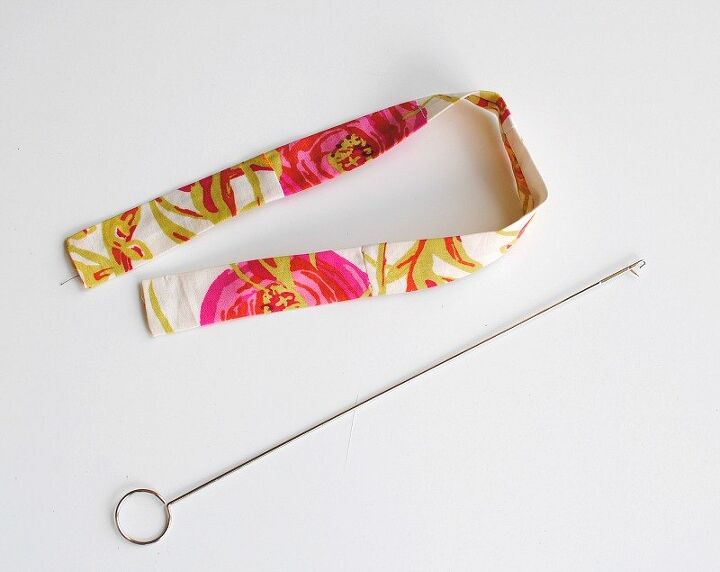
Use a loop turner to flip right side out.

Press so the seam is in the center back. Flip the end edges inside 1/4" and press.

Position on the front of the bag so it's visually even. Pin into place.
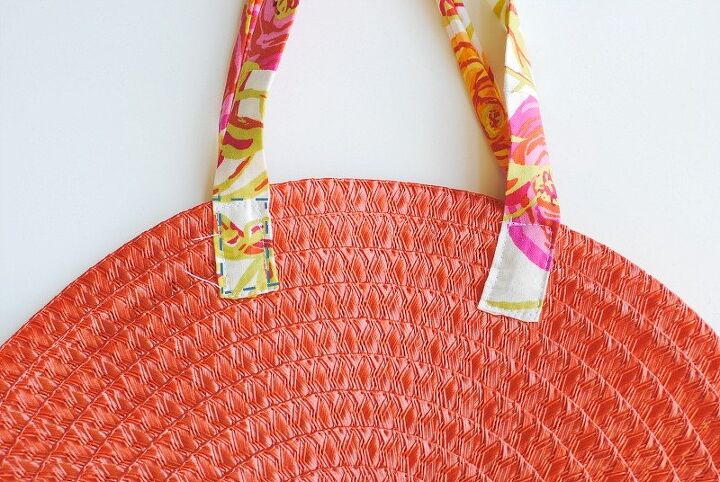
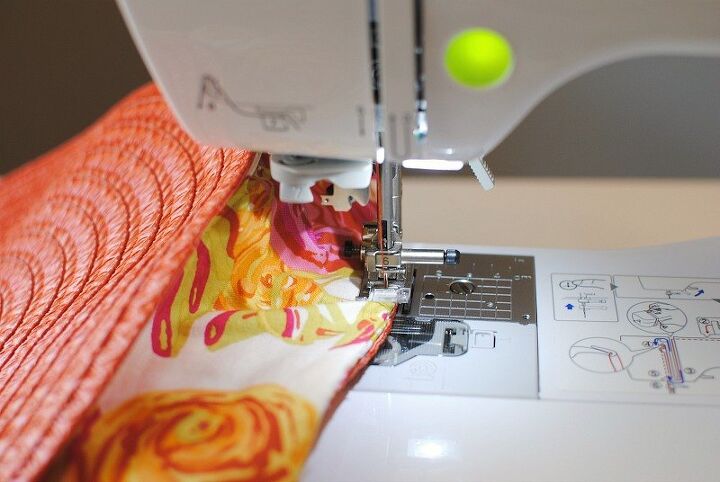
Top stitch the handles into place sewing a square or use rivets.
It takes a bit of Houdini sewing when working with a material like wicker but it works just fine.
Repeat for the back handles.
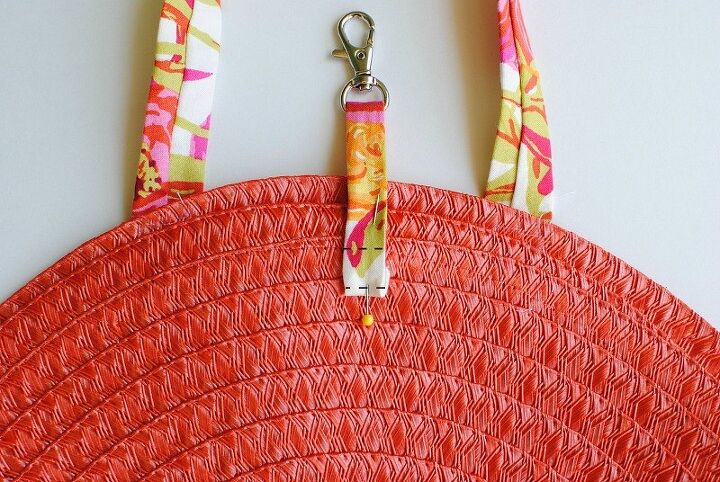
Swivel Hook & D-Ring Closure:
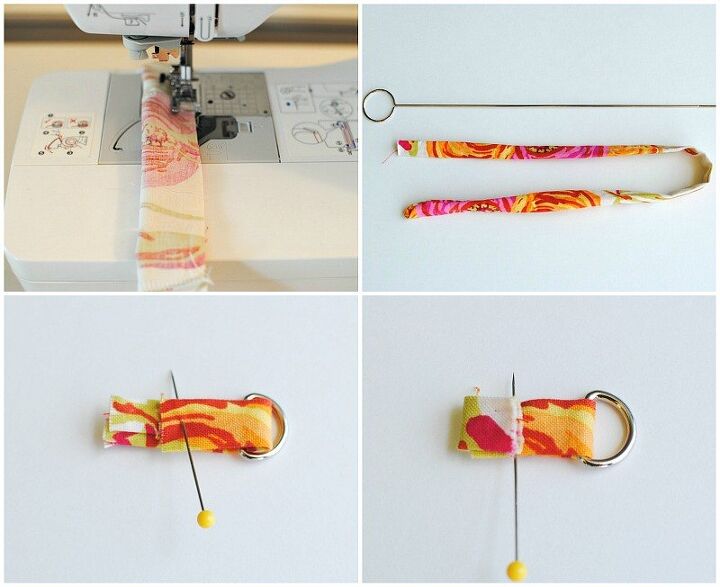
Make another strip of fabric measuring 1"x 12" for your Swivel Hook and D Ring Closure. Again, fold in half right sides together, sew along the raw edges, and flip out with a loop turner.
Press so center seam is in the back.
Cut the strip into tabs. Make sure you can fold over the D-Ring nd Swivel hook and flip up another 1/2". Mine was about 3" long for the D-Ring and 5" long for the Swivel Hook.
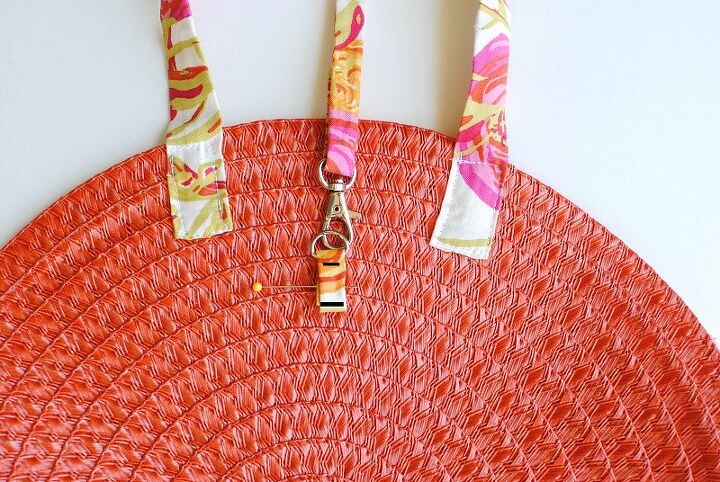
Place tab with D-Ring so it's visually even on the front of the bag. Also make sure the Swivel Hook can fit around from the back before sewing and is positioned where you want it to be.
Top stitch 2 rows along front tab/D-Ring.
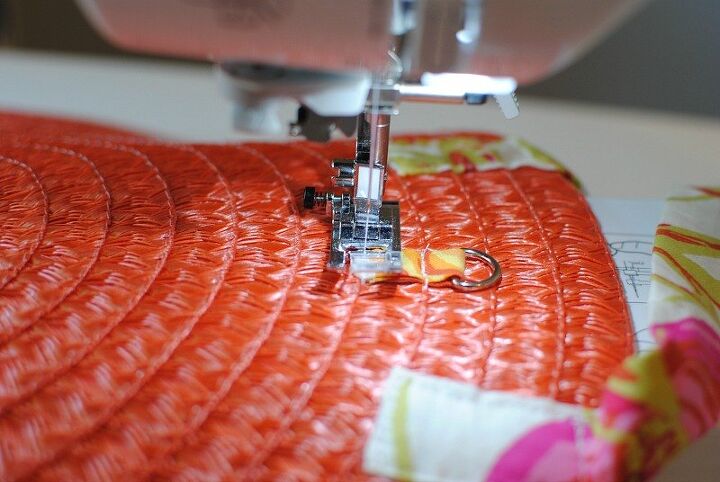
Place and pin D-Ring with longer tab centered in the back between the handles (I didn't do my handles on the back yet at this point so pretend they're there). Sew 2 strips along bottom edge of tab and about 1/2" above (encasing the folded tab underneath).

Sewing the Swivel Hook tab.
Now let's add a custom tassel while we're at it!
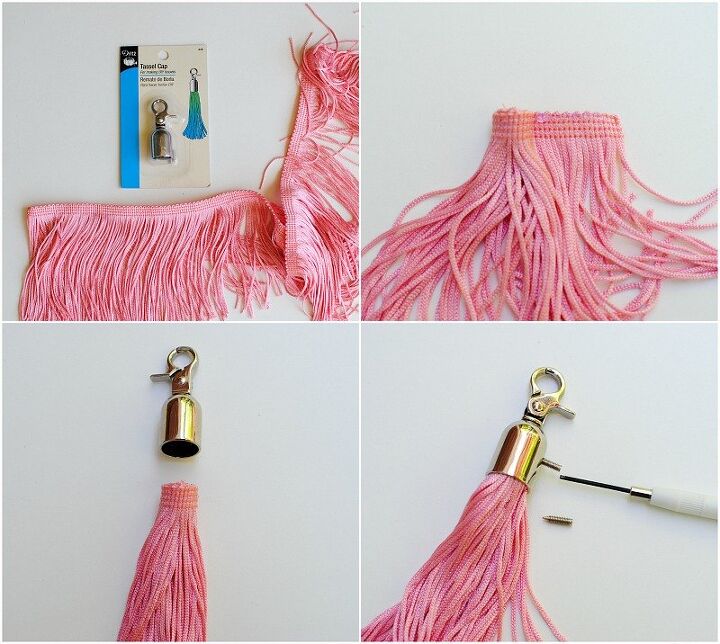
Instructions:
Create a strip of fringe or use fringe trim
Roll up fringe and make sure it fits in the cap. Adjust if necessary.
Unroll and place glue along top edge, tightly roll fringe into finished diameter.
Place a small amount of glue inside the tassel cap.
Insert rolled fringe into tassel cap.
Use a mini screw drive, insert the screws into the hole of the cap and screw.
That's it! You now have your own wicker bag. I can't help but laugh when someone asks me where I go my bag? Oh, a set of placemats...
*In collaboration with Dritz.
I received compensation from Dritz®, and some of the materials featured here or used in this project were provided free of charge by Dritz®. All opinions are my own.
SaveSave
The author may collect a small share of sales from the links on this page.


Comments
Join the conversation
I’ve sewn for many years. Love this idea. However, I would sew the straps and closure pieces before sewing the two placemats and center fabric together
I have the store bought wicker purse, which is sitting on the chair next to me right now! I love the style so much, I bought a second one and painted one side white. I will definitely be making this. It'a a perfect bag for spring/summer. ♥️ I use a purse insert from another bag to organize things so that it's not a bottomless search for things. ♥️