How to Sew a Reversible Tote Bag With Pockets - Step-by-Step Tutorial

What’s the best thing about a reversible tote bag? You get two tote bags out of one sewing project! In this tutorial, I'll show you how to sew a reversible tote bag with pockets. Let's get started.
Tools and materials:
- 2 Different fabrics
- Pins
- Thread
- Measuring tape
- Scissors
- Sewing machine
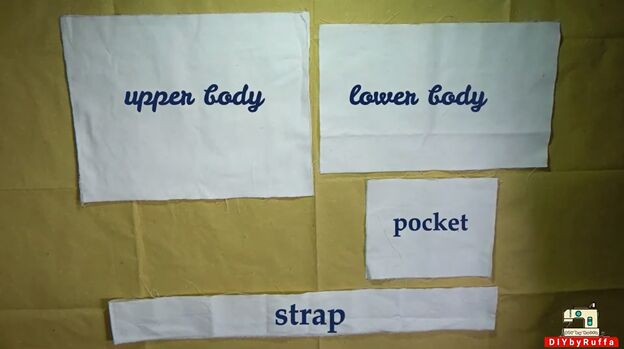
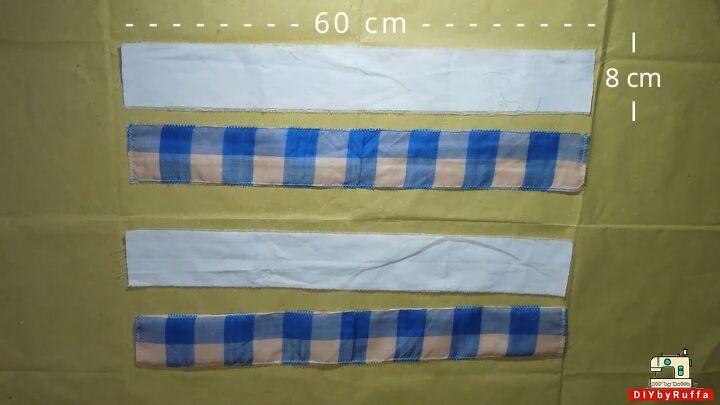
1. Create the pattern
I used two fabrics for this tutorial and cut out the pattern in both. However, my checked fabric was too thin, so I reinforced it with a thicker fabric.
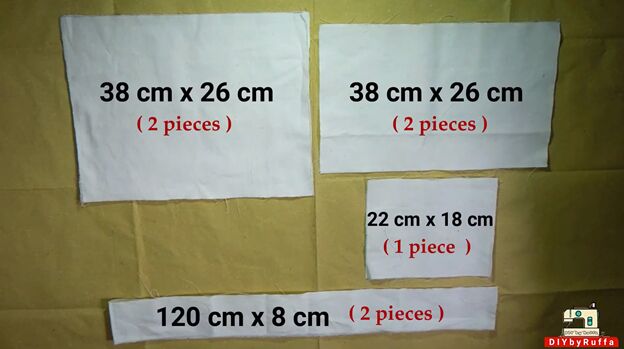
Cut out the indicated pieces from each of your two fabrics.

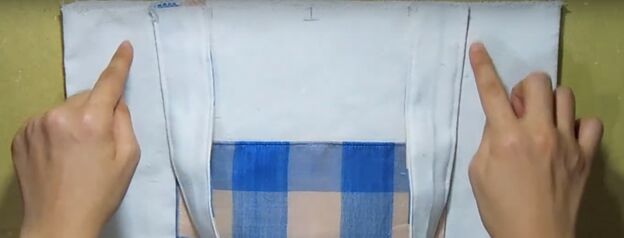
2. Assemble the upper and lower body
Place one white upper body piece on top of the checked lower body piece, aligning a long edge, and pin in place.
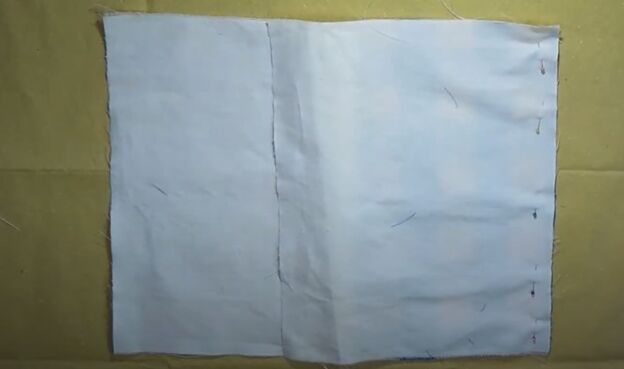
Pin the other white upper body piece on the other checked lower body edge.
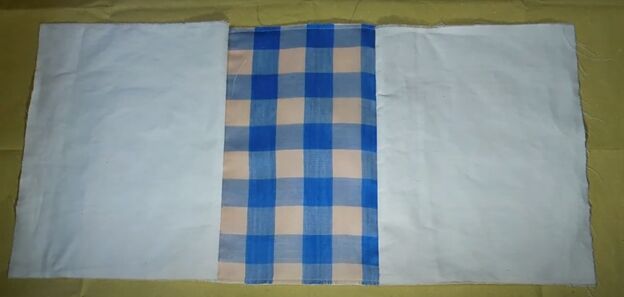
Use a zigzag stitch to sew both of the raw edges.
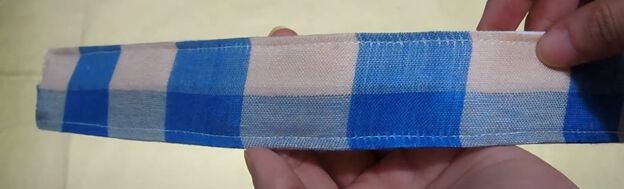
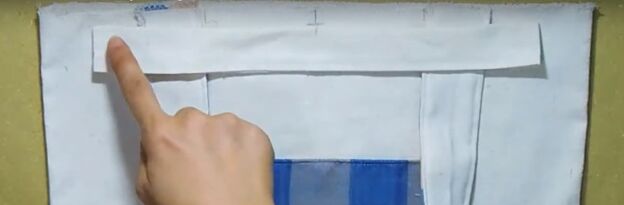
3. Make the pocket
Fold in and sew all four raw edges of the checked pocket.

4. Attach the pocket
Fold your fabric in half lengthwise and crease the fold so the centerline is visible. Fold the pocket in half lengthwise and crease the fold so it is visible as well.
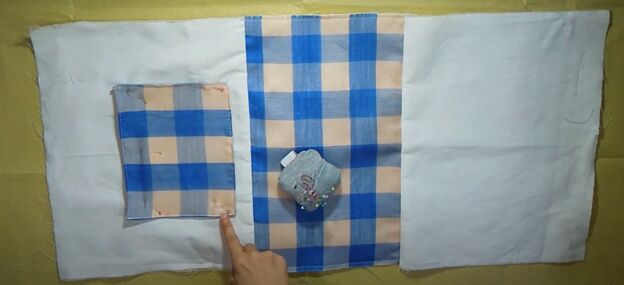
Pin the pocket to the right side of one white upper body piece. Match up the horizontal centerline folds, but pin the pocket slightly to the right of the vertical center with the opening facing the outside edge. Sew the pocket to the upper body.

5. Sew the open seams closed
Fold the whole piece of fabric in half widthwise, with right side facing in, and sew up the bottom and side seams.
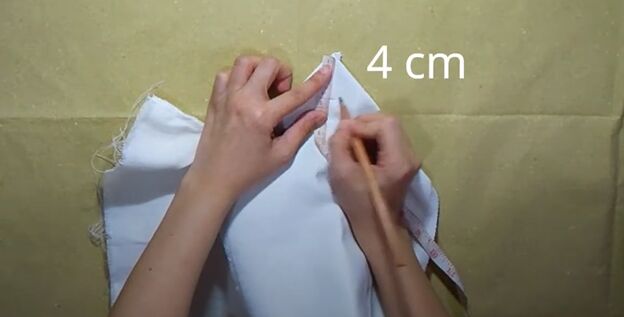
6. Create a wide bottom
Spread the bottom of the bag out and make a mark 4 centimeters (1.57 inches) below the outer point of the bag.

Draw a line across the bottom of the bag at the 4-centimeter mark.
Repeat making that line on the other side of the tote bag bottom.
Sew along both of those bottom lines. You can then either cut away the extra point of fabric, or just leave them in to provide extra strength at the corners of your tote bag.
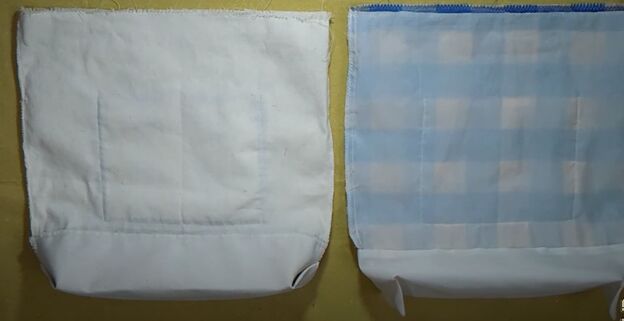
7. Repeat for the second bag
Sew a second bag following the same instructions but reversing the fabric. So, I'm using the white fabric for the lower body and pocket, and the checked fabric for the upper body.
Tack down the bottom corners on your first bag but leave the corners on the second bag loose.
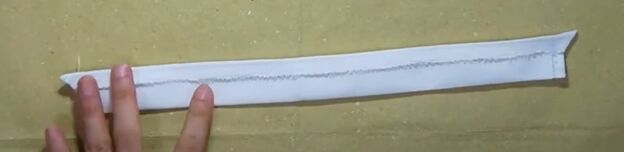
8. Make handle straps
I'm making two types of straps: one pair of small straps (measurements above) and one long strap.
Fold the long edges into the center and then fold the strap in half lengthwise.
Place the two folded straps together, right sides facing out, and topstitch the long edges. Repeat the same process to make the second handle.

9. Make a shoulder strap
Cut two pieces of white fabric 90 x 8 centimeters (35.4 x 3.1 inches) and follow the same instructions as for the handle straps.
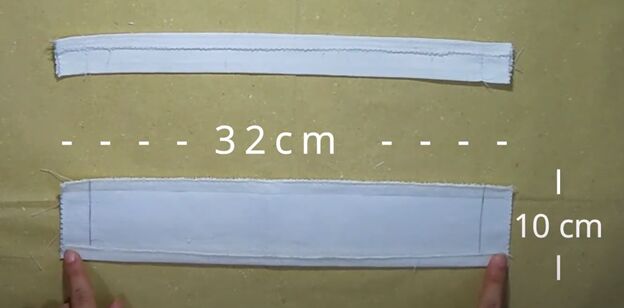
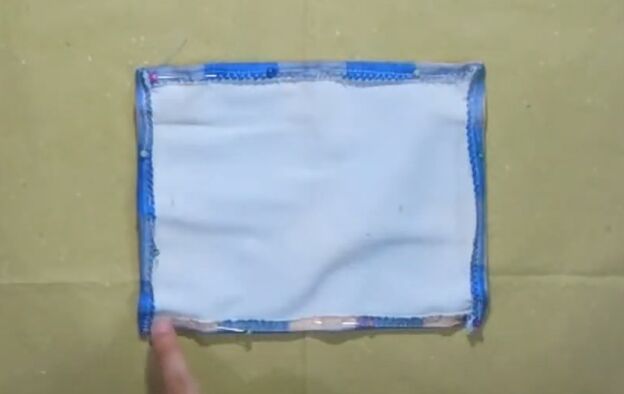
10. Make the zipper casing
Cut two pieces of white canvas 32 x 10 centimeters (12.6 x 3.9 inches).
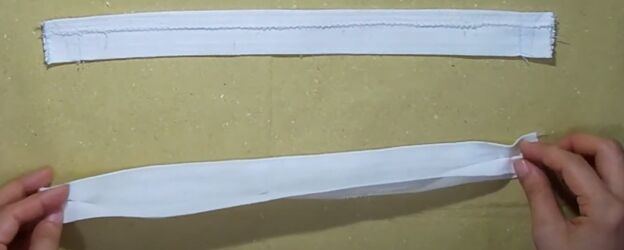
Fold in all edges and then fold them in half lengthwise with the outside facing in.
Sew the side seams at the position shown in the image above but leave the long edge open. That’s where the zipper will be inserted.
Trim excess fabric from ends of the side seams. Turn the zipper casings inside out and press flat with an iron.
11. Assemble the straps and zipper casing
Mark 14 centimeters (5.5 inches) at the center top of the bag.
Place each end of one handle strap at the marks and sew the strap in place. Repeat on the other side of the bag with the second handle strap. Sew the ends of the shoulder strap to the inside sides of the second bag.
Place one zipper casing along the top of the tote bag, centered horizontally, and pin it in place.
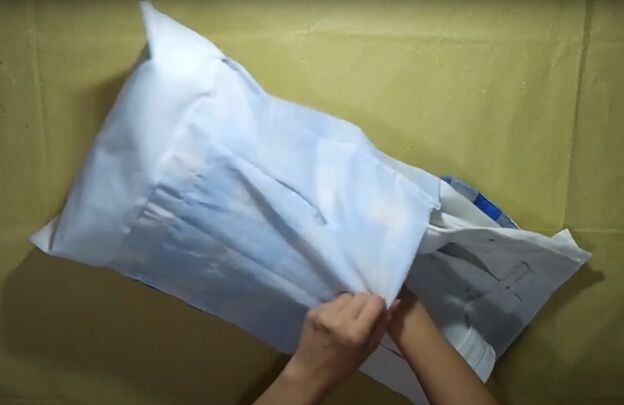
12. Make the bag reversible
Insert one tote bag into the other, keeping both bags inside out.
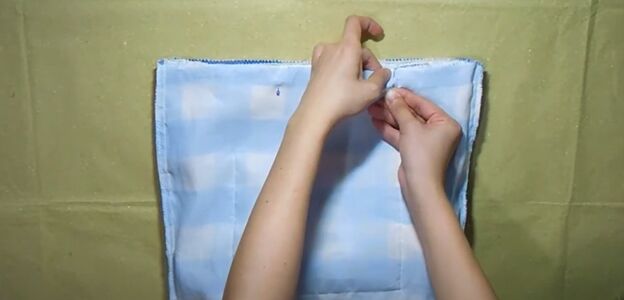
Sew the top of the bag closed on both sides of the zipper, leaving the zipper area open.
Turn the bag right-side out.
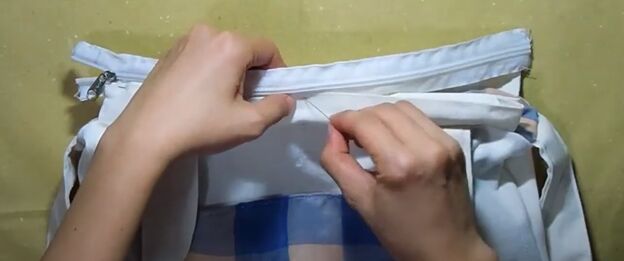
Using either a reversible zipper or two zippers, sew the zipper(s) on to the zipper casing.
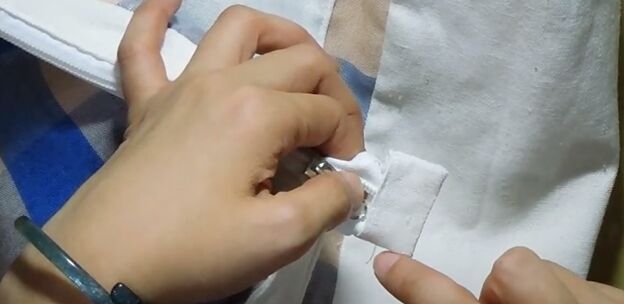
To add zipper end tabs, cut two pieces of fabric 6 x 5 centimeters (2.4 x 2 inches). Fold the top and bottom in and then fold them in half, right sides together. Sew the sides and one long side. Turn the tabs right sides out and press with an iron.
Sew the tab in place over the end of the zipper, not going over the zipper teeth.

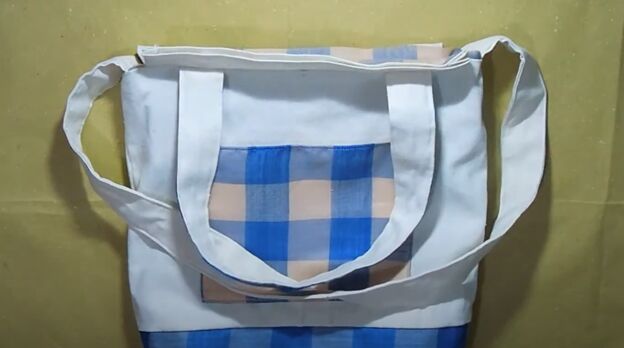
How to sew a reversible tote bag with pockets
Now you have a reversible tote bag, with handle straps on one version and a shoulder strap on the other. Leave a comment to let me know how yours turned out.
The author may collect a small share of sales from the links on this page.


Comments
Join the conversation