Cute and Easy Multi-strand Bracelet Tutorial

Today, I want to show you how to make a multi-strand bracelet. This project is perfect for beginners or more experienced jewelry makers.
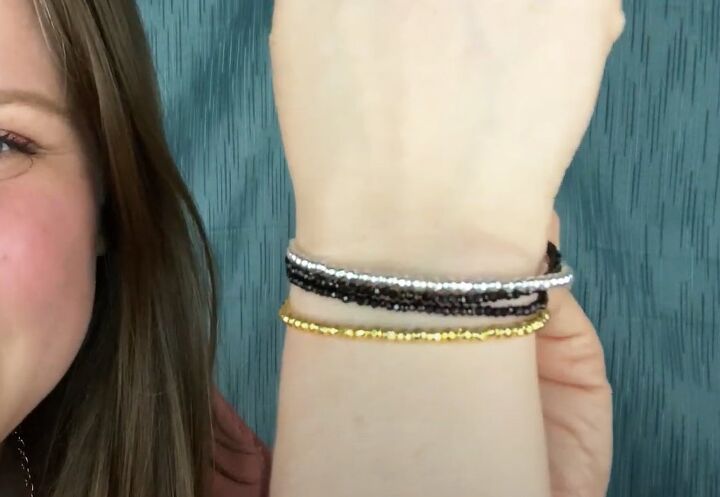
I used mini rondelles that come in 3 mm or 4 mm diameter, but you can use any beads you have on hand and follow my method.
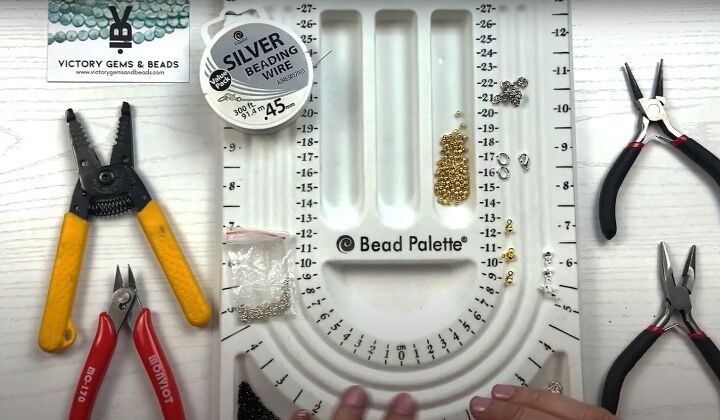
Tools and materials:
- 8 clam shells
- 0.45 mm wire
- 8 crimping beads
- 3 large jump rings
- 1 lobster clasp
- 3 types of rondelle mini beads
- Round nose pliers
- Long nose pliers
- Wire cutter
- Gorilla glue or Superglue
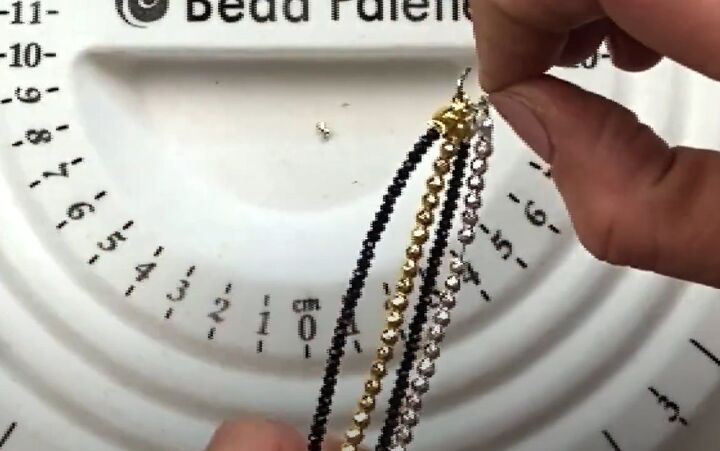
1. Sort your beads
I made one strand each of gold and silver pyrite rondelles and two strands of black spinel.
You could make four strands of mixed beads, use the same colors for all the strands, or mix them however you like.
Lay the beads out on your palette or on separate plates.
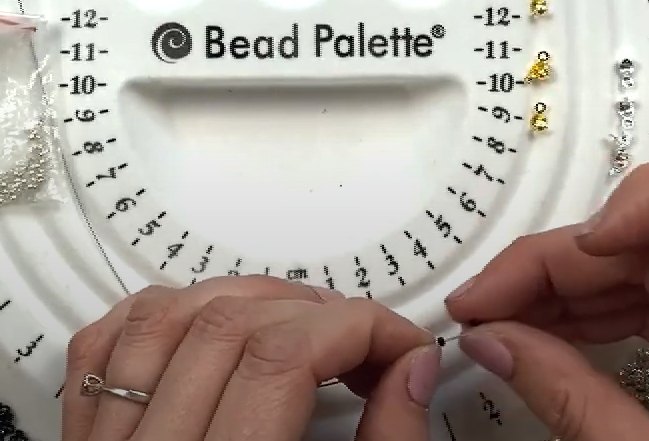
2. Thread the beads
Pull some of the wire towards you and thread the beads on to it for the first strand.
If you want a bracelet that sits quite close to your wrist and you’re not going to twist the strands together, you’ll want to make each strand 1 inch shorter than your wrist measurement.
For a twisted strand bracelet, you will need to increase the length of each strand.

3. Finish off each strand
When you have the length you need for the first strand, thread a clam shell and a crimping bead on to the end.
Use your pliers to crimp the bead on the wire.
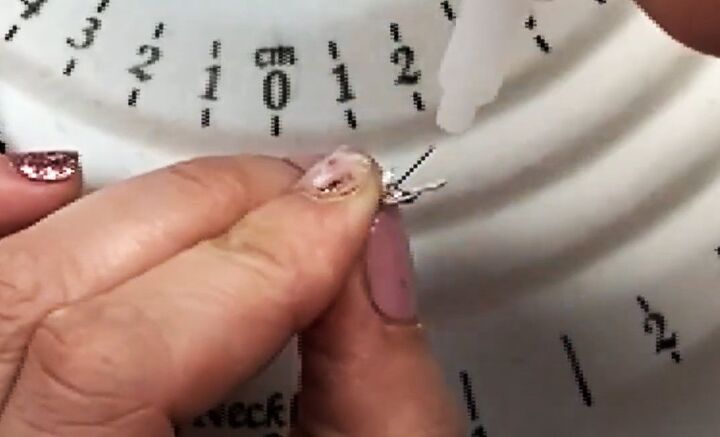
Draw the clam shell over it and add a drop of superglue inside the clam shell before closing it over the crimping bead.
Trim the excess wire close to the clam shell.
Slide the string of beads up against the clam shell so you can crimp the other end.
Cut the wire about an inch from the other end of the beads.
Add the clam shell and crimping bead to the second end in the same way, pushing the clam shell up tight against the beads.
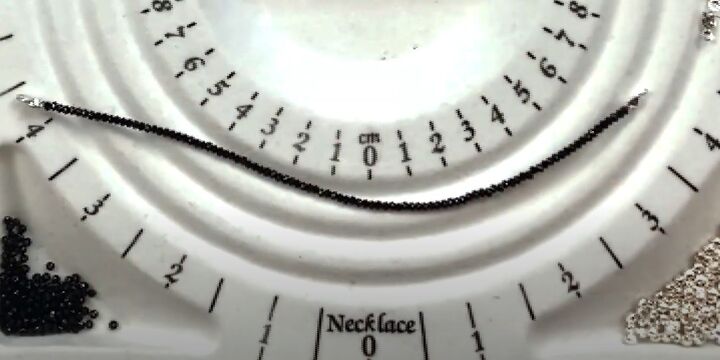
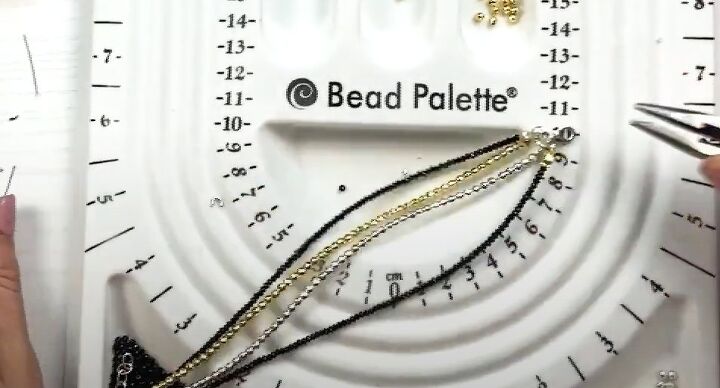
Using the first strand as a guide, thread and finish three more strands of the same length.
4. Add the jump rings
Use two pairs of pliers to open a jump ring.
Thread one clam shell from each strand on to the jump ring and close it securely.
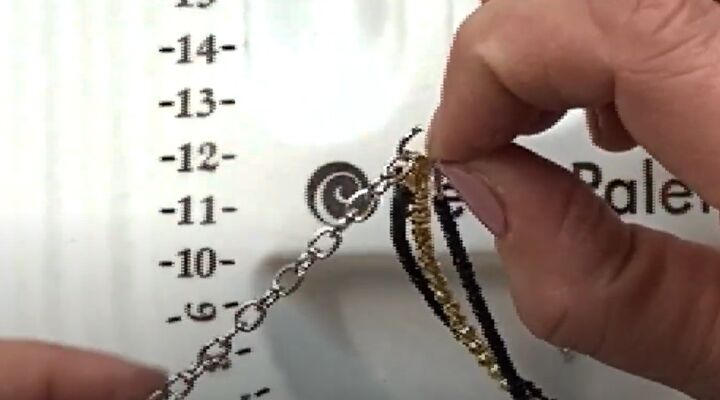
Repeat at the other end, adding a short length of chain - about 5 or 6 links - to the jump ring after the strands.
If you want a flat bracelet, make sure you thread the strands in the same order.
For a twisted bracelet, twist the strands before you thread them.
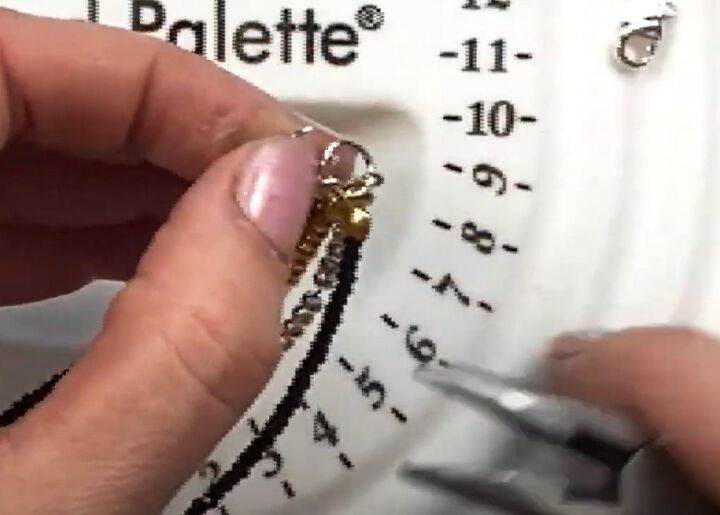
5. Attach the fastening
Open the third jump ring and add it to the end without the chain.
While the jump ring is still open, thread the loop of the lobster clasp - or fastening of your choice - on to it.
Close the jump ring.
How to make a multi-strand bracelet
And that’s all there is to it! It does take some time and patience to thread all those mini beads, but I think the result is well worth it, don’t you?
If you prefer to make a multi-strand stretch bracelet, replace the wire with stretch cord.
Do let me know what you think of this blingy bracelet by dropping me a comment below. I love to hear from you.
Try Out This Button Bracelet Tutorial
The author may collect a small share of sales from the links on this page.


Comments
Join the conversation