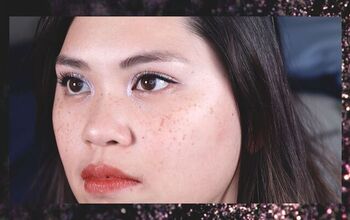
How to Make Your Eyeshadow Pop

Today, I'm going to show you a technique that I like to follow when I want my eyeshadows to be extremely pigmented.
I’m going to show you how you can use concealer as a base in two different ways. If you want to know how to make eyeshadow pop, keep reading.
Tools and materials:
- Concealer
- Eyeshadow
- Eyebrow pencil
- Makeup brushes
- Brow gel
- Eyeliner
- Highlighter
- Eyelash curler
- Mascara
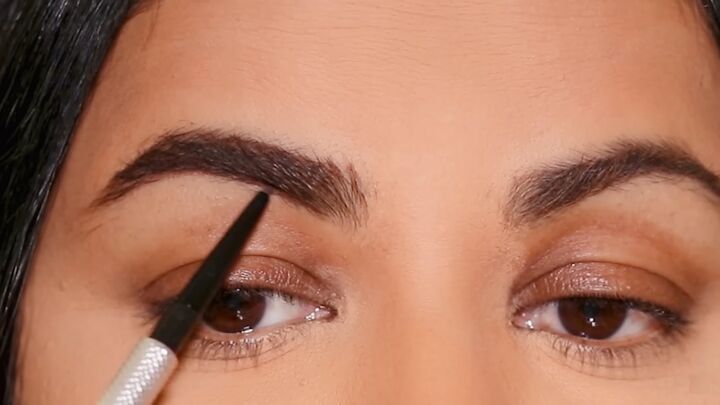
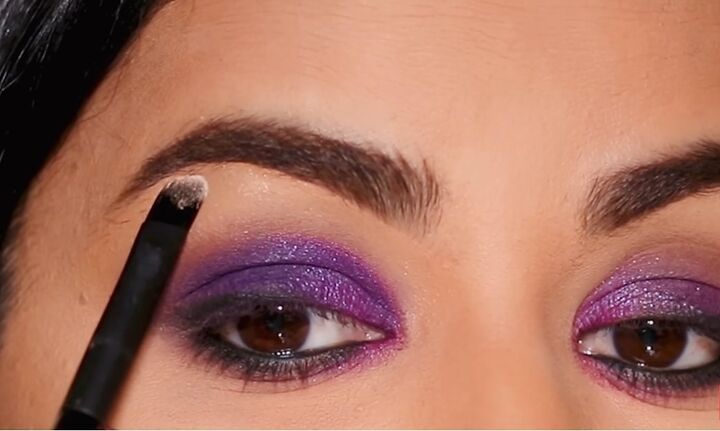
1. Fill in eyebrows
First, do your eyebrow routine.
I use a spoolie to brush my brow hair downwards so I can clearly see the top of my brows and fill in the sparse areas.
Then, I brush my brow hair upwards so I can clearly see the bottom and fill them in there.
Use the spoolie to brush your brow hairs again to distribute all of the product evenly. You can finish up with a brow gel if you want to hold your brows in place.
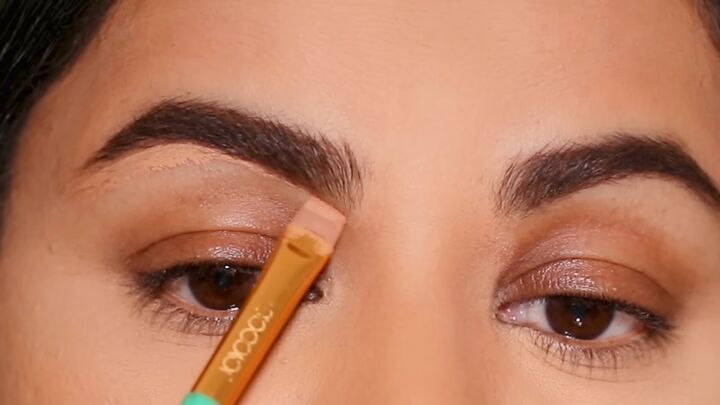
2. Apply concealer under eyebrows
Clean up under the brows with some concealer and a flat brush. Bring it all the way down to your lid.
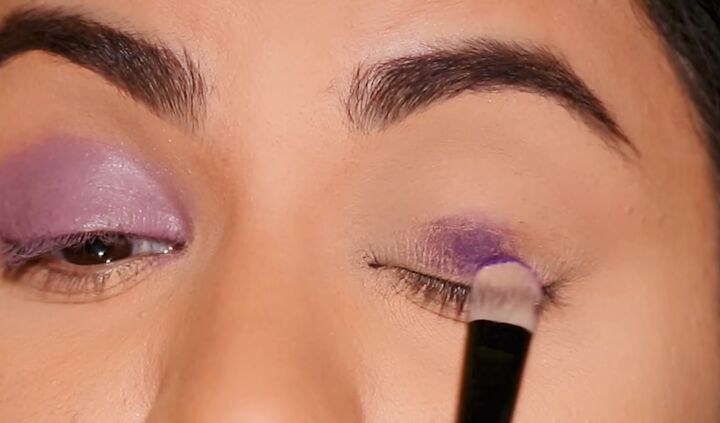
3. Apply concealer to lid
Then place a couple of dots of concealer on your eyelids and blend it out. (I’m only doing this on my left lid).
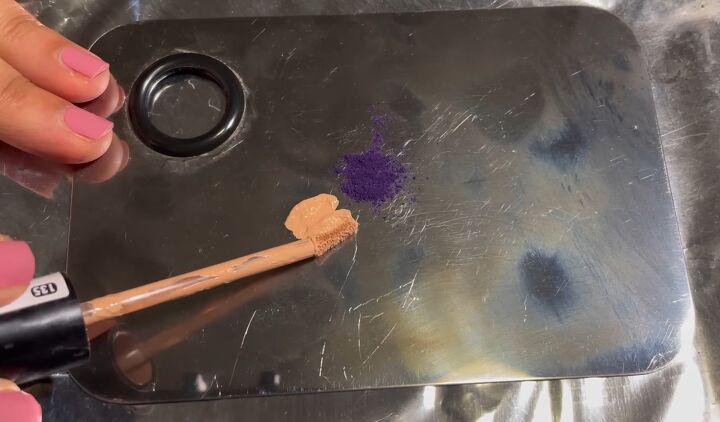
4. Mix eyeshadow with concealer and apply
On my right lid, I’m going to go straight in with the eyeshadow.
Take a dark purple shade and powder it. Then mix it with concealer, and this will be your base. Then apply this on your lid as a base.
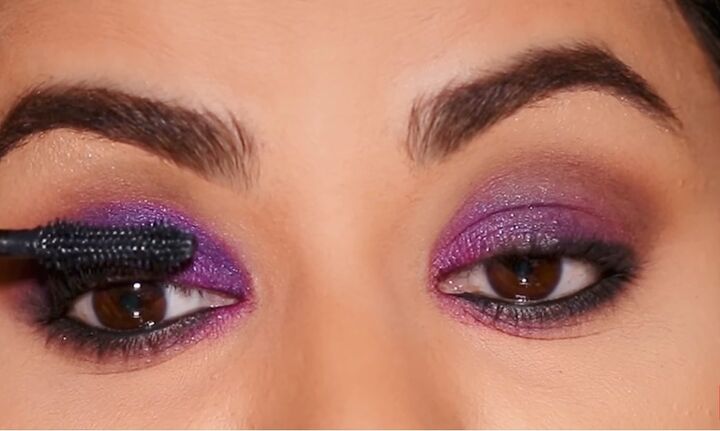
5. Apply eyeshadow
Now dip into the dark purple shade again and use a flat shader brush to press it slowly on both of your eyelids.
When working with matte eyeshadow, try to press it in rather than dragging or pulling, or tugging on it, as this can cause it to appear patchy. But, when you press it in, it settles beautifully on your lids.
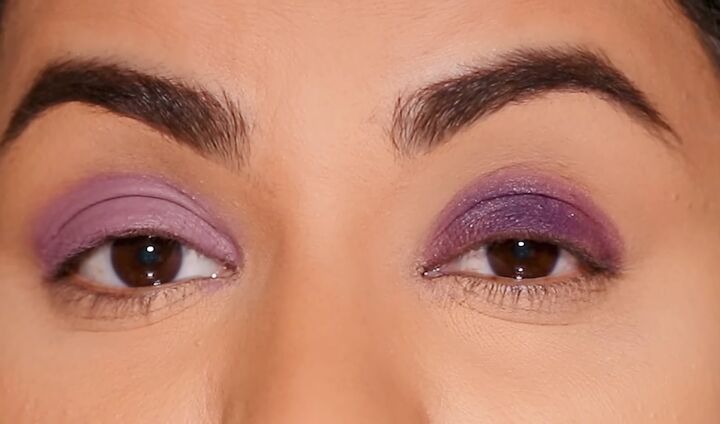
This is how a single coat of eyeshadow looks on my left side, where I had just the concealer as my base.
And this is how it looks on the right side, where I have the eyeshadow and concealer mixed together as a base. It looks much more opaque and pigmented.
Do you see what a big difference a different base makes? This is why I like to use a colored base with colored eyeshadow.
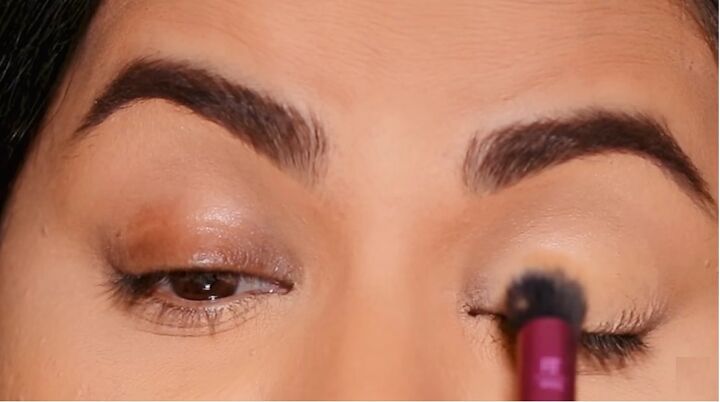
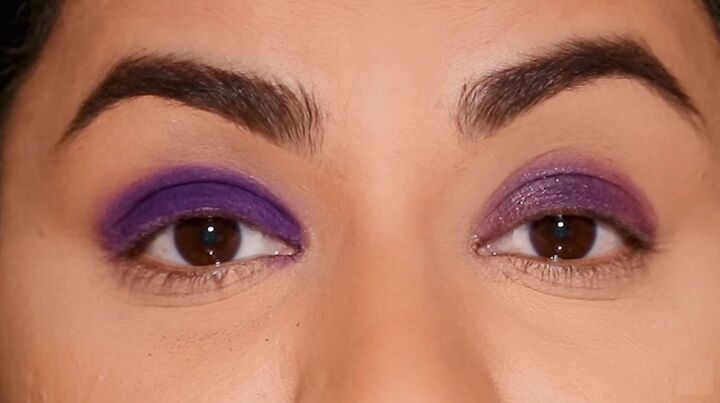
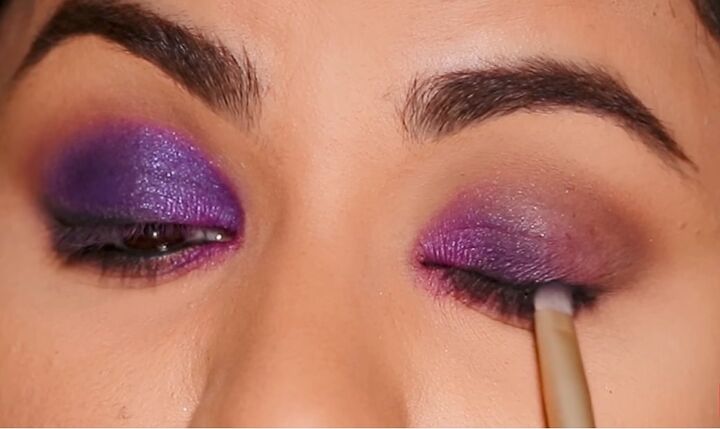
6. Apply eyeshadow to the crease
Now let's finish up the rest of the makeup. We’re going to use a chocolate brown eyeshadow as a transition shade.
Apply it in your crease using a blending brush. I’m doing the same on both sides, just using it in my socket area and blending it with the purple eyeshadow that I used on my lid.
I'm not going to be spreading it out too much. I'm mostly going to focus this on the socket area itself, creating a new crease above my natural crease line.
I have hooded eyes, so doing this makes your eyelid look so much bigger.
Keep on blending till you're happy with the blend and how buffed out it is.
If you want to increase the intensity, you can always layer it with more eyeshadow.
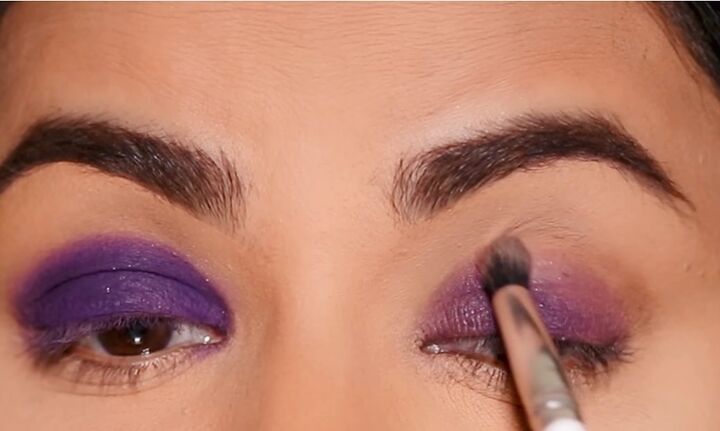
7. Apply eyeshadow to the lower lash line
Then take the same brown eyeshadow with a small definer brush to smoke it out in your lower lash line.
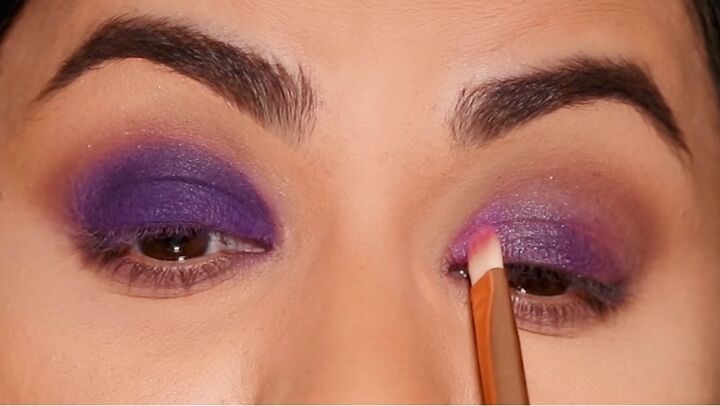
8. Apply sparkly eyeshadow
Apply a sparkly purple eyeshadow to the inner part of your lid with a flat shader brush.
Also, use it in the inner corner of your lower lash line.
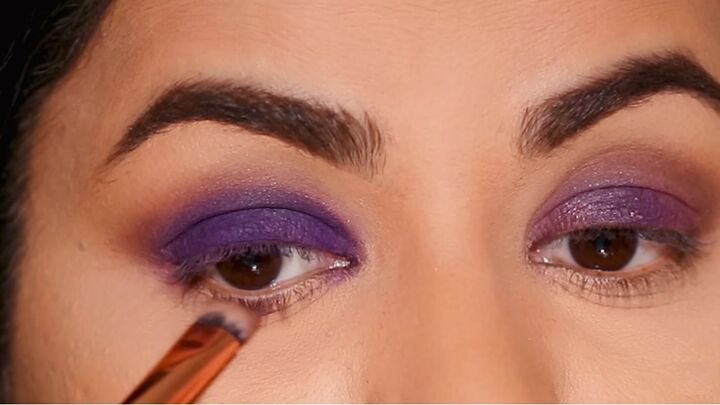
9. Apply eyeliner
Use black eyeliner in your waterline and a little bit in your lash line.
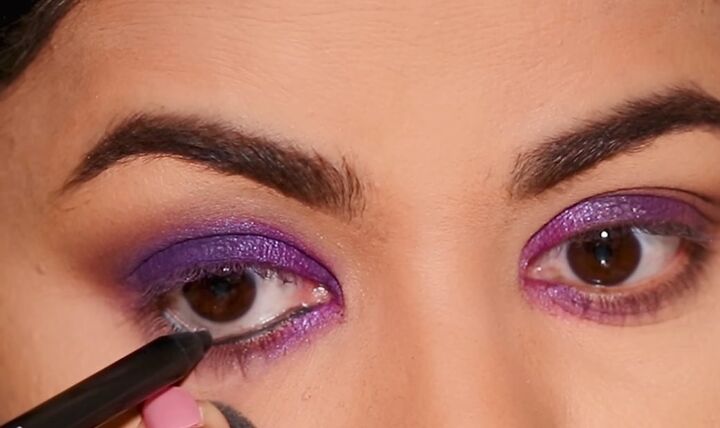
10. Smoke eyeliner out
Dip into some black eyeshadow with a smudging brush, and we’re going to lightly start smudging and smoking the black eyeliner.
It doesn't have to be perfect it just has to look smoky.
I prefer this on my eyes than doing a sharp wing because, again, I have hooded eyes, and sometimes when I do the sharp wing, it interferes with the fold of the hood, but with a smoky liner, it's more forgiving.
11. Apply highlighter
Use some highlighter to highlight your brow bones. This melts into the skin and gives you the glowing-from-within kind of look.
12. Apply mascara
Now curl your lashes and apply some mascara.
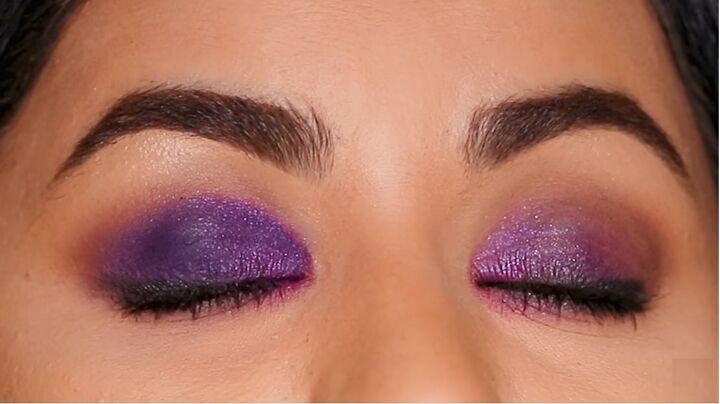
How to make eyeshadow pop
Here is the complete look on my left side with just concealer as the base and on my right side with concealer mixed with the eyeshadow as a base. Let me know which side is your favorite!
The left side is more subtle, but if you want more pigment payoff, I would definitely consider doing the right-side technique.
The author may collect a small share of sales from the links on this page.


Comments
Join the conversation
I like the left better,the more subtle..
Wow if only I knew how to do this when I was younger😀
Well I am still going to try it on my 69 year old self 😃
I hope it will make me look as beautiful as you are!
Thank You