How to Make Fine Hair Curly: Straight Hair to Shakira-Style Waves

Want to know whether you can make fine, straight hair curly? The answer is yes, you can. This tutorial will show you how to get beautiful curls on straight hair. This simple hack will create gorgeous Shakira-style mermaid waves that you’ll adore.
Tools and materials:
- Leave-in conditioner
- Mousse
- Hairbrush
- Clip
- Hair ties
- Heat protector spray
- Curling iron

1. Leave-in conditioner
You want your hair to be about 90% dry to achieve the look. You can do this on freshly washed, damp hair or just dampen your hair yourself.
If it is bone dry, you can dampen it up with some leave-in conditioner.

2. Mousse
If you usually find that curls do not stay in your hair, I recommend using a mousse before you do your braids. To apply, rub it into your hands and distribute it on either side of your hair.
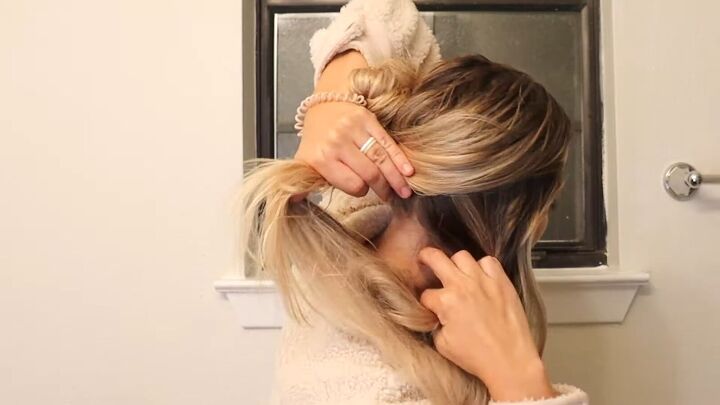
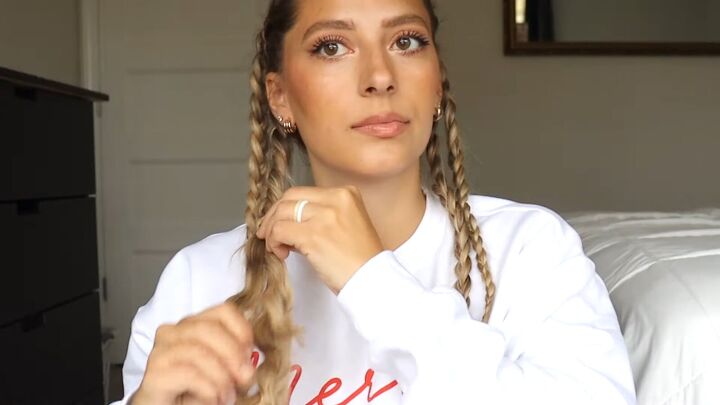
3. Split hair into sections
Next, part your hair down the center and split it into two sections. Put the section that you’re not working with up into a clip.
Then, with the section that you are working with, split it into two again. You’ll do this on both sides, so you’ll have four sections.
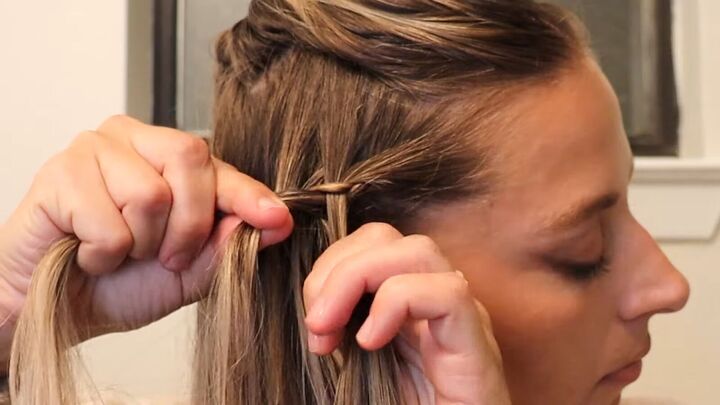
4. Braid the first section
Now with the section of hair you’re working with, you’re going to do a dutch braid.
- First, divide your hair into three equal sections. Start with the back section and cross it under the middle section.
- Then with the front section, cross it under the middle section as well.
- With the back section, grab a section of hair right next to it, add it into the back section, cross them both underneath that middle strand.
- Do the same with the front, add in a section of hair right next to it and cross them both under the middle strand. Add in a section of hair to your back section, combine them, cross them both under that middle section of hair.
- Do the same with the front strand, add in a section of hair to it, cross them under that middle section of hair.
Just keep doing this, adding in hair, crossing it under, adding in hair, crossing it under. It’s the same repetition all the way. If you can do a French braid, you can 100% do a Dutch braid.
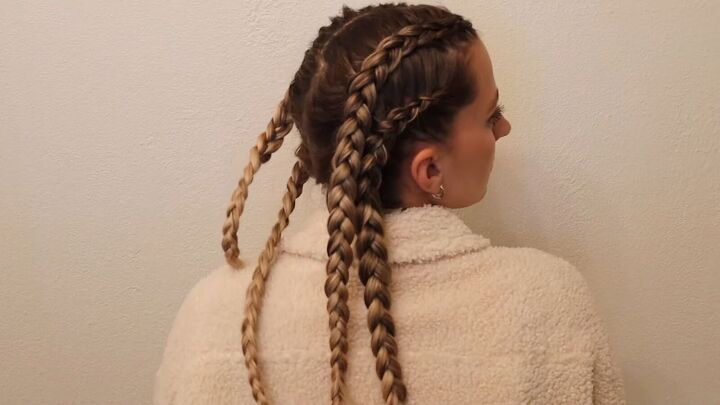
5. Braid the other sections
So now, you’re going to do more Dutch braids with your other three sections of hair. If they’re not the most symmetrical braids and have different thicknesses, that’s ok because you’re just going to sleep in them.
6. Sleep
The next step is to sleep in your braids. Good night! If you’re someone who tosses and turns a lot in her sleep, you could always sleep with a scarf over your hair or a shower cap to protect your hair from frizzing.
7. Take out the braids
It is the next day, I’ve already done my makeup, and I’m ready for the day, so now we just need to take out our braids.
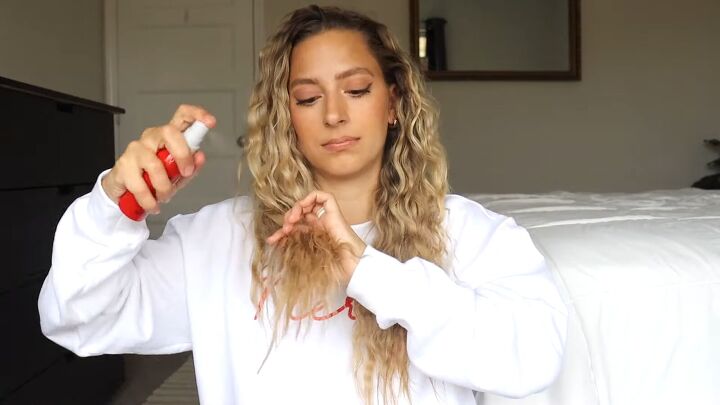
8. Apply heat protector spray
Now you want to use a heat protector spray because you’re going to go in with a curling iron.
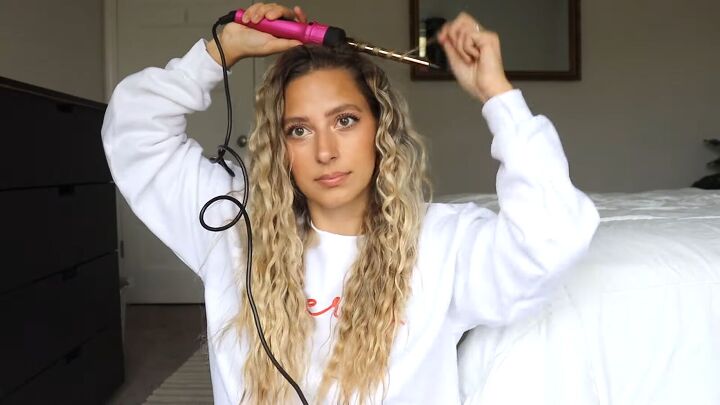
9. Curl your hair
In terms of your curling iron, you could use a half-inch one or a chopstick one. I highly recommend getting one of these if you want really tight, spirally curls. You don’t want to be using a wide one for this look.
My curls are beautiful up top and then towards the ends where I couldn’t really braid them, they’re kind of straight. So that’s what the curling iron is for. We’re going to make this look natural and just like it’s our natural curls.
Aside from curling my ends, I like to take the wand and just curl random pieces throughout.
These four dutch braids are like the foundation of your curls. You can curl any pieces that look like they’ve loosened up or didn’t get braided as tightly. Simply take the strands and wrap them tightly around the wand.
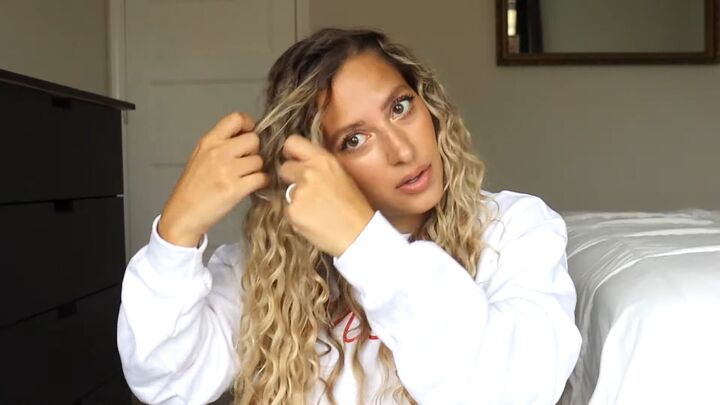
10. Break up the curls
I like to take my fingers and very gently spread the curls apart. You don’t want to loosen them up too much, but you want to break them up a little bit.
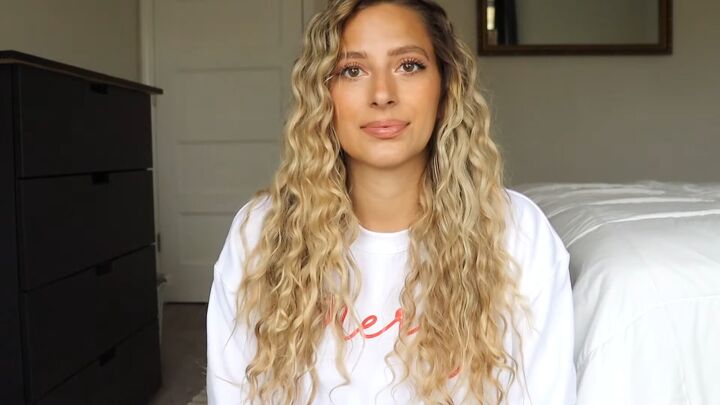
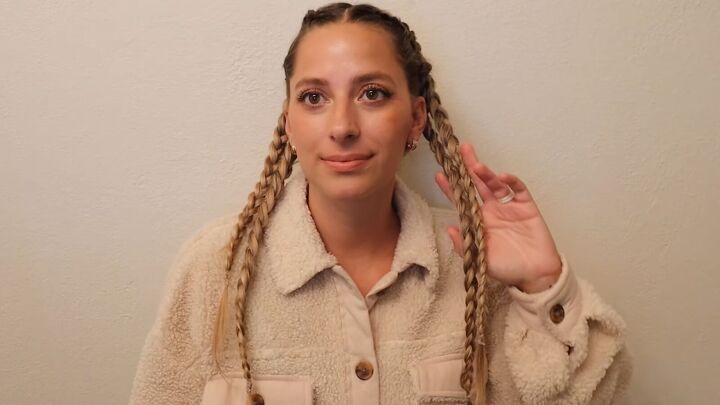
How to make fine hair curly tutorial
Here is the finished look, and I love the outcome of the braids. They look like mermaid waves, like I appeared out of the water, and they also give me Shakira vibes.
My hair is very fine and straight, and the fact that I can pull off these curls for 2-3 days is a miracle. I love feeling like I have curly hair. I hope you’ll give this a try!
The author may collect a small share of sales from the links on this page.


Comments
Join the conversation
Love it!!!
So pretty!! Your braiding instructions are done very well. My hair is/was thick & baby fine. It is hard to make it curl other than a perm wave. I started doing this to my hair some 35 years ago. A tiny barrel curling iron would have been handy. I always had to fiddle with the ends so they didn't hang straight. I had to used a strong hold gel, which would hold for a couple of days. It also helped scrunch the straight ends once I removed the bands & fixed it the way I wanted.