How to Take Care of Nails in Winter: Nail Care Tips & Fun Blue Polish

In this tutorial, I’m going to be walking you through my nail care routine. So if your nails are looking a bit worse for wear, this is for you. I will walk you through everything you need to know about how to take care of your nails in winter. Let's get started.
Tools and materials:
- Cotton round
- Nail polish remover
- Toothbrush
- Soap
- Cuticle oil
- Cuticle pusher
- Cuticle scissors
- Nail file
- Basecoat
- Nail polish
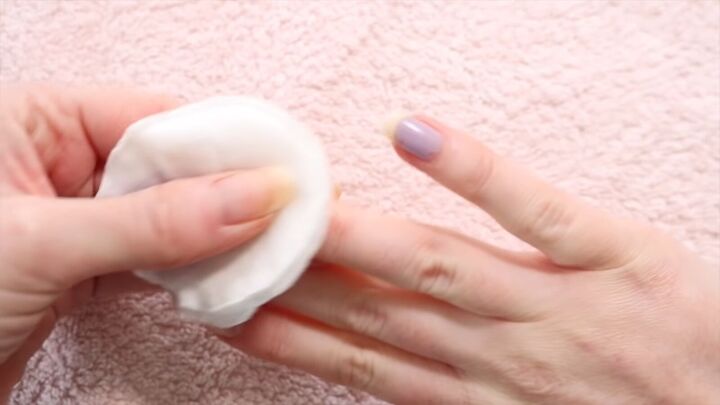
1. Apply nail polish remover
I’m using a special moisturizing nail polish remover because regular nail polish remover is notoriously drying for your nails.
Dab the remover onto a cotton round and gently take any nail polish off your nails. Make sure to also go underneath the nail and right down into the sides.

2. Scrub nails with soap
Next, fill a bowl with warm water, and put some soap on a toothbrush. I’m going to be using a moisturizing soap which is extra care for our hands in the winter and our nails. Then, just scrub your nails with the toothbrush.
Make sure to get underneath the nails and right into the crevices. This is really important after removing the nail polish because nail polish remover is super drying.
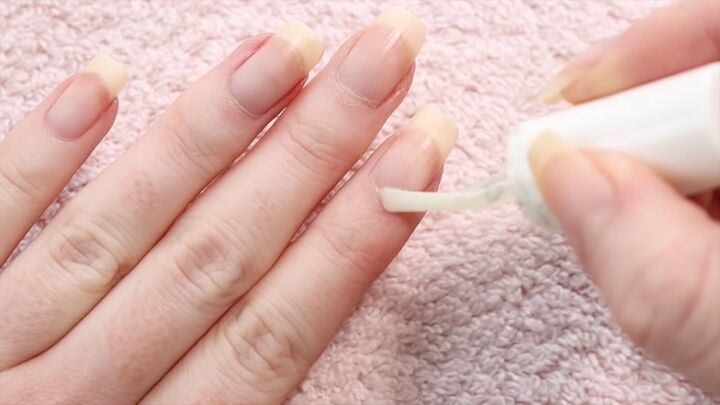
3. Apply cuticle oil
Now your nails are fresh and clean, proceed to brush some cuticle oil on your cuticles. A little bit goes a long way. Once it’s on, massage it in, and leave it for about 5-10 minutes to soften your cuticles.
4. Use a cuticle pusher
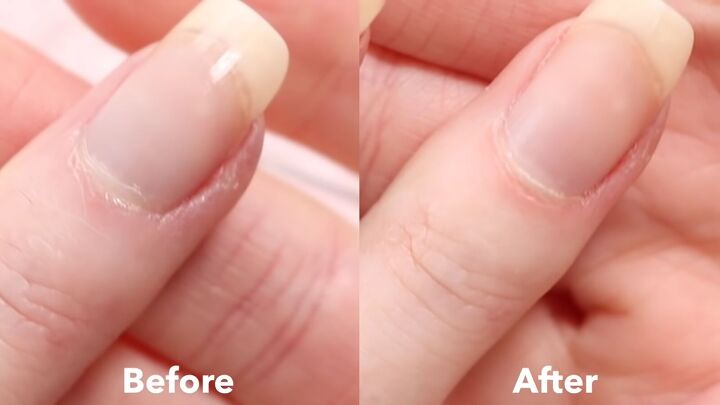
Now take a cuticle pusher, and, really gently, start nudging back your cuticles. Don’t be too forceful; just really lightly nudging.
Once you’ve kind of lifted this bit of skin, if your cuticles are quite overgrown, this is where you’d go in with some cuticle scissors or nippers and gently just cut off the excess cuticle.
It can sometimes look a little white and kind of raw around the edges once you’ve just done them, but it does settle down after about a day.
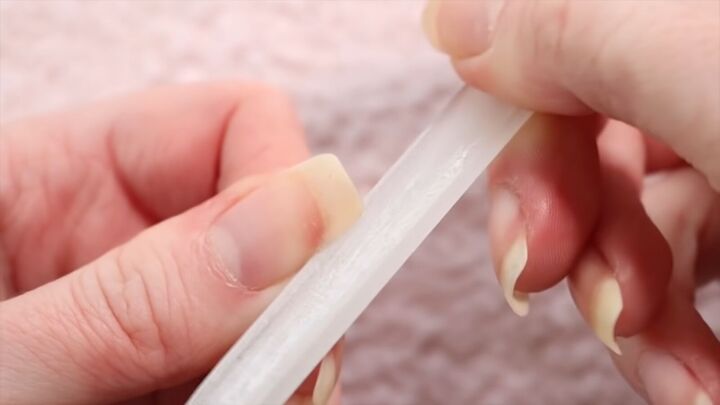
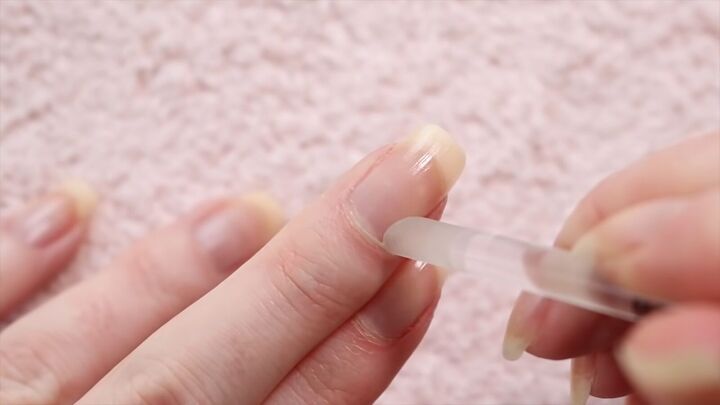
5. File your nails
The next step is to file your nails. I like to use a crystal nail file. If you’re going for a square shape like me, try to go pretty light on the edges so you don’t file them down too much and then go across the top.
I try to get about 1mm off because all that nail at the edge is usually a little bit ragged. Once you’ve got off all you need to, go in a one-way motion to finish it off and make sure that there are no little hanging bits.
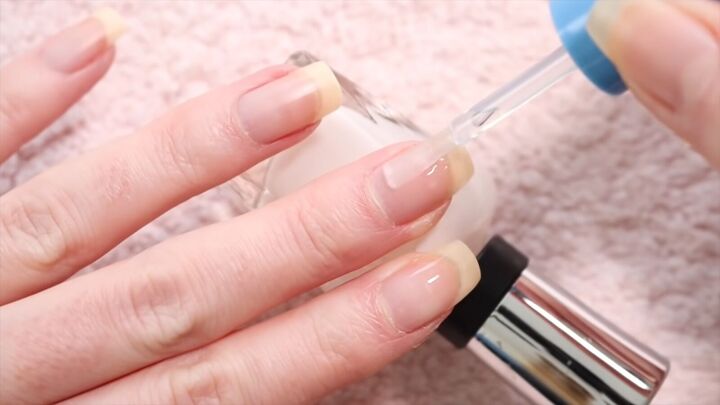
6. Apply a base coat
Now go in with a base coat. In theory, a base coat is supposed to protect your nails from staining from the nail polish. I usually go along the edge of the nail as well, just to seal it in where that fresh raw nail is.
Leave it for at least 5 minutes until you can touch it and it’s not tacky at all.
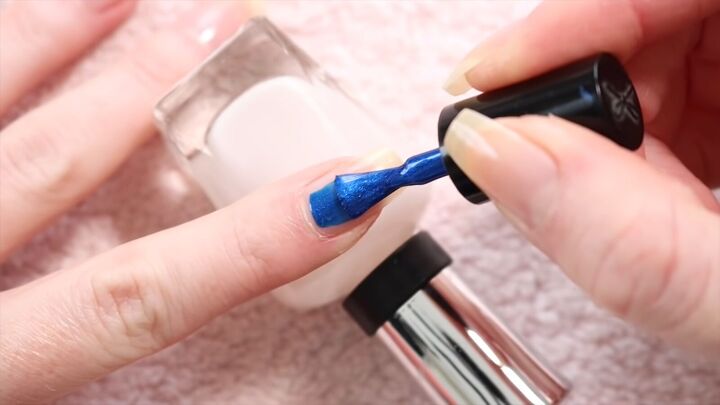
7. Apply first coat of nail polish
Once the base coat is dry, you can apply color. Make sure to get a decent amount on your brush and place it at the base of the nail in the center, push towards the cuticle a little, and then swipe it along. Then, turn the brush around and go on either side.
You don’t want to make the first coat too thick; the key is getting a light, even layer. I leave my thumbs until last because I use them to clean up around the edges of the other nails.
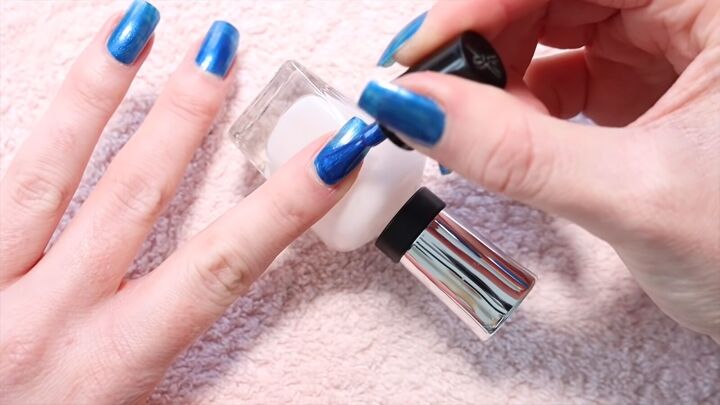
8. Apply second coat
Once the first coat is done, be sure to leave a good length of time before doing the second coat. If you go in with your second coat too fast, it will take forever to dry.
In some cases, it just won’t ever fully dry, and that’s when you’ll find that you get little dents and dashes in your nails when you knock them. I recommend waiting at least 20 minutes, if not longer.
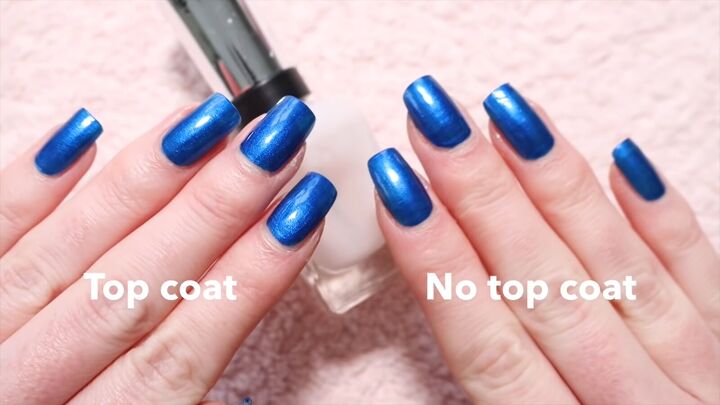
9. Apply top coat
This is where I would usually call it a day, but if I want a really special manicure, then I’d add a top coat. You can definitely see a difference between having a top coat and no top coat. It looks a lot more glossy and more finished.

Winter nail care routine
There we have our finished nails! I absolutely adore this funky blue color. These will probably last me a week or two as the nail polish tends to stay on pretty well. I hope you enjoyed this winter nail care tutorial and that you’ll give it a go yourself!
The author may collect a small share of sales from the links on this page.


Comments
Join the conversation
NEVER USE REMOVER IN YOUR POLISHES THEY SELL NAIL POLISH THINNERS THAT MAKE IT LAST LONGER AND ITS BETTER FOR YOUR POLISH AND NAILS THANKS DEB