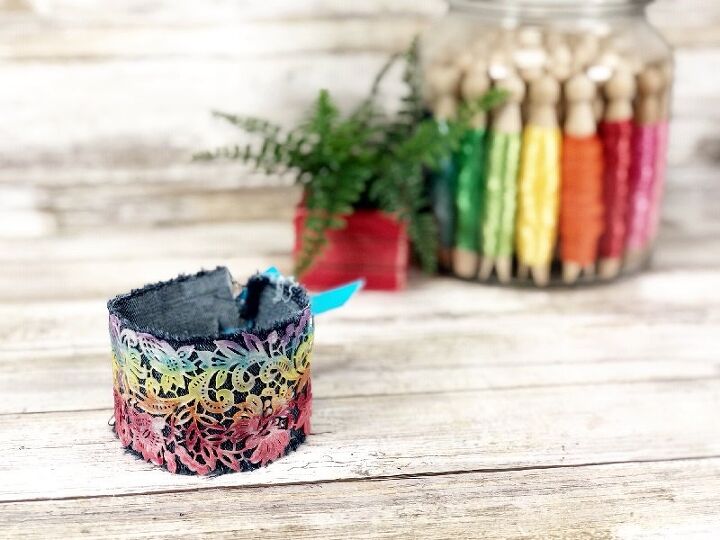
Easy Rainbow Cuff Bracelet With Liquid Sculpey
Y’all know that rainbows are my jam, but ombre rainbows and upcycled denim put me right in heaven. I was recently introduced to Liquid Sculpey® and now I am hooked! It can be custom tinted with any type of permanent dye, so this quick and Easy Rainbow Cuff Bracelet with Liquid Sculpey is the perfect personalized gift idea!
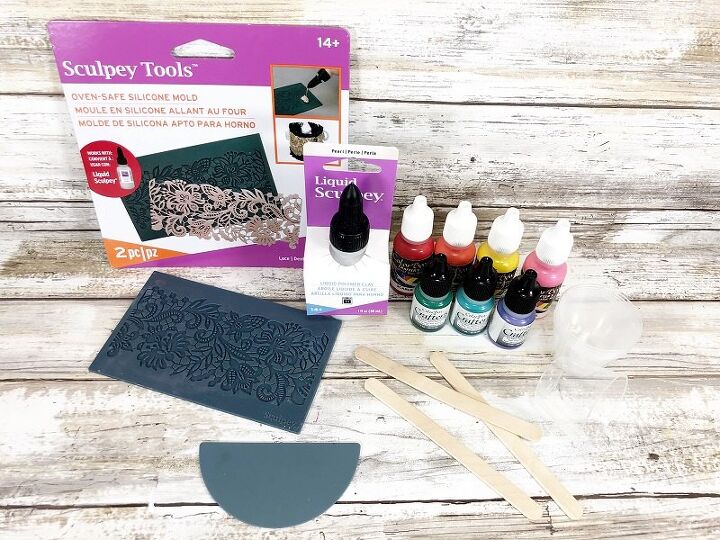
Here’s what you need to make a Rainbow Bracelet:
- Liquid Sculpey® Pearl – 2 oz. bottle
- Sculpey Tools™ Oven-Safe Work Mat
- Sculpey Tools™ Oven-Safe Molds – Lace
- Stamp Pad Pigment Re-inkers – Rainbow Colors
- Mini Measure Cups – Dollar Tree
- Wooden Craft Sticks – Dollar Tree
- Baking Sheet – Dollar Tree
- Oven (mine is electric)
- E6000 Fabri-Fuse Fabric Glue by Eclectic Products
- Paper Towel
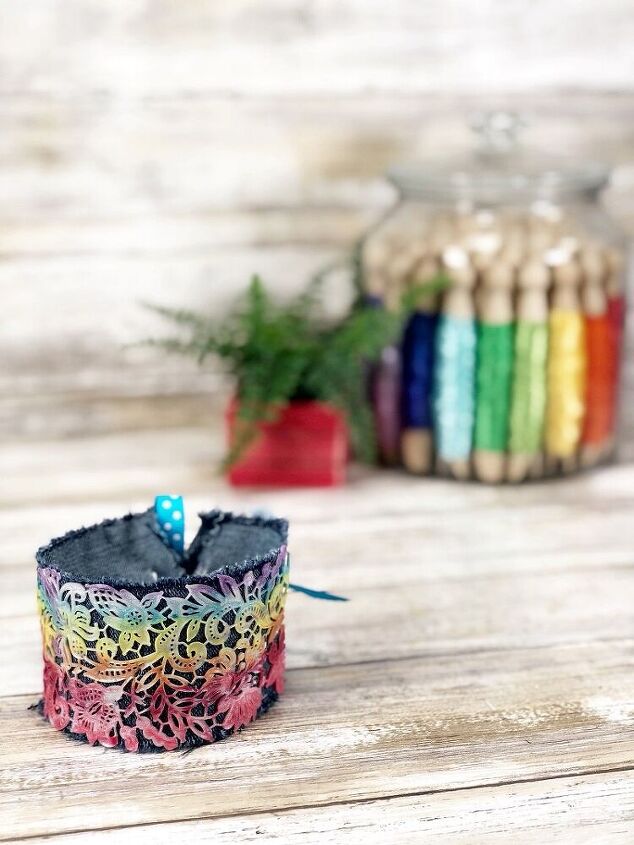
- Scrap of Denim Jeans
- Ribbon
- Scissors – I love my Fiskars!
To begin easy Rainbow Cuff Bracelet with Liquid Sculpey, gather all supplies. Read instructions on the Liquid Sculpey® Pearl and Oven Safe Molds packaging before proceeding. Pre-heat oven to 275 degrees.

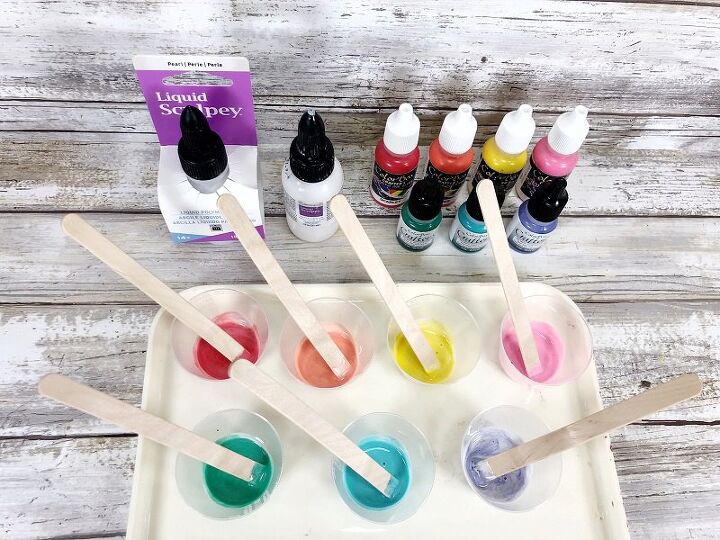
Place seven mini-measure cups on the work surface, twist the Liquid Sculpey Pearl spout open, and add a small amount to each cup. I counted to six while squeezing.
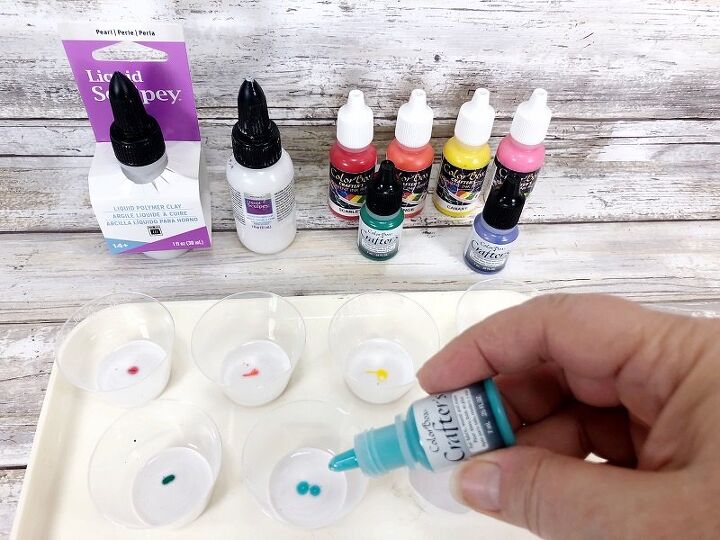
Using stamp pad re-inkers in rainbow colors, squeeze three to four drops of ink into each cup of Liquid Sculpey Pearl. Mix colors thoroughly with a wooden craft stick.
Liquid Sculpey can be colored with any permanent dye, like alcohol ink, stamp pad re-inkers, acrylic paint, chalk pastels, or even liquid food coloring. Test out each method prior to creating your project. I used stamp pad re-inkers because I had them on hand.
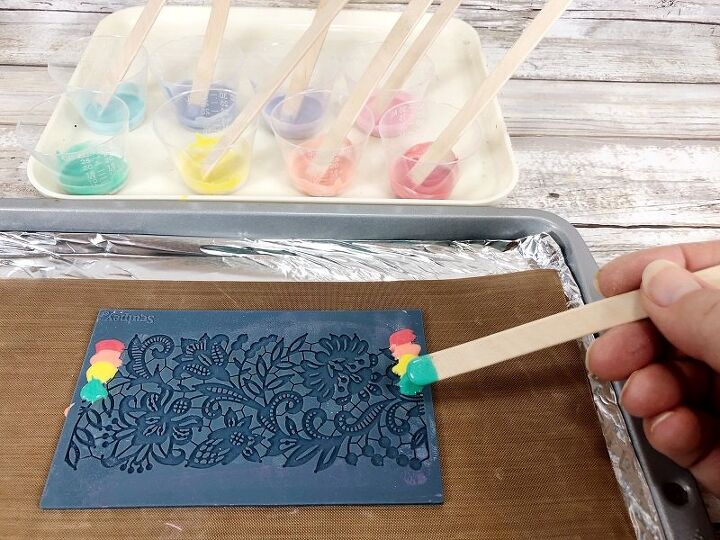
Place the Oven-Safe Work Mat on a baking sheet, and place the Oven Safe Lace Mold on top. Pre-heat mold in the oven according to package directions. Pick up some of the tinted Liquid Sculpey with the wooden craft stick and place several drops of each color, at each end of the lace mold, in rainbow order. I love the free-form look of the drops of color.
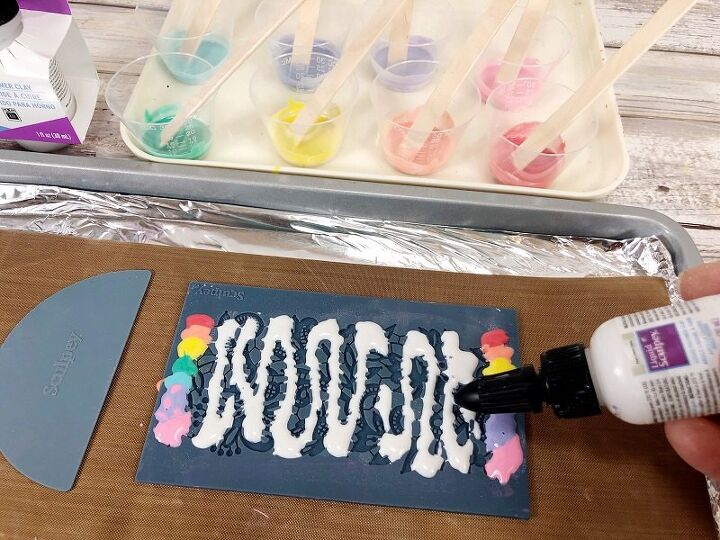
Twist open the Liquid Sculpey Pearl spout and carefully squeeze in a zig-zag pattern on the Lace Mold.
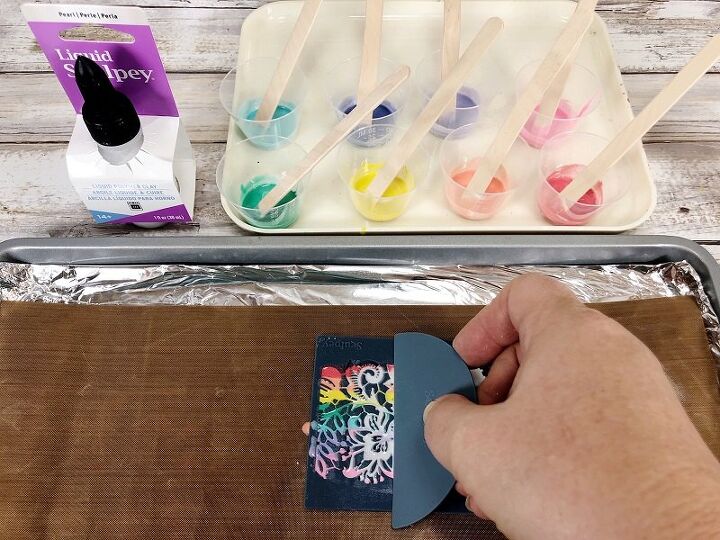
Using the squeegee included in the Lace Mold Package spread the Liquid Sculpey from each end to the center of the mold.
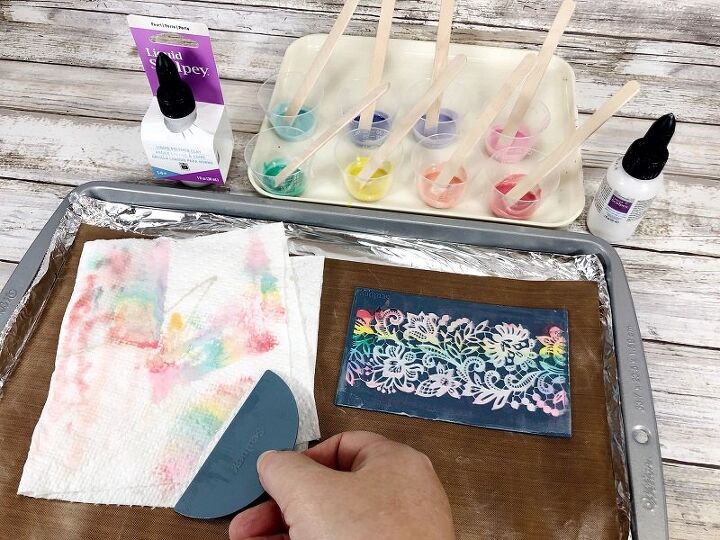
Wipe off any excess Liquid Sculpey onto a paper towel. Bake the Lace Mold in the oven according to the directions on the package. My oven is electric, but if yours is gas, do a test bake first.
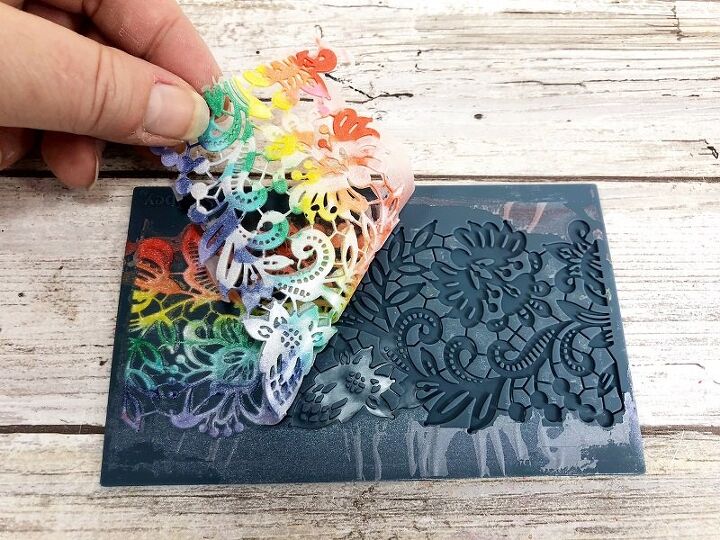
Remove from the oven, allow to cool, and then carefully remove the finished lace from the Oven Safe Mold.
For the rest of the tutorial click through and see how I finished the Easy Rainbow Cuff Bracelet with a pair of old blue jeans!
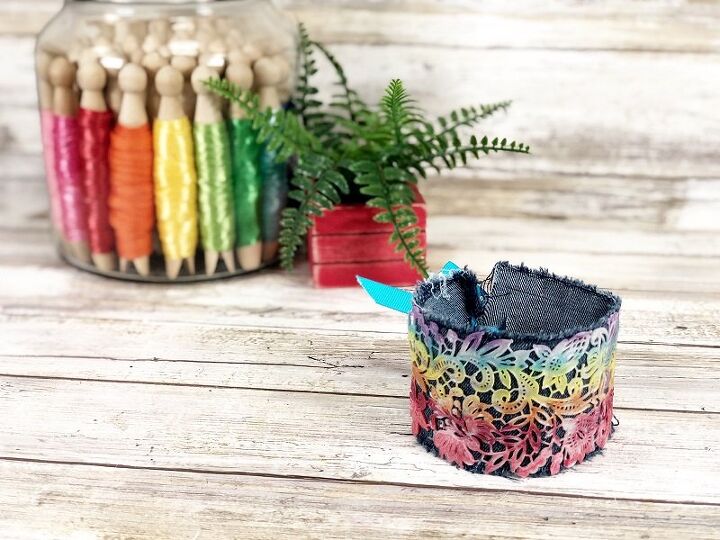
I spent an afternoon experimenting with Liquid Sculpey and now I am seriously hooked. It is a quick and easy craft medium that has a TON of creative possibilities and applications. My Easy Rainbow Cuff Bracelet with Liquid Sculpey takes only 30 minutes to make from start to finish.
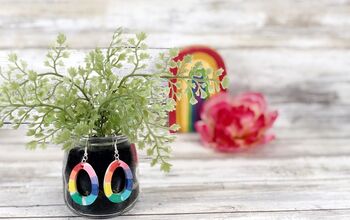
Rainbows are my JAM, so here is another rainbow Liquid Sculpey project that I know you will LOVE!
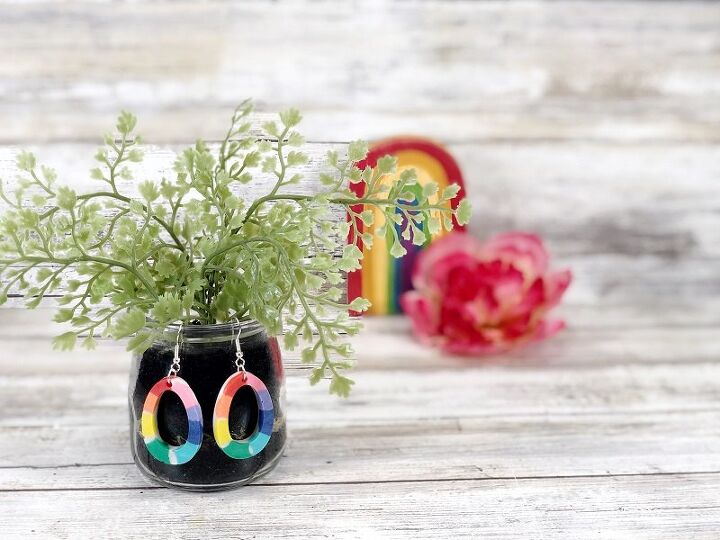
Easy Rainbow Earrings with Liquid Sculpey took only 30 minutes to make.
Thanks for stopping by!
Creatively, Beth
The author may collect a small share of sales from the links on this page.


Comments
Join the conversation
I love the mix of denim and that clay.
So pretty 😍