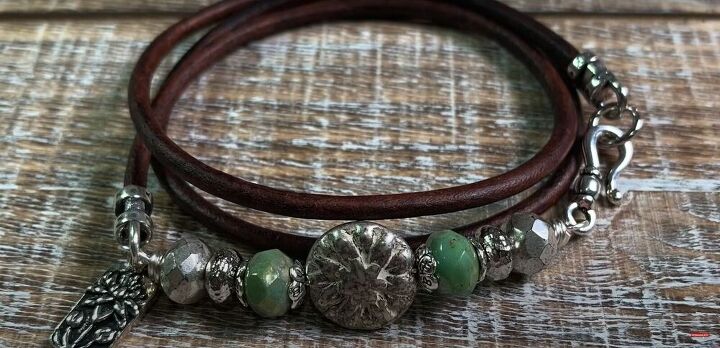
This Simple Tutorial Makes Pretty Leather Bracelets With Beads

The custom leather bracelets you will learn how to make in this tutorial look just like Pandora leather bracelets, but are completely unique to your bead and charm choices.
In this simple tutorial, discover how to make leather bracelets with beads and charms, and you will soon be the proud owner and creator of a gorgeous DIY leather wrap bracelet. Let’s get started!
Tools and materials:
- Leather cord
- 20 gauge silver craft wire
- Beads and charms
- Cord ends
- Large jump ring
- Bead caps
- Wire cutters
- Bent chain nose pliers
- Round nose pliers
- Chain nose pliers
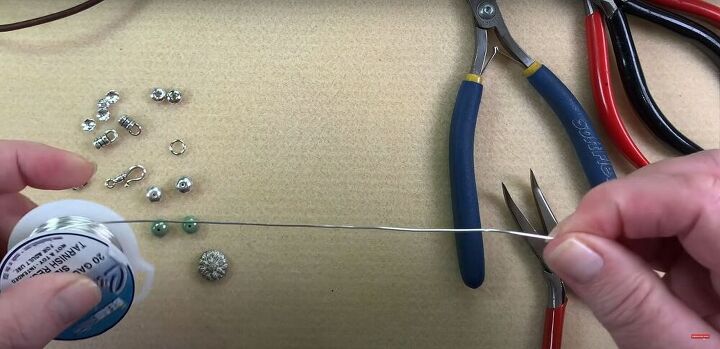
1. Cut the wire
Start by cutting 6-8 inches of wire.
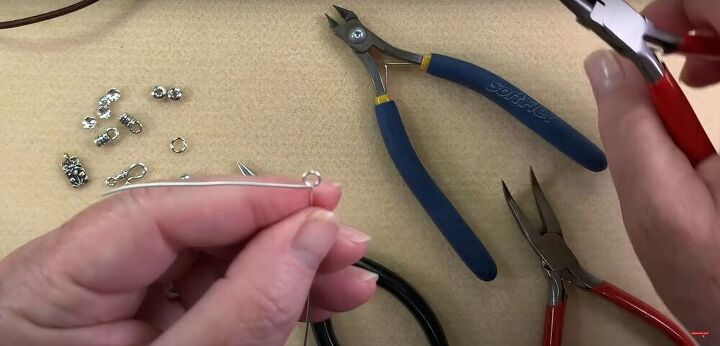
2. Make a wire loop
About two inches down from the end of the wire, make a small round loop using your pliers.
3. Place the hook
Slide the loop on your hook into the loop on the wire, and wrap the shorter length of wire around the bottom of the loop a few times. Cut off the excess wire and use chain nose pliers to press any sharp edges down.
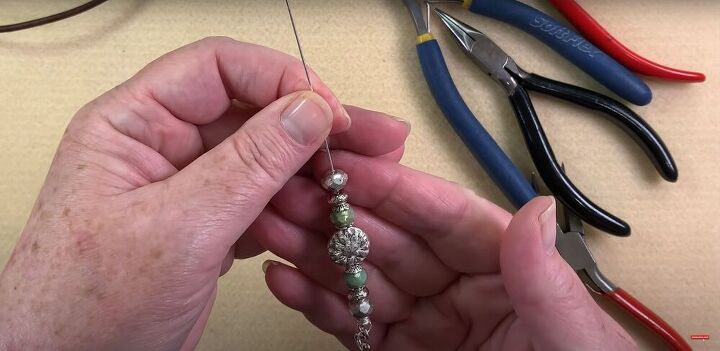
4. Place the beads
Place your beads on the wire in your preferred pattern. You can create any pattern using any types of beads you wish.
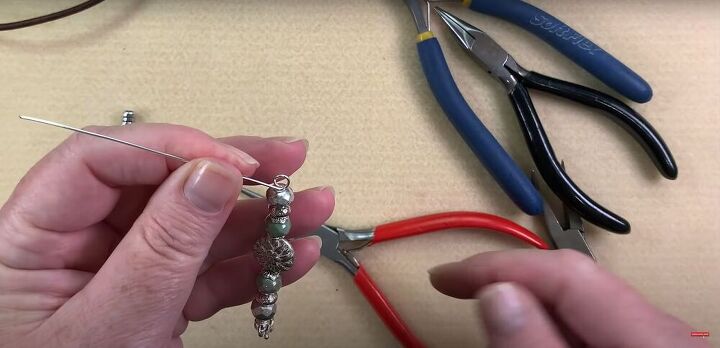
5. Make another loop at the end
Make another loop at the end of the run of beads using the same method shown previously.
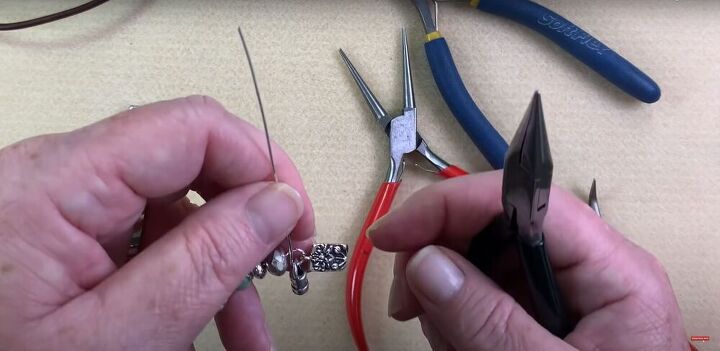
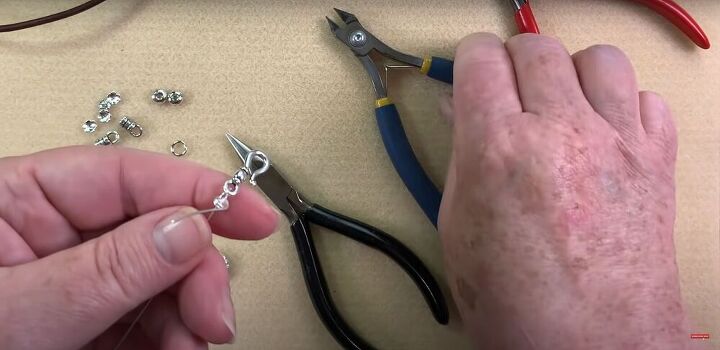
6. Add the charm and cord end
Slide your charm and one cord end down the wire and into the loop. Then, wrap the wire around the bottom of the loop a few times, cut off the excess wire, and press any sharp edges down with chain nose pliers.

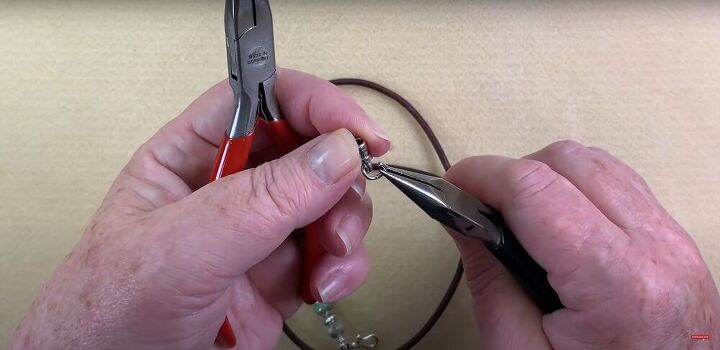
7. Attach the leather cord
To attach the leather cord, insert one end of the cord into the cord end, and push it through so you can just see the tip of the cord coming through the barrel. Then, pull it back a tiny bit.
Once the cord is in place, use chain nose pliers or bent chain nose pliers to crimp the midsection of the cord end, which will press down on the leather cord and hold it in place.
Crimp it a few times and turn it from one side to the other, to make sure you’ve squeezed it as tightly as possible.
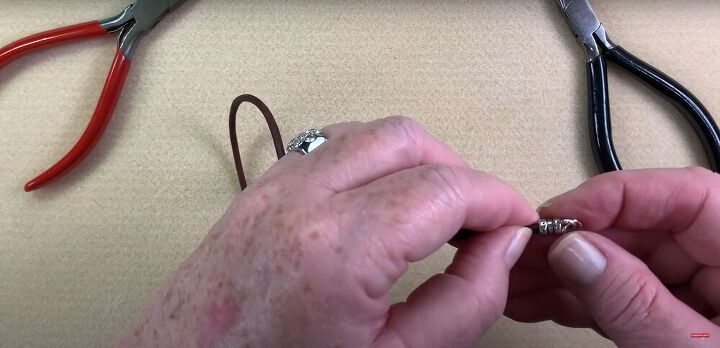
8. Connect the bracelet ends
Next, open the jump ring, place the second cord end on the jump ring, and close the ring well, ensuring there’s no gap, and the ends line up.
9. Attach the cord end
Then, take the cord end with the jump ring attached, and slide the other end of the leather cord into the barrel. Before crimping it, wrap the bracelet around your wrist and make sure it’s a good fit, and the jump ring reaches the hook.
If it’s too long, now is the time to cut the cord to size. Once you’re certain it’s a good fit, you can crimp the cord end on the midsection, as you did previously.
Your beautiful triple-wrap leather bracelet is complete! I hope you enjoyed this tutorial on how to make leather bracelets with beads. If you make your own custom leather beaded bracelets, be sure to hare them, so I can see your bead and charm designs!
The author may collect a small share of sales from the links on this page.


Comments
Join the conversation