Easy Wire Wrap Bracelet Tutorial

In this jewelry tutorial, I’m going to show you how to make a wire wrap bracelet.
If you’re fairly new to the world of jewelry making, this is a great gateway DIY for you as it will allow you to familiarize yourself with some basic jewelry-making techniques. Without further ado, let’s jump on in!
Tools and materials:
- 20 gauge silver wire
- Wire wrapped links
- Beads
- Lobster clasp
- Jump rings
- Wire cutters
- Round nose pliers
- Chain nose pliers
- Bent nose pliers
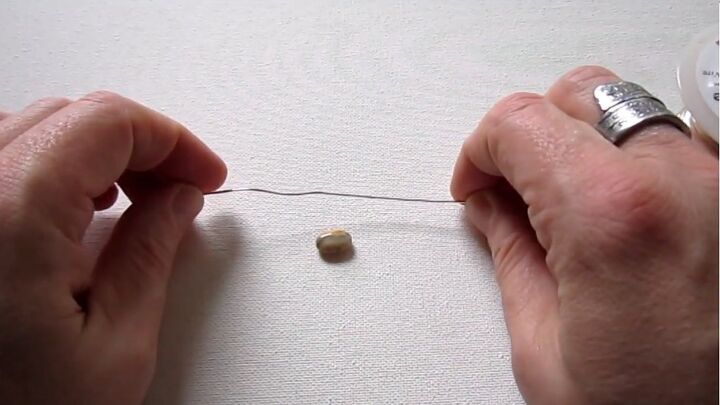
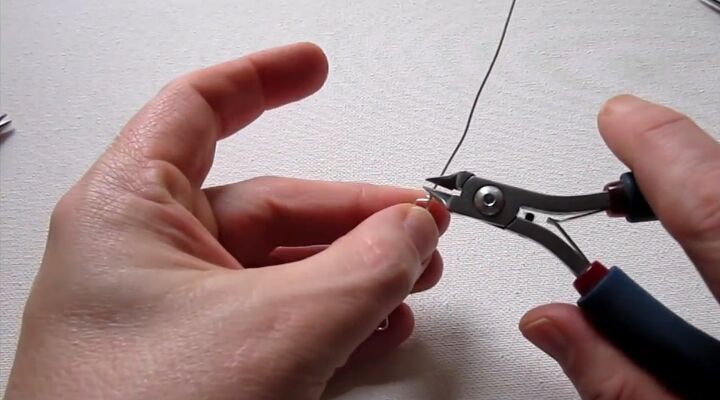
1. Cut the wire
Cut a piece of wire a few inches longer than your bead.
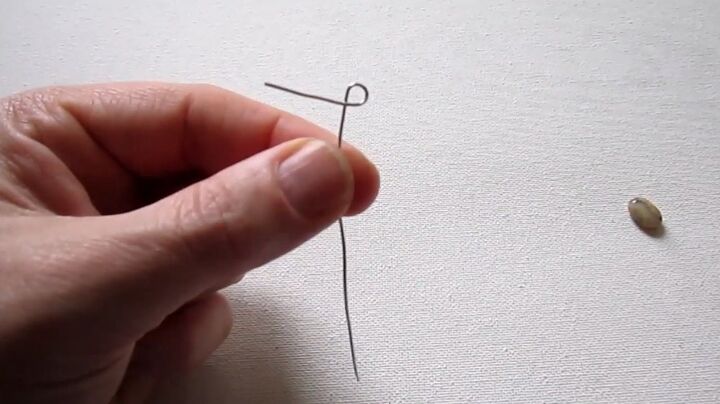
2. Make a loop
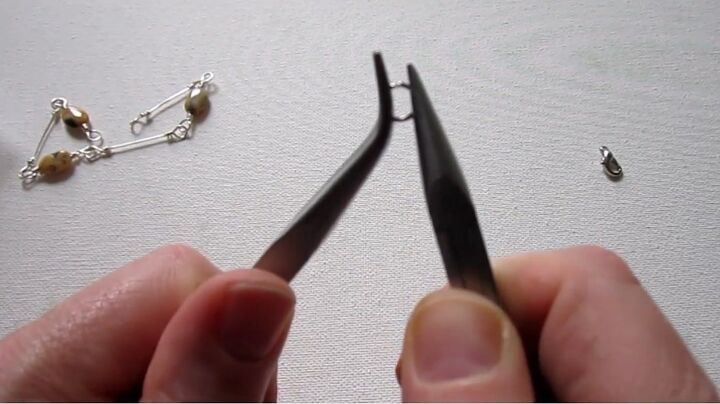
Hold the wire in your round nose pliers about an inch from the top of the wire.
Then, bend the top of the wire around to form a loop. Make a mark on your pliers with a marker pen at the point where you’re holding the wire, and we just do this to make sure the loops are all the same size.
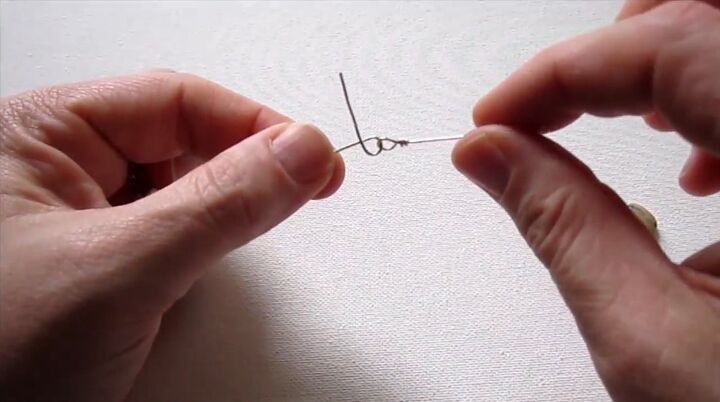
3. Attach a link
Slide one of the links into the loop.
4. Wrap the wire
Now complete the wire wrap loop.
To do this, hold the loop with the chain nose pliers and wrap the wire around once with your fingers.
While you’re doing that, pull out the long wire straight so the loop ends up being straight and centered on the wire.
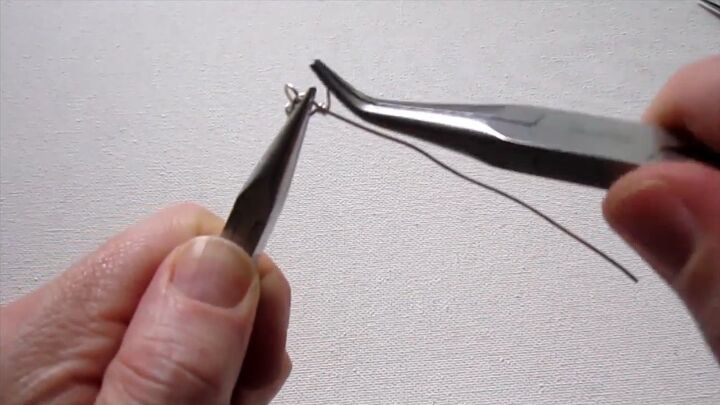
Then, wrap it around a couple more times using the bent nose pliers to help you.
5. Trim the wire
Once done, we're going to trim off the excess wire by making a flush cut. This means cutting with the flat back of the wire cutters toward the work. The other way makes a pinch cut which is kind of pokey.
Then, hold the wrapped wire with your chain nose pliers and go around in the same direction you were going in before to make sure nothing is poking out.
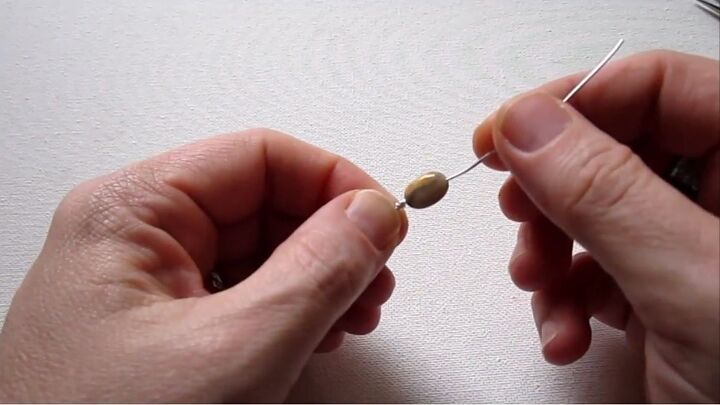
6. Add a bead
Now slide on a bead.

7. Make another loop
Hold the wire in your round nose pliers about ¼ of an inch above the bead. Wind it up so the loops will go the same way from the bottom of the bead to the top.
Make sure to line the wire up on your pliers at the mark so the loop will be the same size again. Wrap the wire around the pliers to form a loop.
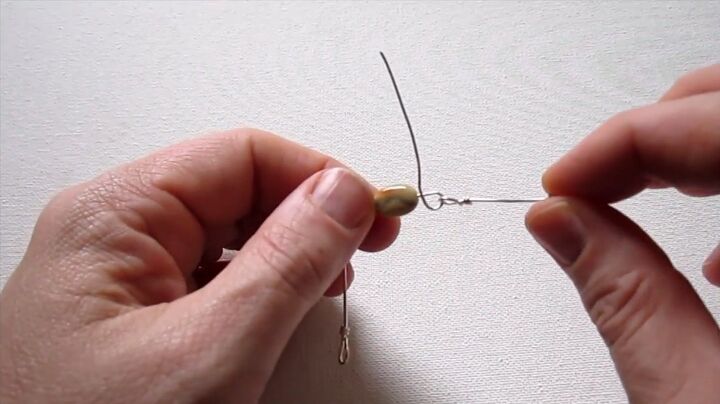
8. Add a link
On the other side, add another wire-wrapped link. Then hold the loop you just formed with the chain nose pliers.
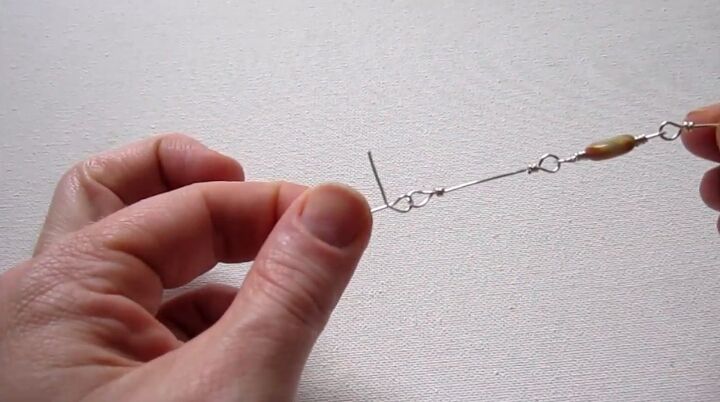
Wrap the wire around once and pull the bead out of the way so that the loop will be straight and centered. Proceed to wrap around more times.
Once done, trim off the excess making a flush cut, and make sure the end is not poking out.
9. Repeat the process
Continue to do this same thing again. Every other link is going to be a bead.
You have to interlock each side by forming a loop, sliding the end into one of the links, and then completing the wraps. Do this till your bracelet is long enough.
10. Adjust the size with jump rings
If the size doesn’t work out perfectly with the wire-wrapped bead links and the wire-wrapped chain links and it’s a bit too small, you can adjust by adding jump rings at the end.
So, open up a jump ring with bent nose pliers and chain nose pliers. Hold steady with one pair of pliers and pull toward you with the other, you do not want to go out because you're trying to keep the round shape.
Check if it fits your wrist. If the size is good for your wrist, you can attach the lobster clasp, then close it by doing the same thing in reverse. If it’s still too small you can add a couple of jump rings to add more length.

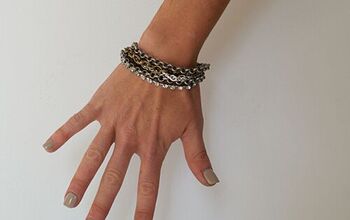
Wire wrap bracelet
Here is the finished bracelet, it has a simple design yet looks sophisticated and elegant.

It works well by itself, or you might like to layer it up with more bracelets in different designs.
If you enjoyed this tutorial, check out my post on How to Make Dangle Earrings with Charms.
The author may collect a small share of sales from the links on this page.


Comments
Join the conversation