Make These Breathtaking DIY Fairy Earrings

It’s time to get enchanted and whisked away into a fairytale world! If you want to know how to make DIY polymer clay fairy earrings with this slab earrings technique, then you've come to the right tutorial! And, wait till you see the results; it’s breathtaking! These DIY fairy earrings are the most fitting way to set the mood for a magical experience.
Tools and materials:
- Conditioned polymer clay of various colors
- Acrylic roller
- Slicer
- Ball stylus
- Needle
- Cookie Cutters
- Paper
Roll the main piece
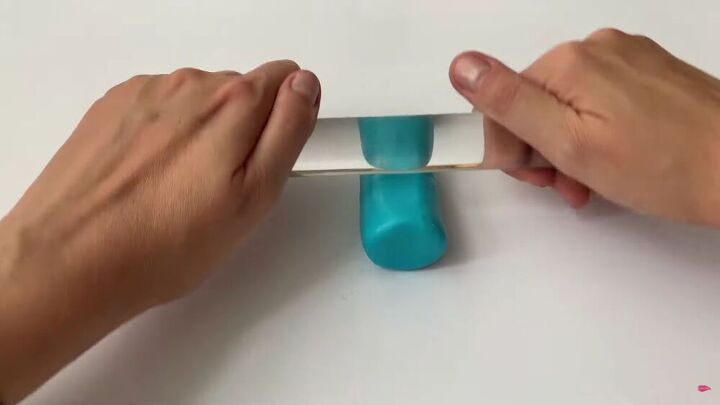
Ok, let’s start with the slab. Using an acrylic roller, carefully roll the clay until it shapes into a flat slab.
TIP-
You can also use your fingers to pull and tug at the corners gently.
Add the details
Take one color and roll it out until it shapes into a super ultra-thin roll. Then, cut them into long, multi-sized pieces. They should have a wispy-like effect.
These are the tree branches, so go ahead and lay them out on our slab accordingly.
Next, take a green color, roll the clay into a thin tube, and cut small, equal pieces.
Shape each piece into a leaf. Flatten it with your fingers and pinch the sides, as shown.
Now, repeat this step with four different hues of green.
Add the leaves to the branches, and with a pin or toothpick, create indentations for an in-depth effect.
Here’s the final look of these stunning leaves! Yes, it does take a while to create this, but again, these DIY clay fairy earrings are worth every effort!
Using white clay, create thin tube-like structures and place them at the bottom of the slab. These are the stalks of the mushrooms.
With red clay, shape out mushroom tops by flattening them in between your fingers. Then, add them to your white stalks. Make sure to make different-sized mushrooms.
Add white smaller mushroom tops to the stalks and add some lines, too.
To finish off the mushroom heads, add tiny white circles to the red areas.
Now for some enchanted flowers. Roll green clay the same way as you rolled the branches and place them in between the mushrooms. Then, with some bright orange clay, add small circles to the ends of the green stalks. Make sure to add different hues for a stunning effect.
With your pin, create dot indentations along the grass and green stalks.
Continue the process throughout the bottom half.
Add more green stalks for a fuller effect.
Make the fairies
Now it’s time to make the magical fairies. Start with the legs and dress. I used a lovely rich purple color for the dress.
Go ahead and add the arms, head, and hair.
Add the wings. The shape is kind of like a bigger petal shape with the ends pinched in. Place it on an angle, as shown. Then, add some indentations to the wings.
Also, add smaller wings to the bottom.
Add more cute fairies to the entire slab. As you can see, I placed mine between the branches, too. Then, finish off your creation with a yellow moon, yellow stars, white dots on the bottom area, and orange circles between the leaves.
Cut the DIY fairy earrings
Now, it’s time to cut your creation to make your breathtaking DIY fairy earrings. Here, I used an oval shape cutter.
Also, I used a round cutter for the top half.
Wow, wow, wow! Would you look at that? That’s seriously a work of art right there! And while these DIY fairy earrings do take around 5 hours to make, it’s pretty straightforward to create in terms of the technique involved. All you need is a little imagination and let your creative juices flow. I hope you feel inspired by this DIY fairy earrings tutorial. I can’t wait for you to try this yourself!
Enjoyed the project?
Suggested materials:
- Conditioned polymer clay of various colors
- Acrylic roller
- Slicer
- Ball stylus
- Needle
- Cookie cutters
- Paper
The author may collect a small share of sales from the links on this page.







Comments
Join the conversation
Super Cute! This definitely takes talent and patience...I don't have the talent, LOL. Great Job and Thanks for Sharing!
GORGEOUS!