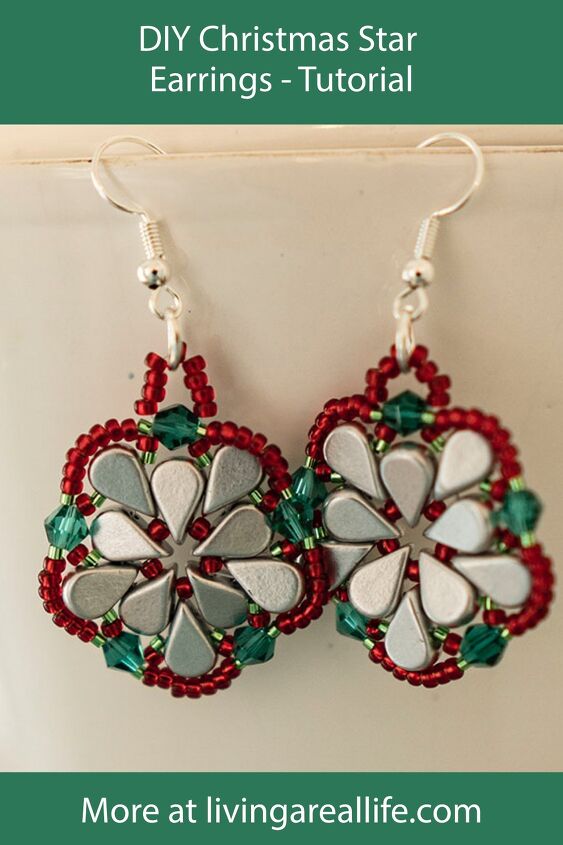
How to Make Christmas Star Earrings
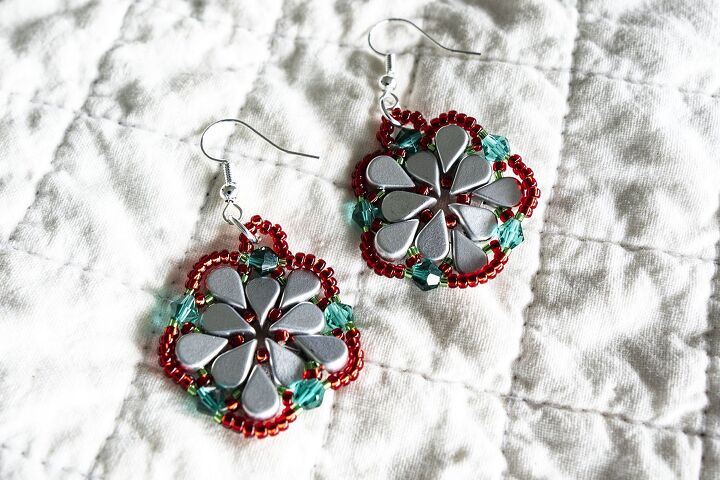
How to Make Christmas Star Earrings
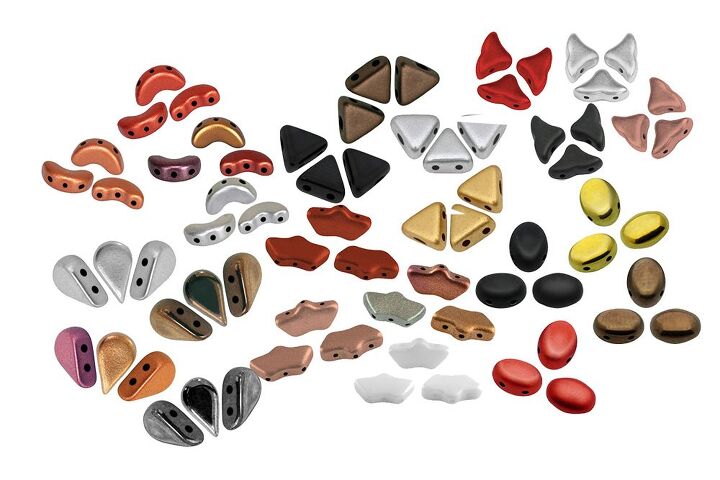
A few weeks ago we had some exciting news! We are now the only authorised reseller of Les Perles Par Puca. These beads are amazing – they come in really unusual shapes and beautiful colours. They are most commonly used in bead weaving but I’m sure I will find other ways to use them.
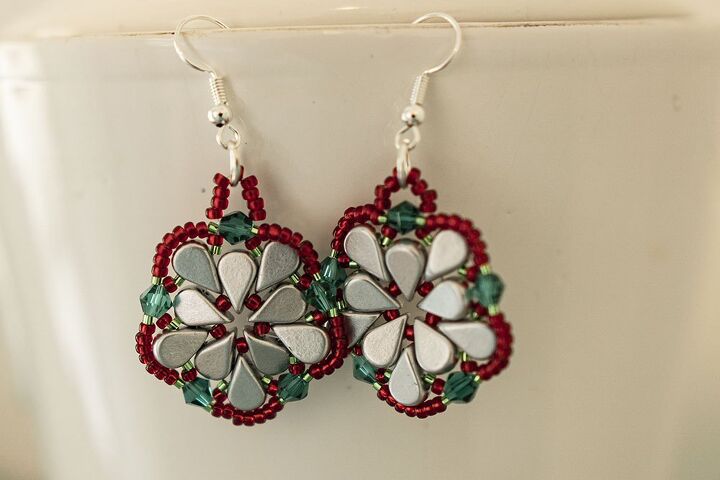
This week I decided to tryout some of the new beads by creating these Christmas Star Earrings. I’m by no means an expert at bead weaving so this was as much as experiment as anything. I like the results. Let me know what you think. If you didn’t want earrings, you could add this to a chain and make it into a necklace.
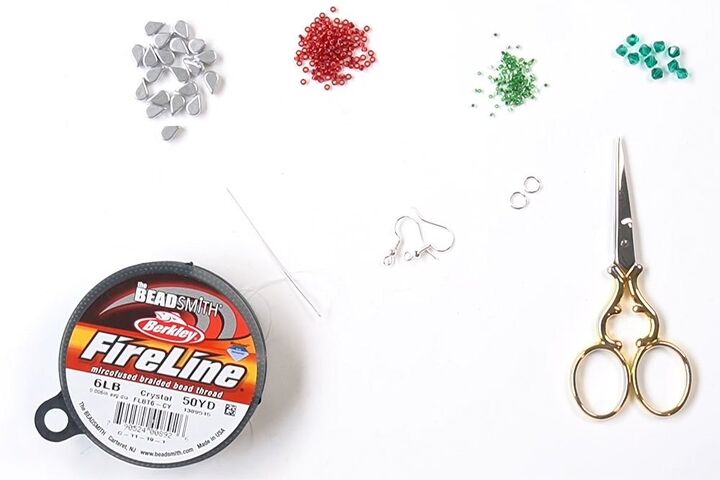
Materials
The materials given are for two stars which will make one pair of earrings. If you wish to make a necklace, only make one star and use half of the beads suggested.
- 8x5mm Silver Aluminium Mat Amos Par Puca Beads x20
- 11/0 Ruby Miyuki Silver Lined Seed Beads
- 15/0 Light Green Miyuki Delica Silver Lined Seed Beads
- 6mm Silver Jump Ring x2
- 19mm Silver Twist Ear Hooks x2
- 3mm Teal Crystal Glass Bicone x5
- Crystal Fireline
Tools
- Chain nose pliers x2
- Beading Needle
- Sharp Pointed Scissors
Instructions
Watch the video or read the instructions below.
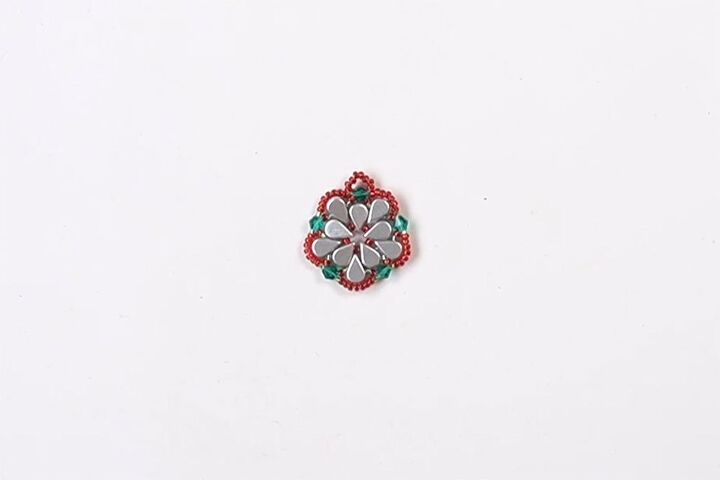
First Round
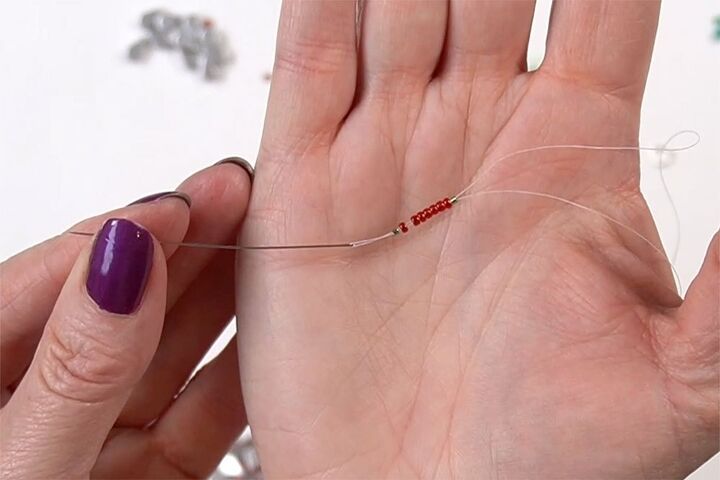
Thread a long piece of Fireline onto your needle. Alternating, thread on five of each of the Amos and 11/0 seed beads.
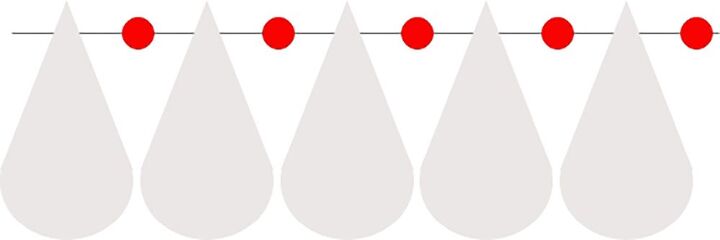
Thread the needle back through the beads from the beginning and pull up to form a circle. Tie a double knot, making sure that there are no gaps. Trim off the short end very close to the knot.
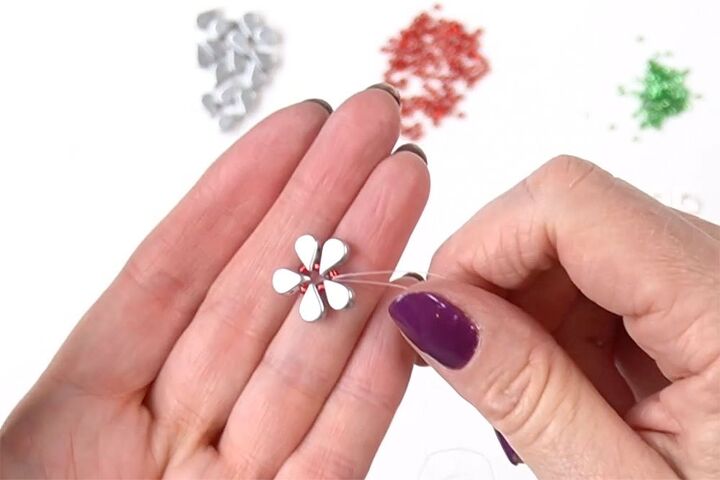
Second Round
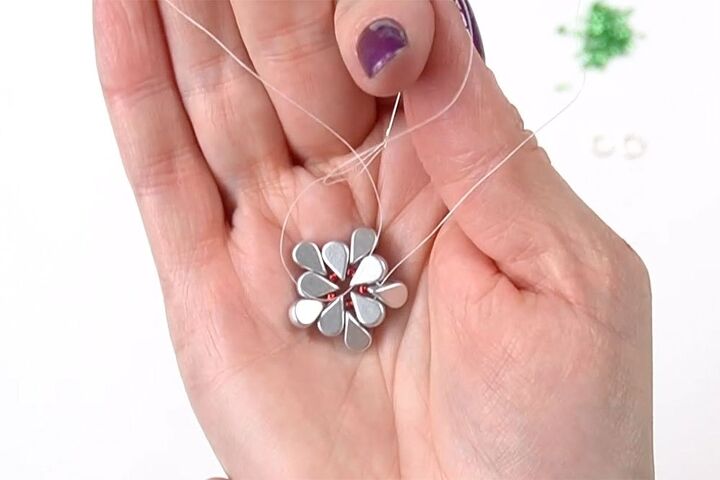
Your thread will be coming out of one of the bottom holes of the Amos bead. Thread the needle through the top hole of the same bead and turn your work over.
Thread one Amos bead (bottom hole) then thread your needle through the top hole of the next Amos bead. Continue until you had added five more Amos beads.

Reinforce by going through all of the same holes again.
Third Round
Your thread should be coming out of the bottom hold of one of the Amos beads. Thread the needle through the top hole of the same bead. Turn your work over.
Thread on beads in the following order:
- 15/0 Light Green Seed Bead
- 11/0 Ruby Seed Bead
- 3mm Teal Bicone
- 11/0 Ruby Seed Bead
- 15/0 Light Green Seed Bead
Thread the needle through the top hole of the next Amos bead.
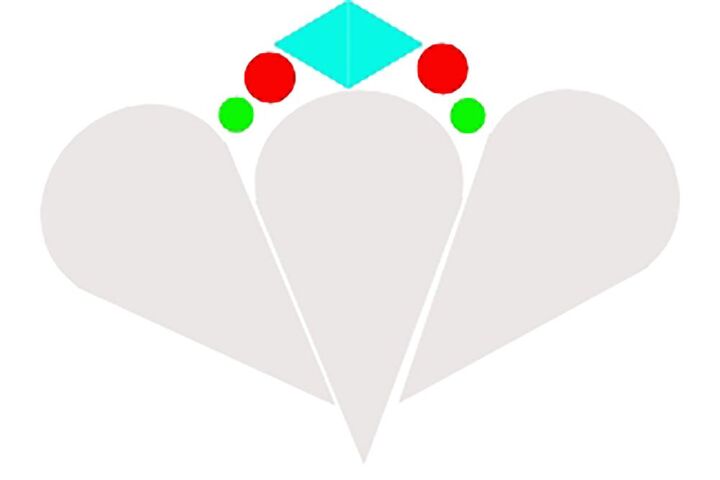
Repeat this until you have gone all the way around. Reinforce by threading your needle through all the beads again.
End with the thread coming out of the bicone.
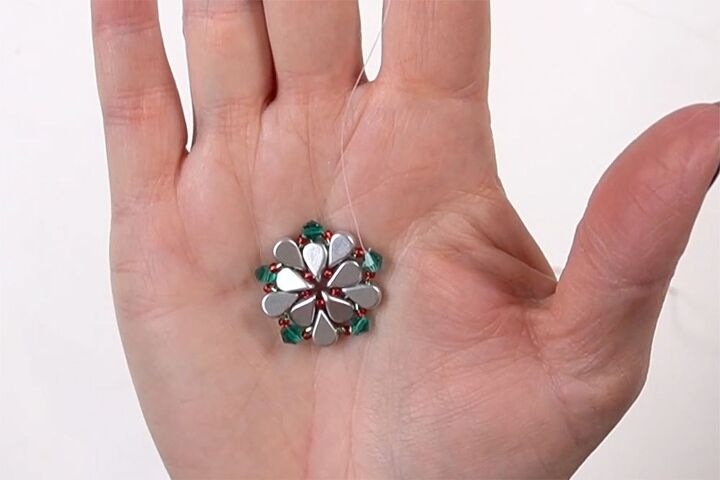
Fourth Round
Thread on beads in the following order:
- 15/0 Light Green Seed Bead x1
- 11/0 Ruby Seed Bead x7
- 15/0 Light Green Seed Bead x1
Thread the needle through the next bicone.
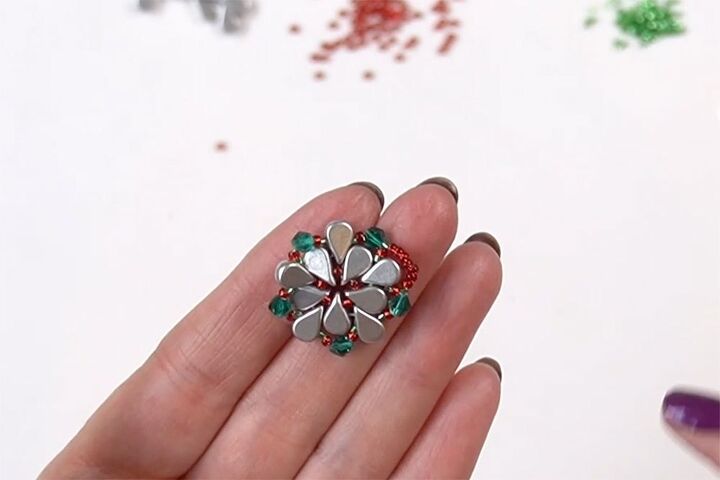
Repeat until you have gone all the way around.
Reinforce by going through all the beads again, ending with your thread coming out of one of the bicones.
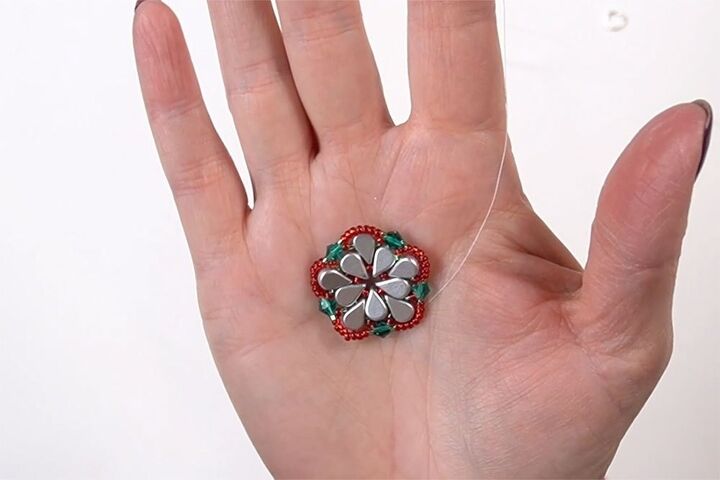
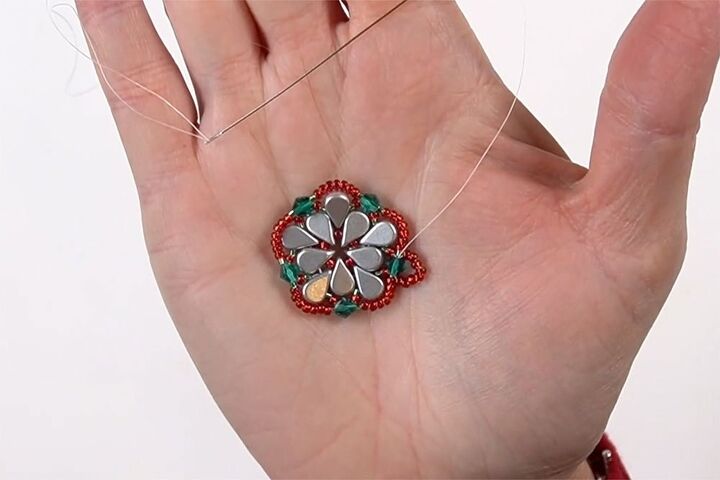
Making the Loop
Thread eight Ruby Seed Beads onto your needle. Thread your needle through the bicone, coming in from the opposite side to where your thread is coming out. Pull the thread up to form a loop.
Reinforce several times by threading the needle back through all of the seed beads and the bicone. You want to make sure that this is secure as it will hold the jump ring and get quite a bit of wear. I went through the beads two more times, ending with my thread coming out of the bicone.
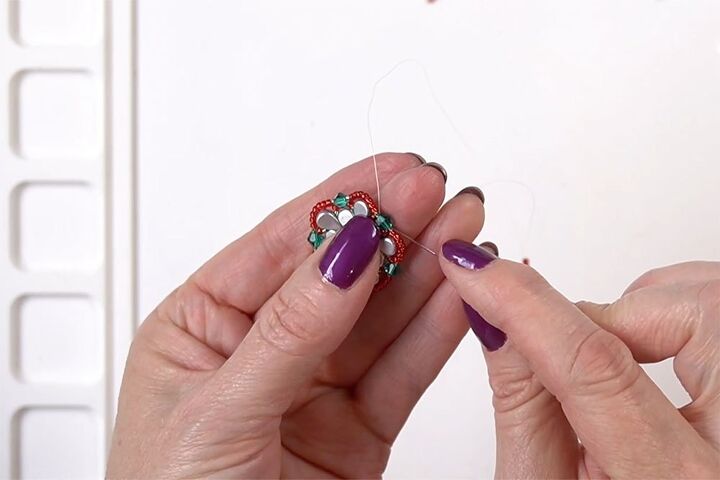
Finishing Off
Thread the needle down through the closest Ruby and Light Green Seed Beads.

Now loop your needle under the seed beads and put your needle through the loop to form a knot. Pull the knot tight making sure that it’s sitting between the beads. Repeat.
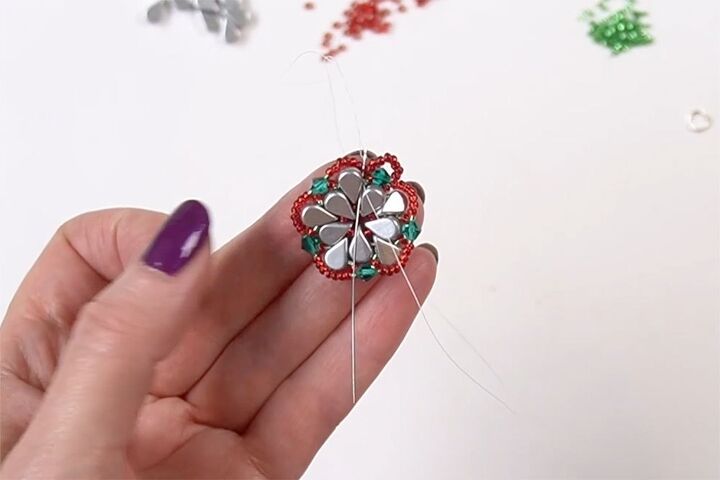
Thread the needle through the closets Amos bead.
Trim off the thread very close to the bead.
Adding the Earring Findings
Open the jump ring using your chain nose pliers. If you have never used jump rings before, watch this video.
Thread on the component you have made and the ear hook. Close the jump ring.
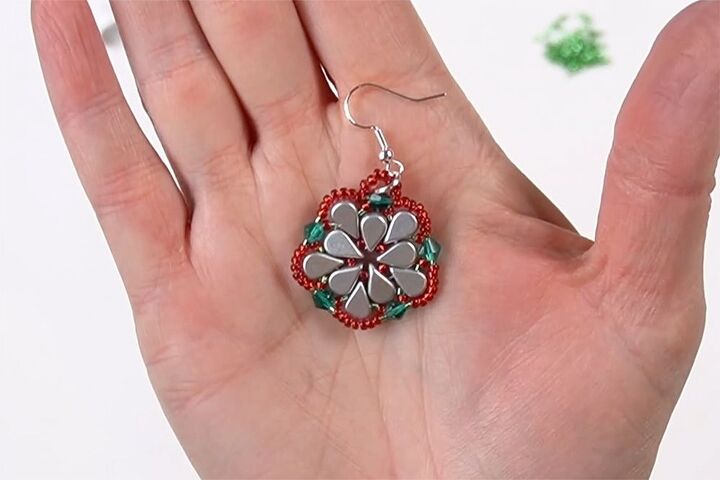
If you are wanting to make a necklace instead of earrings, thread on the chain instead of the ear hook.
For earrings, repeat the process.
This is going to be my last jewellery tutorial for 2021. I hope you have a wonderful Christmas and New Year. See you in 2022.
PIN FOR INSPIRATION AND SHARE WITH YOUR FRIENDS!!
⇓ PIN THIS ⇓
If you like my blog be sure to click on the RECOMMENDED button and SHARE it with your friends! It’s the best way for my blog to grow. I would love for you to be part of my family so sign up to receive my emails. Every time I post a blog, I will send you an update email. Also, follow me on Facebook HERE, Instagram HERE, and Pinterest HERE.
Come by and say Hey!
The author may collect a small share of sales from the links on this page.


Comments
Join the conversation