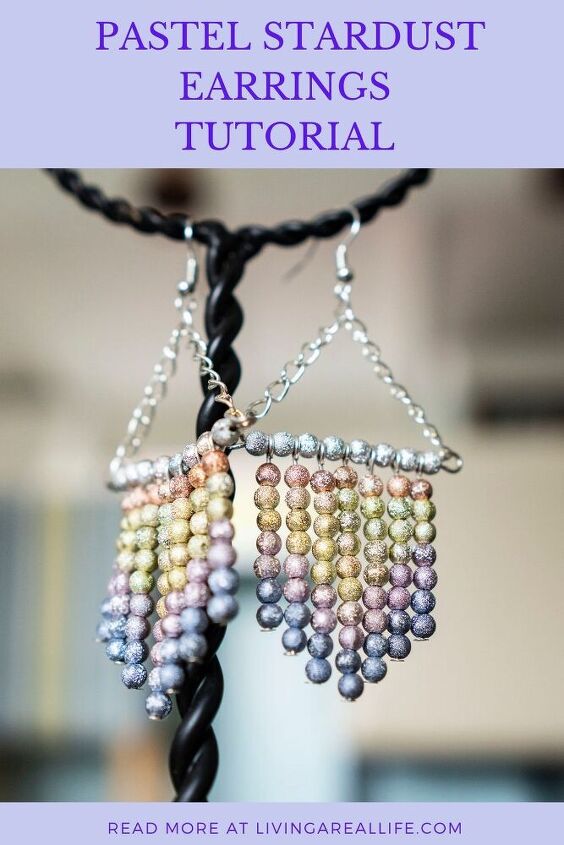
Pastel Stardust Earrings and Giveaway
Pastel Stardust Earrings and Giveaway
I’m a pastel girl! I love pastel colours – they make me happy. How do you feel about pastels?
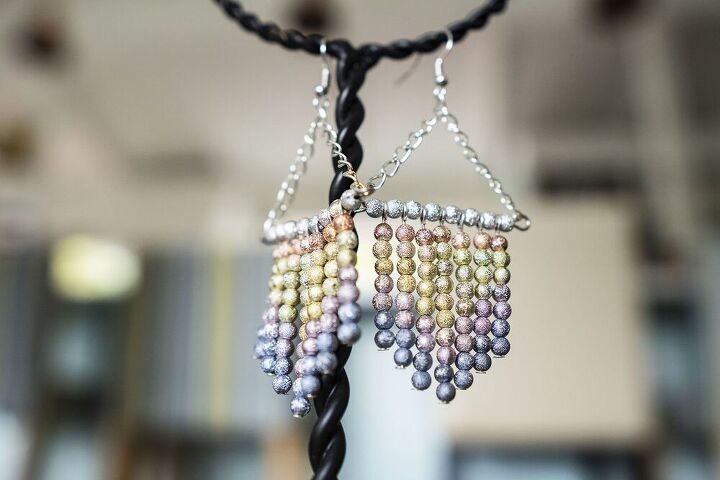
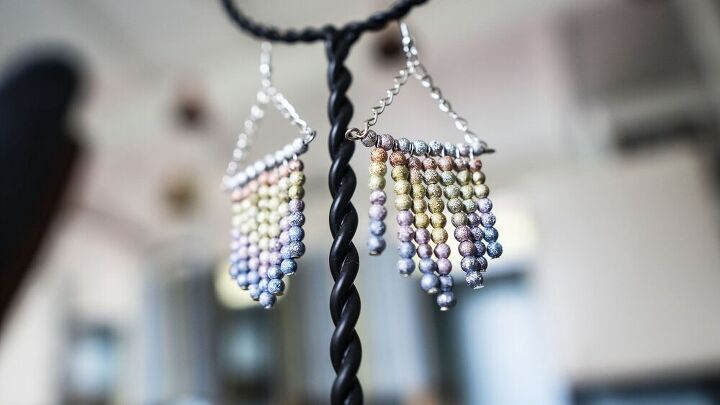
This week, I’m sharing a tutorial on how to make these wonderful sparkly stardust earrings. They are called pastel stardust earrings because the beads are called Stardust Beads, and they come in these wonderful pastel colours.
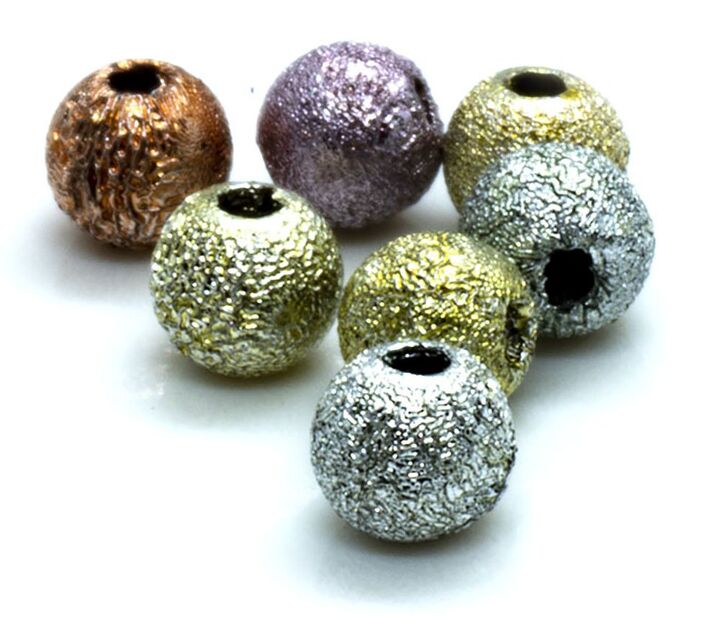
You can see from this closeup photo of the beads that they look like they have been sprinkled with stardust.
I also wanted to experiment with several things when I made these earrings.
First, I wanted to use a bar with a chain.
Second, I wanted to try an ombre effect.
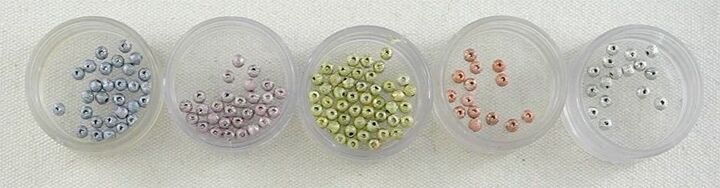
I took the mixed colour beads and sorted them into colours to get this effect.
The beads come in a pack of 10 but you will need to purchase more to ensure you get the right mix of colours.
Giveaway
Affordable Jewellery Supplies is giving away a kit (or the earrings if you prefer) to make these earrings.
To find out how to enter, you need to watch the video.
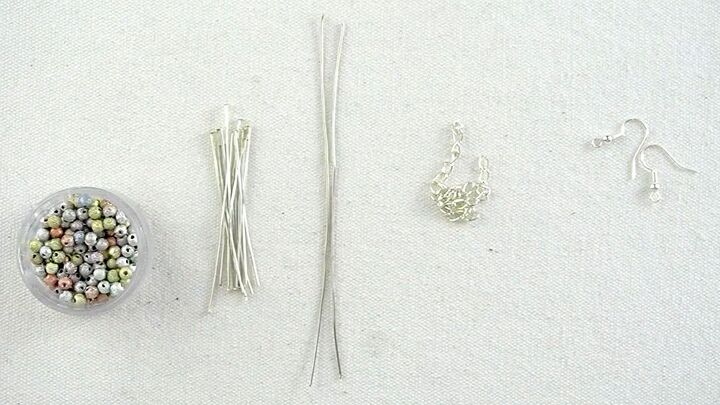
Materials
Here’s what you’ll need to make these earrings:
- 4mm Stardust Beads x132 (buy more to ensure you get a good mix of colours)
- 20 Gauge Silver Wire x15cm
- 5cm Silver Headpins x14
- 5.5mm Silver Chain x13cm
- Earhooks x1 pair
Tools
- Round nose pliers
- Flush cutters
- Chain nose pliers
Instructions
Watch the video or read the instructions below.
Step 1
Sort the beads into separate colours. You will need:
- Silver x16
- Orange x14
- Yellow x46
- Purple x28
- Purple x28
Step 2
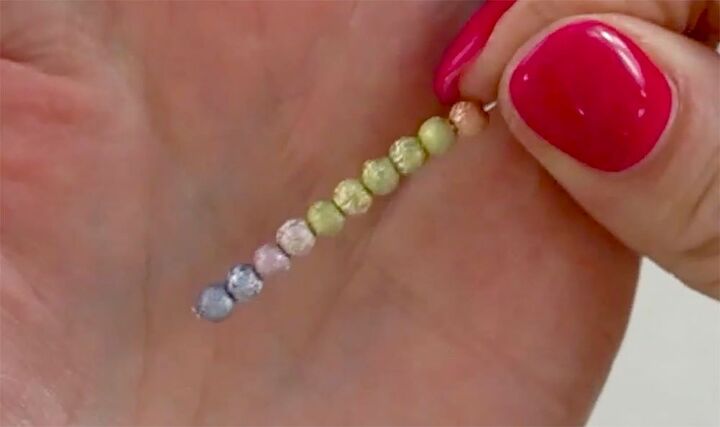
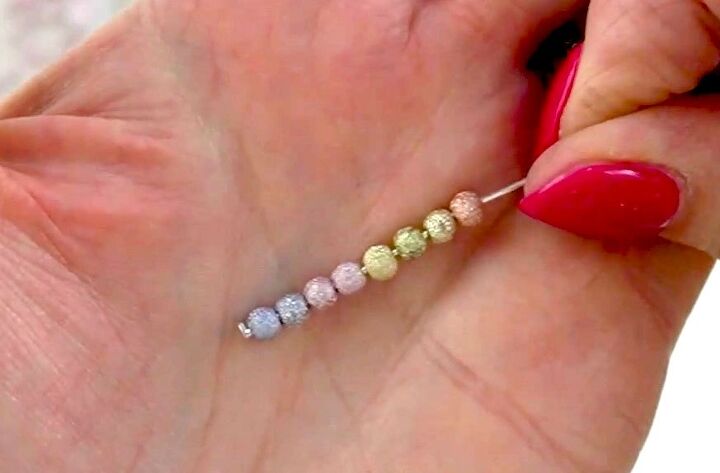
Start by making the centre dangle.
Thread the beads onto one of the headpins in the following order:
- 2x Blue
- 2x Purple
- 5x Yellow
- 1x Orange
Step 3
Make a loop in the end of the wire.
Use your 1-step looper; or
If you haven’t made a loop before, then watch my How to Make a Simple Loop video.
Place your thumb on top of the last bead and bend the wire over to a right angle.
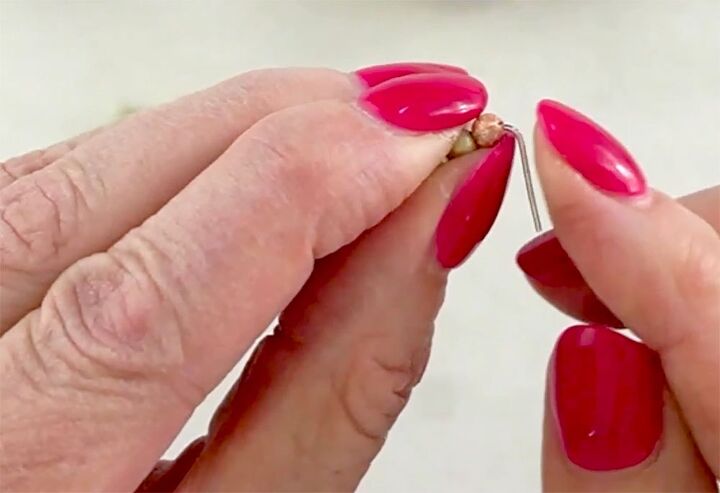
Trim the wire so that it’s approximately 1cm from the bend.
Using your round nose pliers, place the end of the wire between the jaws of the pliers about 0.5cm from the end.
Twist your wrist away from your until it can’t move any further.
Move the loop onto the lower jaw and twist again until the loop is closed.
Step 4
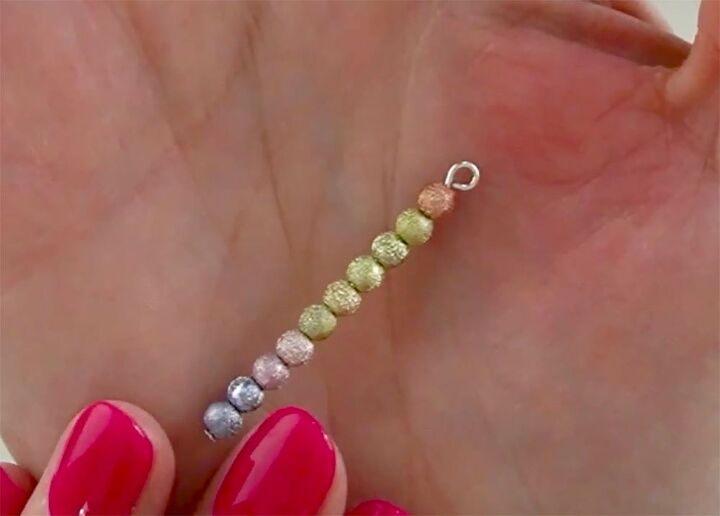
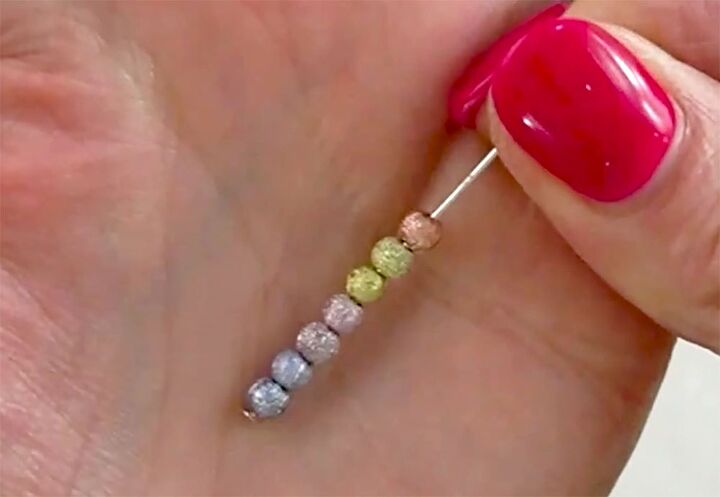
Make the dangles on either side of the centre.
Thread the beads onto one of the headpins in the following order:
- 2x Blue
- 2x Purple
- 4x Yellow
- 1x Orange
Make a loop as before.
Repeat for the other side.
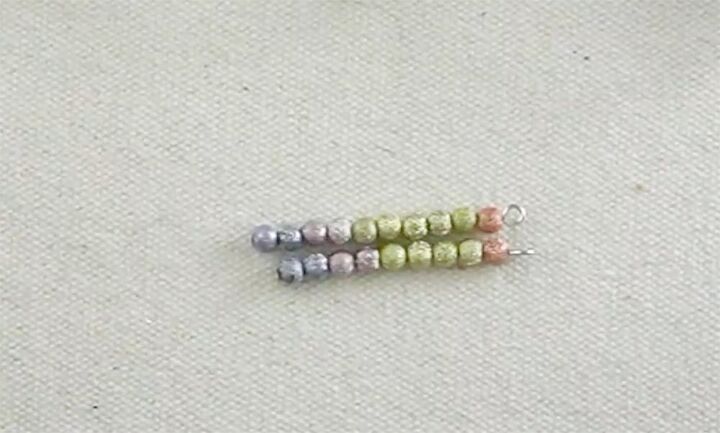
The picture below shows the centre dangle and the one you just made. Notice that the one you just made is one bead shorter than the centre dangle.
Step 5
Make the next set of dangles.
Thread the beads onto one of the headpins in the following order:
- 2x Blue
- 2x Purple
- 3x Yellow
- 1x Orange
Make a loop as before.
Repeat for the other side.
Step 6
Make the final set of dangles.
Thread the beads onto one of the headpins in the following order:
- 2x Blue
- 2x Purple
- 2x Yellow
- 1x Orange
Make a loop as before.
Repeat for the other side.
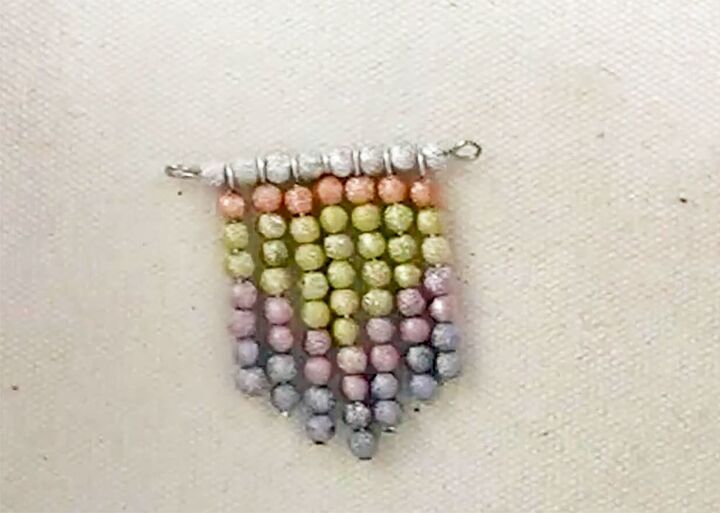
Step 7
To make the bar, make a loop in one end of the 20 gauge wire.
Thread one silver bead, then one of the outside dangles.
Alternate the beads and dangles, ensuring the dangles are in the right order.
Finish with a silver bead.
Make a loop in the other end of the wire.
Step 8
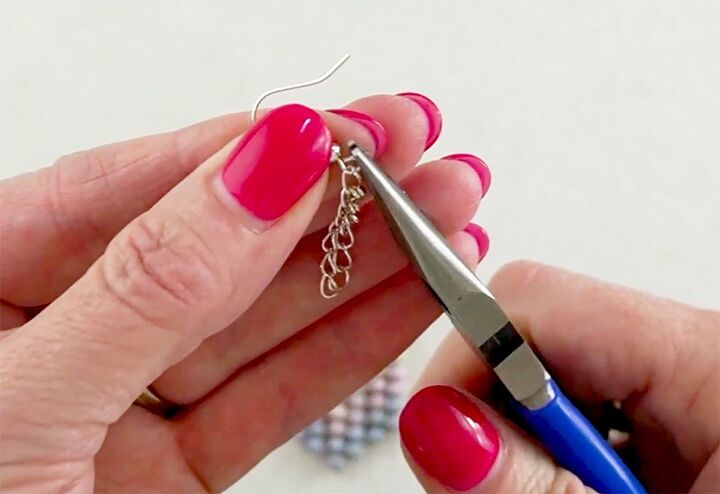
Cut the chain into two pieces and find the centre of one piece. If the chain has an uneven number of links, remove one.
Attach the earhook to the centre link by opening the loop at the bottom of the earhook. To do that, hold the side of the loop of the earhook with your chain nose pliers. Twist up so that the loop opens upwards (never pull out as that will destroy the shape of the loop).
Thread on the centre link of the chain then close in the same way.
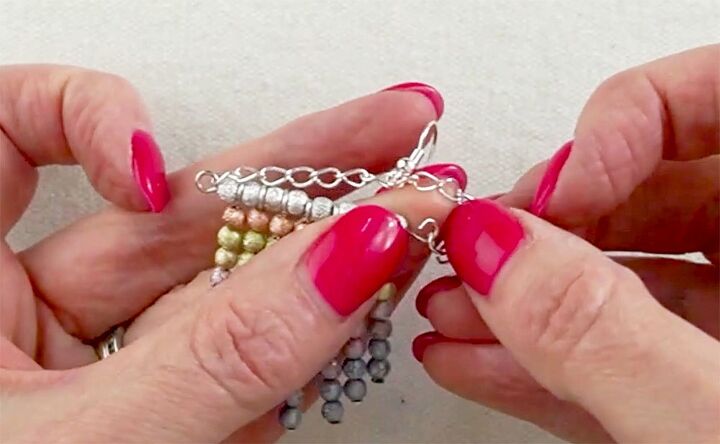
Step 9
Open the loop on the end of the bar and attach the end link of the chain.
Ensuring that the chain is not twisted, attach the other end of the chain to the loop at the other end. Ensure all loops are well closed.
That’s it – you’re done.
Except of course that you need to repeat all of that to make the other earring.
I hope this post gave you inspiration to make these earrings.
If so…..
PIN FOR INSPIRATION AND SHARE WITH YOUR FRIENDS!!
⇓ PIN THIS ⇓
The author may collect a small share of sales from the links on this page.


Comments
Join the conversation
I love it! Very pretty. Will try it. Thanks for sharing!
Your video has given me the know how to make so I can give to charity. I donate almost everything I make. I don't have much but what I have I give. Thank you so much for sharing your ideas. I love the pattern and will make them for the cancer society and others. I am a survivor and a shut-in. I love you and pray for you. Thank you again. I am sorry this a long comment.