Black and White Necklace Tutorial - Times Two
Sometimes, you’ve just got to go where the beads lead you.
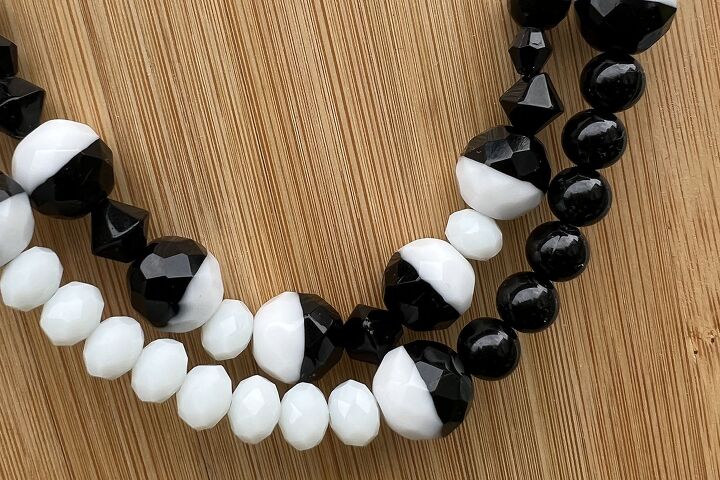
Sometimes, you’ve just got to go where the beads lead you. These Jing Jang black and white beads are amazing. I wanted to honour them in a special way but I couldn’t decide on the pattern. Can you please help me?
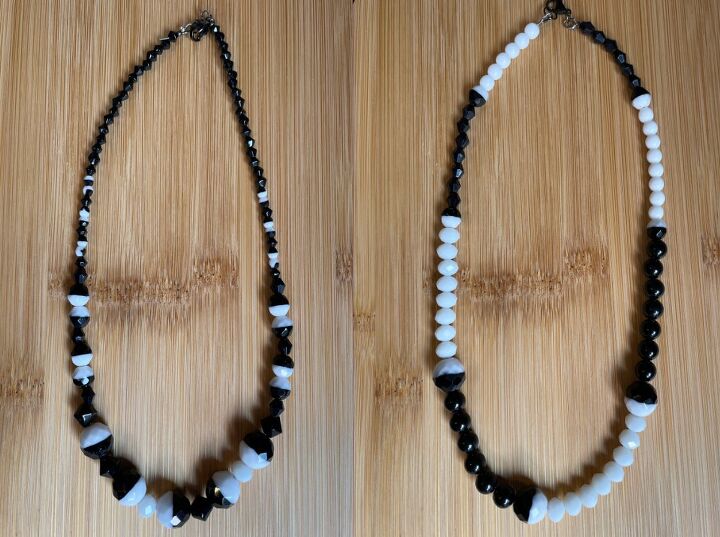
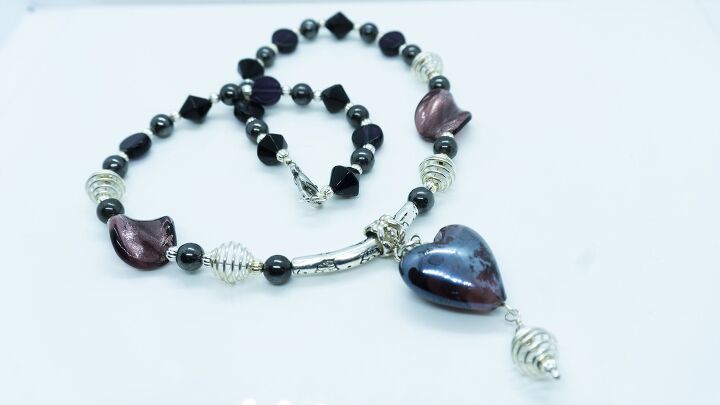
I made two necklaces, and I’d like to know which one you like best.
If you would like to make either, I’ve created a tutorial so you can make them yourself. You could do this with any half and half bead, but I just love these ones.
Materials
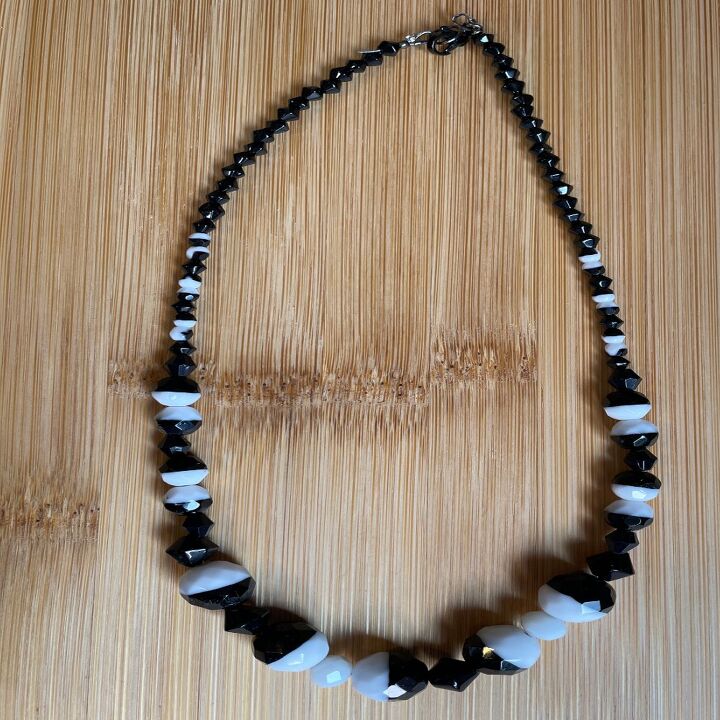
To make the side by side you will need:
- 12mm Czech Glass Firepolished Jing Jang Beads x5
- 8mm Czech Glass Firepolished Jing Jang Beads x8
- 4mm Czech Glass Firepolished Jing Jang Beads x12
- 8mm Jet Crystal Glass Bicones x4
- 6mm Black Acrylic Bicones x6
- 3mm Jet Glass Bicones x40
- 8x6mm White Austrian Crystal Rondelle x2
- 12mm Electrophoresis Black 304 Stainless Steel Lobster Claw Clasp x1
- 6mm Black Jump Ring x1
- 4mm Black Jump Ring x1
- 4.5mm Gunmetal Wire Guardian x2
- 2mm Silver Magical Crimp Tubes x2
- 0.38mm Silver Grey Tiger Tail x60cm (approximately 24 inches)
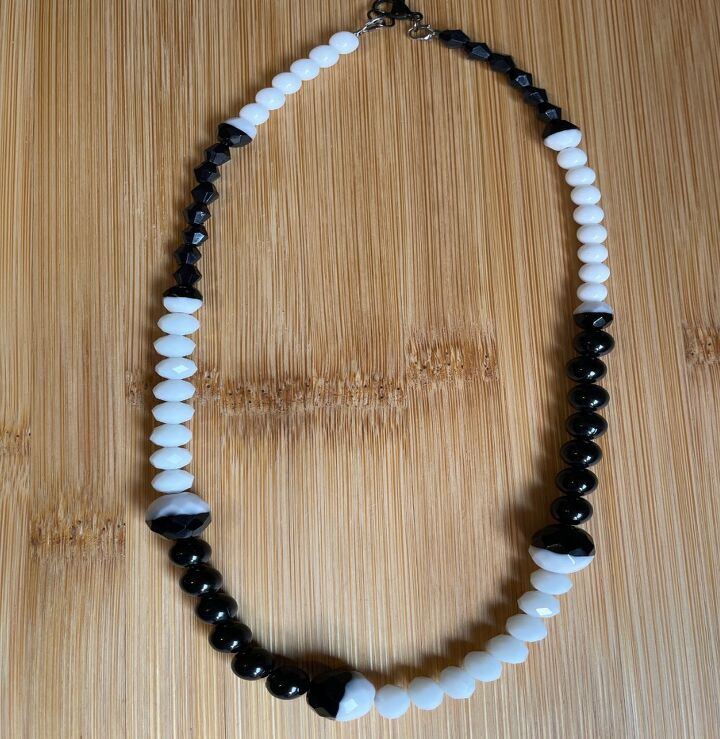
To make the colour block necklace you will need:
- 12mm Czech Glass Firepolished Jing Jang Beads x3
- 8mm Czech Glass Firepolished Jing Jang Beads x4
- 6mm Black Acrylic Bicones x13
- 8mm Black Acrylic Round Beads x13
- 8x6mm White Austrian Crystal Rondelles x16
- 6mm White Czech Glass Druk x14
- 12mm Electrophoresis Black 304 Stainless Steel Lobster Claw Clasp x1
- 6mm Black Jump Ring x1
- 4mm Black Jump Ring x1
- 4.5mm Gunmetal Wire Guardian x2
- 2mm Silver Magical Crimp Tubes x2
- 0.38mm Silver Grey Tiger Tail x60cm (approximately 24 inches)
Tools
The tools I used to make both these necklaces are:
Instructions
Watch the video or read the instructions below.
The instructions to assemble both necklaces are the same.
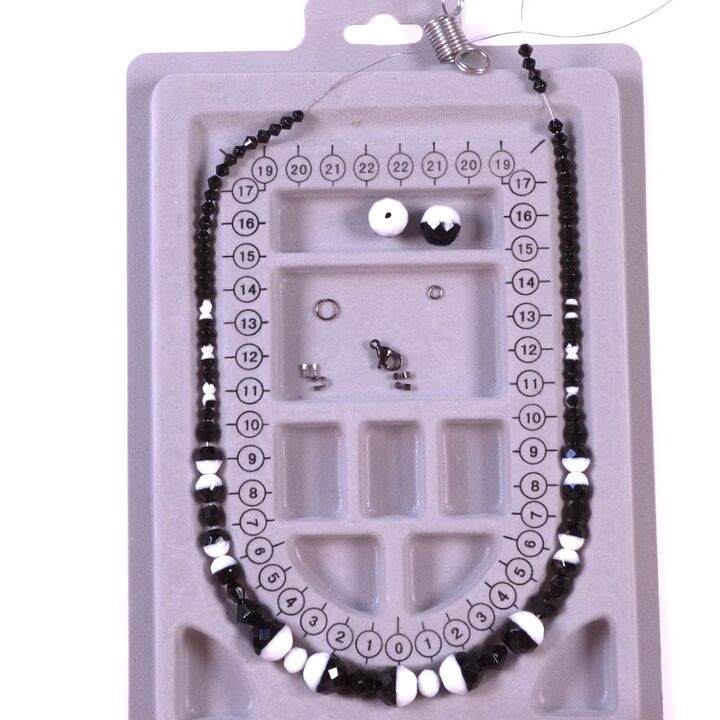
Lay Out the Beads
Lay the beads on the bead design board in the order following the layout diagram below.
Side by Side Necklace

String the Beads
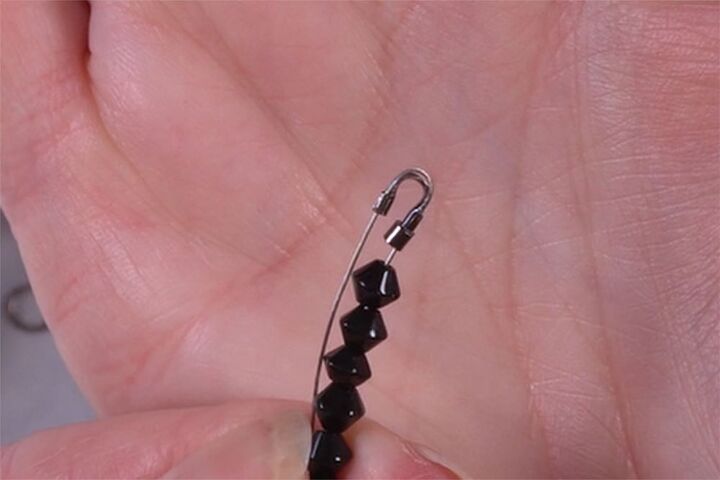
Cut a piece of tiger tail about 60cm (approximately 24 inches) long. Place the bead stopper on one end of the tiger tail.
Starting at one end, thread all the beads onto the tiger tail in the order they are laid out.
Attach the Clasp
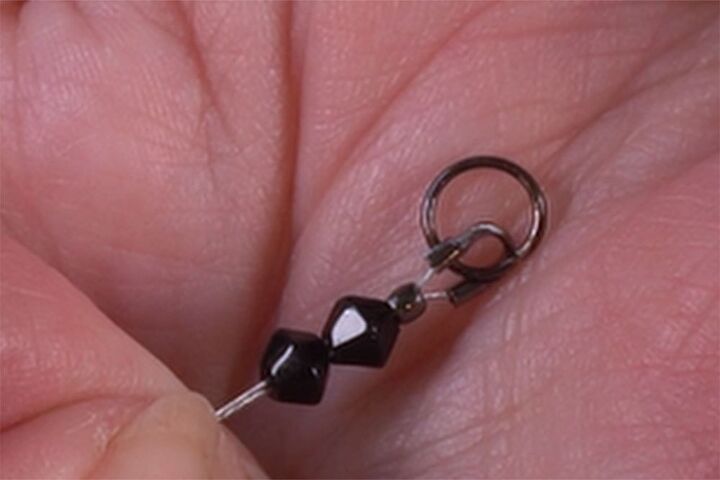
Once you have added all the beads, you need to attach a jump ring to one end and the clasp to the other. I’m using a wire guardian on each side to keep things looking nice and tidy. If you’ve not used a wire guardian before you can watch this video all about how to use them.
We will attach the 6mm jump ring first. Thread one end of the Tiger Tail through the 2mm Magical Crimp Tube. Then thread the wires up through the side of the wire guardian and back down through the other side. Next, thread the wires back through the crimp bead. Pull everything up so that it’s sitting nicely – remember to leave yourself a little bit of room.
Use the Magical Crimp Forming Tool to squeeze the bead into a ball. If you’ve not used a Magical Crimp Forming Tool before you can watch this video.
If you don’t have this tool, just crimp it using whichever method you prefer and place a 3mm crimp cover over the top.
Using the flush cutters, cut the Tiger Tail as close as possible to the crimp. Open the 6mm jump ring, thread on the wire guardian and close the jump ring. If you’ve never worked with jump rings before you can watch this video.
Repeat the above process to add the clasp except that this time, you will need to thread your clasp onto the wire guardian before you thread the Tiger Tail back down through the crimp tube.
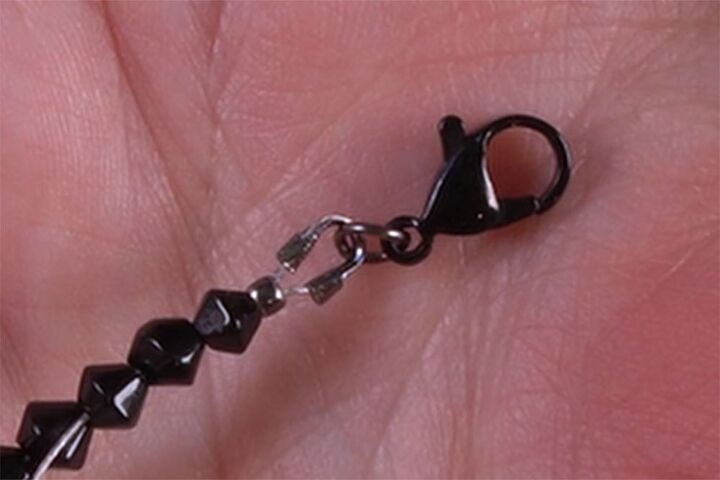
Do up the clasp, and you’re done.
Colour Blocked Necklace
The process for the colour blocked necklace is exactly the same. Just use this layout diagram to lay the beads out on the bead design board. The clasp it attached in the same manner.

Necklace Design
During the video, while stringing the necklaces, I talk about why I chose the beads that I did and why I laid them out in that order. It’s worth a watch to find out.
Jewellery I’m Wearing
In the tutorial for necklace I’m wearing in the video, I also talk about jewellery design. If you would like to watch that, or make the necklace and earrings, please view it here.
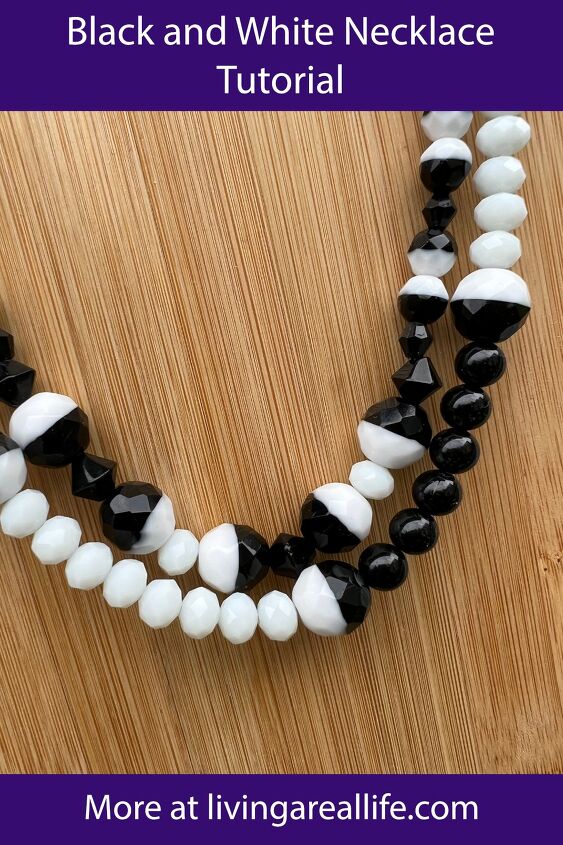
PIN THIS FOR INSPIRATION AND SHARE WITH YOUR FRIENDS!!
⇓ PIN THIS ⇓
If you like my blog be sure to click on the RECOMMENDED button and SHARE it with your friends! It’s the best way for my blog to grow. I would love for you to be part of my family so sign up to receive my emails. Every time I post a blog, I will send you an update email.Also, follow me on Facebook HERE, Instagram HERE and Pinterest HERE.
Come by and say Hey!
The author may collect a small share of sales from the links on this page.


Comments
Join the conversation