How To Make Name Customized Tag Clay Pendant
Handmade accessories are always an interesting kind of crafting. Who doesn’t like customized accessories? Well, I really enjoy making handmade customized jewelry and accessory especially pendants. I tried making another clay/dough pendant customized with my name.
I will show you today how I made it. Would you like to see the making of a dough/clay pendant in some easy quick ways? Let’s have a look today!
How To Make Name Customized Tag Clay Pendant
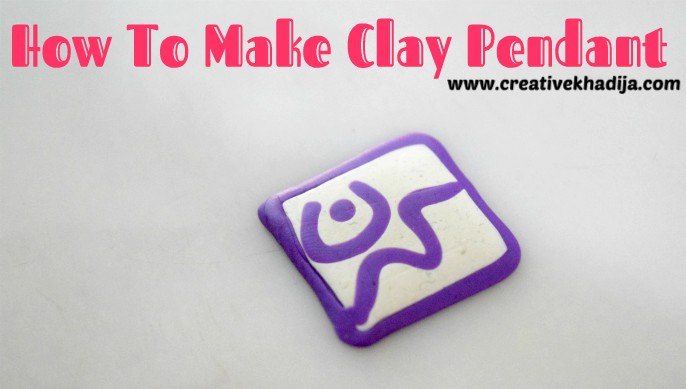
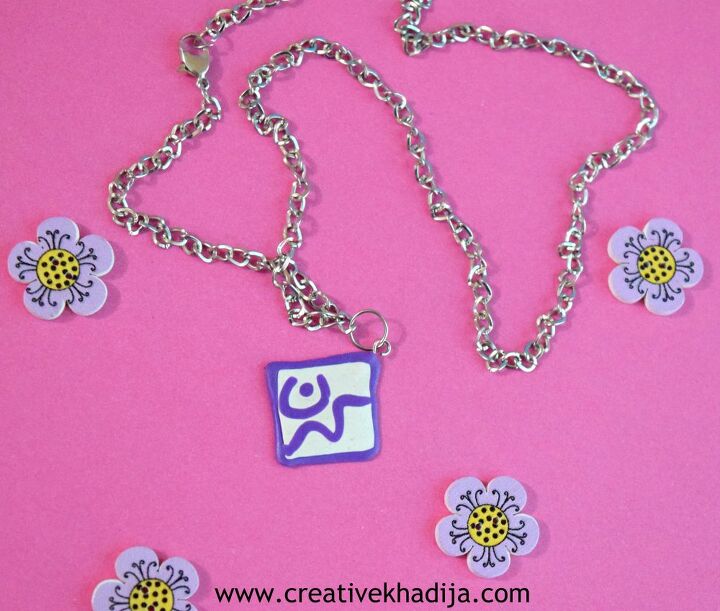
Some of my readers might not understand the design & font of this pendant. It’s in Urdu text and the written word on it is Kiran, my second name actually which is most known in my real life.
I have used polymer clay here but you can also use the handmade dough for making this pendant. Here is the recipe for handmade dough for any kind of craft. It’s air dry but you can also keep it in the microwave for a minute to make it more perfect.
You will need:
Clay-Dough
Rolling pin
Cutter
Hook and jump ring
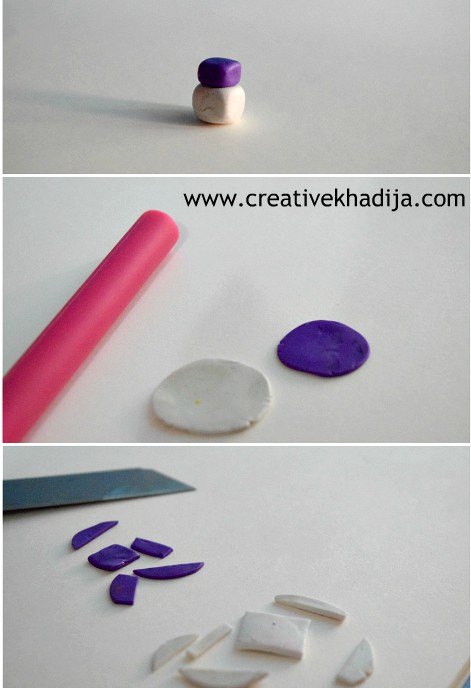
For making a 1-inch clay pendant, you will need a very little amount of clay. I choose the white and purple color but you can have any other of your choice.
With the help of a rubber rolling pin, make the clay ball flat and keep it thick.
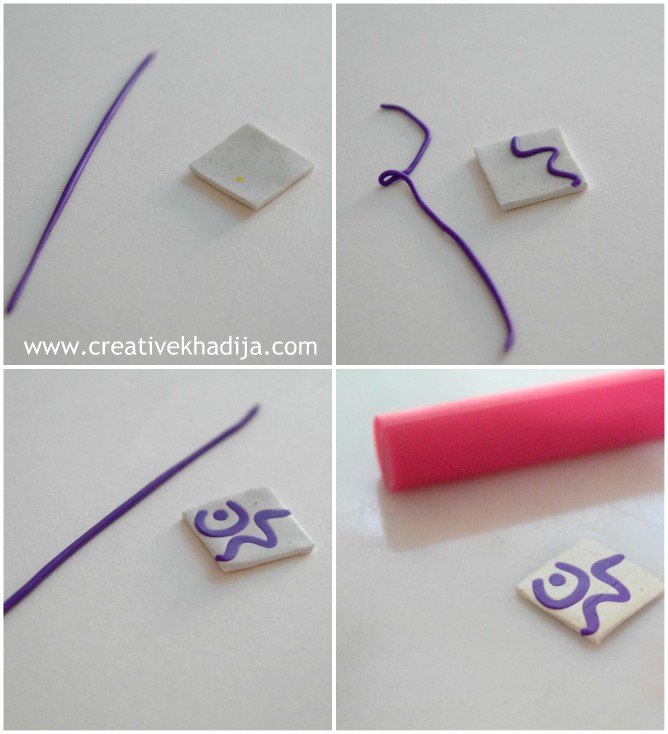
After making it flat, I cut it square. I choose white clay as a base color and purple for the writing purpose. For the writing purpose, I made a thin strip of purple clay. Then carefully I place it on the white clay square tile & compose it according to the shape of my name.
If your name has more curves and syllables then you need to be more careful. For example, if here I select my name Khadija in Urdu, it was not possible to write on this size. As in Kiran name, there are 3 syllables while in Khadija name there are 5 syllables and they can’t be composed on this littles tile size.
I pressed it again with the help of a rolling pin and now it’s more fixed, pressed, and perfect. Isn’t it?
One thing missing is the edges of the clay pendant. So I put another purple round strip to cover the sides. Then pressed it again and it’s ready!
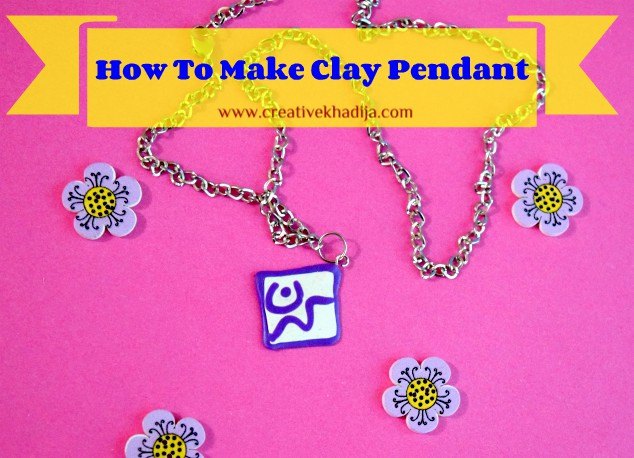
I put it in the microwave for less than a minute & it’s hard now. With the help of E600 glue or any other transparent glue, fix the hook and let it dry for a minute.
Add a jump ring along with the metal chain & your customized pendant accessory is ready!
It’s ready now, I complete it in 15 minutes only. I like the matte look without gloss here. You can also seal it with mod podge dimensional magic.
I hope you will like my today’s tutorial on how to make a customized name tag clay pendant.
You can also have a look at my previous jewelry-making DIYs. I hope you will like my easy and quick tutorials.
The author may collect a small share of sales from the links on this page.


Comments
Join the conversation