Upcycle a Dress Into a Romper With This Easy Tutorial

I had this denim dress that wasn’t really doing it for me anymore. I liked it, though, and wasn’t quite ready to get rid of it altogether. So I started thinking about different things I could do with it and decided to attempt turning it into a romper. It wasn’t a flawless process, but it was a fun one, and I’m so happy with the end results. So grab an old dress and your favorite pair of shorts, and follow this tutorial to get an awesome upcycle.
Tools and materials:
- Dress (should not be too form-fitting)
- Shorts
- Ruler
- Scissors
- Chalk
- Sewing clips
- Sewing machine (and needles that are appropriate for your fabric)
- Sewing pins
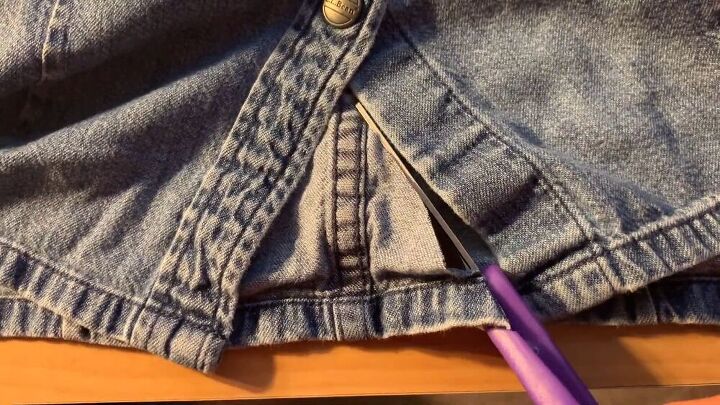
The first thing you’ll need to do is try on your dress and decide where the crotch area of the jumpsuit should start. I decided it should be below the last button, so I marked it and cut out the bottom V.
If your dress doesn’t open up in the front like mine, here is a technique for you to make the crotch. Grab your dress and fold it in half, with the front of it on the outside. Then fold your shorts in half, also with the front on the outside, and place them on top of the dress, lining up the crotches. Measure the crotch of the shorts and divide the measurement in half. Then cut the measurement in the crotch area of the dress, cutting in a diagonal line. At that point, your crotch area cut should look like mine.
Now you’re going to clip the crotch area together and sew it on a straight stitch. If, like me, you’re using denim, do not forget to change your needle to one appropriate for denim! When replacing your needle, be sure to insert it with the flat part of the needle facing the back of your machine. You can add a professional finish by zigzagging or using a serger. Then cut your threads.
Before continuing, you’re now going to try on the jumpsuit. It’s likely that your romper will have some weird bunching in the front, so here’s how to fix that. With the romper still on you, grab some sewing pins and pin where you want to take it in. Honestly, though, this technique isn’t ideal because you’ll get stuck in your romper, so I’ll show you a better way to do this.
Take your folded shorts again, and place them on your romper, which should be inside out. You’ll be focusing on the crotch line to the waistband line. Line the crotches up exactly. You’re going to sew up the curve of the crotch to the top of the waistband of the shorts. Make sure you’re only sewing on the front of the dress.
Don’t sew all the way up, because if you do you won’t be able to fit into your romper. How do I know this? Because I sewed all the way up. Oops. So, if you make the same mistake as me, you can add a hidden zipper like I did. I may have also put the zipper in upside down. OOPS.
Okay, so obviously some mistakes were made when making this romper, but, as Bob Ross says, “There are no mistakes, only happy accidents.” And I’m definitely happy with the result of this project. I think the romper is super cute and also totally comfortable, so I’m good with it! You can use any dress to make this project, so I’d love to see your versions in the comments!
Enjoyed the project?
Suggested materials:
- Dress
- Shorts
- Ruler
- Scissors
- Chalk
- Sewing clips
- Sewing machine
- Sewing pins
The author may collect a small share of sales from the links on this page.


Comments
Join the conversation
Super cute!