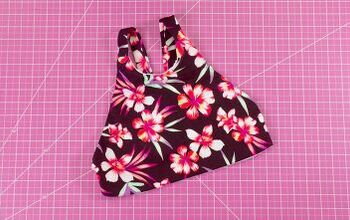
How to Make a Cute DIY Jumpsuit From Scratch

In this tutorial, learn how to make a DIY jumpsuit. I'll teach you how to create the jumpsuit sewing pattern, as well as how to assemble the jumpsuit. The elasticized bodice gives this DIY jumpsuit a fitted look and using stretchy fabric will make it super comfortable to wear.
Tools and materials:
- Stretchy fabric
- Regular sewing thread
- Elastic sewing thread
- Ruler
- Chalk
- Scissors
- Sewing machine
- Pins
- Elastic
1. Create the jumpsuit sewing pattern
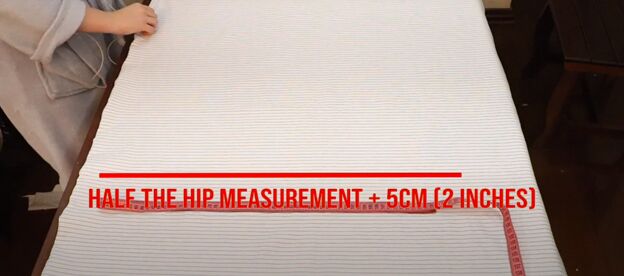
Fold your fabric in half, right-side facing in. Measure your hip circumference, add 5 centimeters (2 inches) to that measurement and divide the total in two. Mark that measurement on your fabric, measuring from the open edge.
Now, place a small mark on the fabric halfway across the hip width.
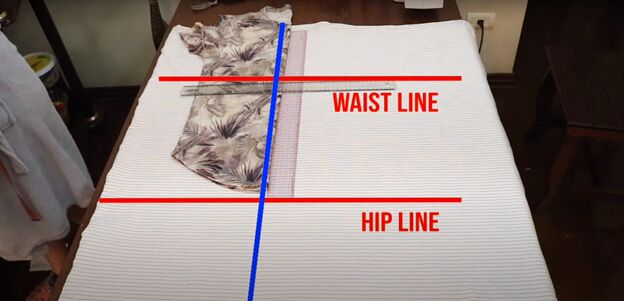
Fold a t-shirt in half lengthwise and place the folded edge at the last hip mark you just made (the midline). Lay the t-shirt so that the bottom of the neckline lines up with the top of your fabric and mark the waistline position on your fabric.
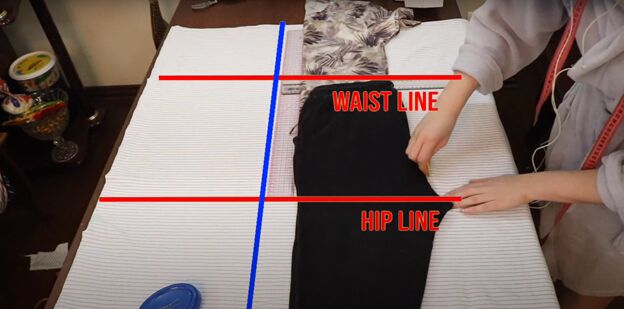
To allow for some looseness in the jumpsuit, move the shirt and pants over about 5 centimeters (2 inches) from the midline. They will now lie between the edge of your fabric and the midline mark.
Fold in the sleeve of your t-shirt, then trace around the entire t-shirt and pants, so you have a pattern for the left side of your jumpsuit.
Now, flip the top and the pants over and lay them on the right of the midline mark, so you can trace the mirror image of the left side of the jumpsuit for the right side.
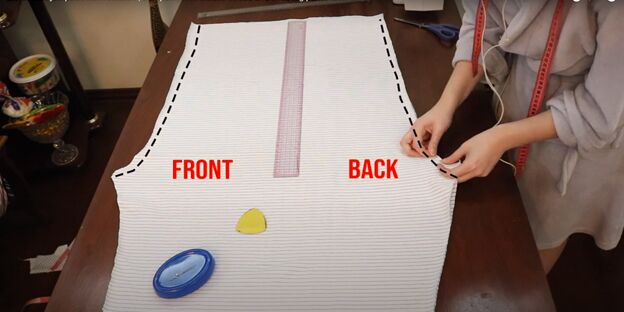
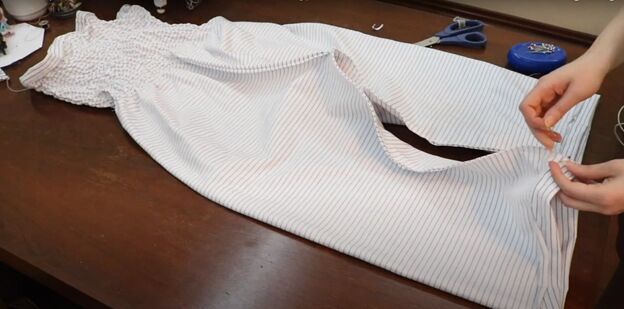
Cut the complete pattern from the fabric. You will now have two full pieces.
2. Sew the jumpsuit bodice
Unfold both pieces and, with right sides facing, pin them together from the waist to the crotch on both sides. Sew the seams from waist to crotch using a zigzag stitch.
Tip: If your fabric has a design, like stripes, try to line up the pattern as best as you can.

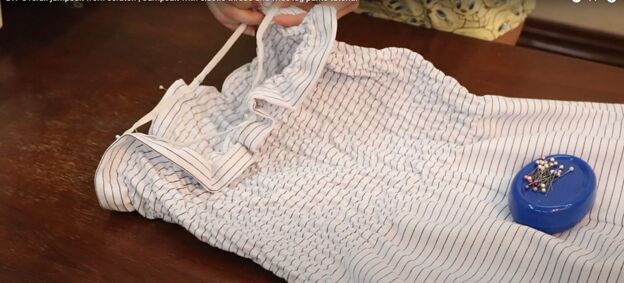
Mark the waistline across the fabric.
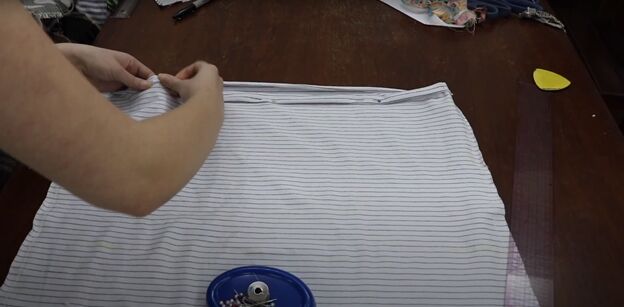
Fold the top edge of the DIY jumpsuit over twice. Pin in place and sew the top hem.
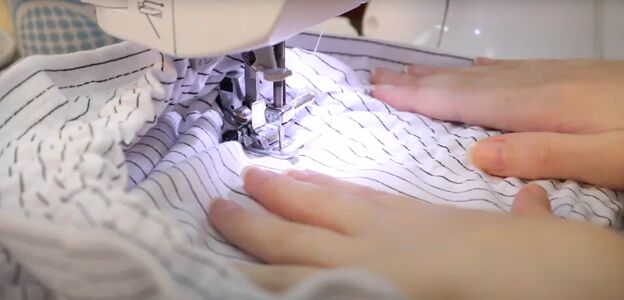
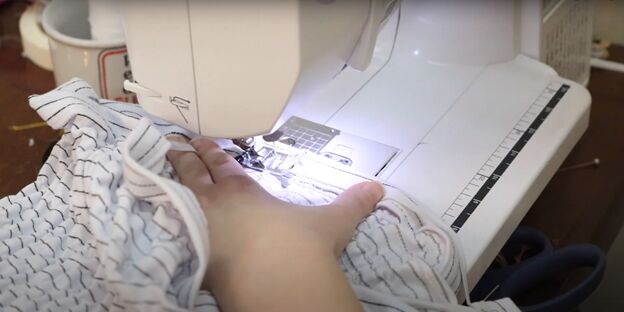
Now, switch the regular sewing thread in your sewing machine to the elastic thread. Test for the right tension of elastic thread using a scrap piece of material until you are satisfied with the amount of shirring.
Sew horizontal lines from the top of your jumpsuit to the waist, keeping the rows close together for good shirring in the whole jumpsuit bodice.
3. Sew the jumpsuit legs
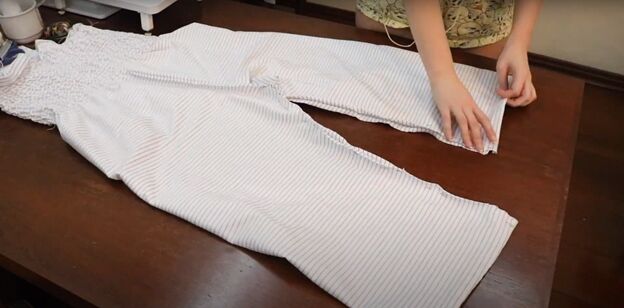
Return the regular sewing thread to your sewing machine. With the jumpsuit inside out, pin the inside of the jumpsuit legs together and sew with a zigzag stitch.
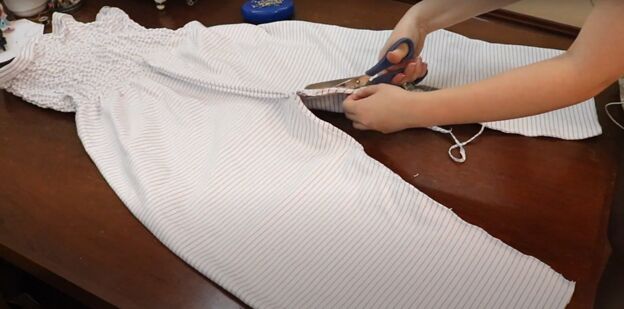
Trim the excess seam allowance from the inside of the pant legs.
Fold up the pant leg hems and sew the hems.
4. Fit the very top of the jumpsuit
Try on the jumpsuit, and if the top of the bodice doesn’t feel secure enough, and a wider piece of elastic to the very top.
Measure your body to determine the length of elastic you will need and cut that length. Pin the elastic in four places evenly around the top of your DIY jumpsuit.
Sew the top elastic in place by pulling it straight so it sews smoothly onto the fabric.
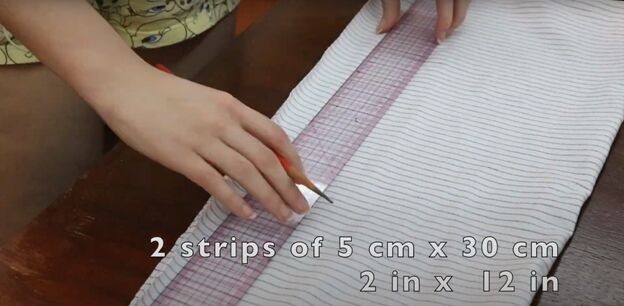
5. Make the jumpsuit straps
Cut two strips of fabric measuring 5 centimeters x 30 centimeters (2 inches x 12 inches) each.
Fold each strap in half with right sides facing in and sew the long open edge closed.
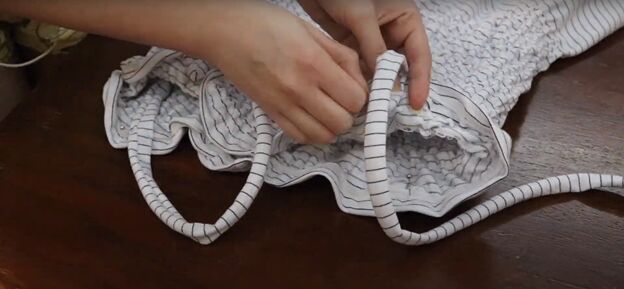
Turn the straps right side out and pin the short edges in place on the jumpsuit. Try on your DIY jumpsuit to check the size and positioning of the straps and adjust as necessary. Then, sew the straps in place.
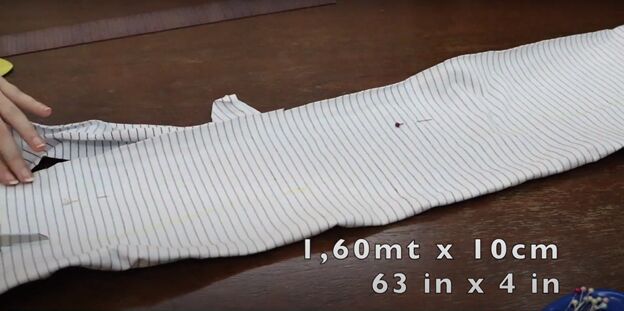
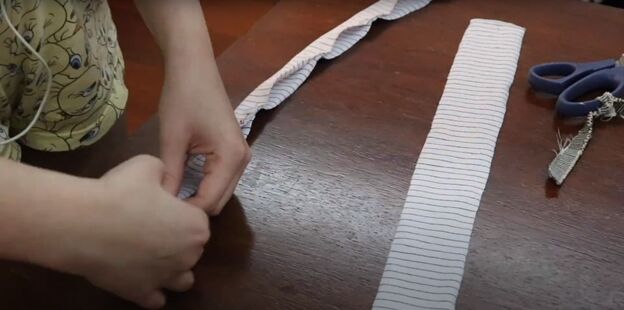
6. Make a belt for the jumpsuit
If you have more fabric, cut a belt piece measuring 1.6 meters x 10 centimeters (63 inches x 4 inches), or an appropriate length for your waist. If you prefer to have rounded corners on the ends of your belt, cut the corners now.
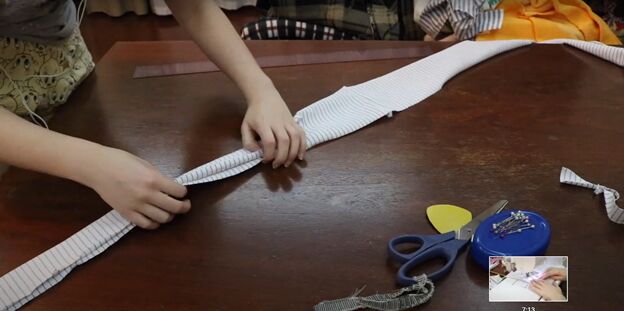
Fold your jumpsuit belt in half lengthwise and sew the open long edge. Turn the belt right-side out and topstitch the entire belt, including the short edges.

DIY jumpsuit tutorial
This is such a pretty DIY jumpsuit and so comfortable with the stretchy fabric. You can wear it with the matching belt, swap in any coordinated belt, or wear it with no belt at all! Enjoy your new DIY jumpsuit and leave a comment to let me know how much you love it.
The author may collect a small share of sales from the links on this page.


Comments
Join the conversation