How to Easily Make a Cute DIY Peasant Top From a T-Shirt

In this tutorial, I'll be showing you how to make a peasant blouse from a t-shirt. If you’ve got a large t-shirt, some basic sewing skills, and a few other materials, you can make a cute DIY peasant top. Here’s how to do it!
Tools and materials:
- Large t-shirt
- Ruler
- Measuring tape
- Marking chalk
- Elastic
- Clips
- Pins
- Scissors
- Seam ripper

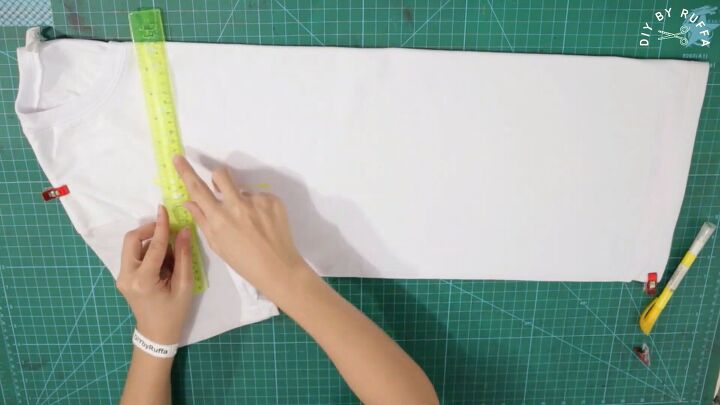
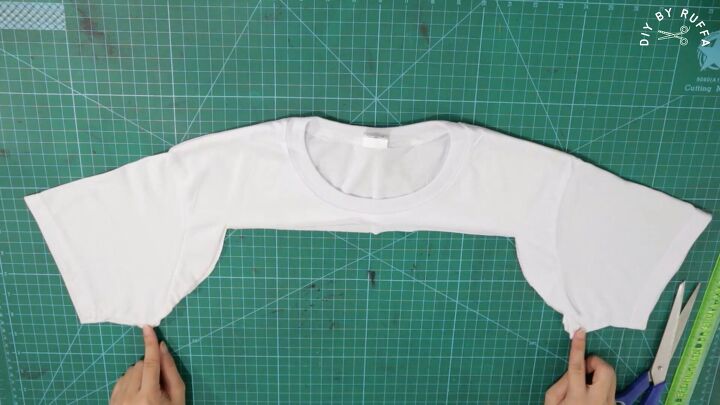
1. Cut the t-shirt
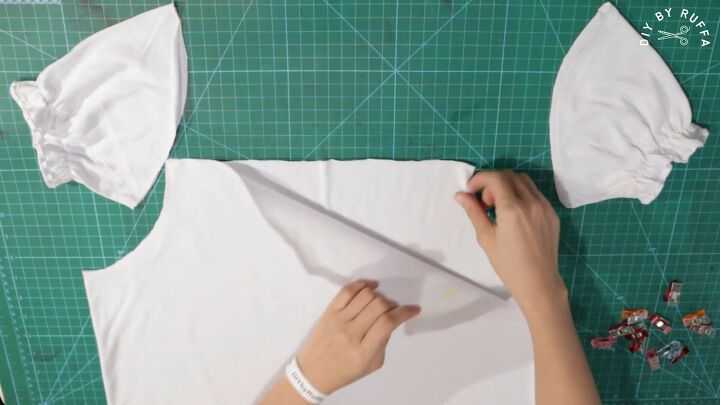
Fold the t-shirt in half lengthwise. Mark 4 inches in from the edge right by the armpit. Then connect to 5 inches up from the first mark. Connect them in an “L” shape. Draw a curve from the edge to the armpit. From the top line, mark it with the ruler all the way across.
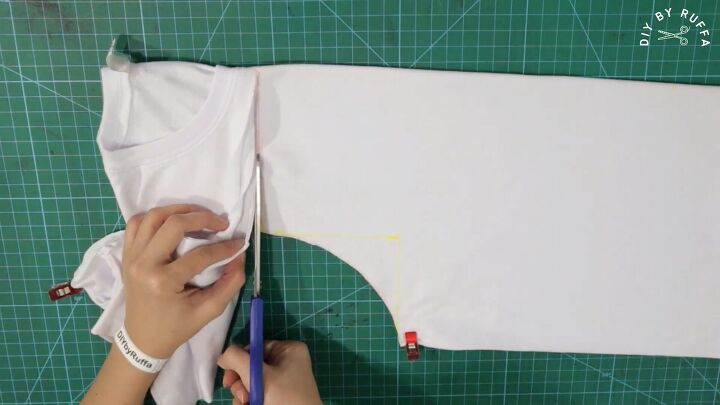
Even though it is folded, cut each side separately. Reserve the top part.
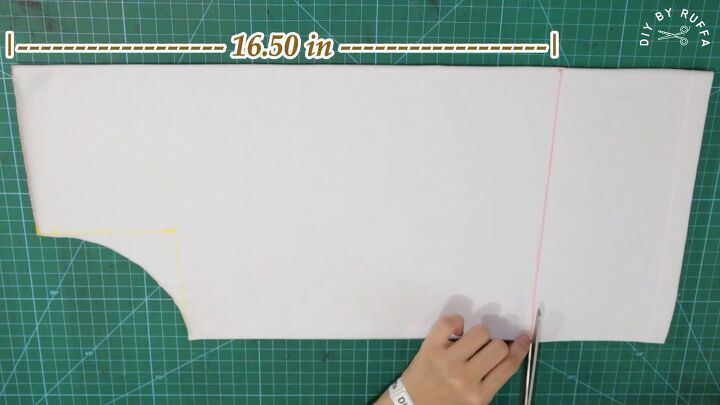
Now mark 5 inches from the bottom all the way across. Cut the bottom off. Reserve the bottom.
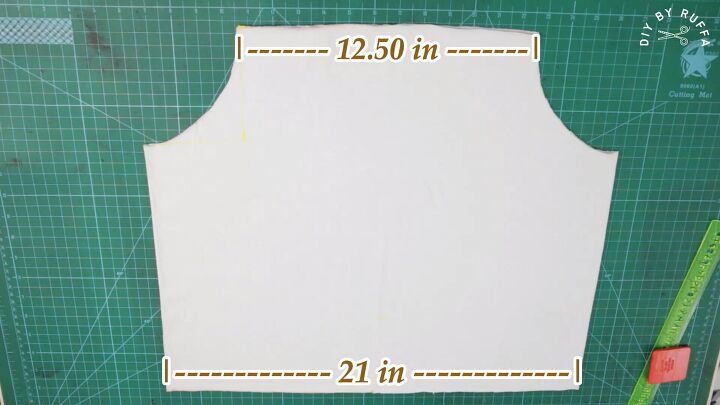
The body of the shirt should be 12.5 inches at the top and 21 inches at the bottom.
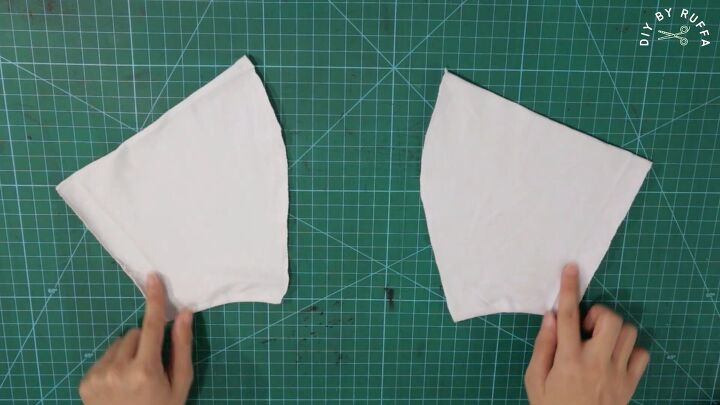
2. Create the sleeves
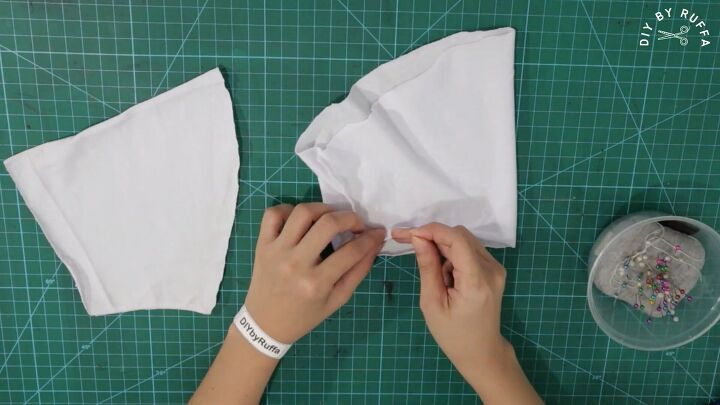
Lay the reserved top of the t-shirt on a flat surface. Cut off the sleeves at the seam, keeping the sleeve intact. Open the hems on both of the sleeves using a seam ripper.
Turn the sleeve loop inside out and fold the opened hem once about ¼ inch in. Pin into place. Sew with a zigzag stitch and stretch the fabric while sewing. Do both sleeves.
Mark about one inch up from the newly stitched hem. Place a piece of elastic on the marked area and pin it into place. Wrap it so the elastic meets on the other side. Sew with a straight stitch, slightly stretching the elastic while sewing.
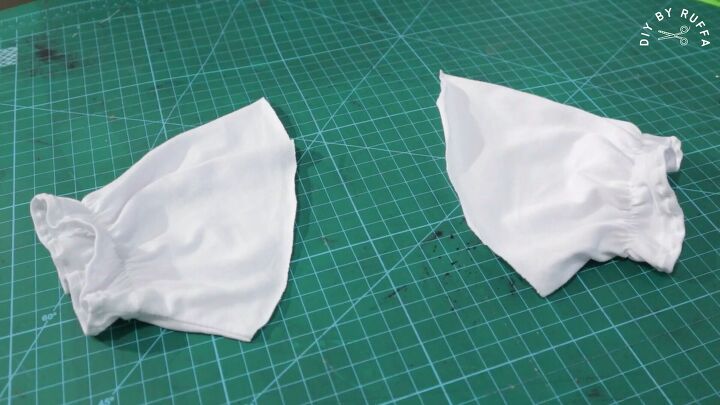
It will create a blouson effect. Do the same for the other sleeve.
3. Attach the sleeves
Turn the shirt bodice to the wrong side. The sleeves should be on the right side.
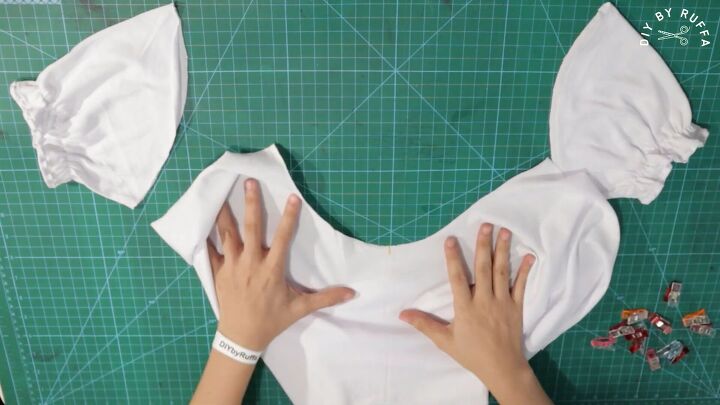
Turn the shirt so the armhole is facing you in the center. Pin or clip the sleeve into the armhole. Sew the sleeve in place. Do the same for the other side.

4. Attach elastic
Fold the shirt in half lengthwise right sides facing in. Measure and mark ½ inch down from the top of the neckline and one inch from the sleeve connection to the neckline. Trim the fabric if needed.
Fold down ½ inch from the neckline and pin. Fold the bottom up ½ inch and pin. Sew both.
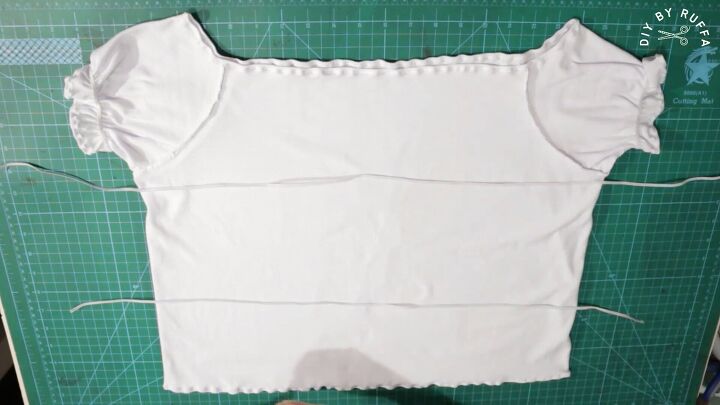
Cut two pieces of elastic: 25 and 27 inches long.
Mark 2 inches up from the bottom on both sides of the shirt and connect the lines using the ruler so it is straight. Mark ¼ of an inch at the neckline, including the shoulders.
Sew the 25-inch elastic at the neckline. Sew the 27-inch elastic at the 2-inch mark on the bottom.
Turn the shirt so the right side is facing you.

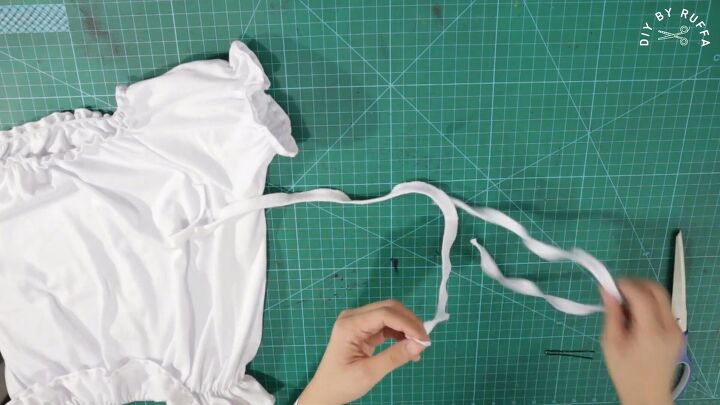
5. Create the bow
Take the reserved shirt bottom. Measure a 1-inch height and cut all around. Snip the loop and fold in half lengthwise to make a strip.
Sew the strip down. Trim to a 26-inch length. Use a safety pin or other tool to turn it inside out. Knot either end. Fold the strip in half.
At the center of the neckline, pin in place. Sew it down. Fashion a small bow.
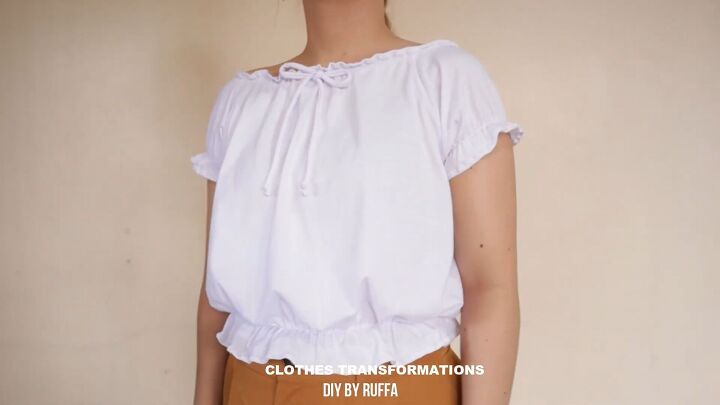
DIY peasant top tutorial
There you have it! A lovely peasant blouson top. Let me know in the comments how easy this was for you and if you enjoyed this tutorial on how to make a peasant blouse from a t-shirt.
If you do make this DIY peasant top, please share your photos. I love seeing your work!
The author may collect a small share of sales from the links on this page.


Comments
Join the conversation
Very cute idea. thank you!
I love it!