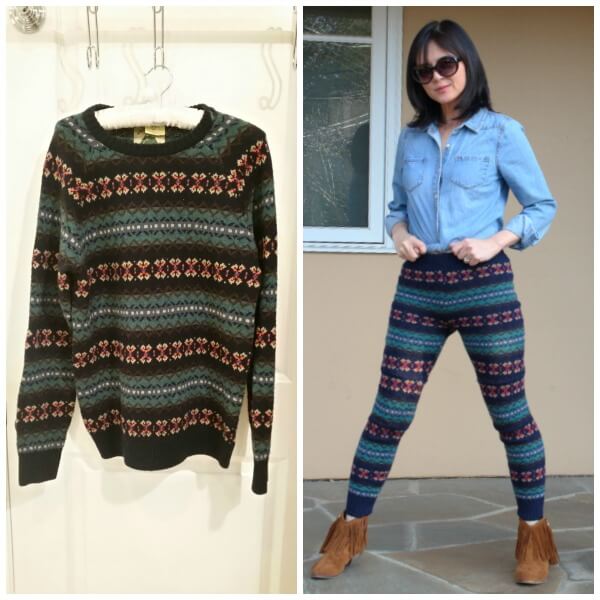
How to Make Cozy Leggings From an Old Sweater
I was looking for new sweater refashion ideas when I came across Sadie’s sweater pants project. Who knew a large sweater could be transformed into leggings? After reading her post, I was inspired to do my version with some slight tweaks. I found the perfect wool sweater at the thrift store for $5 and immediately got to work.
In this sweater-to-leggings tutorial, I’ll show you how to recycle an old sweater into a pair of cozy leggings in one afternoon. Here’s a quick overview of the project:
- Step 1: Cut sleeves of the sweater to make the bottom half of the leggings
- Step 2: Cut the bodice of the sweater for the upper half of the leggings
- Step 3: Sew the upper half of the leggings
- Step 4: Attach sleeves to the leggings
- Step 5: Add an elastic waist
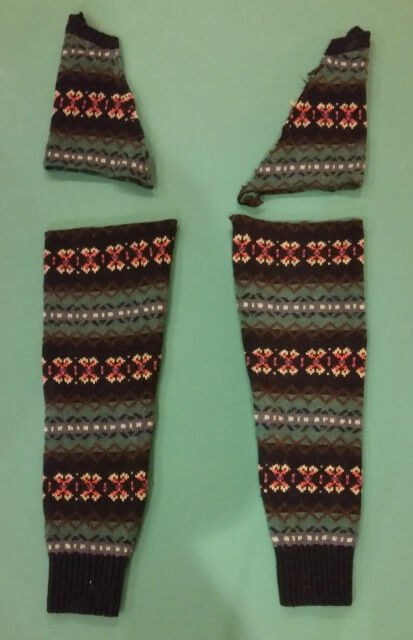
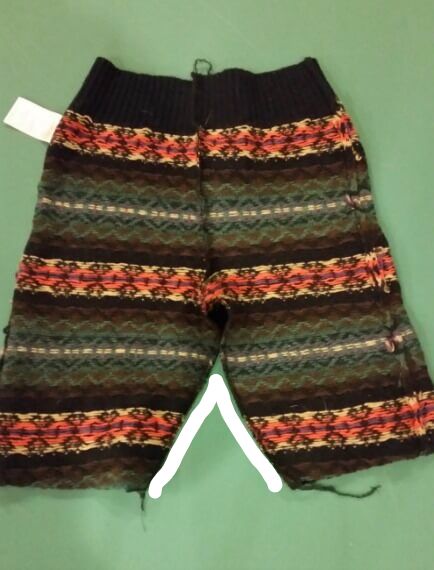
The sleeves are the perfect size for the bottom half of the leggings. I chopped the sleeves right below the armhole. Pardon the poor photography. The sweater looks green and brown under fluorescent lights when it’s teal and navy.
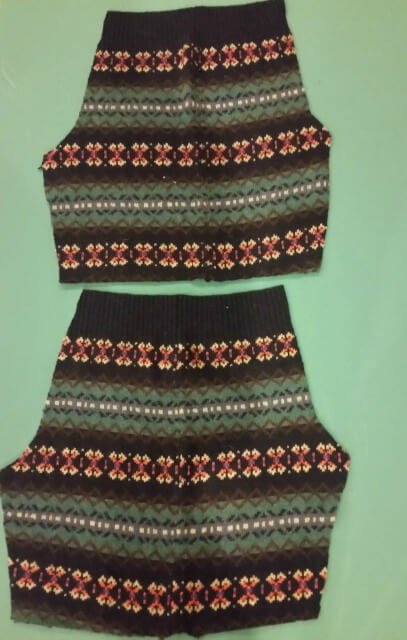
I used a pair of stretchy yoga pants as my pattern to cut out the top half of the leggings. In my haste, I forgot to take a photo of this step (sorry!), Check out my frumpy dress to jumpsuit refashion on how to use an existing pair of pants as a pattern.
Notice how one piece is bigger than the other? The sweater I used was size small, and it was barely enough to make the leggings. I highly recommend using an XL sweater so you don’t run out of material. I knew this wasn’t going to be a problem because sweater knits have a lot of stretch.
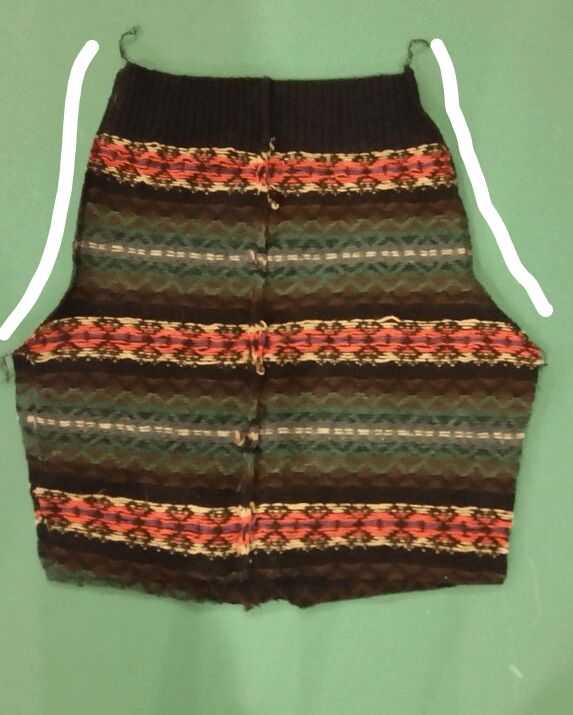
With right sides together, sew the center front and center back seams of the top half of the leggings.
Then sew the inside leg and crotch.
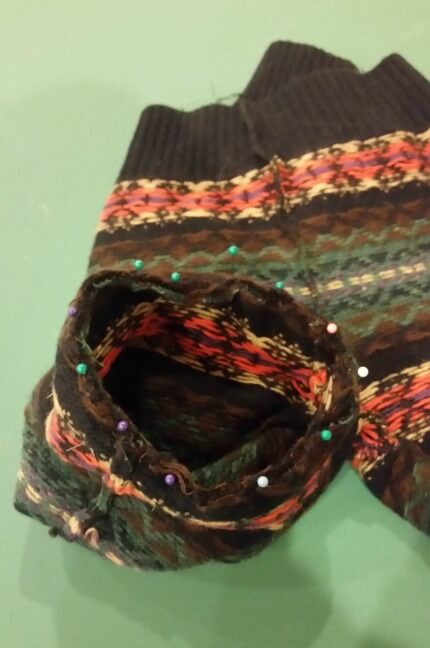
With right sides together, pin a sleeve to the upper half of the leggings and sew.
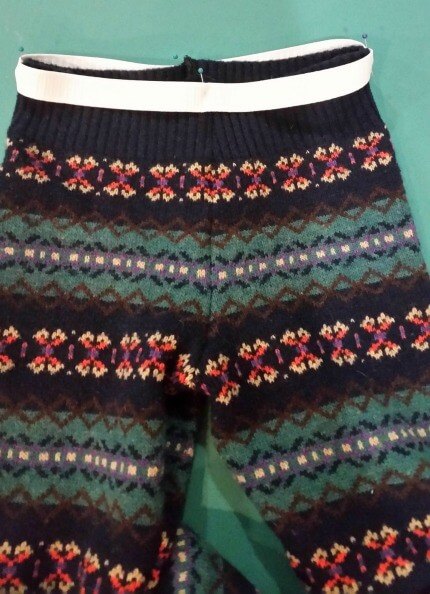
Cut a length of elastic that fits snuggly around your waist. Close the ends and sew on the right side of the waist. Flip the elastic to the inside and tack on the side seams.
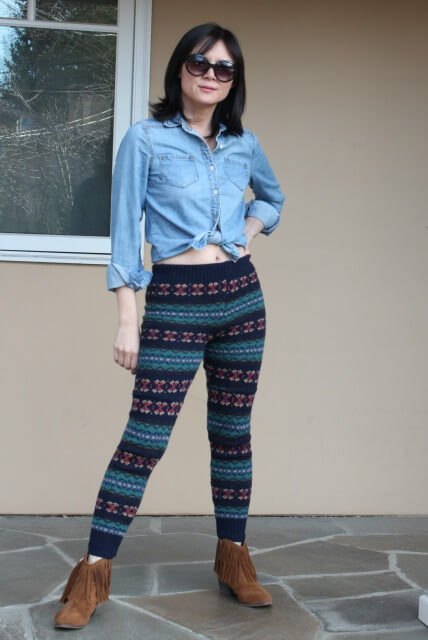
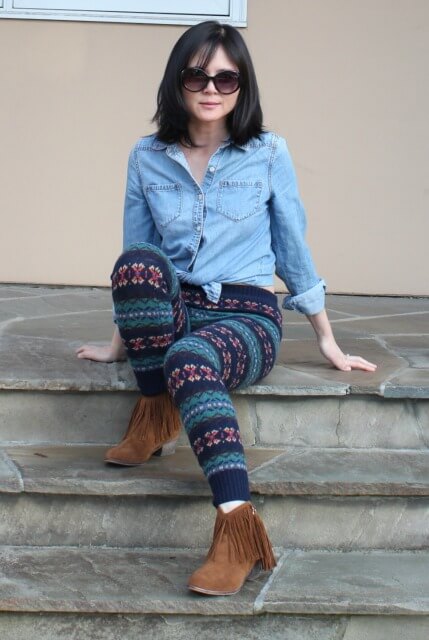
Whadaya think of the finished project? I made the leggings this way because I wanted all the stripe to run horizontally. It was also easier to hide the seams in the stripe pattern.
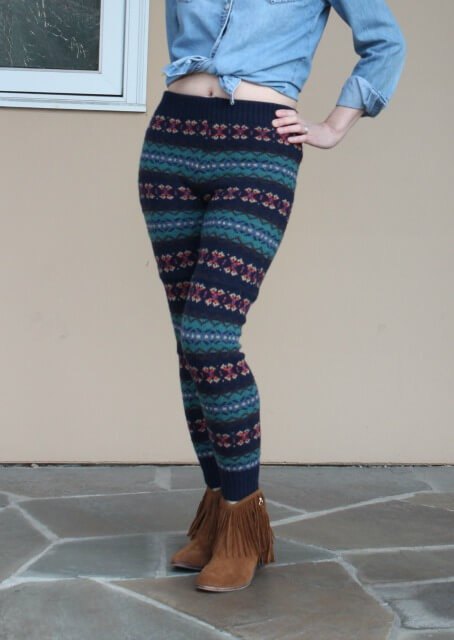
In the real world, I would pair these leggings with a mini denim skirt, but I’m wearing it bare so you can get a full view of the leggings. To be blunt, this baby don’t have enough back to wear any leggings without bum coverage. My tookus is as flat and flabby as a pair of pancakes. Notice the absence of pictures from my backside . . .
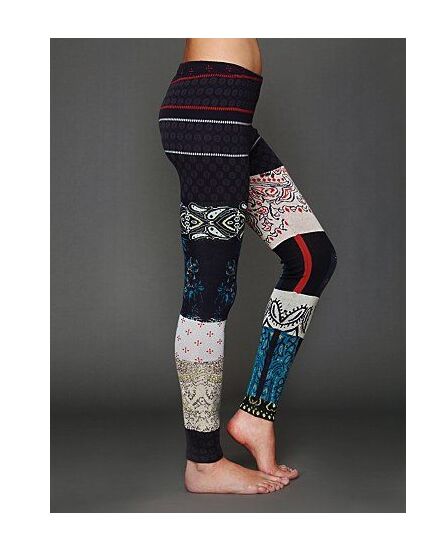
I’m short, so I was able to do this project with one sweater. For the taller gals out there, you can combine a couple of sweaters for a cool patchwork effect. Take a look at these sweet sweater leggings from Free People.
I made these leggings on my serger, but you can make this on your sewing machine. Here are my favorite tutorials for sewing with knits:
How to sew sweater knits by It’s Always Autumn
How to sew with sweater knits by Colette
Did you enjoy this sweater-to-leggings refashion? Let me know by leaving a comment. I love hearing from you.
The author may collect a small share of sales from the links on this page.


Comments
Join the conversation
Wow I love this! i have a bunch of old sweaters I might try. Great idea.
Looks great!♥