Make A Dickie From a Shirt

Hello Readers. I had this shirt that I didn't love and didn't wear. Today's project is a dickie to wear under other shirts to add interest at the neckline.
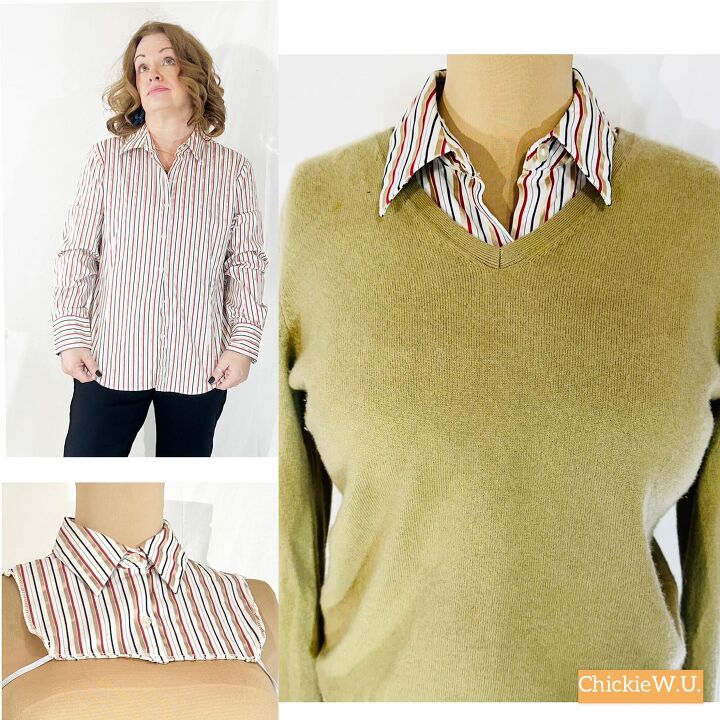
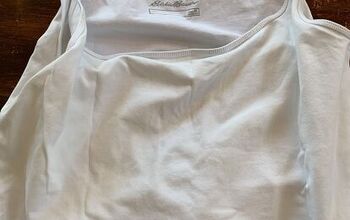
Before and after.
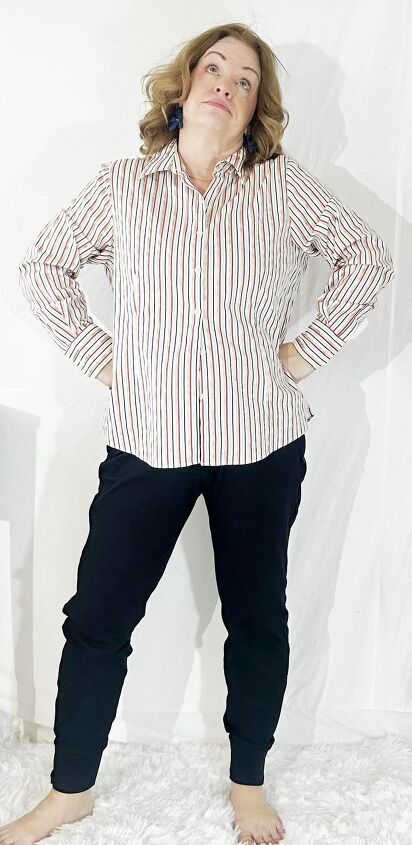
There isn't anything wrong with this button-up shirt I just never wear it. It is a little stiff and never feels comfortable when I put it on.
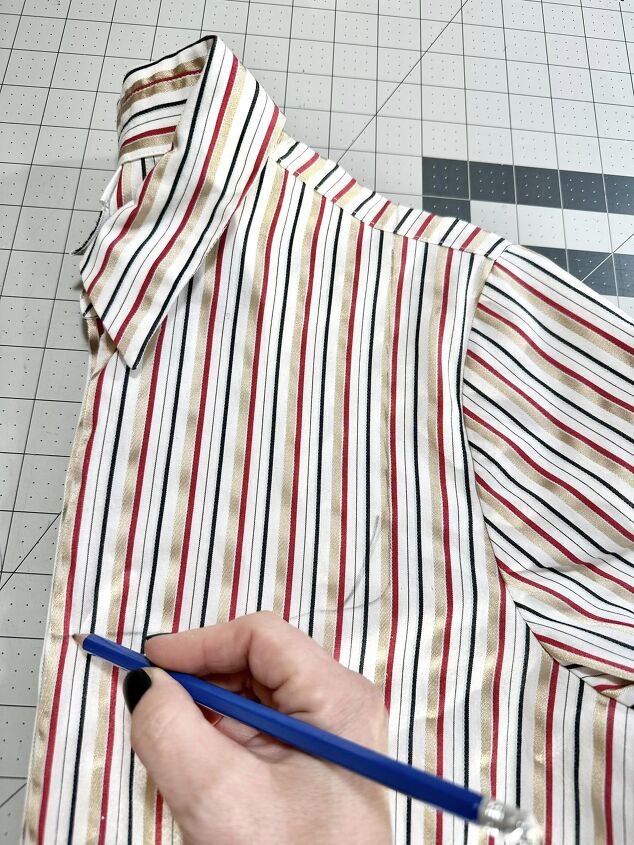
I sketched out the shape of the dickie I wanted. I folded the shirt in half so each side would be symmetrical. I only wanted the collar, and a small piece from the center front and center back below the collar.
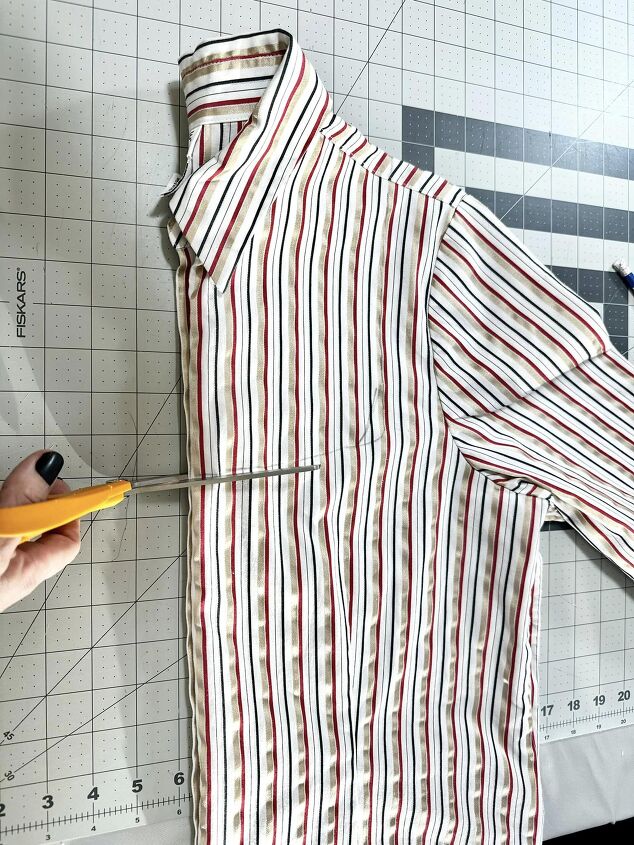
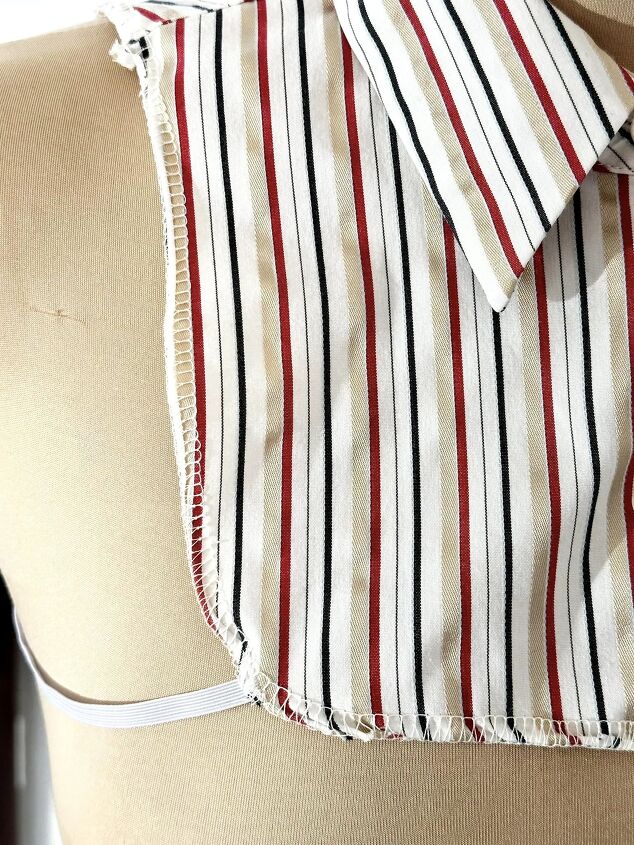
I cut the piece out of the shirt while it was folded in half. I curved the corners because I thought it would lay flat under other shirts.
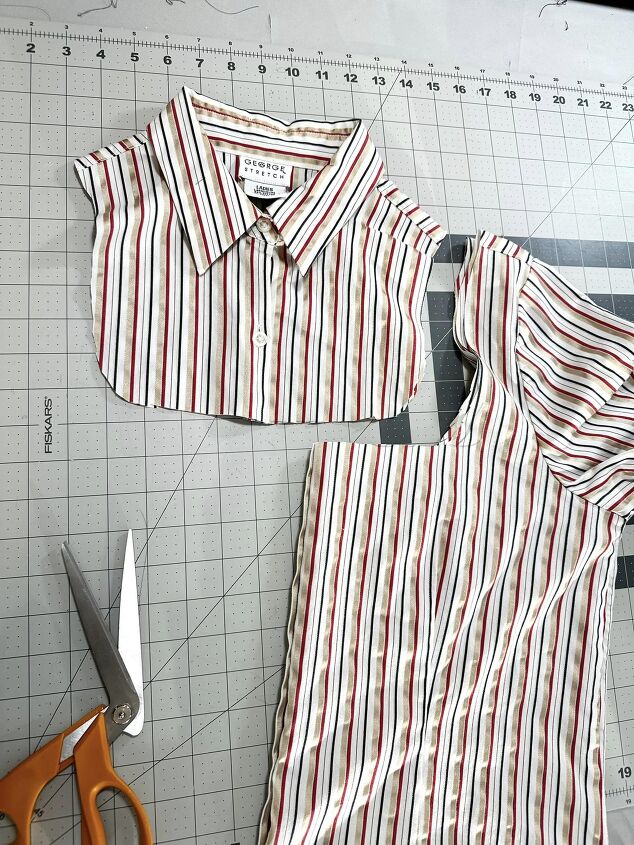
Here is is my basic dickie all cut out. I need to do a little more to finish it.
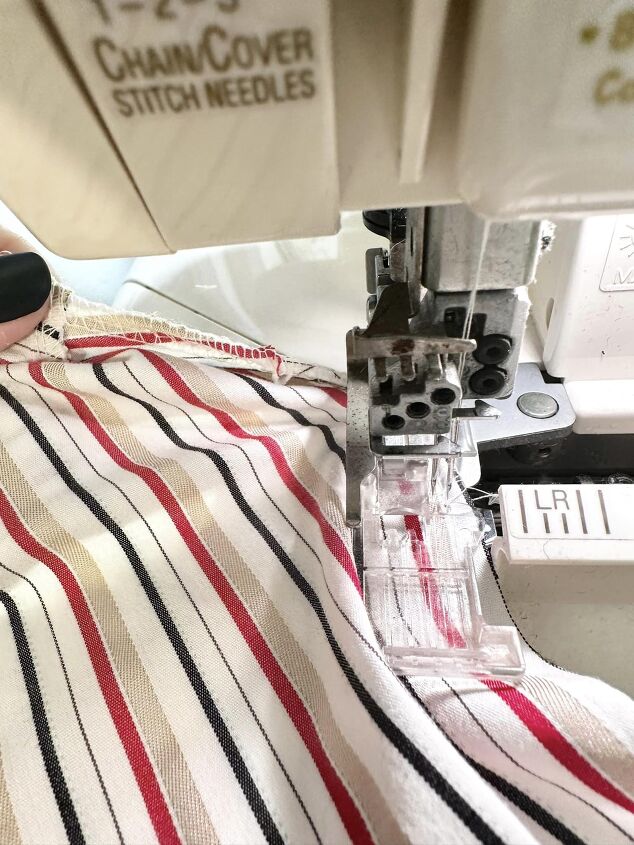
I used my serger to finish the edges. These edges will not show when I am wearing it but I don't want it to fray. You could also use a zigzag stitch on a sewing machine for this.
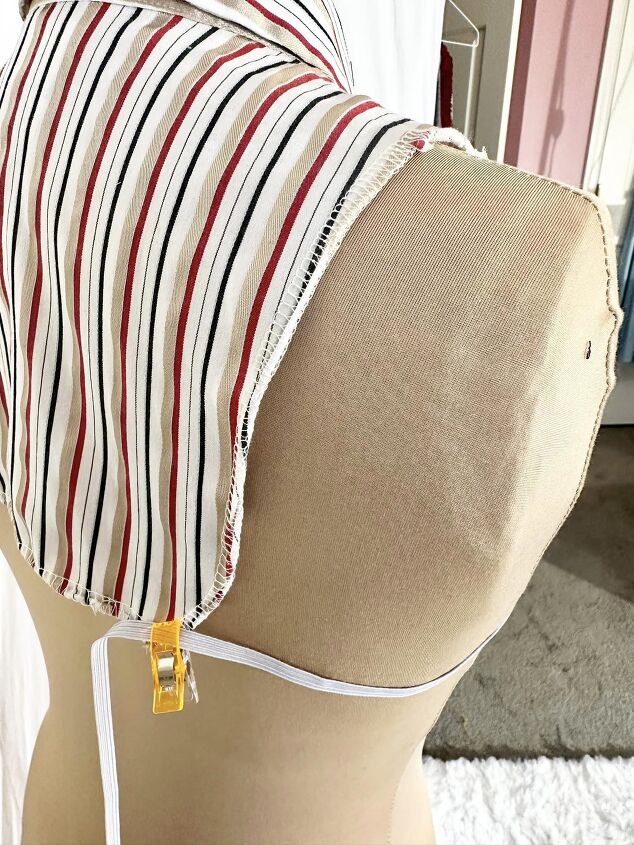
I needed to add something to the dickie to keep it in position. These elastic straps will be under my arms. They will keep the dickie from shifting or riding up when I am wearing it.
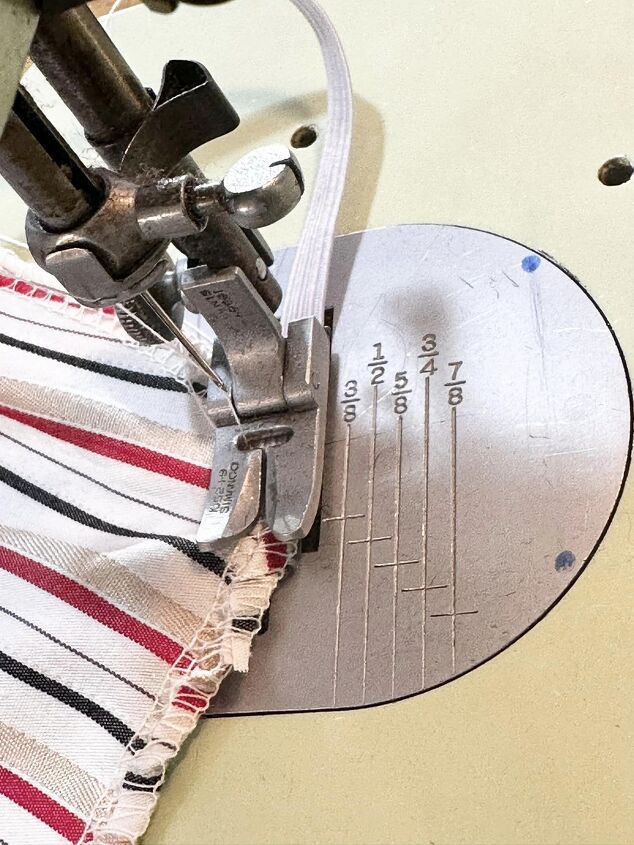
I used my sewing machine to sew the elastic to the dickie. I went forward and backward a few times to make sure the elastic was well attached.
The straps are soft, stretchy elastic so they will never get too tight.
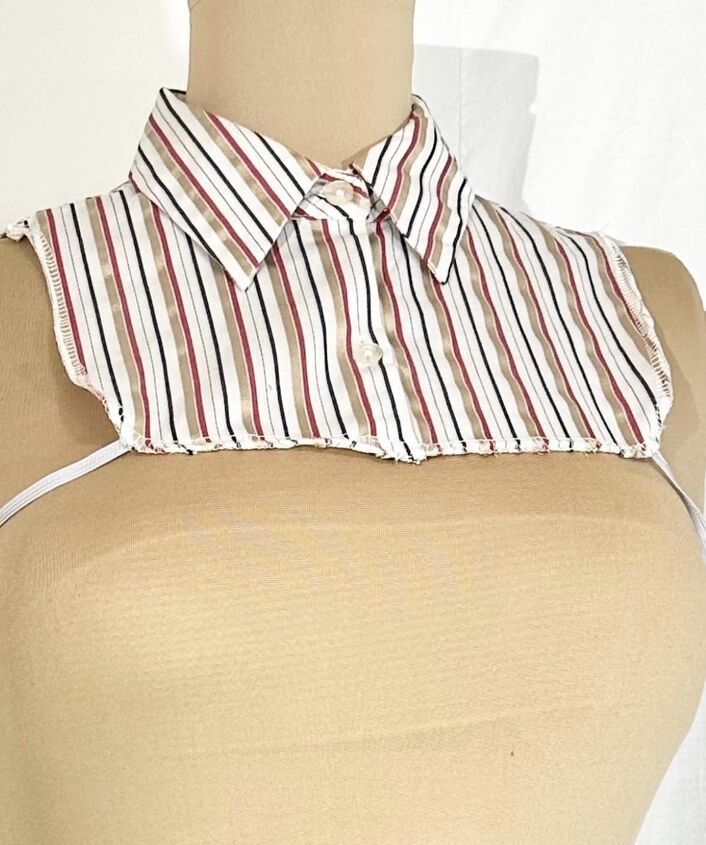
The elastic straps are on each side and are attached in front and back. They will keep the dickie where it should be under my sweater.
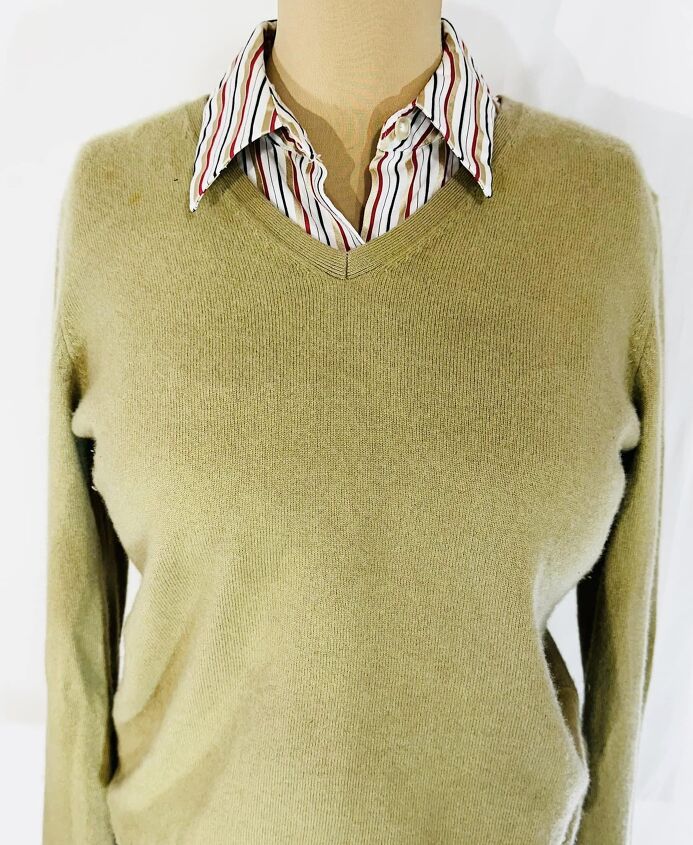
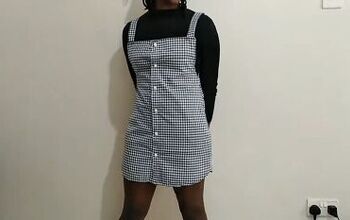
This striped dickie is great under this simple sweater. It adds a little color and interest to this shirt. Thanks for reading along, now go make something fun for yourself.
Chickie
The author may collect a small share of sales from the links on this page.


Comments
Join the conversation
I can see me trying this hack
😊😊😊