How to Taper Pants Quickly and Easily Like A Pro
Fashion seems to have a love/hate relationship with wide legged pants. One season they are the ‘must have’ pant style only to be quickly panned as a fashion faux pax the following season when designers return to the ‘skinny leg’ phase. This constantly changing fashion style is a headache for devoted fashionistas who simply want to dress on trend but cannot afford to discard entire wardrobes every season. So, if you have wide leg culottes or flared hem pants and are looking for a “ How to taper pants” sewing tutorial, then this is a must-read tutorial.
Step 1: Measure the pant hem circumference
Most wide leg pants have a large hem circumference. (It is not uncommon to see a hem circumference of 30 inches or more). To create this flared hem, designers usually begin adding extra fabric at the upper leg and gradually expand the pant leg width until they reach the desired hem width at the bottom. This means that it is easy to “remove” that extra fabric if you understand the tapering/grading process. Start by measuring your hem circumference. The easiest way to do this is to lay the pants on a flat surface and measure the hem width. Next, multiply that number by 2. For example, if your hem width is 15 inches multiply that by 2. This means your hem circumference is approximately 30 inches.
Next, you need to determine your desired hem circumference. Most straight leg pant hem circumferences fall in a range between 17 to 19.5”. Skinny pants have a smaller hem circumference, but for demonstration purposes of this sewing tutorial, I’m reducing the sample pant hem circumference to 19”.
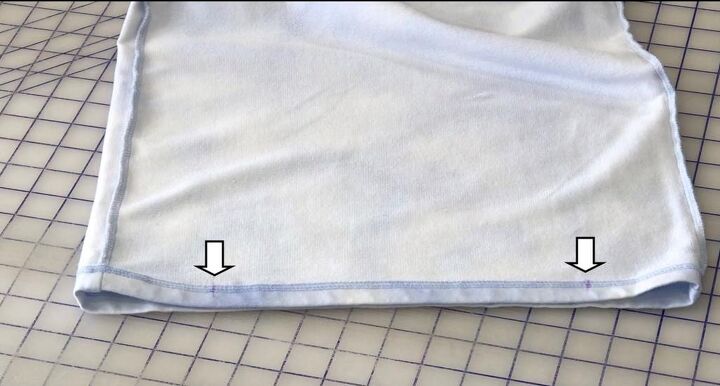
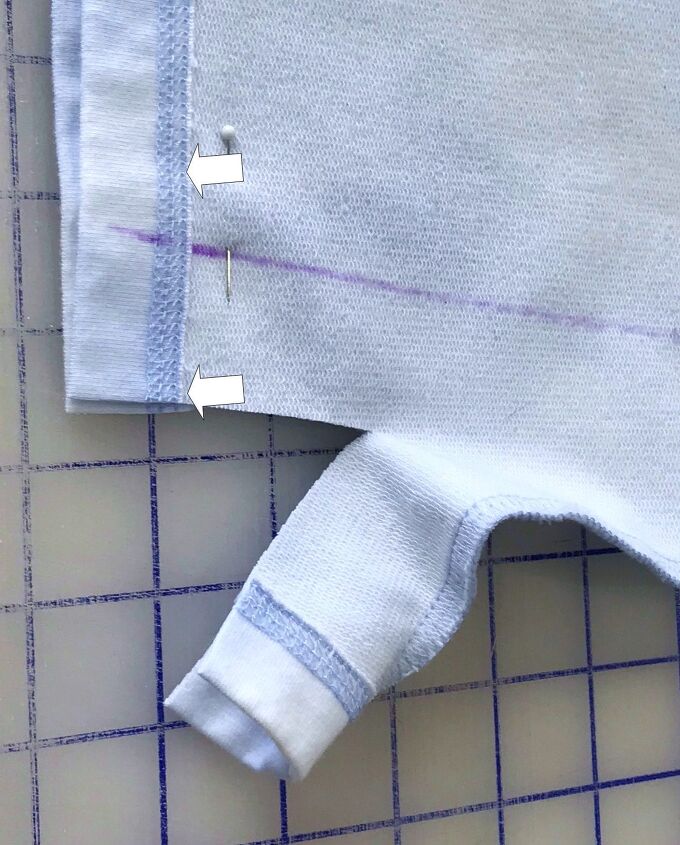
The culottes used in this sewing tutorial started out with a pant leg hem circumference of almost 30”. I needed to remove 11” from each leg. You cannot remove that amount of fabric from just one side seam and have the tapered pants hang correctly on the body. You need to equally divide the difference from the front and back as well as the inner and outer seams. To do this, I divided the 11 inches by 4 which equaled 2.75. I then placed a mark with a washable fabric pen 2.75” from the current side seams at the hem. (See photo 1)
The reason I used the number 4 is because I have a (1) leg front and (1) leg back at both the inner and outer seams of each pant leg.
Step 2: Mark the top and bottom points of new seam lines
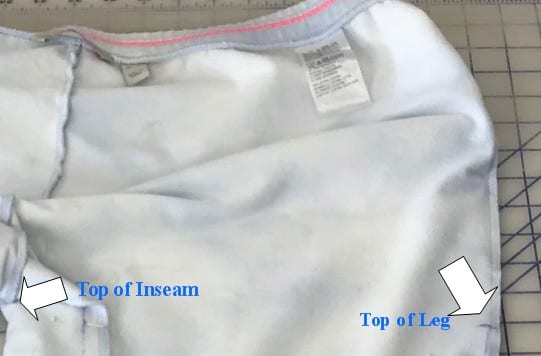
Once the new hem width points are marked you can now mark two additional points—the top of the inseam (which is located at the top of the inseam) and the bottom of the hip. This second mark is usually about 9.5” from the waistline; but may vary depending on the size and fit of your pants. The easiest way to find it, is to put a pin at the top of the leg on the OUTER seam when the pants are on the body.
These two points will now be the new termination points. (Where the pants tapering ends).
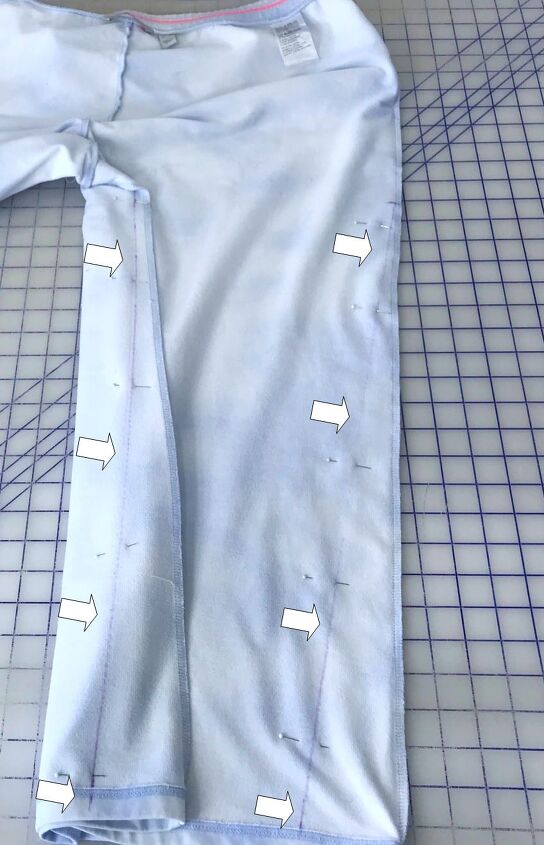
Using your washable marker and a ruler, draw a straight line from the new TOP points to the new HEM SIDE points. Each Pant leg will have 2 lines. (See photo)
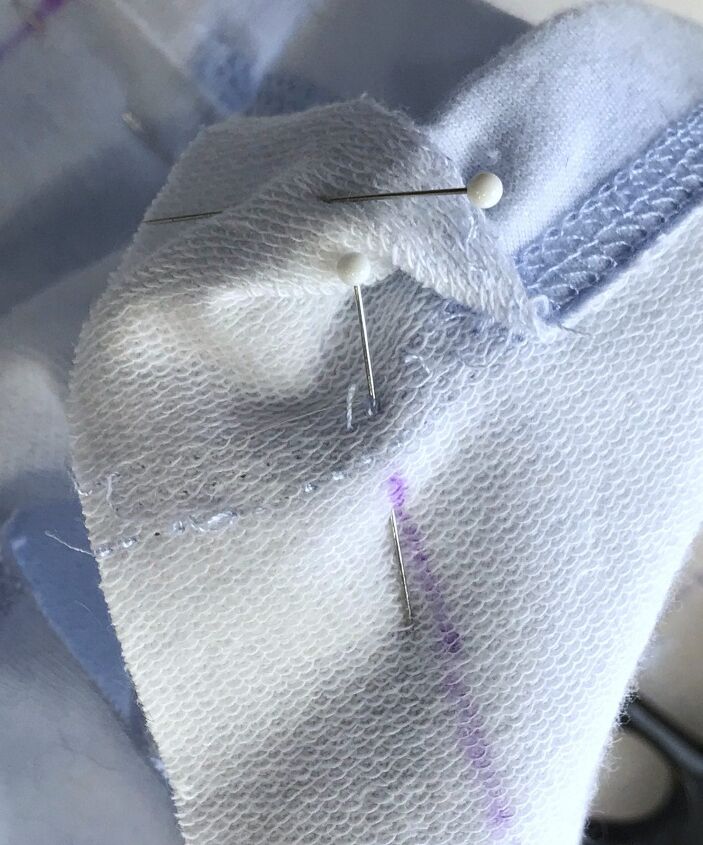
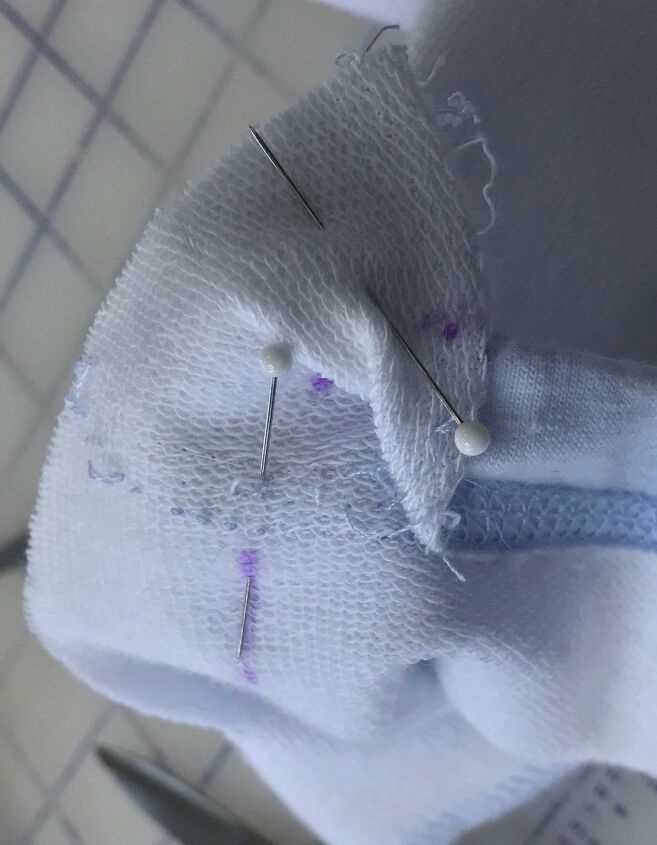
Once you have carefully drawn your new seam lines, it is important to smooth the fabric at the seams and pin the legs flat. Since you are starting with a wide leg, you will need to push the ease toward the center of the pant leg. Don’t worry if the pants look strange during this step. It’s important that you have a smooth, flat seam on both sides. Use the following photo as a reference.
NOTE: If possible, mark the seams so that the seam allowance will be facing TOWARD the sewing machine and the bulk of the pants are on the left side of the needle. It’s easier to taper without a lot of fabric to handle under your sewing machine arm. I’ve folded the pant leg over in the photo so that both leg seams are visible for you.
Step 3: Open old hem
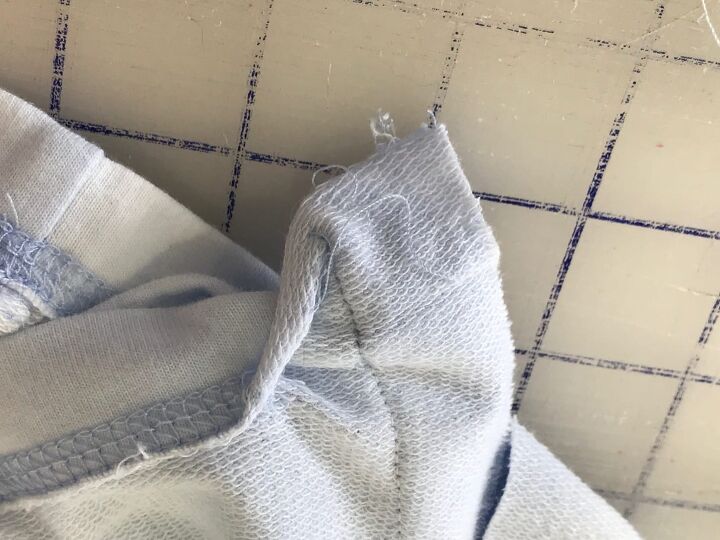
Before you sew the new side seams, you need to open a portion of the old hem near the marked side seam lines so that you can finish marking your lines and fully sew the new side seams. I’ve found that it is much faster and easier if you make a short cut on the pant leg approximately 1 to 1.5” from the new seam markings in the area between your new seam line and old seam. (See photo below) Then you can remove the hem stitching approximately 0.5-0.75” to the left of the new side seam line to the cut area. (See photos below.) Once you have the hem open, continue marking your new seam line to the unfinished hem and use pins to keep the fabric in place. I used purple dots to extend my line. You can draw a solid line to assist you.
Step 4: Sew new seams
Once all the new seam lines are marked, it is time to sew! Lets learn How To Taper Pants now… Select a general utility sewing thread that matches the color of your pant fabric as closely as possible. Use a straight stitch set to a normal or default stitch length and sew your new side seams along the marked lines. Start at the TOP area of the pant leg where your stop points are marked. Make sure that your new seam is secured and intersects the existing side seams to prevent the existing seams from unraveling above the intersection.
You may need to sew slowly and carefully smooth the fabric as you reach the hem area. Be sure to lock with a backstitch once you reach the end so that the seam is secure.

Step 5: Grade seams
After the seams are sewn, turn pants right side out and try on. Determine if the pant legs are narrow enough or if you need to make any adjustments. If you would prefer to taper the pants slightly more, now is the time to do so. Once you are satisfied with the pant leg size, it is time to grade the seams.
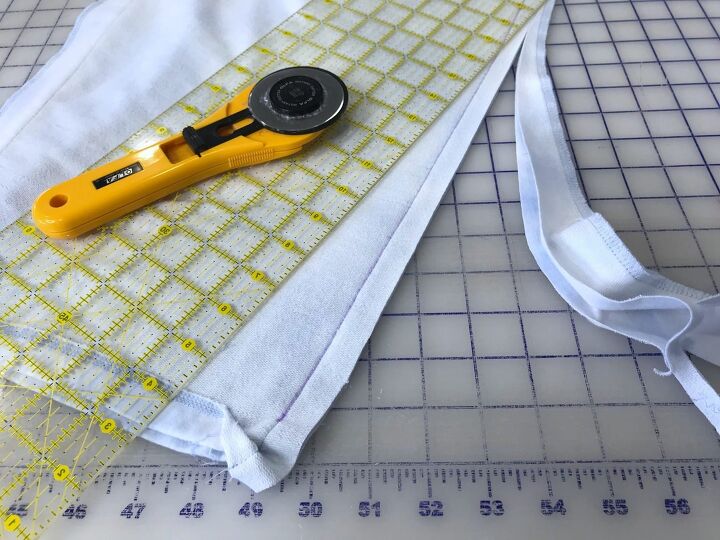
Turn pants inside out. Using a sharp pair of fabric scissors or rotary cutter, trim the seam allowance to ½”- 5/8” wide.
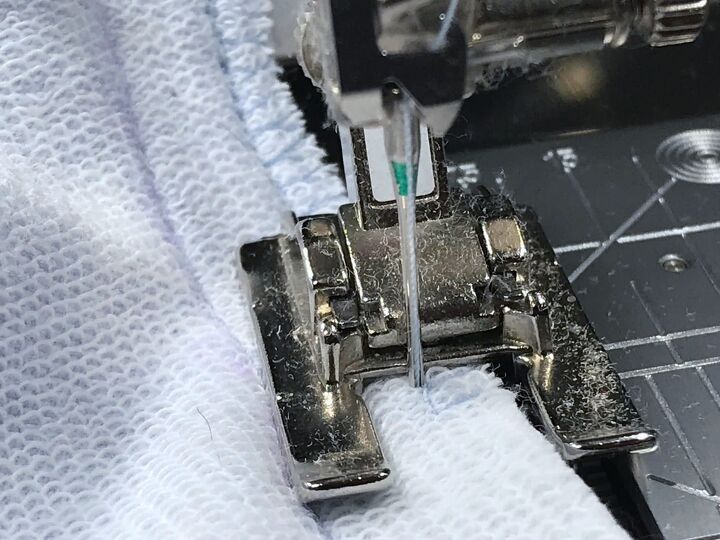
To prevent the fabric from unraveling, select a stitch on your sewing machine that resembles an Overlock stitch. If you are not familiar with the stitch, find a stitch on your sewing machine that looks similar to the one that was used to finish the raw edges on your tapered pants.
Once you finish the edges, press each seam towards the pant BACK. You can use a straight pin to hold the seam in place until you resew the hem.
Step 6: Resew hem
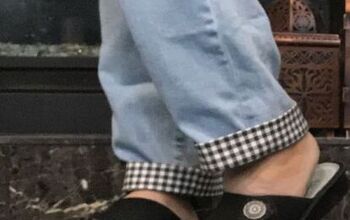
To finish this tapered pants project, flip the hem up and resew the open areas in place. If you don’t have the exact stitch on your machine that was used originally, select a hem that is similar to the original. Once you complete the hem, press the hem and pants. You are now finished!
Sewing Tips to consider:
This pants tapering technique works well with knits and woven fabrics. If you are tapering a woven fabric, make sure you do not taper too much as you will need some ease so you can comfortably walk and move in the pants.
If you are using a different stitch for the hem and don’t like the result, consider adding a trim or design to beautify the area.
While the idea of tapering pants may seem challenging, it can be successfully completed using the steps and sewing tips provided in this sewing tutorial.
If you have any questions or concerns, please leave a comment below. I will be uploading more helpful sewing tips and exciting sewing tutorials soon! Also, once you complete your pants tapering project, come back, and share them here in the comments below! I’d really like to see your sewing projects!
AlterationsDesignFabricHacksHemingHow toInspirationSewingSewist
The author may collect a small share of sales from the links on this page.


Comments
Join the conversation