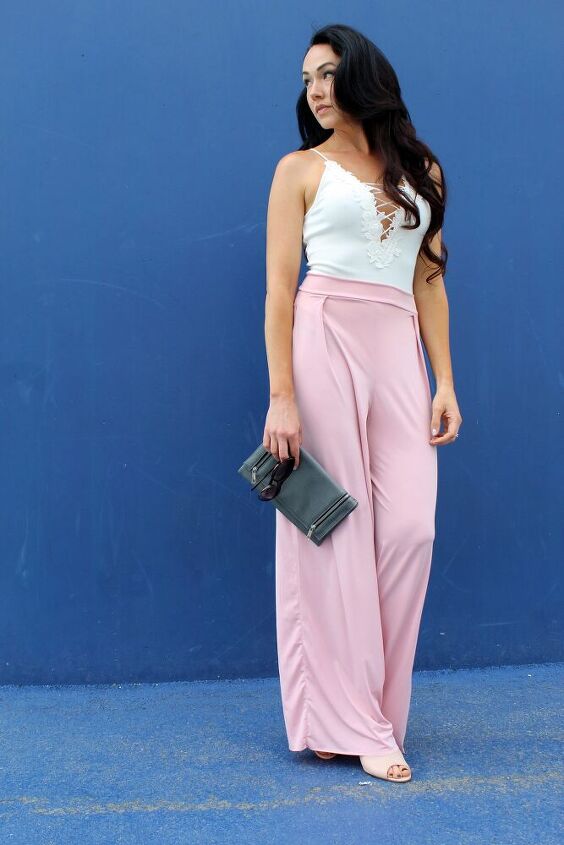
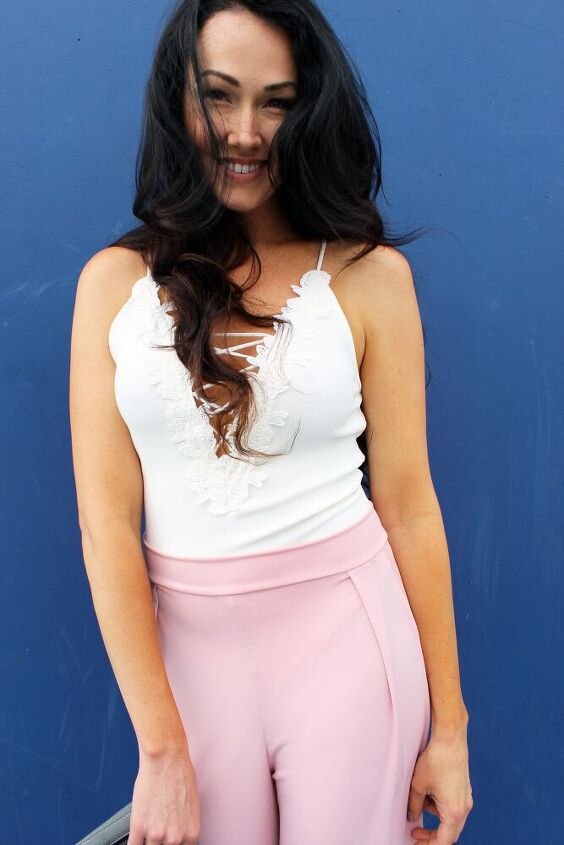
DIY High Waisted Wide Leg Trousers
This post may contain affiliate links for products I love and recommend.
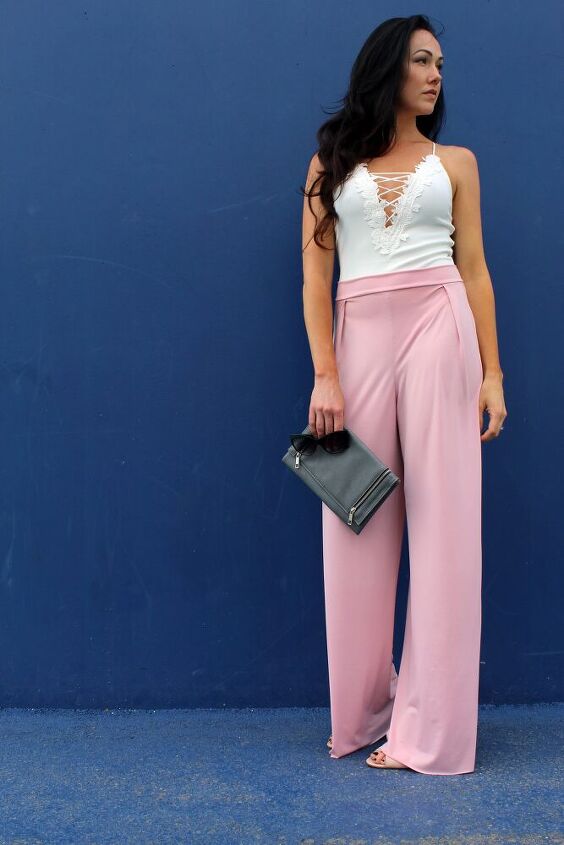
I can’t even begin to describe how excited I am about today’s tutorial! These DIY high waisted wide leg trousers are hands down the most comfortable thing in my closet and likely the easiest tutorial on Creative Fashion Blog so far. So far, I’ve made several in solid colors and funky prints and they absolutely never disappoint. I hope you like them too!
Just like the other fashion DIYs on Creative Fashion Blog, I’ll be walking you through exactly how to create your own pattern from clothes you already have. This way, you are starting with a piece that will have the correct measurements and shape you like best.
If you’ve been sewing for very long, I’m sure you have had the moment when you look down at your store-bought, tissue paper pattern and realize it’s measurements weren’t really made for your figure. In making your own clothes, there seems to always be some alterations involved, (which really is part of the fun!) but since we want this to be a quick and easy project, I prefer to use clothes I already have as the base and eliminate the confusion in the first place. Once you get the hang of basic pattern making, you’ll be able to make your own patterns in less time than it takes you to buy one at a brick and mortar store. Today I’ll show you how.
Supplies:
My supply lists are shoppable w/ aff. links for your convenience! Just click any material and get everything you’ll need to complete this project without adding extra errands to your day.
- Old baggy pants to create a pattern from (you can use pajama pants, sweats, etc.)
- Basic Sewing Machine
- 1 1/2 yards of ITY Knit Jersey – I used this kind
- Dressmaker Shears
- Dressmaker Pins
- Pencil
- Pattern Paper or Contractors Paper
- Matching Thread
- Grid Ruler
How To Make DIY High Waisted Wide Leg Trousers
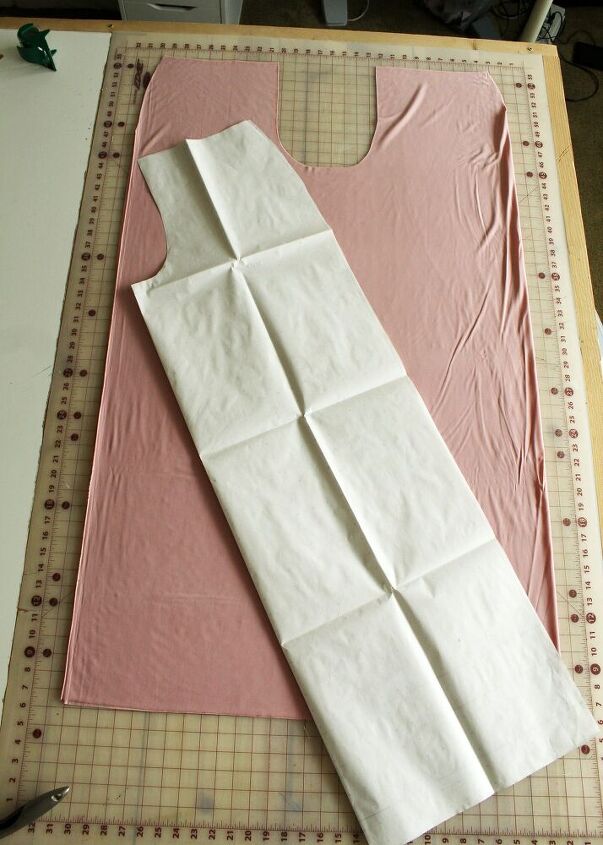
Before we really get going, we need to make your pattern! Don’t stress. It’s easier than you think. Start out by laying your pattern paper or contractors paper out on a table. Fold your baggy pants in half and lay on top.
Tip: Personally, I like contractors paper when I’m making something quickly but use pattern paper when I want to refer to the pattern later. You’ll save some money by creating your patterns on contractors paper since it’s only about half the cost.
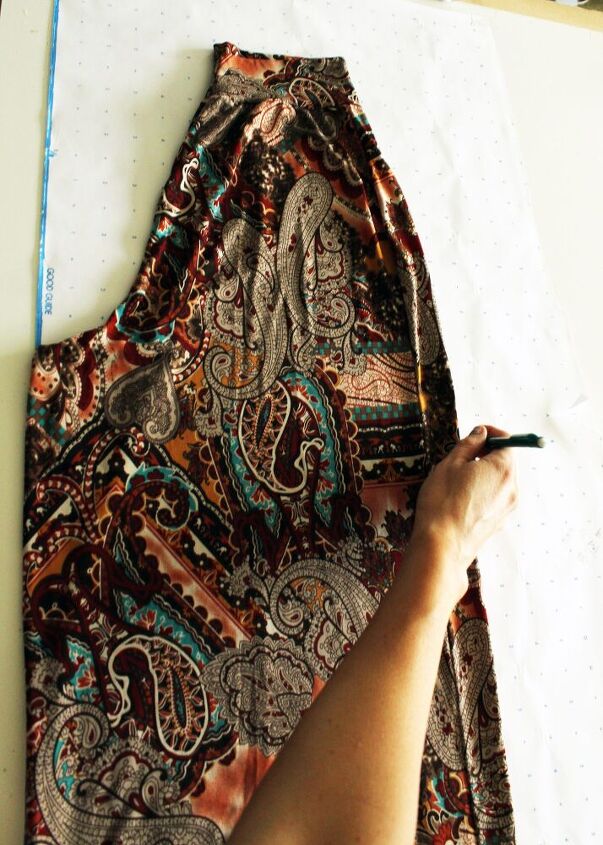
Use your pencil to trace the outline of your pants and then a grid ruler to mark 1/2″ out from your original, traced line. This will allow for seam allowances and create some extra give you make want as you’re putting your pants together. Be mindful of any pleats or gathers along the waistline of your baggy pants and be sure to pull them tight while you are tracing that part to get an accurate pattern.
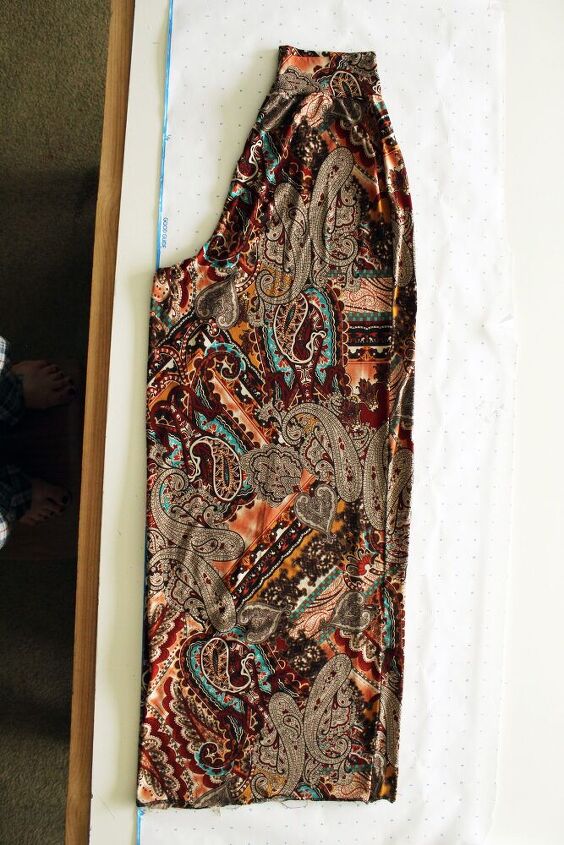
Now it’s time to cut out your new pants! Take your fabric and fold it in half before spreading it onto the table. Then, lay your new pattern over the fabric and line up your inside seam (the crotch seam and inside leg) with the edge of your pattern.
Doing this eliminates the need for an ugly seam on the outside of your leg and speeds up the time it will take to actually put your pants together.
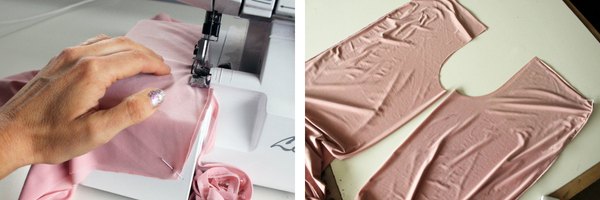
Cut your pants out and when you open up your fabric, you will have a single leg that looks like this:
Repeat on the other side so you have two funky-looking leg pattern pieces. Now, fold them back together and sew along the inside leg seam all the way down.
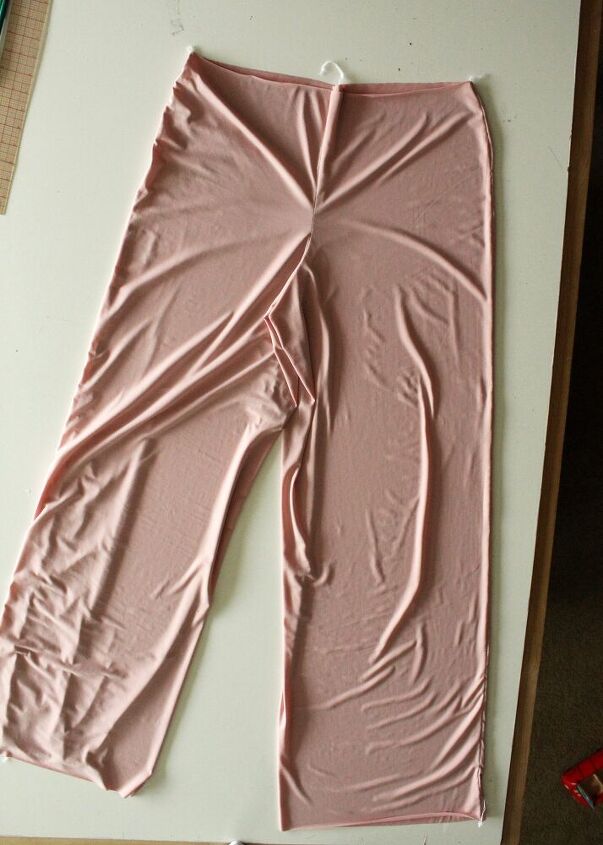
Next, it’s time to line up your crotch seams. Lay your pants down on your table as shown below and pin the legs together at the curved edges.
After they are sewn together, you can flip your pants inside out and you will have a pair of pants that look like this:
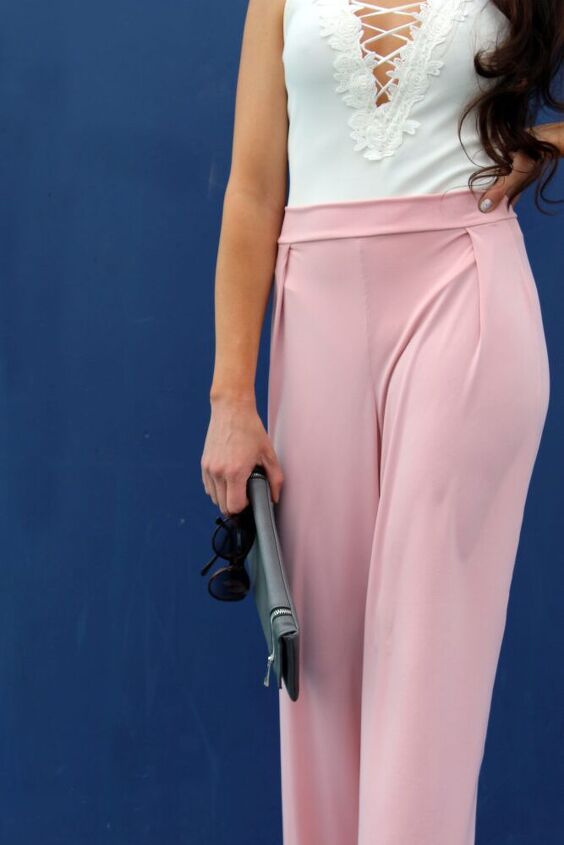
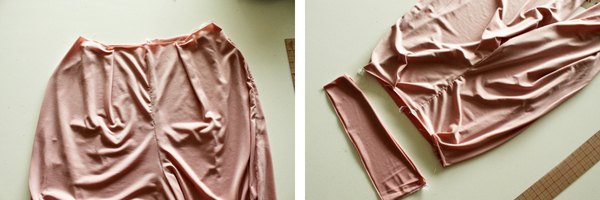
The last step is to make them a little more polished and pretty. Put your pants on and use sewing pins to mark flattering pleats.Sew the pleats in place with a criss-cross stitch (so they still stretch when you put them on) before starting on the waistband.
To create the waistband, take a 5″ strip of fabric and wrap it around your waist. Be sure it’s snug since it’s going to be the only thing holding your new pants up! Mark and sew the short ends of your strip together to create a band.
The last and final step is to fold your waistband in half (hot dog style) and pin around the body of your pants. Sew into place using either a serger or a criss-cross stitch with your sewing machine and slide your pants on!
I chose to leave the hem of my pants unfinished because I love the delicate drape and the ITY fabric won’t fray anyways. If that bothers you, feel free to finish them however you like.
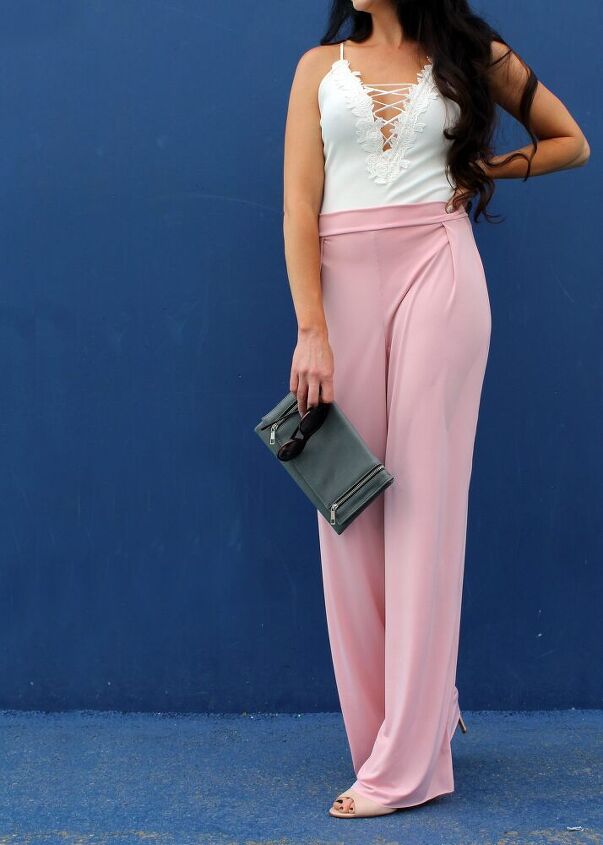
I seriously can’t get enough of these high waisted wide leg trousers. They feel so polished and chic but are also the most comfortable thing in my closet. I love the drape of a good ITY knit. It’s lightweight, comfortable, and stretchy.
Thank you so much for reading my little DIYs and supporting my blog! It’s absolutely incredible to me that I’m able to share my projects with you and you guys actually read them! I will never be able to thank you enough!
As always, if you ever have any questions while you are creating one of my projects, let me know in the comments below and I would love to help out!

The author may collect a small share of sales from the links on this page.


Comments
Join the conversation
The fit of your pants especially in the crotch area is perfect. Pants are one of the hardest designs to fit and fall well and yours do. I am wondering if your original pant that you used for a pattern is one you made or bought and if you took into consideration when making your pattern that the front and back panels in ANY pant pattern are different in the crotch area. You also did not mention if you used ball point sewing machine needles which are used with knits and delicate fabrics so they won't pull the fabric when sewing. Thank you for sharing your process.
Yes I love your project, I live in South Africa down by the Coastal side of the Country, and soft materials are a great benefit as it's very hot and humid here most of the Year. I am going to make these for sure and I will let you know how they came out.
THANK YOU FOR YOUR PATTERN IDEA.
BERNICE