Here’s How to Make These Exquisite Rhinestone Nike Slides

Spruce up your closet with some bling and dazzle! I'm going to show you how to make rhinestone Nike slides from scratch. It's such a fun and easy process! Also, you will be in awe of how beautiful these rhinestone Nike slides turn out in the end. All you need are some slides, glue, and your desired, multi-colored rhinestones. Let's make these easy rhinestone Nike slides together! So get your bedazzle game on. Here we go!
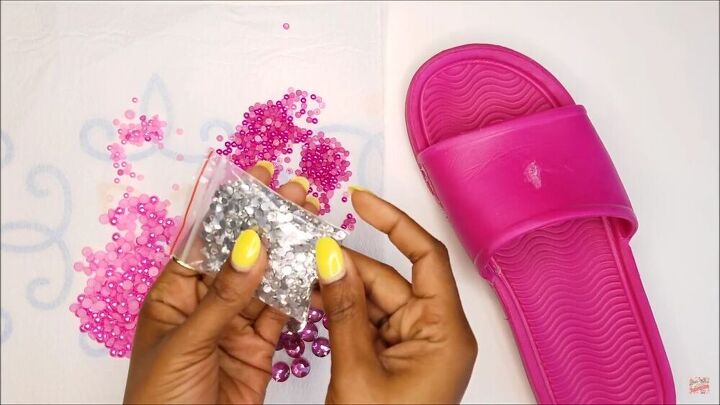
Tools and materials:
- Slides
- Paper
- Printer
- Rhinestones
- Pearlstones
- E6000 Glue for jewelry and beads
- Glove
- Skewer

Prep your workspace
First things first, get all your materials out and think of a design you'd like to make. I got a whole bunch of rhinestones and pearl stones in different shades of pink. The sizes are also different. The rhinestones are really inexpensive, and you can get the assortment from major outlets. Get all your embellishments out, including your glue and shoes. This process may take longer, but it's super fun and actually even therapeutic.
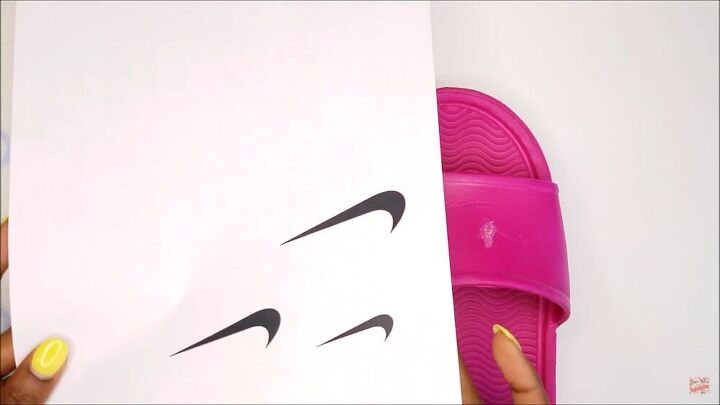
Trace the Nike logo
I wanted the Nike logo on my basic rhinestones Nike slides. If you want the same, go ahead and print the Nike check in various sizes. Cut them out and check what size would be perfect for your slides.
With a pen, trace the logo in the center of the slides.
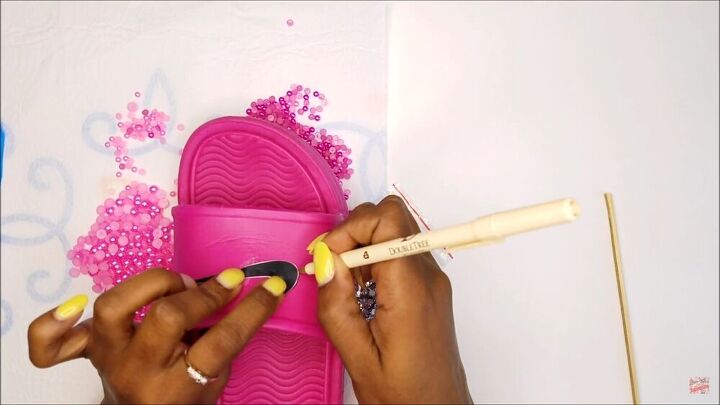
Start bedazzling
Start with the tick, and add glue inside. Next, take your desired rhinestone and use the tip of the skewer, individually stick each rhinestone inside the logo itself.
TIP-
It's important to glue the rhinestones in increments. If you add glue along with the whole area of the logo, the adhesive may dry.
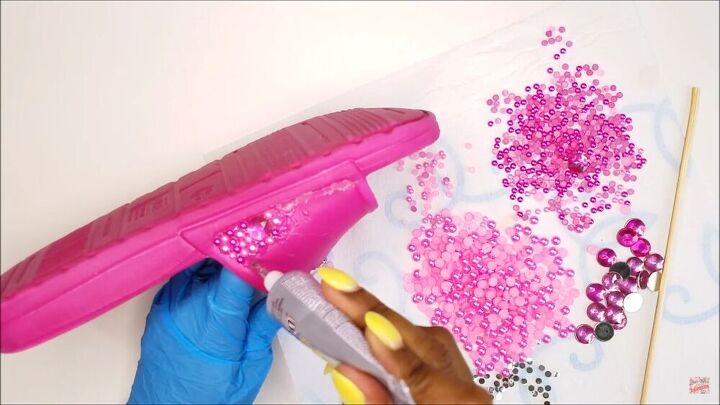
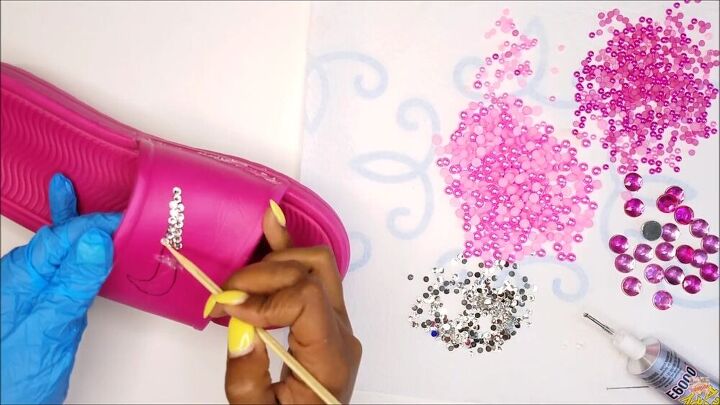
Now that the logo is all blinged out, start the rest of the embellishing process from the side of the shoe. I added some pearl stones here; also, I didn't really follow a pattern. I lay them out randomly. Of course, go ahead and do whatever you wish! The creative process is all yours.
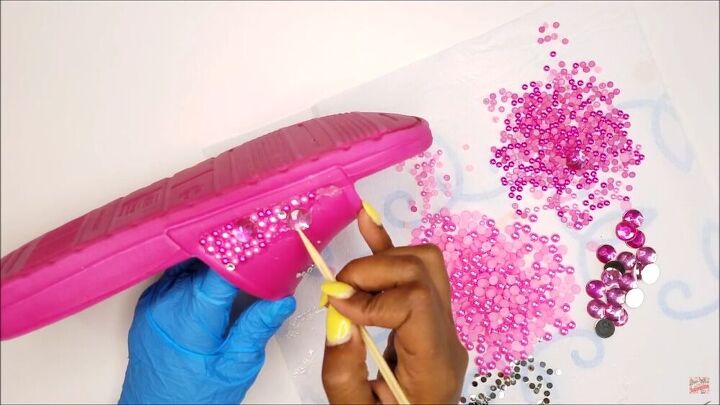
While you continue throughout the Nike slide, be sure not to apply too much glue, so the rhinestone doesn't "drown" in the glue. Remember to do this in increments throughout the whole slide. Also, set the stones out evenly and not very close to each other.
I added larger stones randomly throughout the whole surface to give it some sort of dimension.
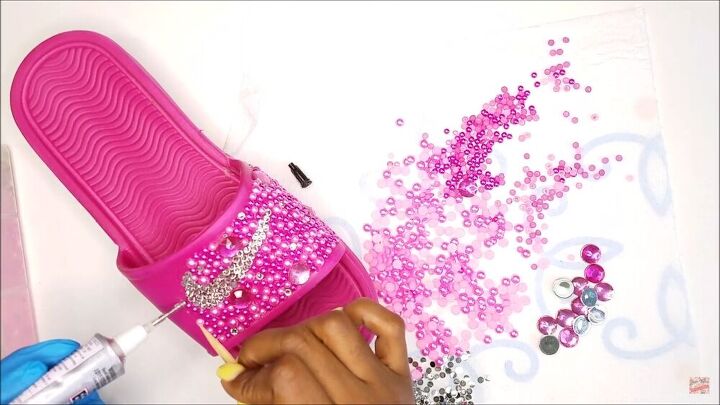
Be sure to repeat the same process on the second shoe.
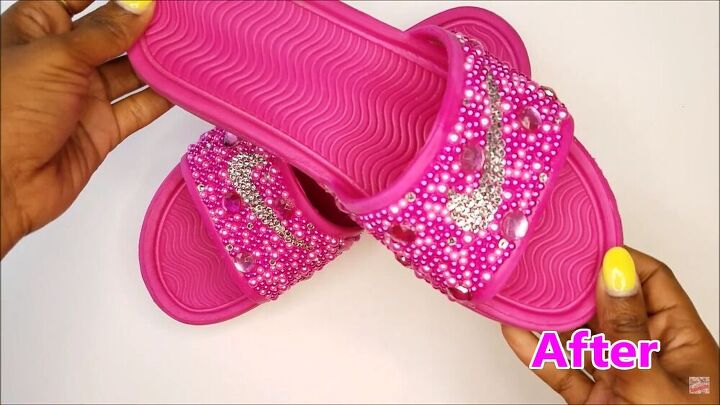
Bling queen alert! Just look at those DIY rhinestone Nike slides, beauties! There's nothing better than a bedazzled set of slides to take your outfit to a whole new level. I hope you enjoyed this fun tutorial! Yes, the process may be long, but I assure you ( as you can see) the result is so worth it! Happy blinging!
The author may collect a small share of sales from the links on this page.


Comments
Join the conversation
Are these nike slides??? Why do you put symbols on them if they arent nike, is that legal.
Wonderfully done and beautiful.