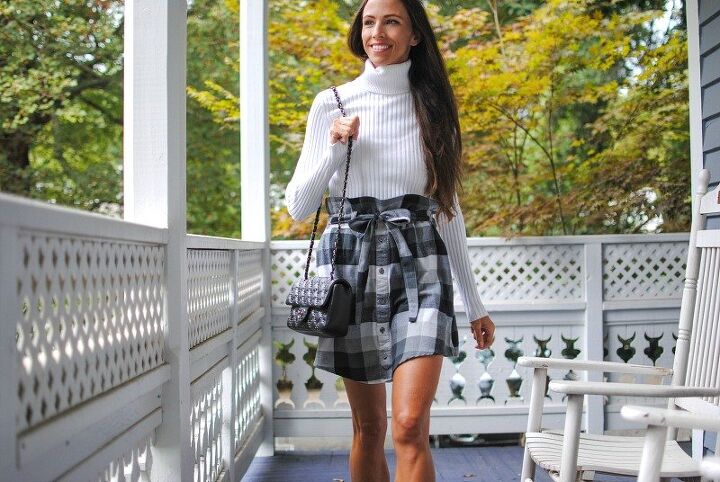
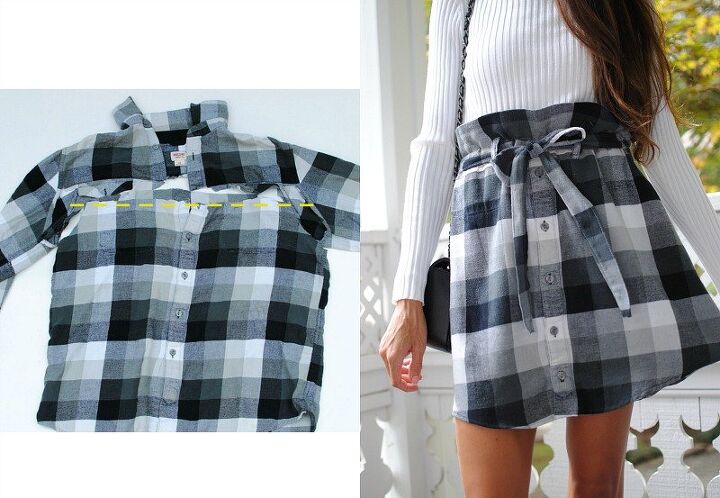
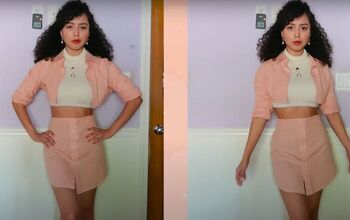
Refashioned Men's Shirt to "Paper Bag Waist" Skirt
I have been wanting to make a "Paper Bag Waist" skirt for while now and really liked the look of buttons down the center front.
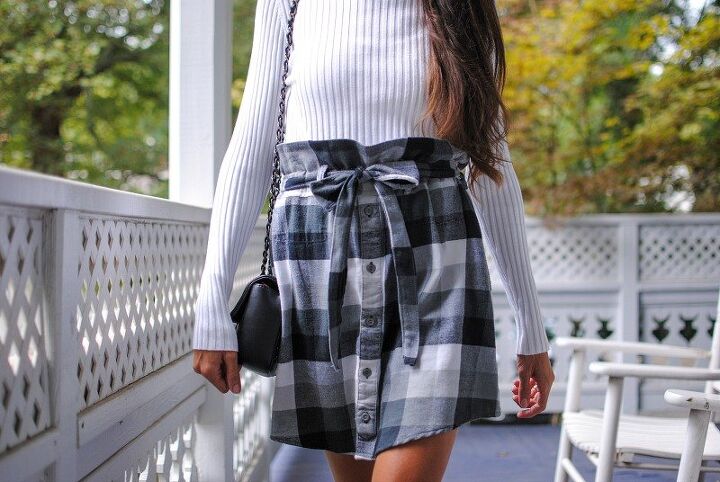
As I was organizing our closets I saw this buffalo plaid shirt my husband didn't want anymore. It was just the fabric, print, and color I was looking for with buttons right down the front.
So why make life harder when I already have the buttons and hem sewn into place right?
The trick was figuring out the "paper bag waist" which is a wide waist band with elastic or a sash to cinch and give a ruffled look. I got resourceful with the sleeves and excess shirt portion to create the waist, the tie, and the belt loops. It turned out cuter than I thought and a great fall skirt to add with a sweater and boots.
Get the details below to sew your own!

Supplies:
- button down shirt (I used my husband's XL)
- Dritz Non-Roll Elastic 1 in.
- Dritz Loop Turner
- Basic sewing notions
- Brother Sewing Machine
DIY:
Measurements:
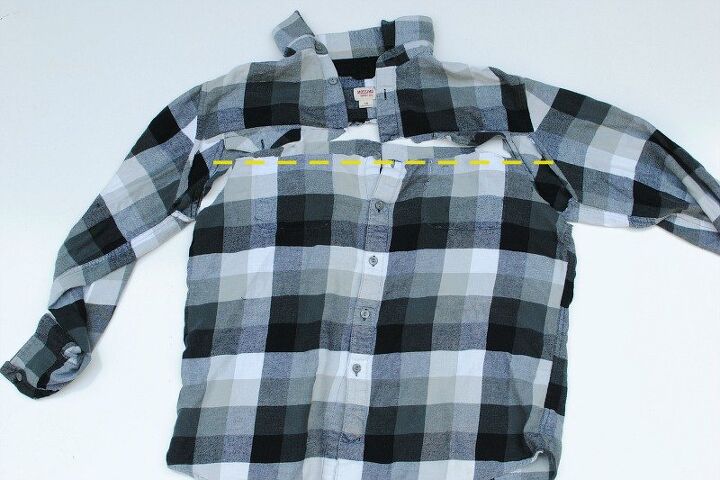
Decide the length you'd like your skirt to be by measuring from waist to point you'd like it to hit. This measurement will be your guide for cutting the shirt. You also may need to make adjustments depending on the shirt you're refashioning.
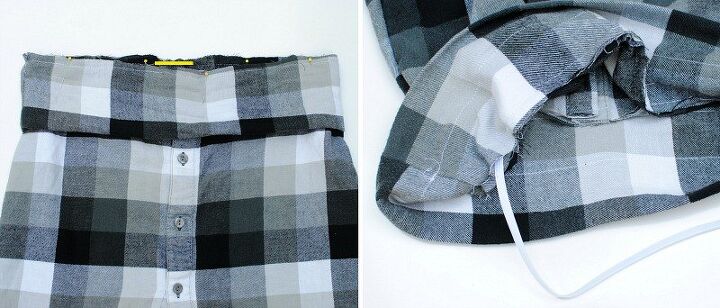
Cut just below the under arm. If you need more length you can go up a couple inches like I did. Remove the pockets if necessary.
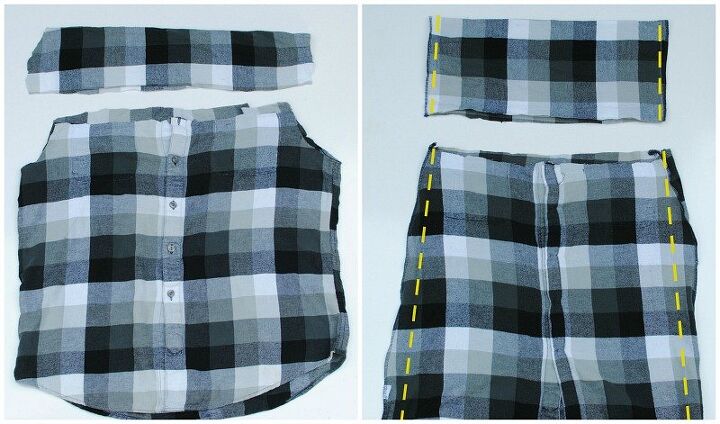
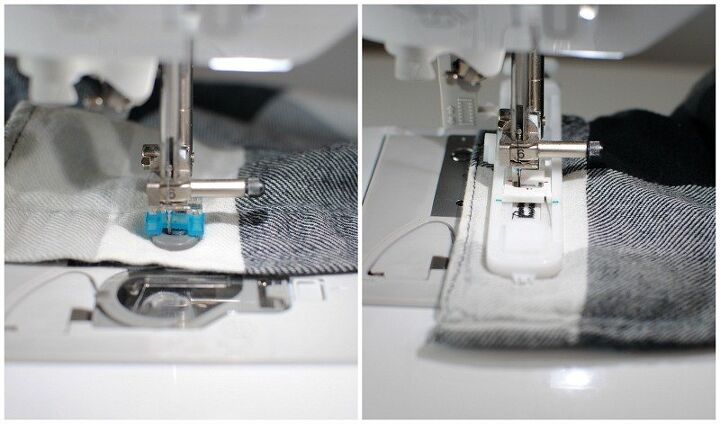
For the "paper bag waist" you will need 2 strips that measure the waist of you skirt x 7". I used the sleeves for the front and back. You will need to cut the sleeve seam to open up the sleeve so it's flat.
Flip the skirt part right sides together and sew the sides in if necessary.
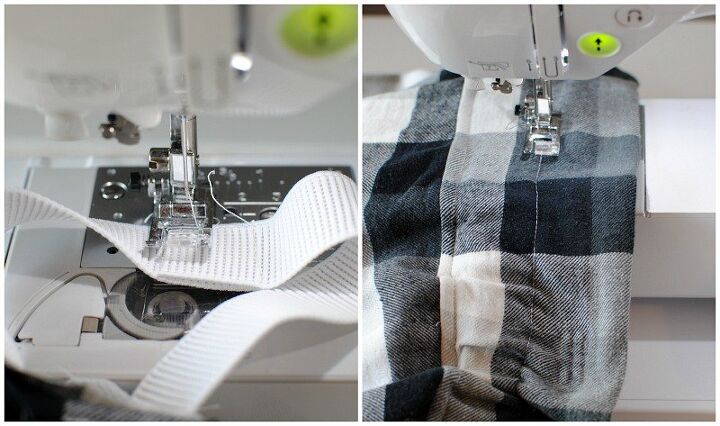
Sew the strips you cut from the sleeves right sides together at the sides creating the waist.
Fold the waist strip in half and pin right sides together along the waist of the skirt. Sew all layers leaving a 2" opening in the center back for elastic.
Cut elastic to waist size and glide through with a safety pin.
Once you both ends of the elastic are out zigzag stitch them together overlapping 1/2".
Sew the opening closed.
Top stitch just 1 1/4" above the elastic to keep it from moving up and down.
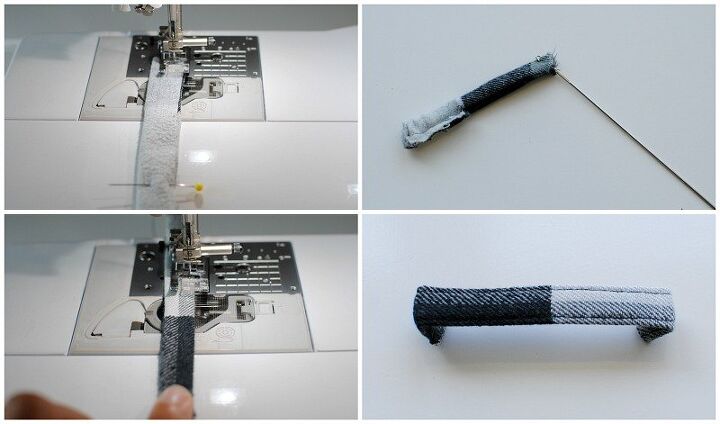
Create belt loops: I made 2 just for the front.
- Cut 2 strips of fabric (I used the pockets) that measure 1.5" x 4"
- Sew right sides together (1/4" seam allowance).
- Press seam flat.
- Flip right sides out with a Loop Turner.
- Top stitch just along the both side edges (1/8" or so)
- Fold under ends 1/4" and press.
- Top stitch onto the skirt in between the elastic casing.
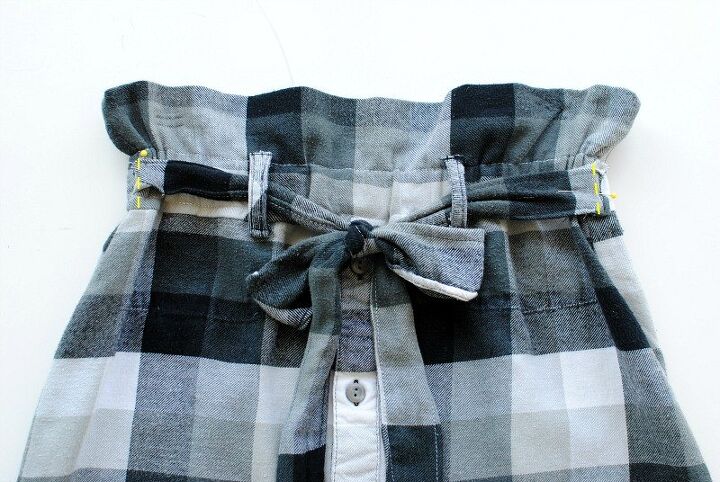
If you have any additional scraps use them to create a sash to tie around, or sew them into the side seams and just tie the front like I did. Use the tutorial for the belt loops just make them longer (20"-22").
You can also use another material if you're unable to string together two strips to create a bow tie in the center.
If necessary use the buttons from the sleeve or pocket cuff to add additional buttons/button holes at the bottom. I needed to add one.
The author may collect a small share of sales from the links on this page.


Comments
Join the conversation
Absolutely fantastic! I wish I was that talented! Loved it!
So cute and creative!