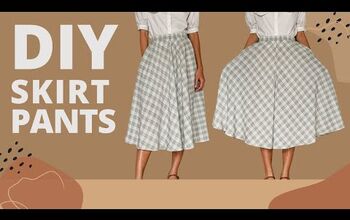
Easy Flared Skirt Pattern Tutorial

Six panel skirts are flattering to most shapes, and this flared skirt pattern is very easy to make.
The measurements I give and the elasticated waistband mean it will fit all sizes. I used woven polyester but any medium weight fabric that moves and drapes well will look great.
Upstyle Recommends!
Tools and materials:
- 2 x 56” (140 cm) lengths of 36” (90 cm) wide woven polyester fabric
- 1 1/2” (4 cm) wide elastic
- Fabric marker
- Measuring tape
- Ruler
- Scissors
- Pins
- Sewing machine

1. Flared skirt sewing pattern
Trim your fabric to 26 inches (65 cm) wide. Put the surplus aside.
Place the two pieces of fabric together and fold them in half widthways once, so you have four layers. Lay the folded fabric flat with the fold towards you.

Measure and mark 4 inches (10 cm) from the fold on the left edge and 12 inches (30 cm) from the fold on the right edge.

Join the two marks with a straight line and cut along the line to make the first two panels.

Open out the panels at the fold and place them in the reverse direction on the remaining length of the fabric, lining up the edges carefully.

Cut along the outer edge of the first panels, to make a total of six panels.

Stack the six panels together and draw and cut a curved line along the hem, making it two fingers width deep at each end and one finger width deep in the center of each panel.
Cut a similar curve at the waist edge, one finger width deep in the center tapering to each side edge.

2. Join the panels
Separate the panels and lay them out in a semicircle with the right sides uppermost.

Pin both edges of each panel to the panels next to it, with the right sides facing.

Pin the last two edges together to make a circle.

Sew all the seams.

3. Elasticated waistband
Cut a strip of fabric 43 inches (108 cm) long and 4 inches (10 cm) wide from the surplus you put aside.
Join the ends into a circle with the right sides facing.

Cut a piece of elastic 24 inches (60 cm) long or to fit comfortably around your waist.

Overlap the ends and sew them securely together.

Match the seam on the elastic with the waistband seam. Place the elastic inside the lower half of the waistband on the wrong side and fold the waistband over it. Pin it in place.

Pin the waistband to the skirt with the right sides facing and the raw edges aligned.

Sew the waistband to the waist edge, being careful not to stitch through the elastic.
Pull the elastic through the waistband as you sew, to keep the edges flat.

4. Hem the skirt
Turn up a narrow double hem at the lower edge of the skirt and sew in place.
If you’re a beginner, you may prefer to pin the hem before sewing.


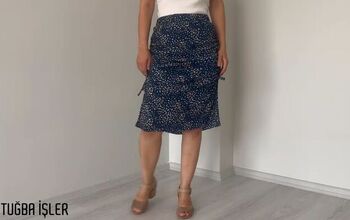
DIY skirt
I love how gracefully and elegantly this skirt moves.
If you follow my step-by-step instructions, you’ll learn how to sew a skirt that looks professional and fits you perfectly.
If you’re more experienced you can easily add side pockets between the panels, making the skirt even more versatile.
Please let me know what you think of this DIY skirt in the comments below - I love to hear from you.
Next, check out my post on a Cute and Easy DIY Bag Made From Jeans.
For more patterns and sewing tips and tricks, please follow me on TikTok: @tugbaisler
The author may collect a small share of sales from the links on this page.


![Swing Dress Pattern & Tutorial [Easy & Free!]](https://cdn-fastly.upstyledaily.com/media/2020/12/20/6348151/swing-dress-pattern-tutorial-easy-free.jpg?size=350x220)


Comments
Join the conversation