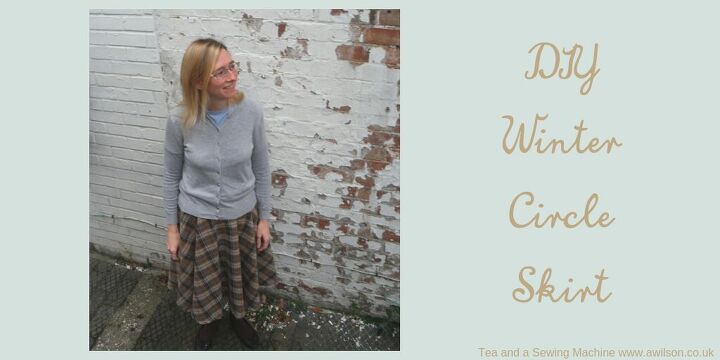
Winter Circle Skirt Tutorial
After successfully managing to lose some weight, I’ve ended up with a wardrobe full of clothes that don’t fit, and the perfect excuse to make some new clothes for myself!
Over the summer I made several new things, and by the end of August, I could manage a week of pretty vintage style dresses and skirts.
Unfortunately, the end of summer meant putting the pretty things away and going back into things that were decidedly baggy and, in some cases, actually falling off.
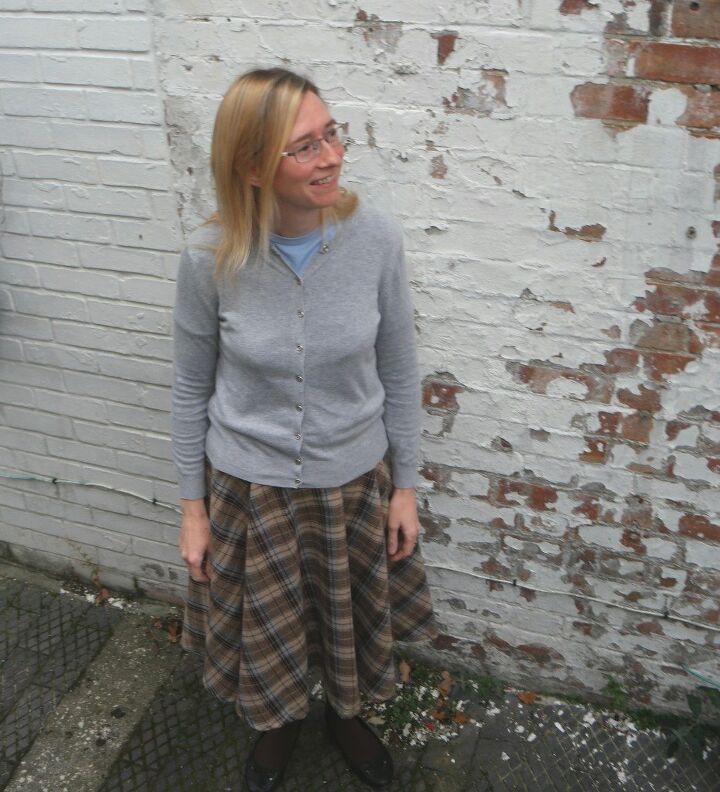
So I’m now in the process of making some winter outfits for myself. I now have a l ovely blue dress with appliqued flowers on it, and a couple of weeks ago I made myself a winter circle skirt.
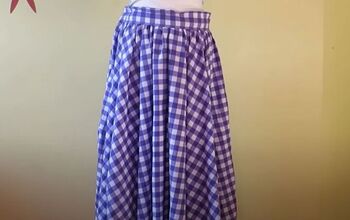
I love circle skirts and the last one I made was from a duvet cover! This one I’ve made from some lovely wool plaid as cotton duvet covers aren’t warm enough for winter!
Circle skirts are fab, and here’s why:
They’re easy to make. Although there is a zip which I know might give some of you the heebie jeebies, there is an easy way to put them in. If you’re still terrified, you could use a button or ties instead.
They are quick to make. Once you’ve made one or two, you’ll be able to knock one out in an evening easily. You could even make several at once as there’s nothing especially complicated about them and apart from the waistband, the bits are all the same.
Fitting is easy. As long as it fits around your middle and it’s the length you want, you don’t need to worry! And if it turns out to be too long or too short, that’s easy to fix. Either cut a bit off or add an extra bit of fabric, a frill or some broderie anglaise.
They look lovely on most people, regardless of body shape. There’s no gathering, so no extra bulk around areas you might not want to draw attention to.
They’re lovely and swirly to wear, and if you’re in a foofy kind of mood, you could wear a petticoat or add some circles of net underneath.
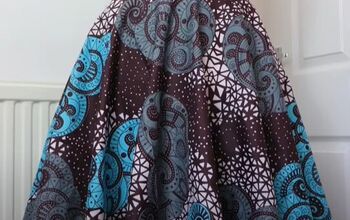
They’re the kind of thing that will work equally well whatever fabric you use. Personally I’d avoid stripes and big prints, but I can imagine them working if you match the patterns. I’ve made them in cotton prints, jersey, plain fabric, duvet covers, taffeta, chiffon, tulle and now wool plaid.
You can wear pretty much anything with them! A t shirt, cardigan, blouse, jumper, or a vest will all go.
So given that I love circle skirts and that I knew I could make one in the limited time I had, a winter circle skirt was an obvious choice!

How to Make a Winter Circle Skirt
You Will Need:
Warm fabric for the skirt, like a wool blend. Depending on your measurements and on the width of the fabric, you might need a couple of metres, or it might be 3 or 4. So check your measurements first!
Fabric for the lining
A 20 cm zip
Bias binding
1. Take Your Measurements
First of all you’ll need to measure your waist and decide how long you want the skirt to be.
When measuring yourself, let the tape measure rest gently where the skirt will sit. Don’t be tempted to pull it too tight! We’d all like those numbers to be a bit smaller, but being able to breathe is more important!
Jot down your waist measurement, then add 10 cm for seam allowance and ease. If you are planning on cutting 2 half circles instead of 4 quarter circles, you’ll only need to add 6 cm.
When it comes to length, 62 cm is a good length for most people. A skirt of this length will come to just below your knee if you are of average height. If you are either very tall or very small, or if you want a skirt that is longer or shorter, you’ll need to measure yourself.
The easiest way to do this is to dangle the tape measure upside down. When the the end is where you’d want the hem to be, make a note of the number at your waist.
2. Working Out the Squares
You’re going to be cutting the skirt pieces out from squares, so the next job is to work out how big the squares need to be.
You already have some of the information because you’ll have worked out how long you want the skirt to be in the previous step. What you need to work out now is the distance from your waist to what will be the centre of the circle.
The easiest way to do this is to take your waist measurement plus the extra cm for seams and ease, and divide it by 3. Then divide the answer by 2.
Add this to your desired skirt length and this will tell you how big the square will need to be.
3. Cutting Out
The Skirt
Now you can cut the bits out! If you prefer, you can make a pattern piece which might make things a bit quicker if you decide to make another winter circle skirt. I don’t usually bother, partly because I know I’ll forget where I put it!
Cut 4 squares of fabric with each side being the same length as your desired skirt length plus waist divided by 3 divided by 2.
If you are fairly slim, you might be able to cut out half a circle by folding the fabric in half widthways.
The thing to remember is that for your winter circle skirt to hang properly, the grain needs to be running up and down the centre front and back.
Choose which corner will be the top of your skirt. Using pins and a tape measure, start at one side and mark off your desired skirt length plus waist divided by 3 divided by 2. Measure across the skirt to the other side, keeping one end of the tape measure at the top corner.
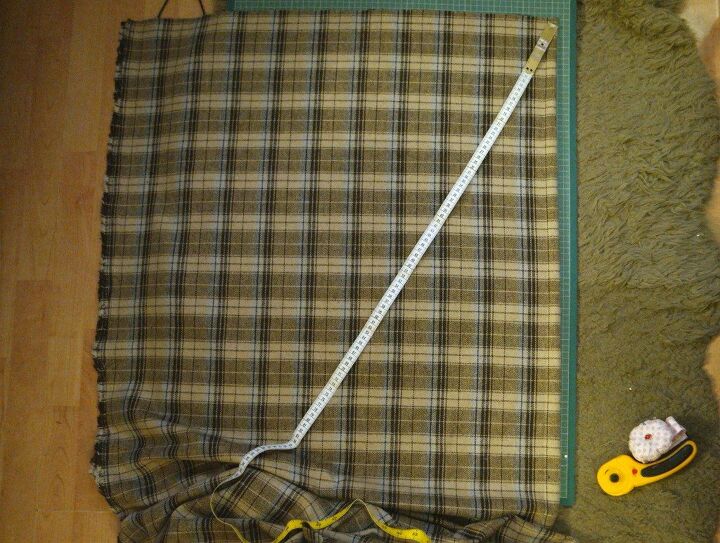
Go back to the top corner and one side, and this time mark off your waist measurement divided by 3 divided by 2.
Now cut out where you have pinned. You should have what looks like a quarter of a doughnut.
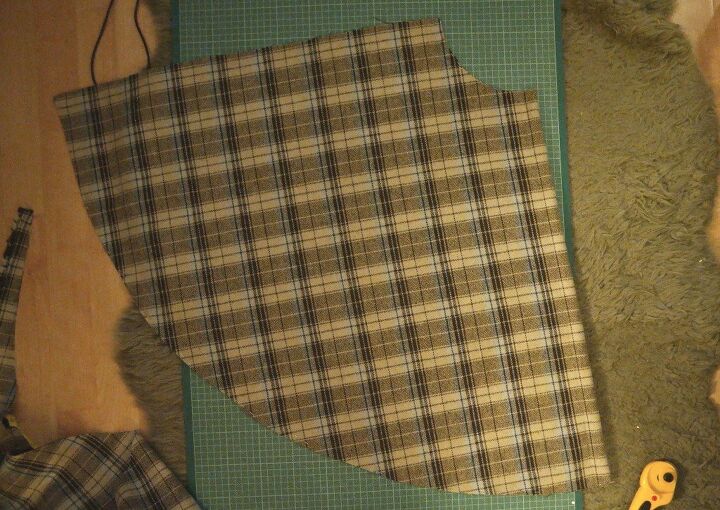
You’ll need 4 of these!
With cotton fabric, it’s possible to cut out all 4 quarter circles together, but if you’ve chosen something thicker for your winter circle skirt, it’s probably safer to cut them out 2 at a time.
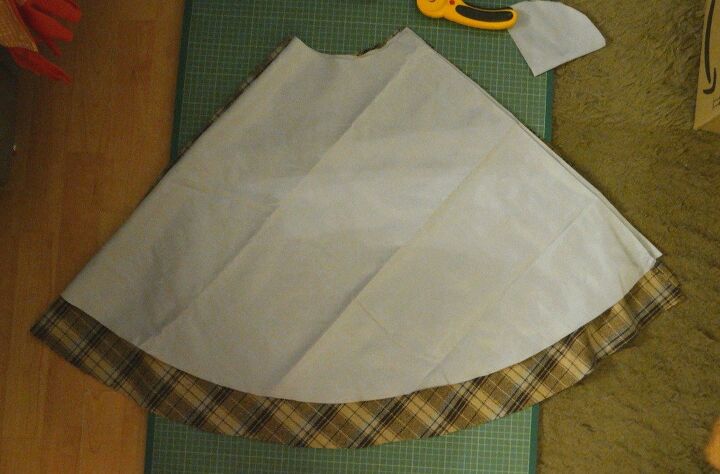
The Lining
Cut the lining out in the same way. Just make your overall length 10 cm shorter.
Cutting Out the Waistband
Cut a piece of fabric the same length as your waist plus a bit extra, and 10 cm wide. You might have to cut 2 pieces and join them.
4. Sewing the Skirt Pieces
If you’ve ended up with 4 quarters, sew the front and back sections. If you cut 2 half circles, you can skip this step!
Take 2 of the quarters and pin them, right sides together, along one of the straight edges. These straight edges should have the grain running up and down.
Sew, then trim the seam. Press it open.
Repeat with the other 2 pieces.
5. Sewing the Side Seams
If you have some safety pins handy, you might like to use those instead of pins. This is a tip from Julie of Sum of Their Stories and it definitely beats jabbing yourself with a pin!
Pin one of the side seams near the waist. Put the skirt round you and pin the other side. You might need to adjust the pins a bit so that the seams on each side are the same.
On one side, mark where you have pinned with a pencil or tailors’ chalk, then unpin it. Take the skirt off and repin the side seams. Sew both seams. Trim and press the seams open.
6. Making the Lining
If your lining sections are in quarters, sew them together to get a front piece and a back piece.
Pin the front and back sections together, using the skirt as a guide for the side seams. Sew the seams, trim and press.
7. Installing the Zip
Sewing the zip to your winter circle skirt is much easier if you sew the lining to the skirt first!
Make sure that the side seams are matched up, then sew the lining to the skirt a cm (1/4 inch) or so from the waist. You can do this either by hand or on the sewing machine.
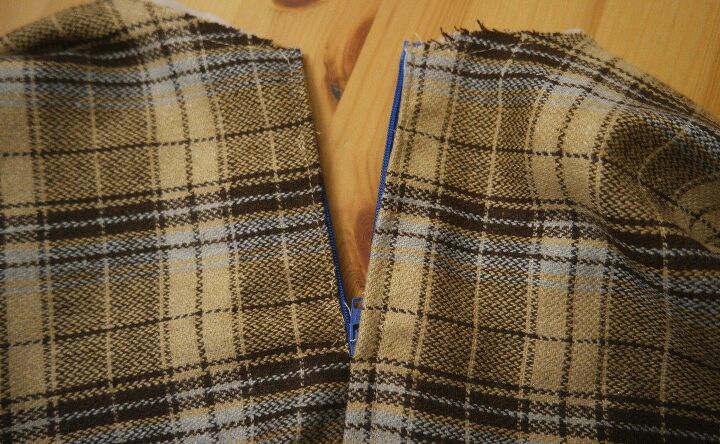
I decided to sew the zip on top of the lining because it’s easiest. If you’d like a neater finish, you could sandwich the zip between the lining and the skirt instead.
Using the zip as a guide, unpick some of the side seam of the lining.
Pin the lining to the skirt at the bottom of the bit you unpicked. Check that the unpicked bit of side seam of the lining is matched up with the side seam of the skirt.
Now pin the zip over the unpicked lining seam and the skirt seam. Tack the zip in place, checking that the teeth of the zip are over the seam.
Sew the zip. This is easiest with a zip foot, but you can still do this if you don’t have one.
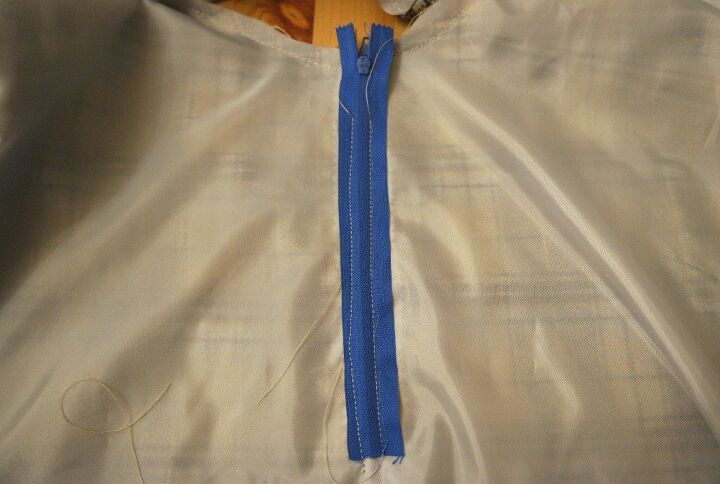
Now unpick the part of the skirt seam that’s covering the teeth of the zip.
When sewing the zip, it’s easiest to start some way down from the zip pull. When you’ve unpicked the seam, move the zip pull down into the bit you’ve sewn already, then sew the top of the zip.
8. Making the Waistband
If you need to join the pieces of your waistband, do that now.
Fold the waistband in half lengthways and press. Your finger will probably do! If not then use the iron.
Open it out, then fold the long raw edges into the centre. Fold it in half lengthways again and press, with your finger or with the iron.
Unfold the waistband. Pin one of the long edges to the waist of the skirt on the wrong side. The waistband needs to be face down, so that once you have sewn it to the wrong side, you can fold it over the raw edges using the creases you pressed into the waistband earlier.
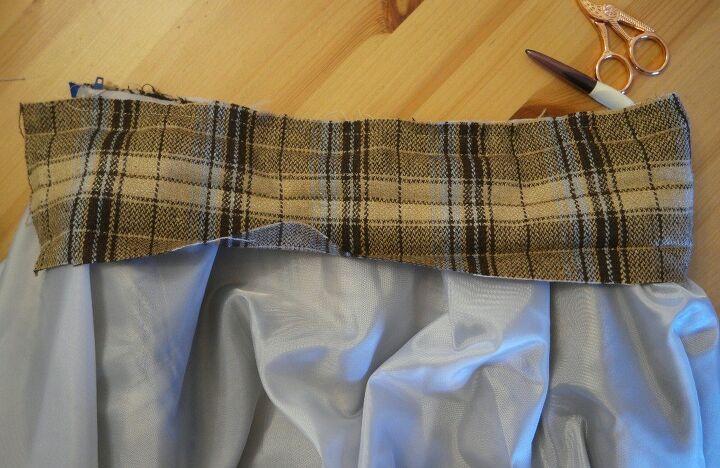
Sew the waistband to the skirt, keeping close to the folded edge. Leave a couple of cm either side of the zip.
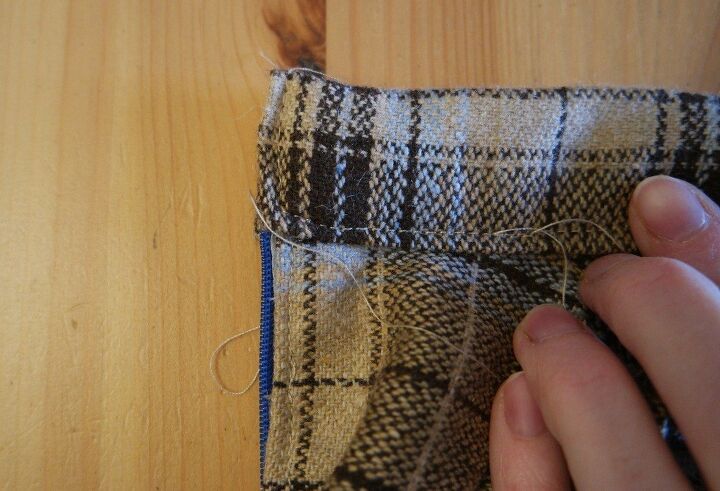
Now fold the waistband over to waist of the skirt. Tuck the raw edge of the waistband underneath so that all the messy bits are enclosed.
Topstitch around the waistband.

When you get to the zip, tuck the ends in and sew.
9. Finish the Hems
The easiest way to finish the hem on your winter circle skirt is with bias binding.
As it’s going to take quite a lot, it’s best to leave it on the roll. Starting somewhere inconspicuous (A side seam is a good place), pin one end of the bias binding to the skirt on the right side, so that the right sides are together.
Sew the bias binding to the skirt, keeping close to the folded edge.
When you get back to where you started, overlap the ends of the bias binding by a cm or two and sew over them.
Fold the bias binding over so that it’s all on the underneath of the skirt. Press it, then sew the bias binding to the wrong side of the skirt, keeping close to the other folded edge.
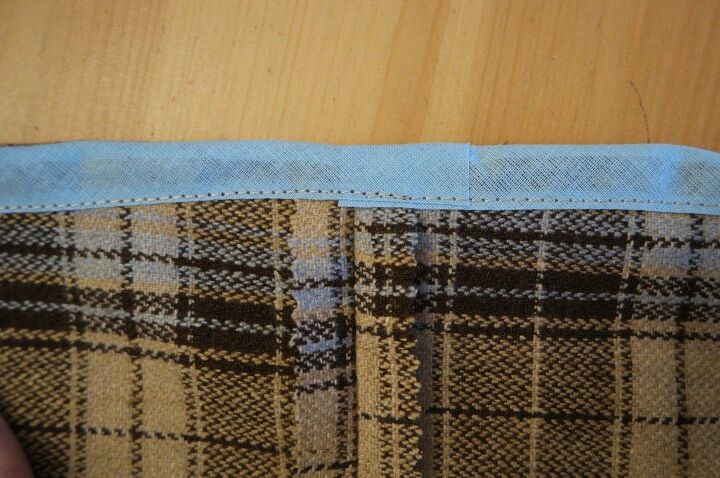
Finish the hem on the lining in the same way.
Trim away any stray threads, run the iron over it and your winter circle skirt is ready to wear!


The author may collect a small share of sales from the links on this page.


Comments
Join the conversation