Learn How to DIY a Fun and Easy Sweater

It seems I just can’t get enough sweaters! I love how comfy and cozy they are! I decided to DIY an amazing new sweater to add to my collection. This simple, easy-to-make piece has become an absolute fashion favorite of mine! If you want to learn how to make a super cute sweater in just a few simple steps, my tutorial is for you! Follow my easy, step-by-step guide and get started on DIYing this totally gorgeous and extremely comfortable sweater.
Tools and materials:
- Measuring tape
- Ruler
- Paper
- Marker
- Fabric
- Ballpoint needle
- Sewing machine
- Pins
- Scissors
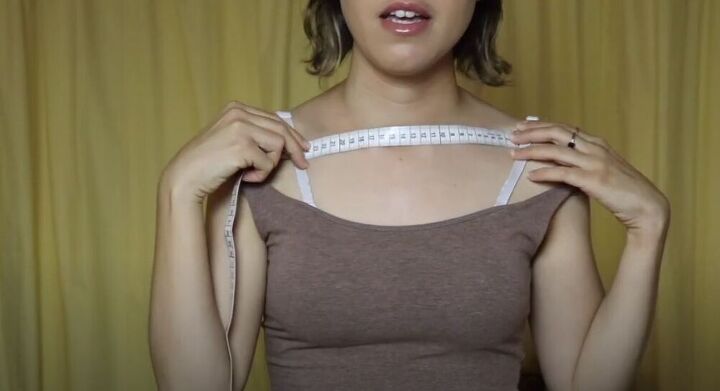
Before you get started on sewing this amazing sweater start by taking a few measurements. The first measurement you will need is for the neckline. I suggest measuring in between your two bra straps to get an accurate measurement.
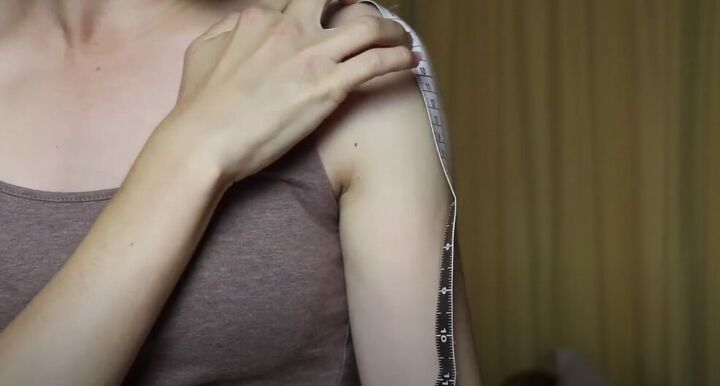
For the next measurement, you‘ll need to measure from the inside of your bra strap until the end of your shoulder. Make sure to also get a measurement for the sleeve by measuring from the end of your shoulder to your wrist. You can make the sleeve shorter or longer if you prefer to!
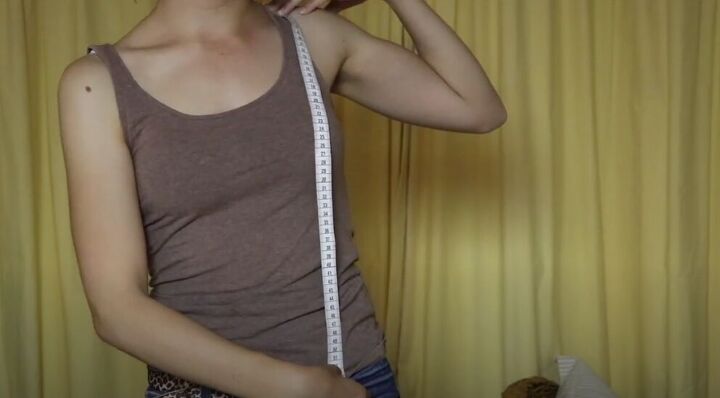
You’ll also need to measure from your shoulder, over your bust, and down to the length you want your new sweater to end. I measured until the waistband of my jeans but feel free to make it longer or shorter.
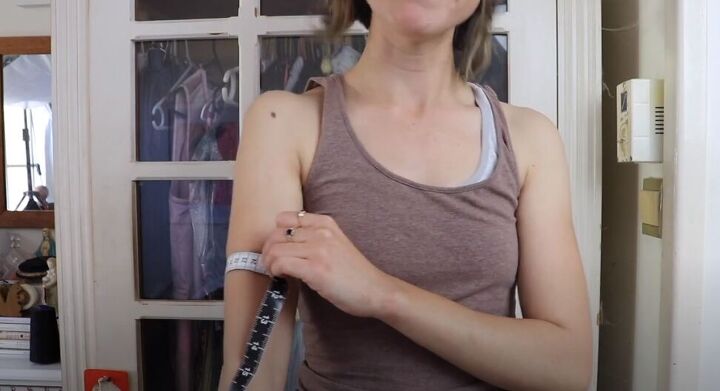
Lastly, don’t forget to take a bicep measurement before you can start drafting your pattern for this stunning sweater.
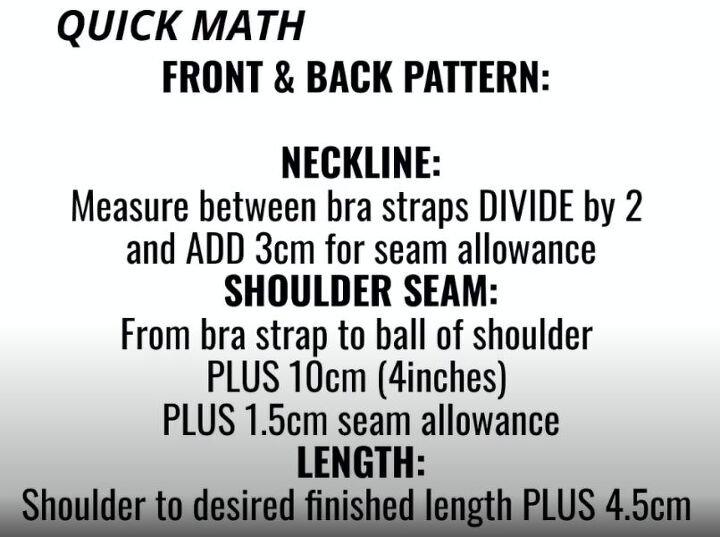
To help out before making the pattern, I did a little bit of quick math using the measurements. This will be really helpful for drawing the pattern pieces.
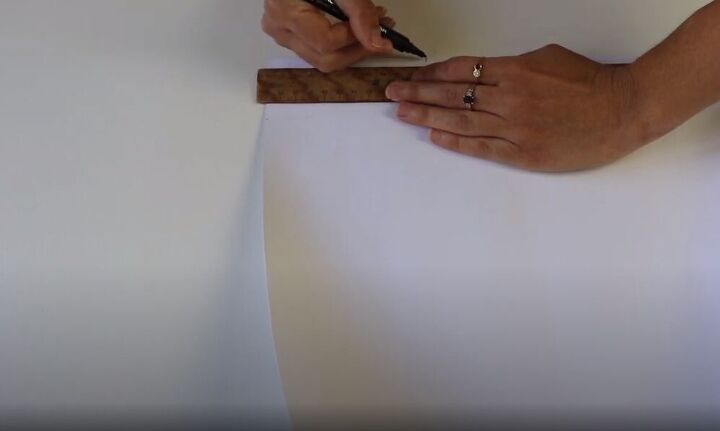
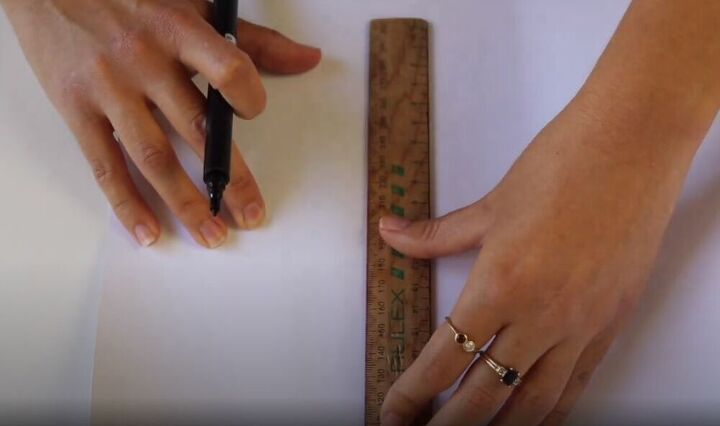
To create the pattern, I used a piece of cardboard but any paper you have at home will work just as well. Start at the straight edge of the paper and mark the ‘between the bra straps’ measurement divided by 2.
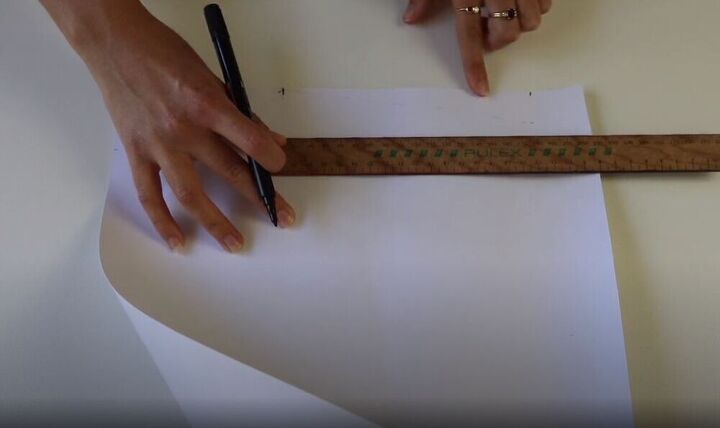
Next, starting from your marking, use the ruler to get the length you measured to the ball of your shoulder, plus 10 cm. Make sure to mark this point on your paper as well.

Starting from the marking you just made measure 2.5 cm down and mark it.

Using your ruler, start at your latest marking and draw a straight, diagonal line to the first marking you made. This will be your shoulder seam.
For the neckline, measure from the corner of your cardboard down. I measured out 5 cm but if you want a lower neckline you can definitely add on a cm or two.
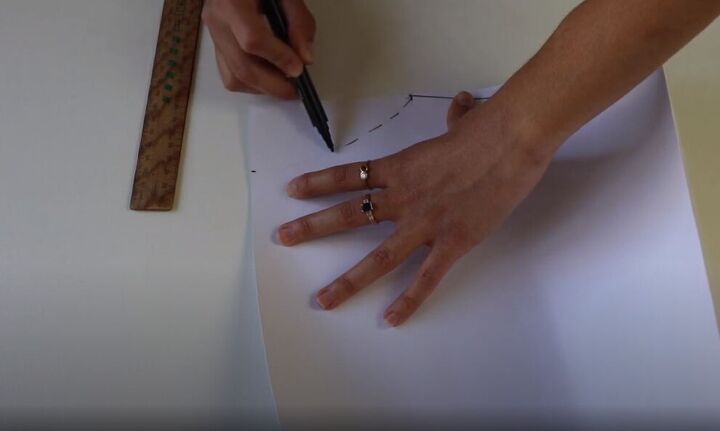
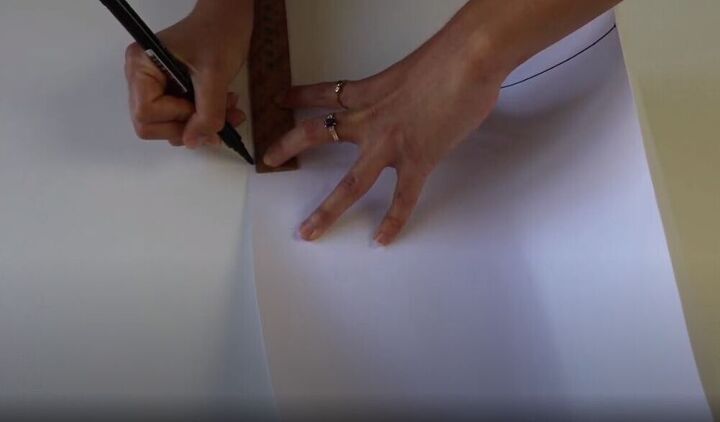
If you don’t have a french curve you can start by just doing little dots and sketching out the curve. I decided to use the same pattern piece for the front and back, but if you want a higher neckline at the back, you can move the marking up a little and redo the curve.
Next, you need to measure the length of your sweater, Start at the edge of the neckline and mark the length you measured plus 4.5 cm.
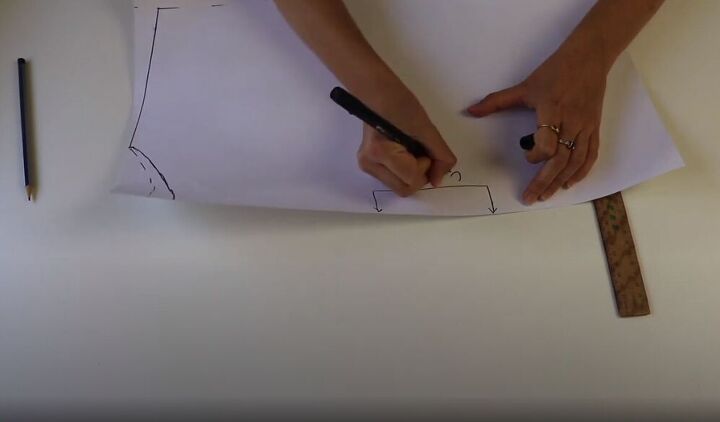
This pattern piece can be used for the front and back of the sweater. Make a little marking so that you know where you need to cut on the fold of the fabric. Once you have finished drafting this pattern piece, you can cut it out.
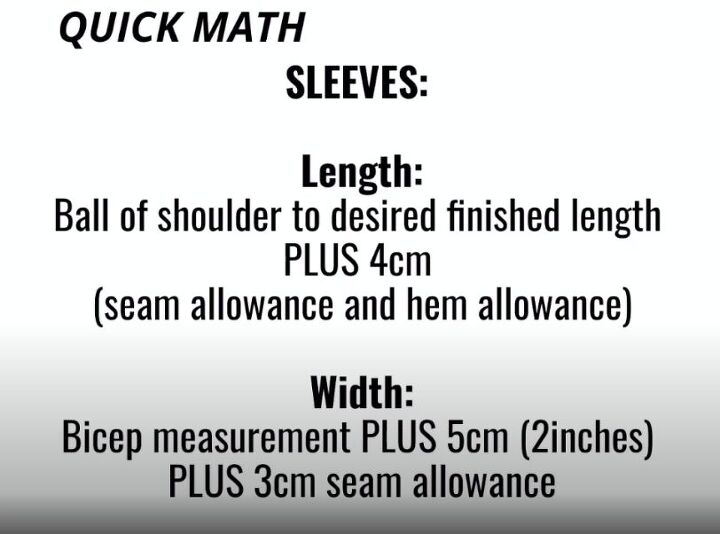
I did a little more quick maths to help with drafting the pattern for the sleeves. To draft this pattern piece, you will basically be drawing a rectangle. Just make sure to follow the maths and add seam allowance where necessary.
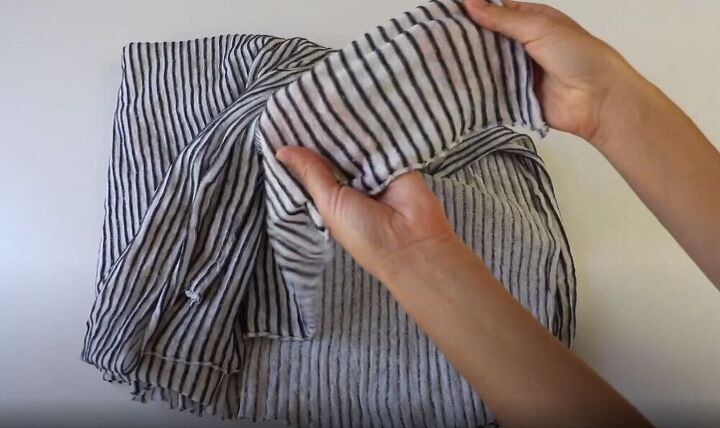
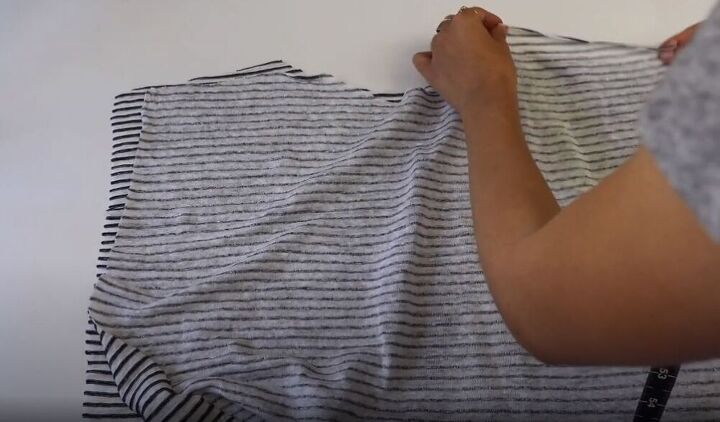
Finally, it’s time to start sewing. I decided to use this beautiful 100% linen striped knit for my sweater. The best tip for making a sweater is to find a fabric that you think is comfortable with a good amount of stretch to it. When sewing any knit fabric, make sure to switch out your regular needle with a ballpoint needle.
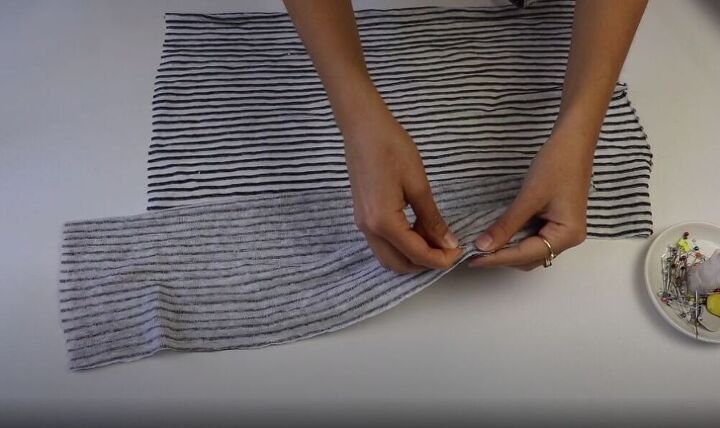
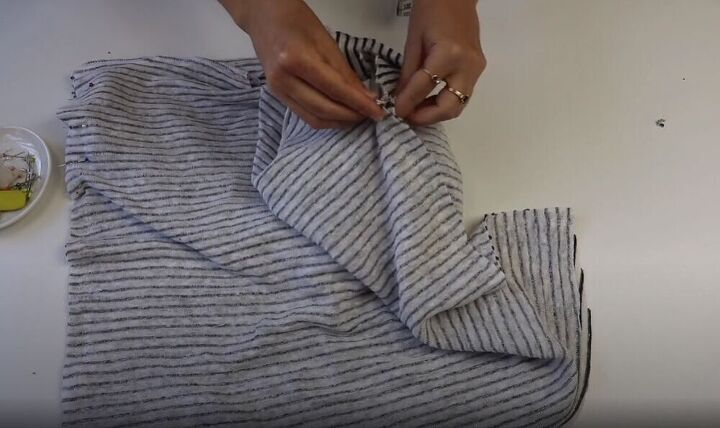
Place your front bodice piece over the back bodice piece, right sides together. Pin along both shoulder seams. Once your pins are in, hop on over to your sewing machine and sew the shoulder seams with a 1.5 cm seam allowance.
Once you’ve sewed the shoulder seams, you can move on to the sleeves. Fold the sleeve in half, right sides together. Pin along the long edge and then sew together. I did an overlocker on the raw-edges inside the sleeves. If you don’t have an overlocker you can just do a zig-zag stitch.

Next, you’ll need to sew the sides of the sweater. Take your sleeve and line it up with the shoulder. Then pin on the sweater where the bottom of the sleeve is. Next, you can pin down, from your first pin mark to the hem, and sew the sides of the sweater closed. Make sure to leave a 1.5 cm seam allowance.
It’s time to attach the sleeves. Turn them right side out, and pull them through the armhole of your amazing, new sweater. Make sure to line up the seam of the sleeve with the underarm seam of the sweater. Then you can pin and sew all the way around the armhole with a 1.5 cm seam allowance.
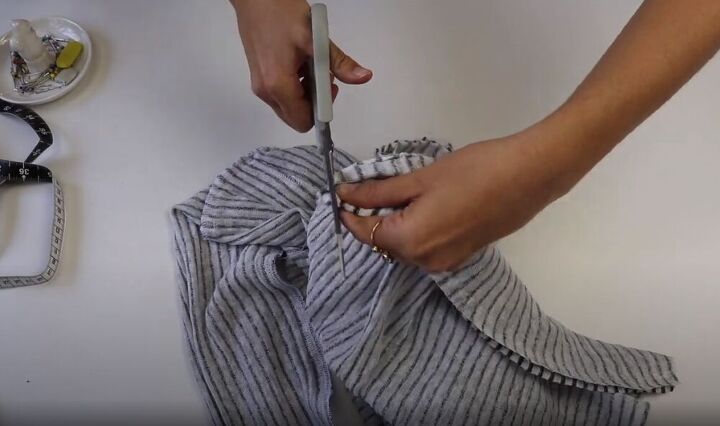
Once it’s stitched, if you see it’s a bit bulky under the arm, fold the extra fabric and cut it at a small angle so that your arm will fit comfortably in the sleeve.
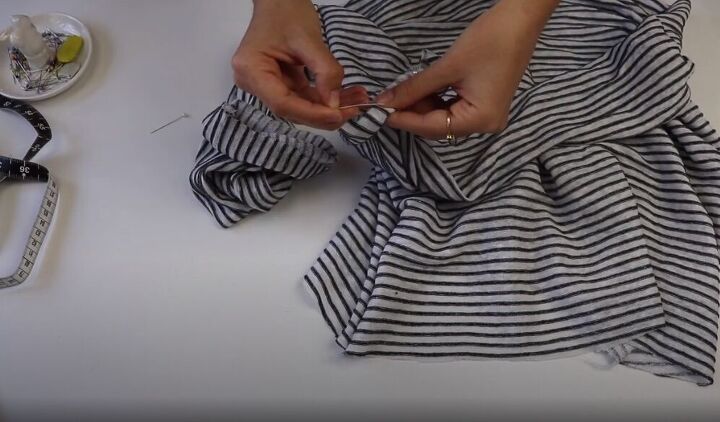
All that's left to do is hem all of the raw edges to give your sweater a beautiful, neat finish. Starting with the sleeves, make two folds on 1.5 cm each and pin them in place. You can then stitch where you had pinned. Repeat the same hemming process for your neckline and bottom of your gorgeous sweater. Once you have finished sewing, go over all your seams with the iron and get ready to try on your new sweater.

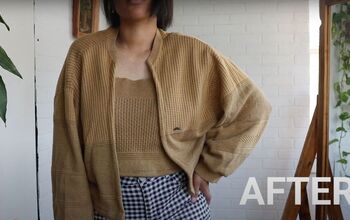
I am totally in love with this sweater! How would you style this amazing piece? Let me know in the comments below!
The author may collect a small share of sales from the links on this page.


Comments
Join the conversation
Wonderfl!!! I will make the neckline smaller--for me the fit is better if the neckline is smaller. Thanks!
Yes I will, a little longer and I will put elastic at the wrist so my granddaughter can wear it to work.