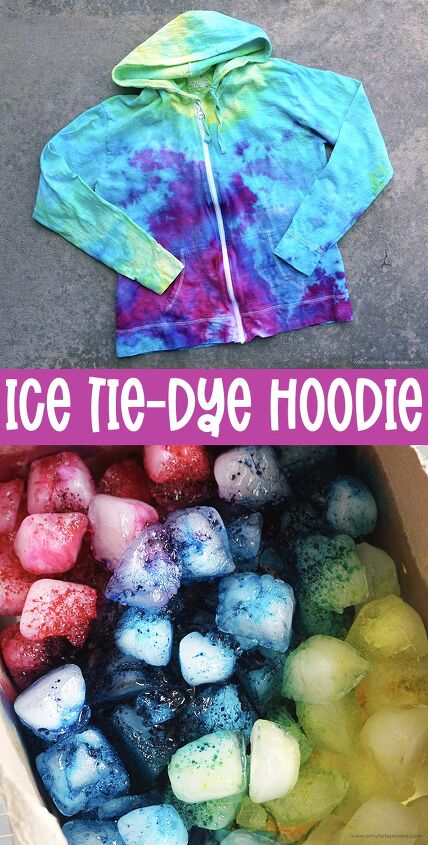
Ice Tie-Dye Hoodie
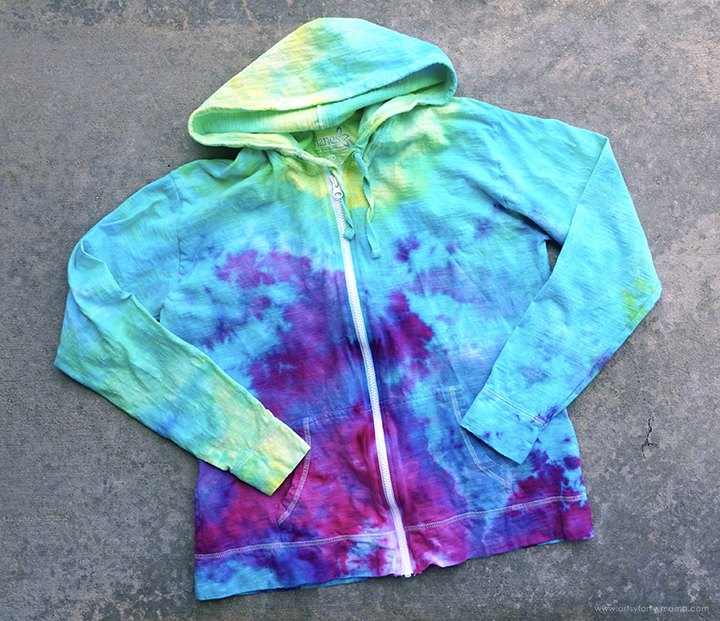
Tie-dye is one of my favorite summer crafts, and I had so much fun trying a new technique!! Using ice is a fun and less messy way to tie dye, not to mention a great summer craft. No two projects will come out the same, and I am blown away by how this hoodie turned out. We all know kids love using tie-dye, and they will have so much fun making their own colorful tie dye creations to suit their personal style.
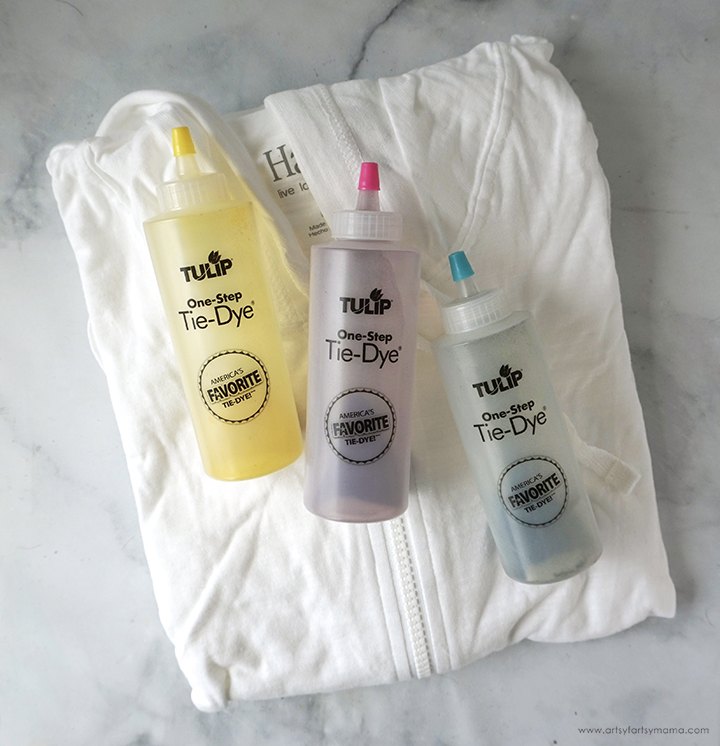
To make your own Ice Tie Dye Hoodie, you will need these supplies:
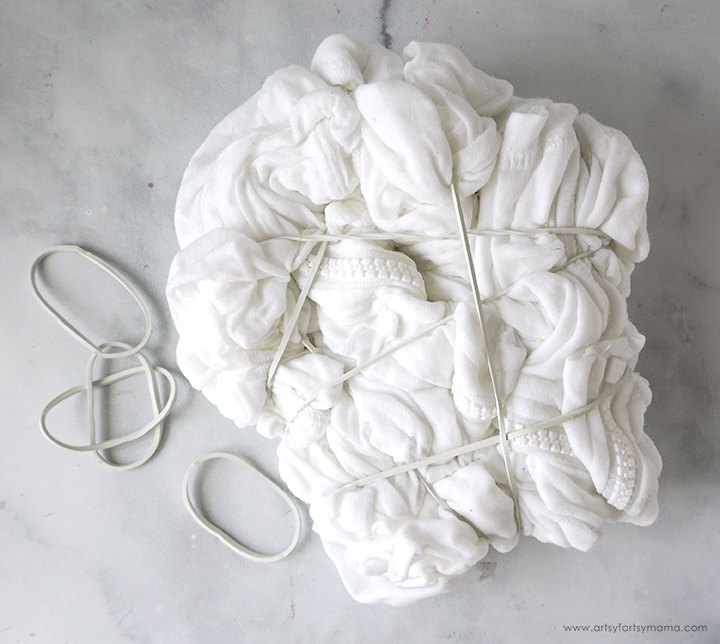
Get the hoodie completely wet, and then wring it out so that it's slightly damp. This will help the fabric to absorb the dye better and more evenly. Scrunch or twist the shirt like you would do with a traditional tie dye project. Use the rubber bands (included in the Tulip One-Step Tie Dye Kit) to hold the shape.
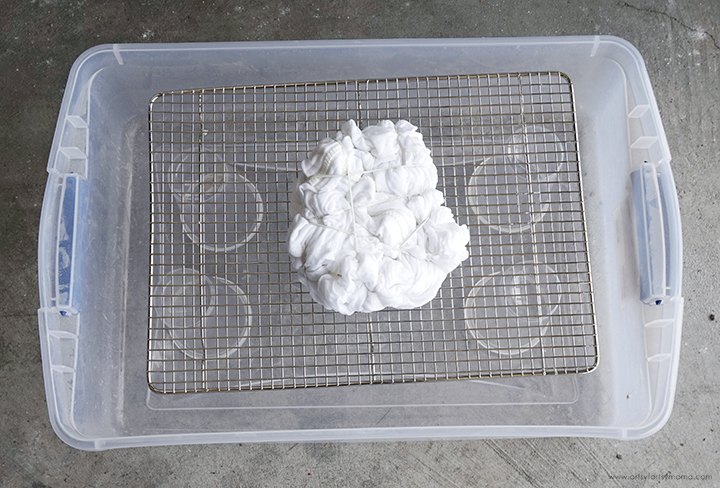
Protect your workspace with a plastic tablecloth or garbage bag, or work somewhere that you wouldn't mind accidentally staining (I set up in the garage). Next, you will need something to catch your dye drippings, like a large tray or a plastic bin. Use plastic cups to prop up a wire cooling rack* inside the bin. Lastly, center the shirt on top of the rack.
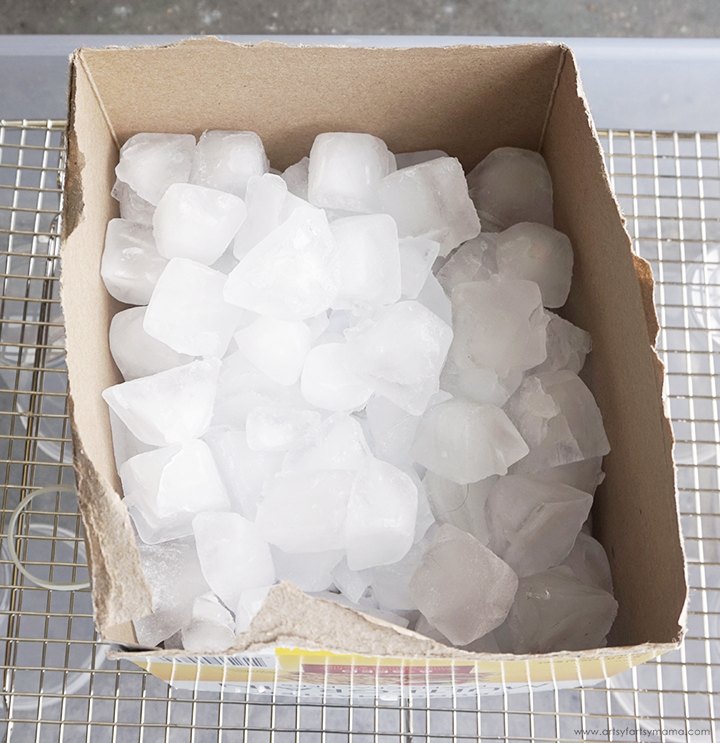
Next, you will need a cardboard box that is about the same size as your project. This will help to keep the ice contained over your project instead of sliding off as it melts - and therefore wasting the dye. Remove the top and bottom of the box and place it around your project. Get a bunch of ice and pour it on top of the shirt, filling up the box.
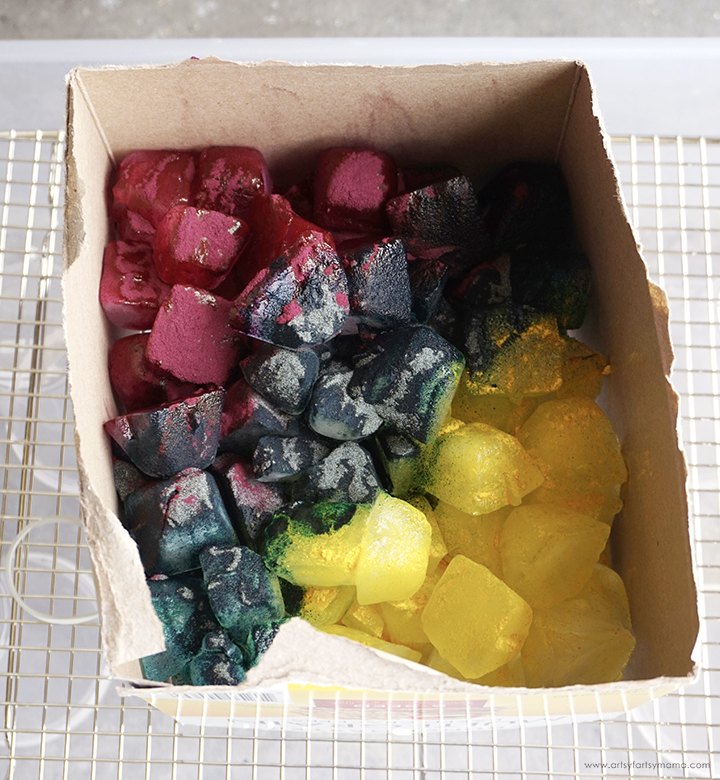
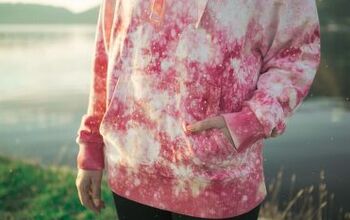
Choose 3-4 bottles of Tulip One-Step Tie Dye that you want to use on your hoodie. Try to keep in mind not to put colors together that may become "muddy" when mixed, like red next to green or orange next to blue. I tried to get a rainbow by simply using magenta, blue, and yellow, and then let these three colors do the mixing.
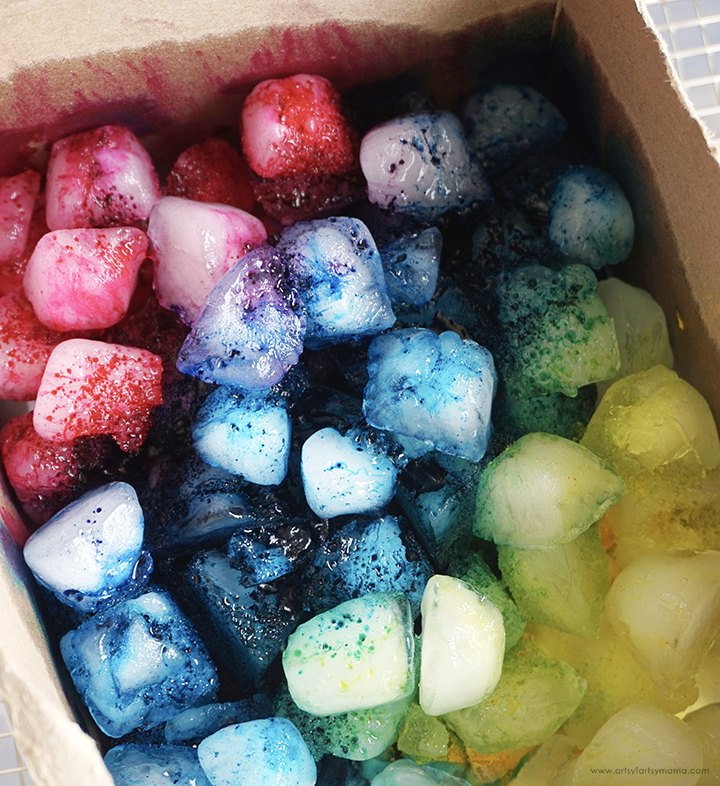
Now, just sit back and wait for the ice to melt! As the ice turns to liquid, it mixes with the dye and drips down onto the hoodie. This will obviously take some time, so come back to the project once in a while to check how things are going - but try to resist touching anything!!
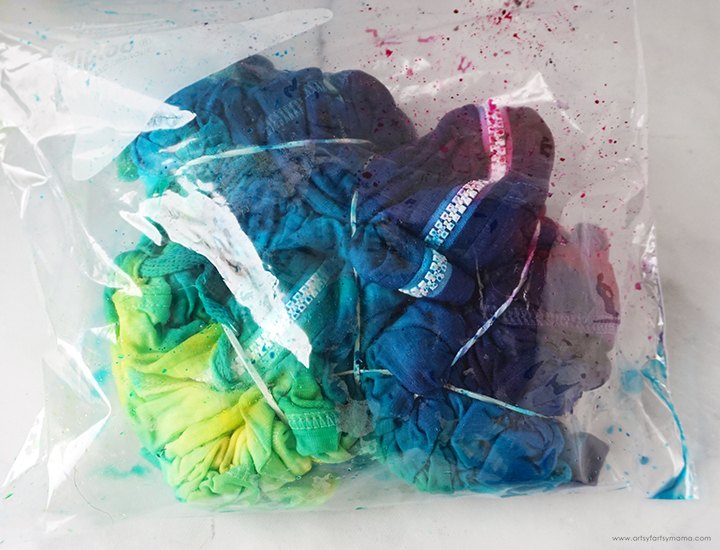
Once the ice has completely melted, put on some gloves (also included in the Tulip One-Step Tie Dye Kit) and put the shirt into a gallon Ziploc bag to sit for 8-24 hours. This is an important step because the dye needs time to set and fully absorb into the fabric.

I am beyond impressed with this ice tie dying technique, and am absolutely in LOVE with my new Rainbow Tie-Dye Hoodie!! I'd love to hear what do you think!! As always, I would love to see your creations! Leave me a comment, or tag a photo on Facebook, Twitter, or Instagram!

The author may collect a small share of sales from the links on this page.


Comments
Join the conversation