Make a Stunning Multi-Colored Tie-Dye Hoodie

Why not add some color to your life with a tie-dye hoodie? Add a beautiful touch of magic with some bright colors to this easy tie-dye hoodie. In this tutorial, I'm going to show you how quickly and exciting it is to make a tie-dye hoodie. The best part is that you can choose your own colors and patterns to make it unique and fabulous. I'll be using a white hoodie so that the colors really stand out, but feel free to use any light-colored hoodie you may have on hand. So, grab your dye and hoodie, and let me show you how to make this fun, basic tie-dye hoodie!
Tools and materials:
- Light-colored hoodie
- Elastic or string
- Bucket
- Gloves
- Plastic bag
- Various dye colors
- Salt
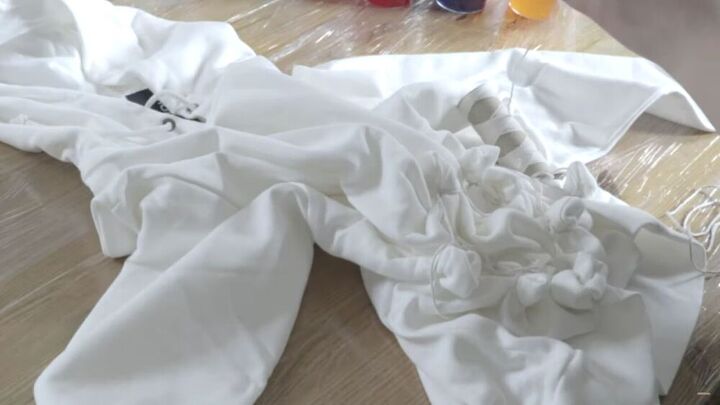
Make the pattern
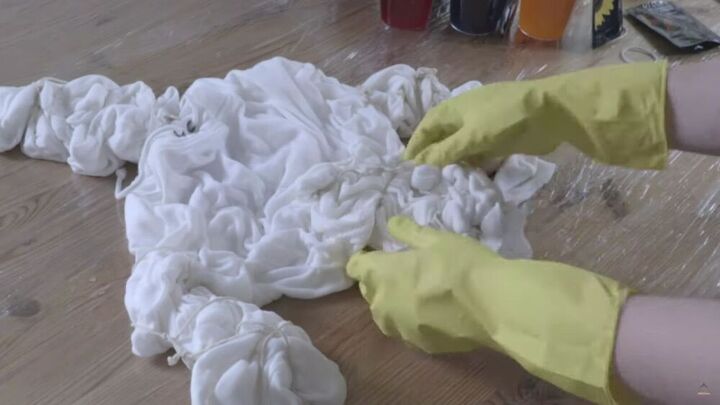
Lay your clean hoodie out on a hard surface, and either using strings or rubber bands, crinkle the mid-section and tie each bulge.
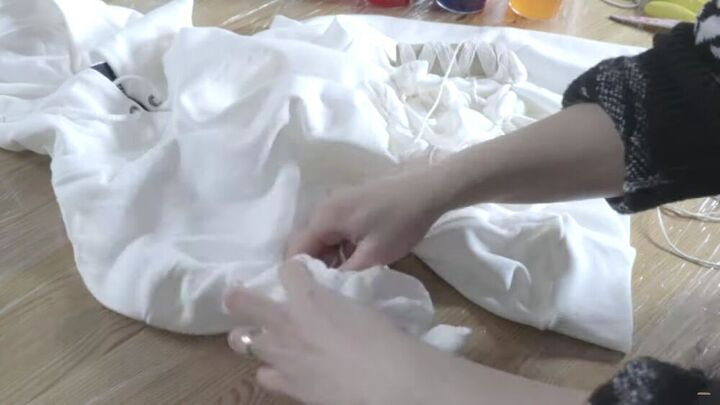
For the sleeves, do the same method. However, I focused more on the bottom sections. I also tied the hoodie area so that the whole hoodie would have a touch of color!
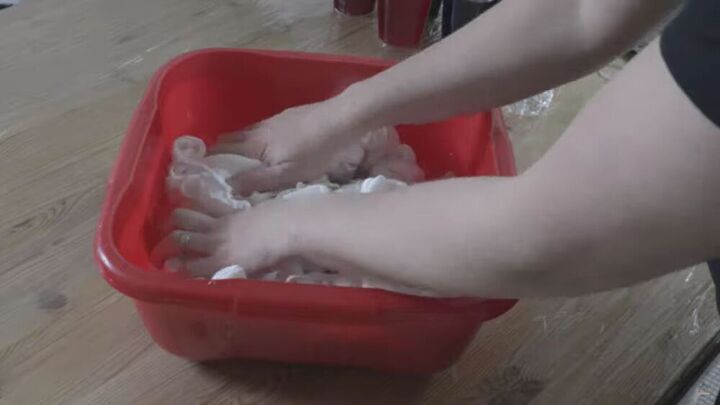
Soak in water
Now, soak the whole hoodie in water. I used a bucket filled with water and simply soaked the hoodie for a couple of seconds, making sure it was all wet.
Add the dye
I have pre-prepared the dye colors in plastic cups. If you haven't done so, now is a good time to do it! Then, lay your hoodie out on a flat surface, throw on some rubber gloves, and start adding the dye.
TIP-
I added some salt to the dye as it will help hold the color.
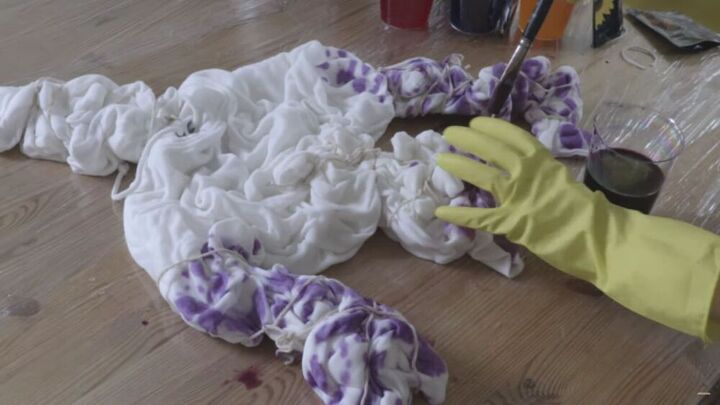
Drizzle the dye with a paintbrush on the tied areas of the hoodie. Be sure to add dye on both the front and back areas.
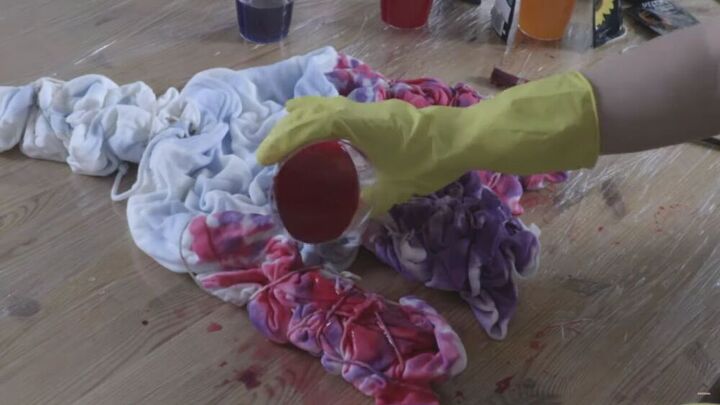
Continue doing this method with the other colors. You can even pour the dye directly from the cup onto the hoodie for a more intense effect.
Leave to dry
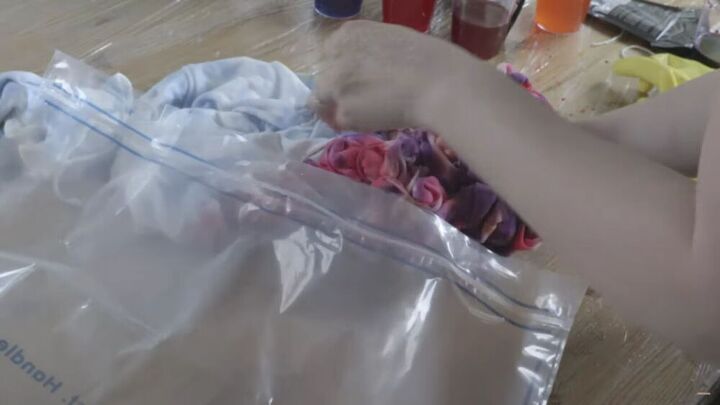
When you're satisfied with the tie-dye, place your hoodie in a plastic bag for a few hours.
Finish off the basic tie-dye hoodie
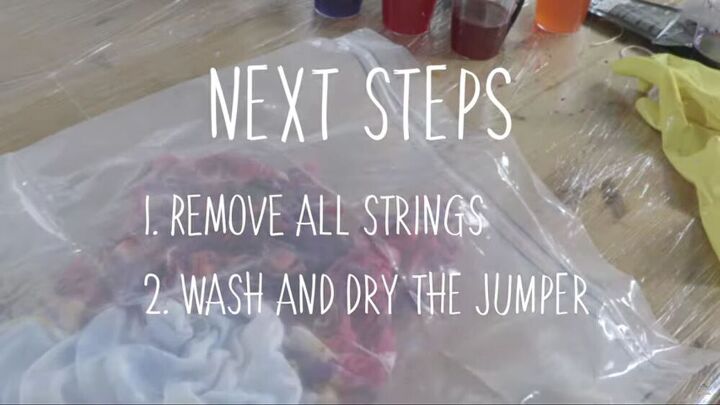
Once your hoodie is dry, remove the strings or elastic and wash the hoodie in a washing machine.
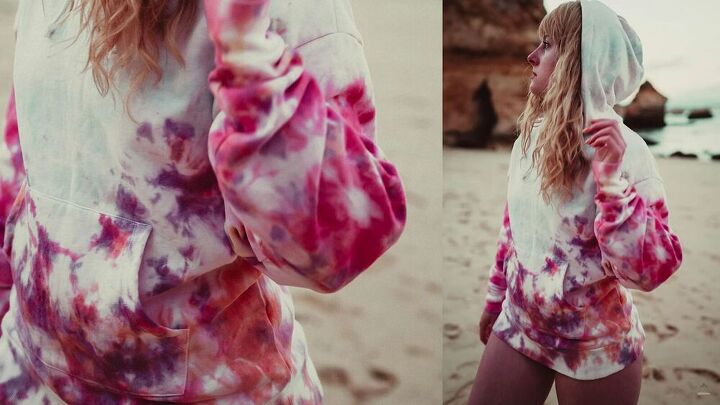
Here's the final look! It's so enchanting and colorful, don't you think? I love how the colors blend well together. It's so unique and simply magical. It's so quick to make a tie-dye hoodie, and you can literally use this process for any other items you have. I hope you enjoyed this tie-dye hoodie tutorial.
The author may collect a small share of sales from the links on this page.


Comments
Join the conversation
Yep 👍
Having a clean hoodie to start with is great, but you forgot to mention you should wash it prior to prep for tie-dye. Also shouldn't use fabric softener in that wash, just some detergent. And you can just pull it out from the rinse cycle, you don't need to dry it first if you're using Tulip type dyes. For longer color retention don't use hot water wash, bleach of any kind or fabric softener. The first 2 will fade the colors, and the fabric softener adheres to the fabric and makes the colors appear dull and muddy.
But the most important thing is to buy a hoodie that is no less than 50/50 cotton. Natural fibers and fabric take and hold dye best over the life of the garment.
Cute idea