Easy Tutorial for 2 Super Cute Beaded Fringe T-shirts

I've got two t-shirt-cutting tutorials for you today.
I’m going to be showing you how to make a beaded fringe t-shirt and a macrame tank top.
Grab your scissors and some t-shirts, and let's begin!
Tools and materials:
- T-shirts
- Scissors
- Ruler
- Marker
- Beads
Style 1: Beaded fringe top
1: Mark side and center of shirt
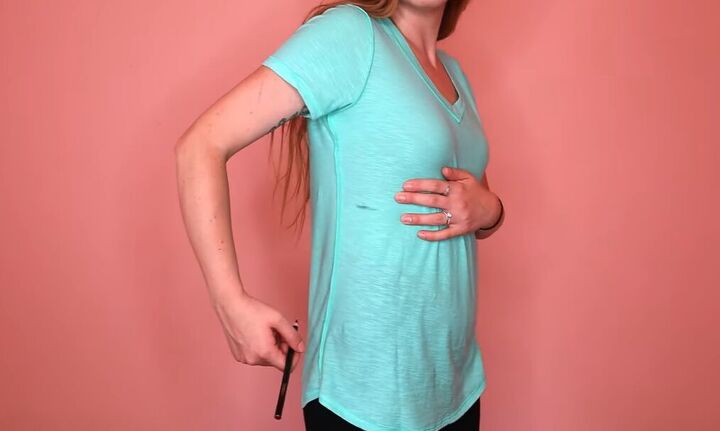
Start by putting your shirt on inside out and marking the highest point you want the fringe to go at the side.
Then, mark the center of the shirt.
2. Mark other side
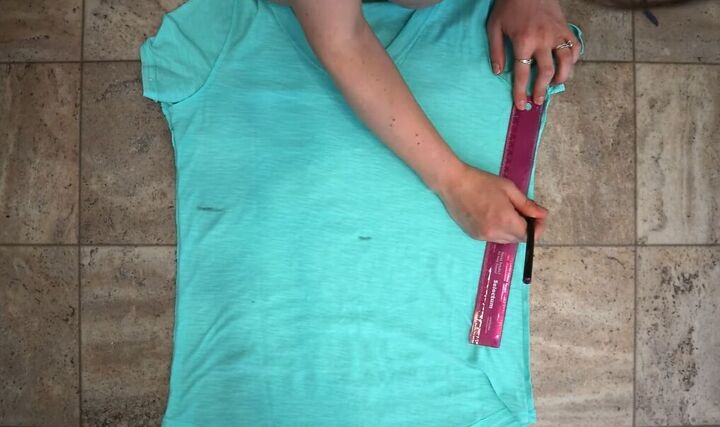
Lay your shirt down flat and measure where your side mark is.
Make the same mark on the other side.
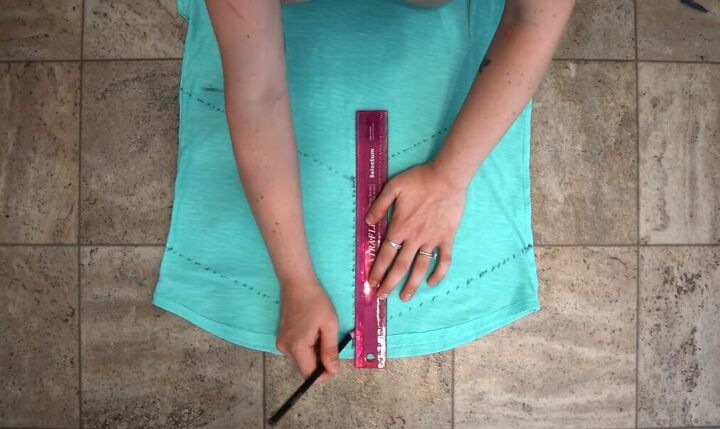
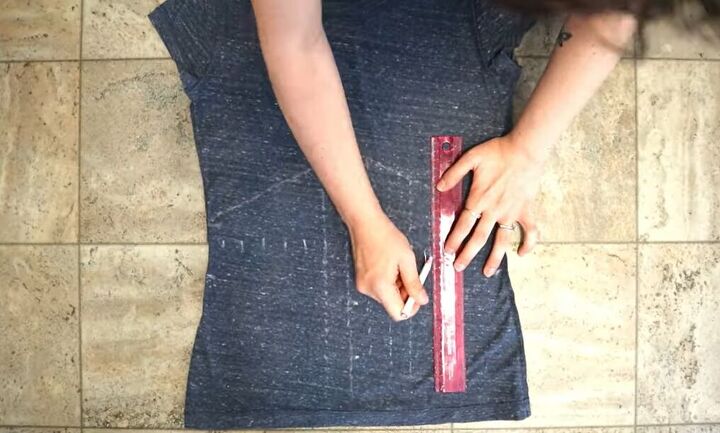
3. Connect points
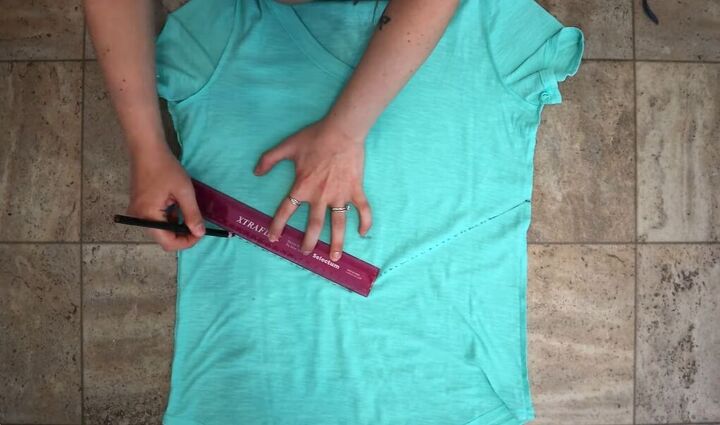
Now, decide how far down you want your point to go and mark that in the center. Use your ruler to connect those marks to a point.
4. Draw parallel line
Measure from the bottom of the point to the bottom hem and mark it in the center.
Then, use that measurement to mark the same distance below the side marks.
Connect those marks you just made, making a second point parallel to the first.
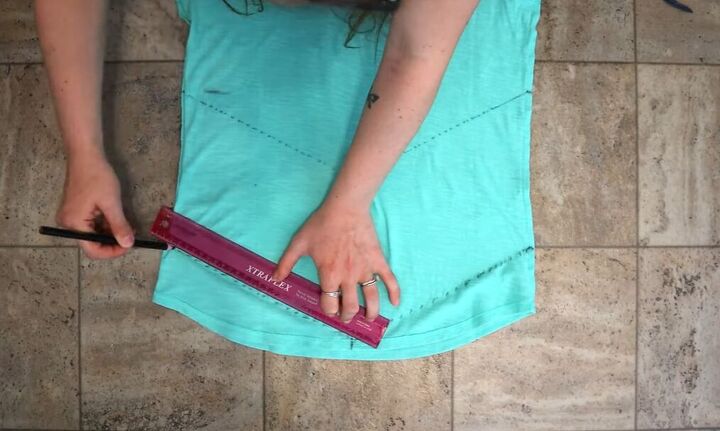
5. Draw line down center
Draw a line vertically down the center of the shirt connecting your two points.
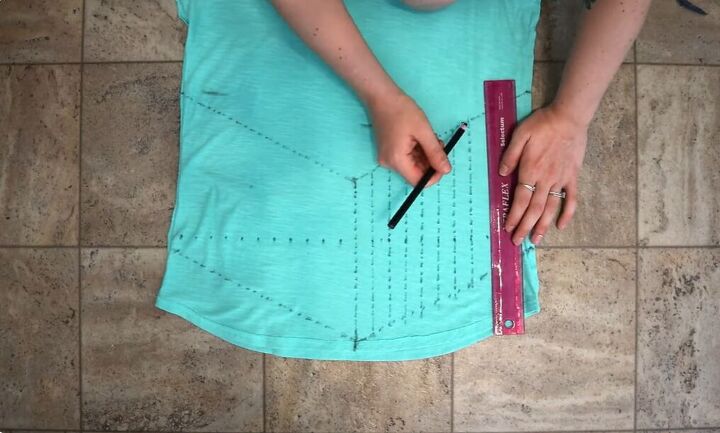
6. Draw lines
Now measure out and draw more vertical lines about two centimeters apart all the way across the shirt.
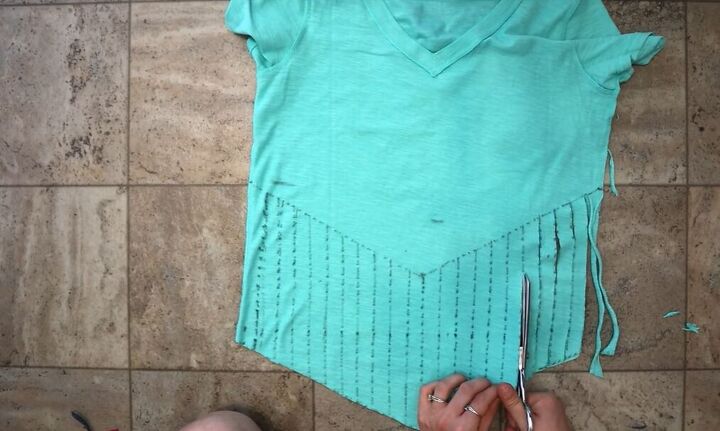
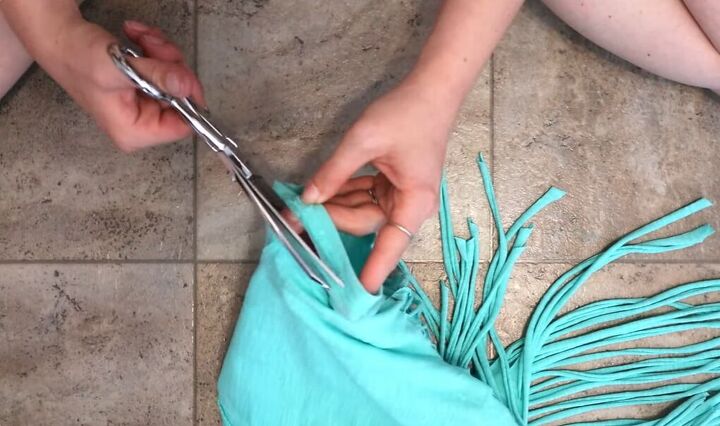
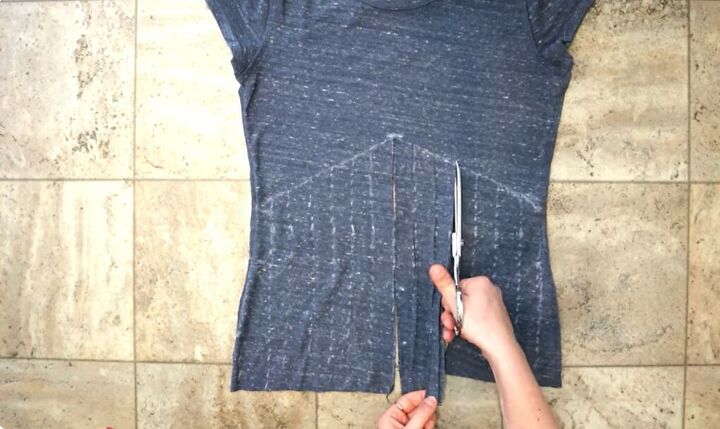
7. Cut along lines
Between your two points, grab your scissors and cut along the bottom point, then start cutting along all of your vertical lines, stopping at the top point.
Open up or cut along your side seams up to the top point as well.
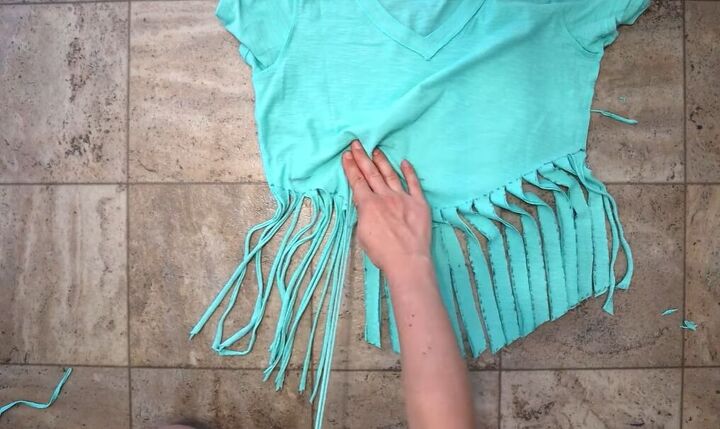
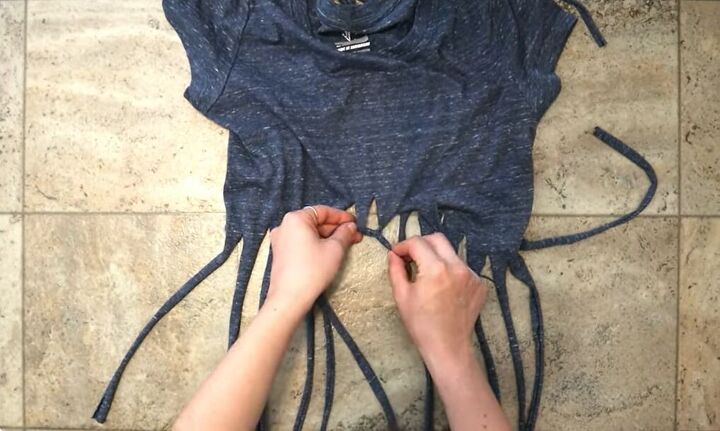
8. Stretch fabric
Proceed to stretch all of your strands of fabric.
9. Open up sleeve seams
Moving on to the sleeves - first, open up the seam at the bottom of the sleeves to make the sleeves longer.
Then, cut open the armpit seam and the shoulder seam.
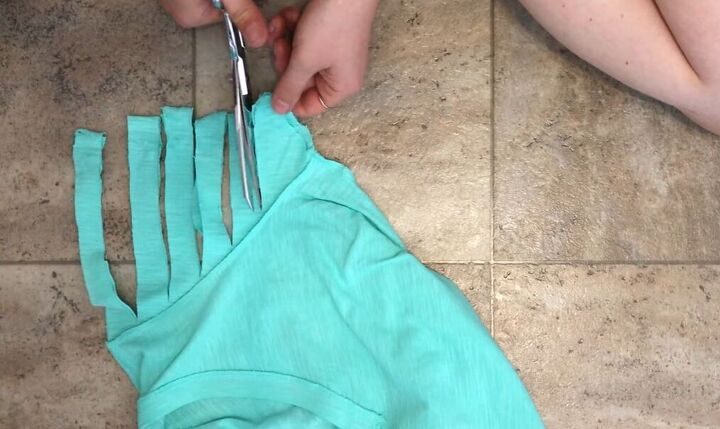
10. Cut sleeve into strips
Cut the sleeve into strips from the end of the sleeve to the shoulder seam.
Then, stretch all of your strips. Repeat on the other sleeve.
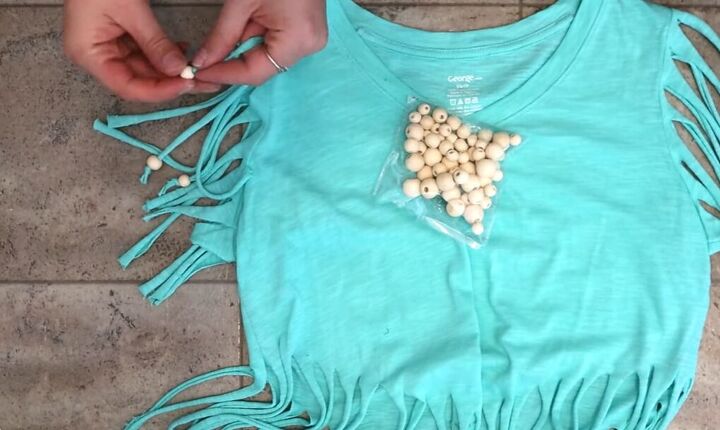
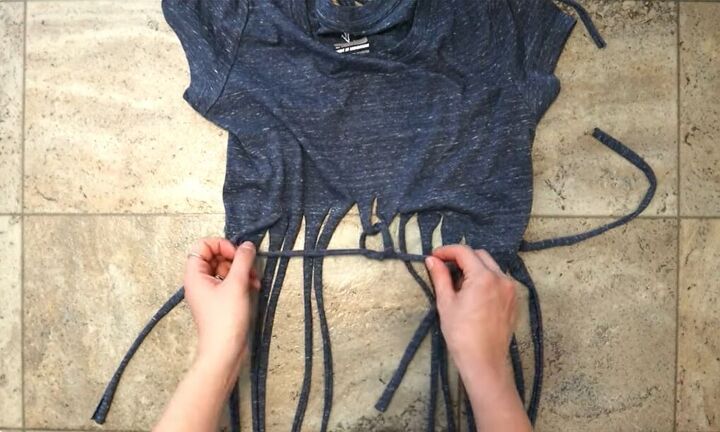
11. Add beads
Turn your shirt back inside and grab your beads. Start adding beads to each piece of fringe and then tie a knot at the bottom.
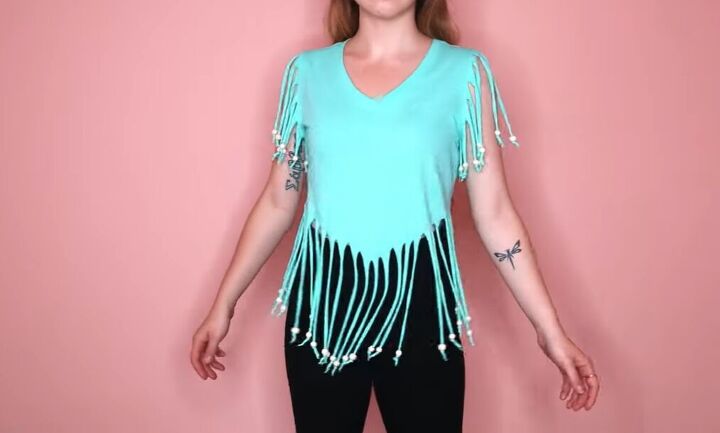
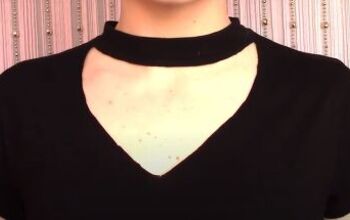
Here is the finished beaded fringe top.
Style 2: Macrame tank top

1. Mark top
Start by putting your shirt on inside out and marking the highest you want the macrame to go in the center.
Mark your waist at both side seams.

2. Connect marks
Lay your shirt down flat and use your ruler to connect your three marks, making a point.
3. Draw vertical lines
From the center of the point, draw a vertical line down to the bottom of the shirt.
Draw more vertical lines parallel to the first from the point down to the bottom of the shirt an inch apart.
4. Cut and stretch lines
Grab your scissors and cut off the bottom hem.
Start cutting along your vertical lines up to the point and stretch all of the strands of fabric.
Proceed to turn your shirt back inside.
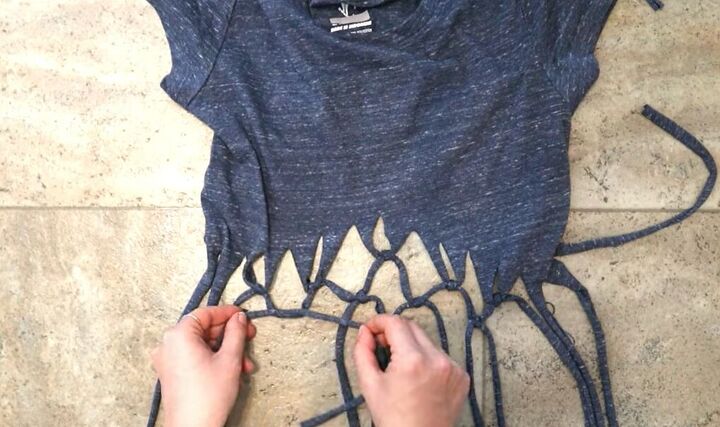
5. Knot strands
We're going to start with just the front layer of fringe, so tuck the back layer behind for now.
We're starting with a square knot about an inch down in the center.
Grab the two center strands and tie them left over right, then right over left, or vice versa.
6. Tie another knot
Then, tie another square knot about an inch down.

7. Tie knots on either side
Repeat on either side so that you have three knots about an inch down from the point. Add one more set of knots on either side.
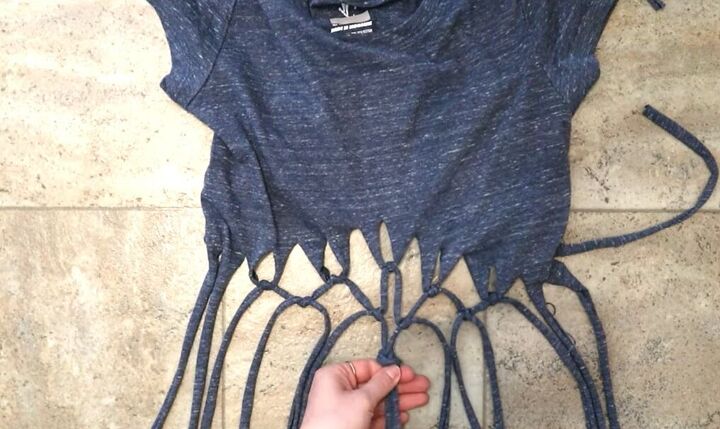
8. Tie second row
Now, do another row of knots.
Grab an end from the first knot and then grab an end from the knot beside it and tie them together about an inch below the first row of knots.
Do the same on the other side.
Then, add one more square knot on each side, so you should have five knots in the first row and four in the second.
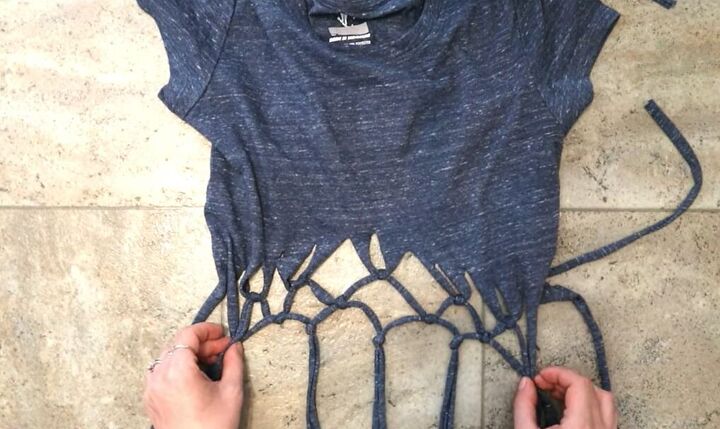
9. Tie third row
Grab your two center strands and tie them together in a regular knot about an inch down.
This time, just wrap both strands around in a loop and pull both ends through.
Do the same thing with the next two strands and the two on the other side, so you should have three regular knots in the third row.
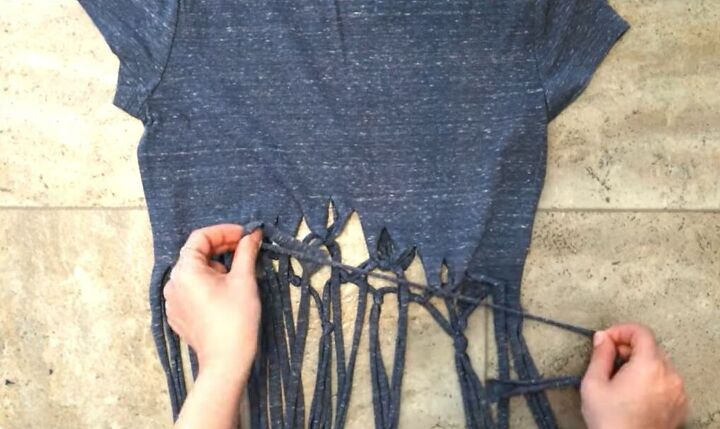
10. Tie end knots
For the last two knots, take the next three strands on either side and tie them together in a regular knot about an inch below the second row of knots.
11. Repeat on the back
Flip your shirt around and copy that pattern with the fringe on the back.
Finish off by cutting off the sleeves.

Here is the finished macrame tank top.
Beaded fringe t-shirt
I love the design of both tops, and they were both so straightforward to make.
I hope you like the designs as much as I do, and that you’ll give these tutorials a go for yourself!
Next, check out my Cute and Easy No-sew Thrift Flipped Shirt Tutorial.
The author may collect a small share of sales from the links on this page.


Comments
Join the conversation