Cute and Easy No-sew Thrift Flipped Shirt Tutorial

I have an exciting and original thrift flip for you today.
We’re going to turn a large men’s shirt into a backless halter dress. And to make it as easy as possible, there’s no sewing or gluing involved.
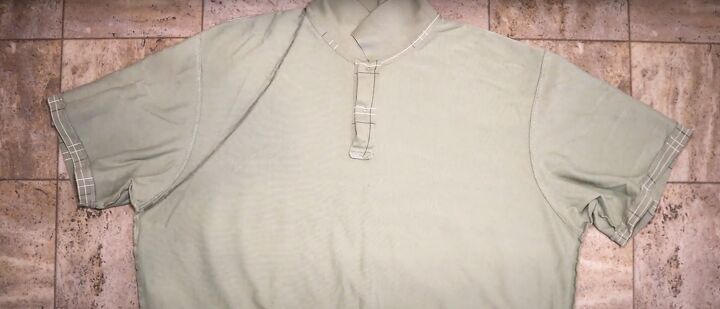
I used a man’s polo shirt in size XXL, but this works just as well with an oversized t-shirt.
Tools and materials:
- Very long collared shirt or T-shirt
- Scissors
- Fabric marker
- Ruler
- Safety pin
1. Cut the halter neck
Turn the shirt inside out and lay it flat and smooth.
Draw a slightly curved line connecting the side of the collar with the bottom of the sleeve on the same side.
Repeat on the other side.
Cut the sleeves off, following the lines.
Alternatively, to make sure the two sides are exactly the same, you could cut one side, fold the shirt in half lengthways and use the first side as a template to cut the second one.
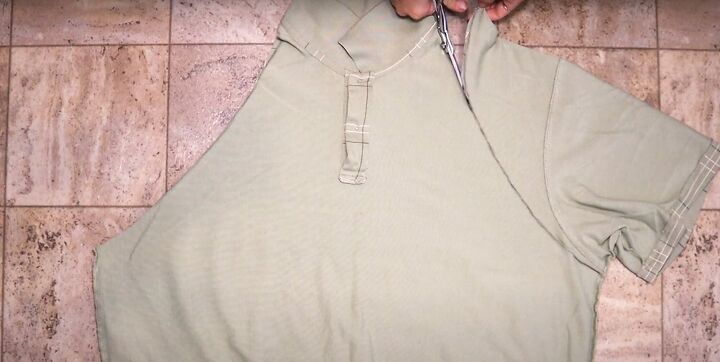
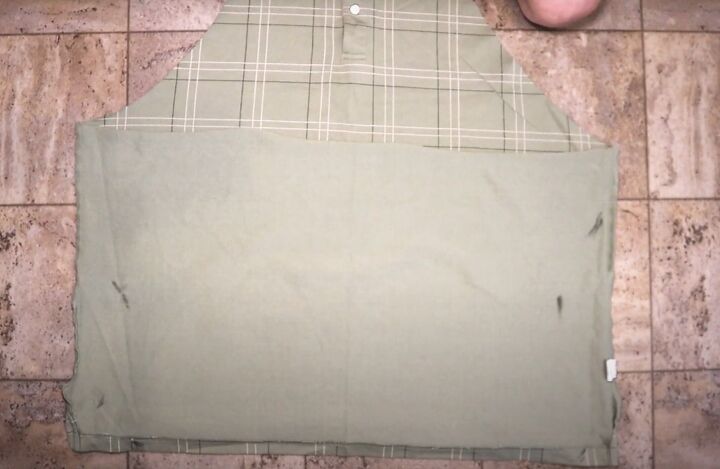
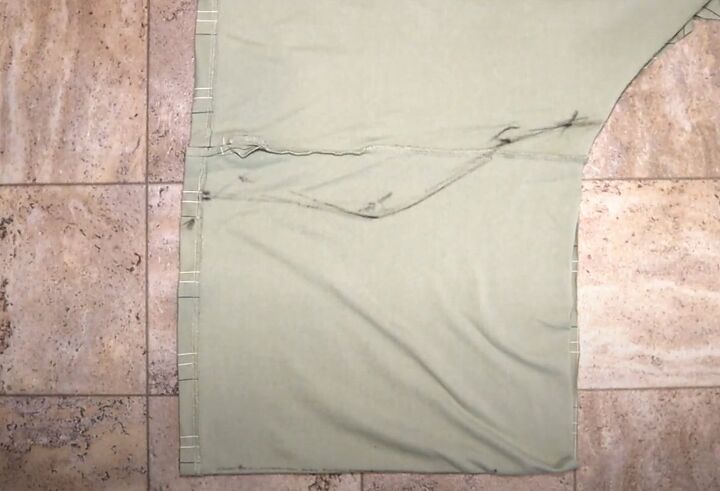
2. Cut out the back
Turn the shirt over so the back is uppermost.
Draw a line across the shirt at the bottom of the sleeves.
Cut along this line, but very importantly, through the back of the shirt only.

Cut around the back of the collar.
3. Fitting
Put the shirt on, still inside out.
Pull the side fabric towards the back, making the shirt fit your body.
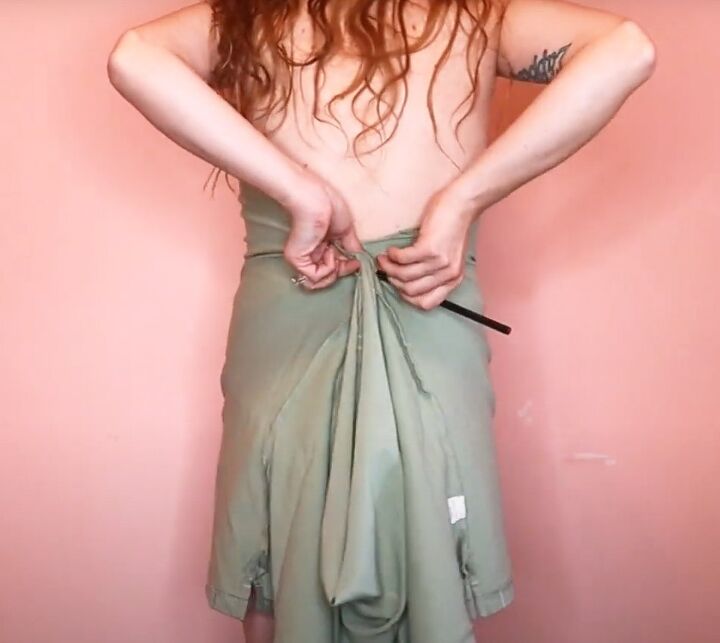
Mark where the two sides touch at the back, on both sides.
If you have someone to help you, this next part becomes a lot easier!

Continue working down the back, pulling the fabric to fit you and marking where the two sides meet in several places.
You want the dress to fit tightly around your waist and slightly more loosely over your hips.
Do the same thing with the collar. Pull the sides towards the back until it fits comfortably, and mark where the sides touch.
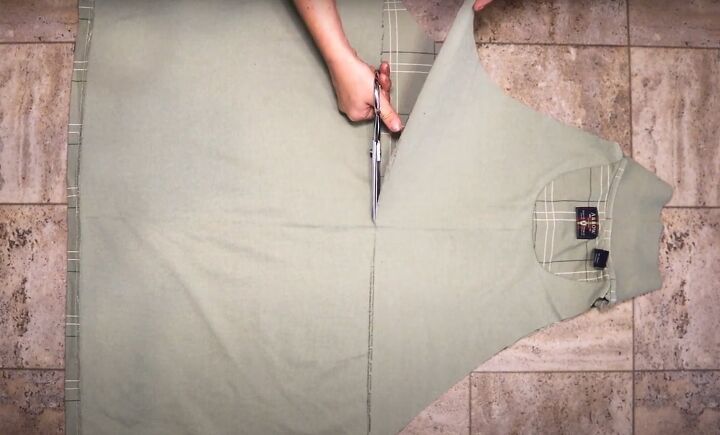
4. Shape the back
Lay your shirt down flat again, with the back uppermost so the marks are visible.
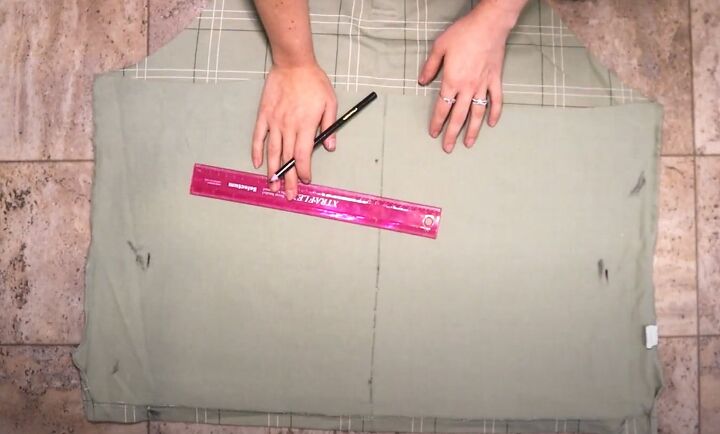
Find the center back of the shirt and draw a line down the center.
Measure the distance between each pair of marks across the back of the shirt.
Make new marks at the same level, half that distance out from the center line.
We’re basically transferring the marks from the sides to the center back.
Do this for each set of marks.
Fold the shirt along the center line, making sure the side seams are on top of each other.
Draw a line connecting your new marks.
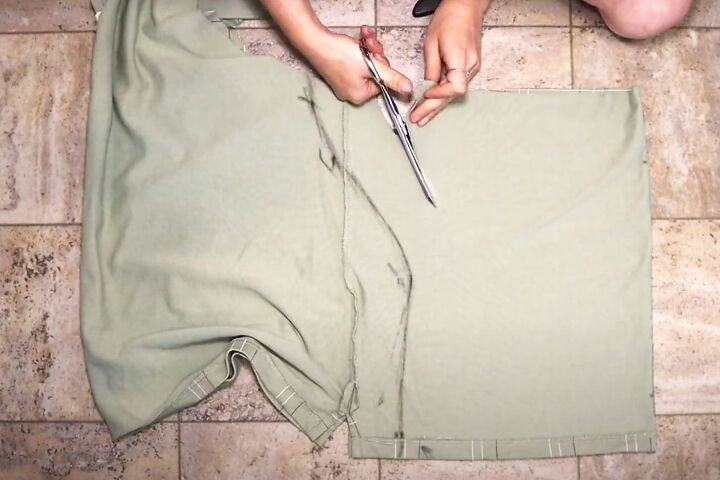
Cut off the excess fabric, cutting a few inches outside your line.

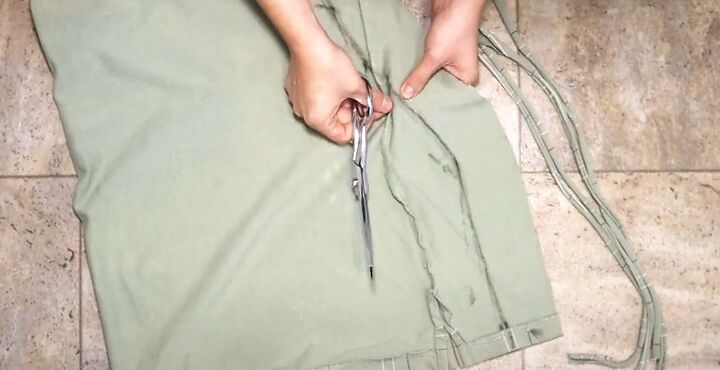
5. Make the ties
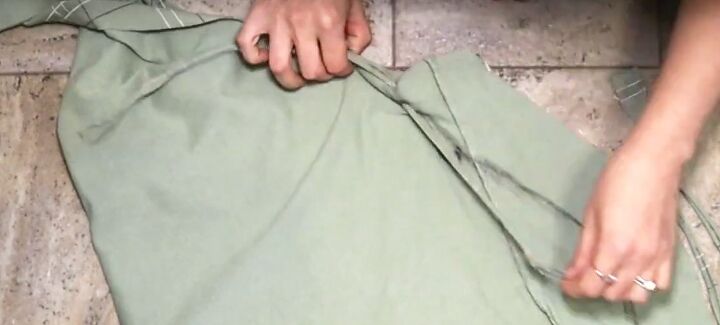
Cut a few thin strips from the excess fabric.
Stretch them lengthways and put them to one side.
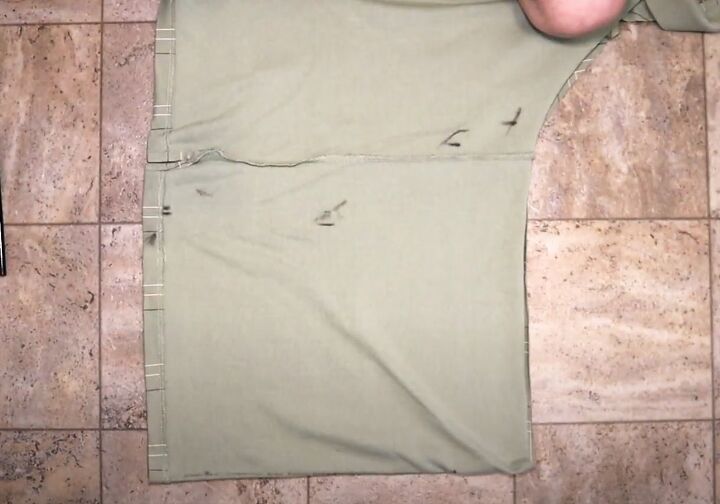
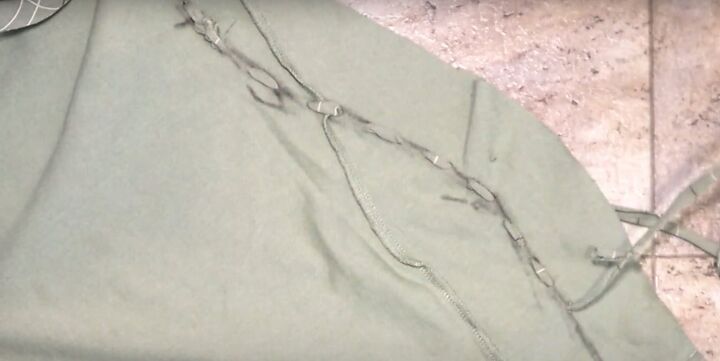
6. Cut the eyelets
Keep the shirt folded. Check that both layers are lined up at the top and bottom.
Using very sharp scissors - or a punch if you have one - cut tiny holes about half an inch apart through both layers of fabric along the line you drew.
7. Thread the ties
Pin a safety pin through the end of one of the ties.
Thread the tie in through the top hole and out through the second hole, through both layers.
Knot the end to the rest of the tie to hold it in place.
Continue to weave the strip in and out of the holes down to the bottom. Pull the shirt fabric lengthways as you go, to keep it lying flat.
When you come to the end of the first tie, knot a second one to it and continue.
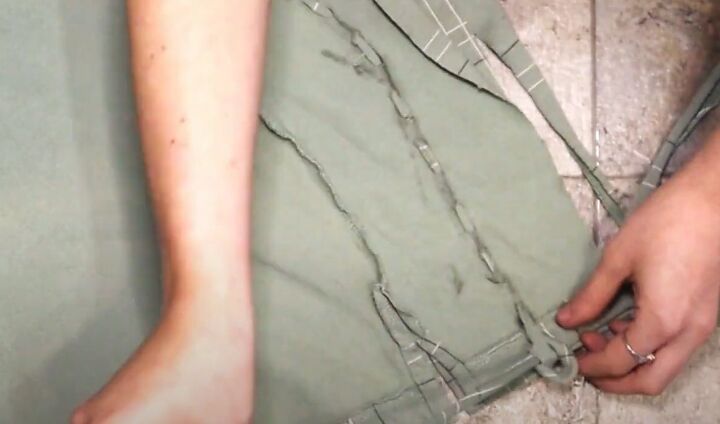
At the bottom of the shirt, knot the end back through the tie and trim it.
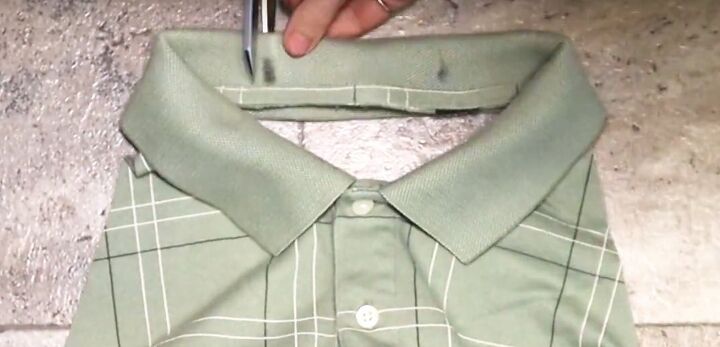
Cut off the back section of the collar just outside your marks.
Make holes at the top and bottom of the collar on each side and through both parts of the collar.
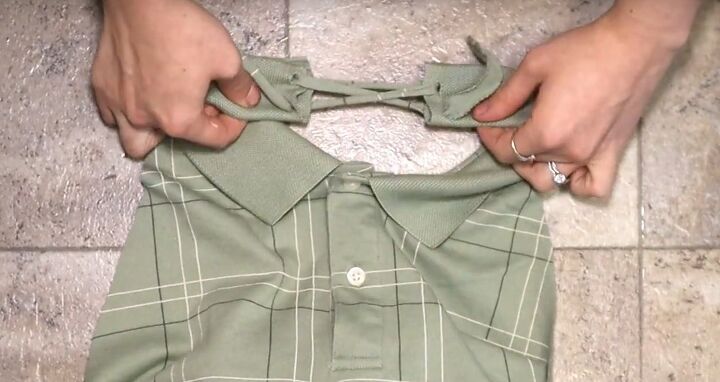
Lace the collar up with one of the ties, as if you were lacing a pair of shoes. Tie the ends together.

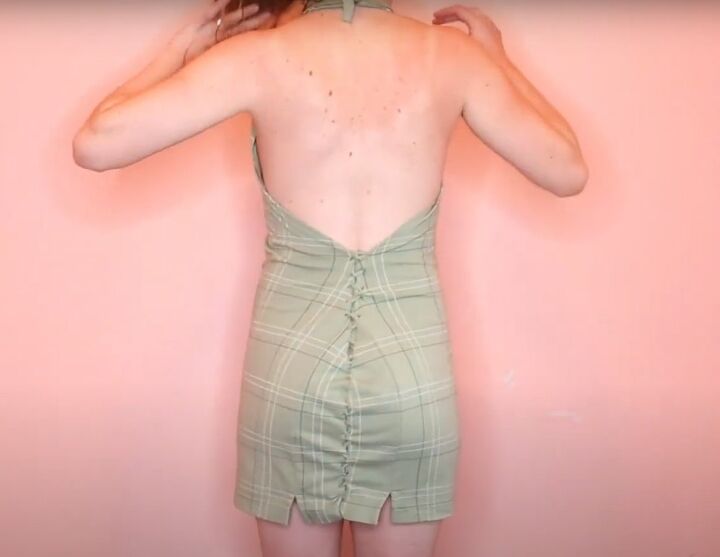
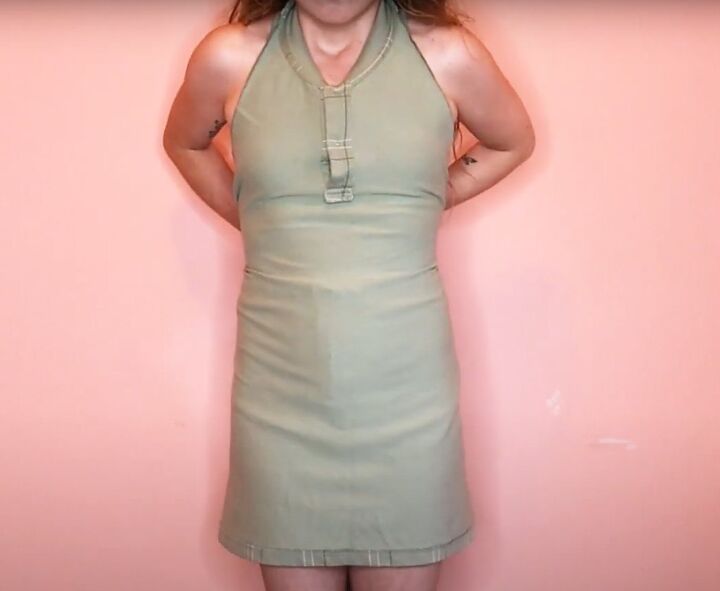
Thrift flipped shirt dress
To wear the dress, put it on over your head and tie up the collar. Fold any raw edges that show to the inside. If you really want to, you could sew them in place.
I really hope you like the latest of my thrift flip ideas. Have a go at this, it really does make a stunning dress!
And please let me know how you get on in the comments.
The author may collect a small share of sales from the links on this page.


Comments
Join the conversation
I LOVE this, and very do able! Thank you.