DIY Lace-Up Halter Top (No Sewing Required)
Here is a step-by-step DIY guide to transform a regular t-shirt into a cute lace-up halter top with no sewing at all. The process is very simple and doesn’t take much time at all! And, it’s just in time for summer. Enjoy! 🙂
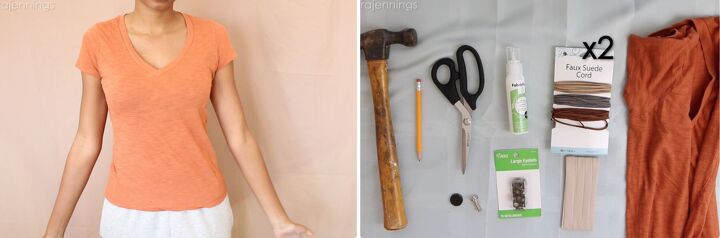
Step 1: Gather Materials
What you’ll need:
- T-shirt
- Hammer
- Pencil
- Fabric glue: http://amzn.to/2qor51E
- Fabric scissors: http://amzn.to/2lpapZM
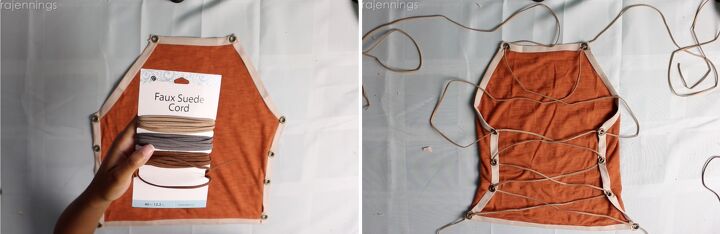
- (2) Faux suede cord: http://amzn.to/2lmI0CN
- Binding tape: http://amzn.to/2pZasZs
- Large eyelets: http://amzn.to/2lowzKh
- Large eyelet toolkit: http://amzn.to/2kIeALg
*Miaira is a participant in the Amazon Services LLC Associates Program, an affiliate advertising program designed to provide a means for sites to earn advertising fees by advertising and linking to Amazon.com.
Step 2: Draw & Cut Halter Shape
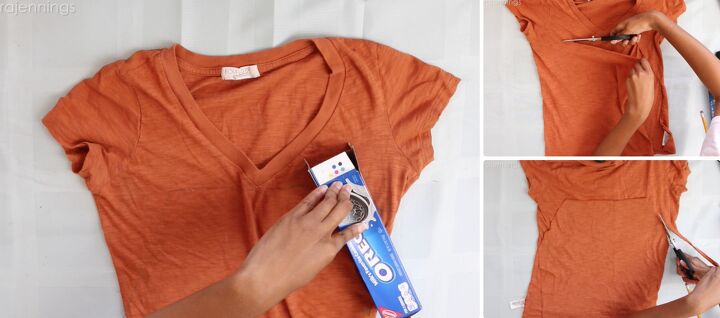
Using a straight edge (I’ve got my trusty Oreo box), draw a straight line across the top of the front of the shirt, then diagonal lines on each side to create the halter shape.
I chose to go back and cut another layer from the back of the shirt so the halter would be twice as thick. *I didn’t cut both layers at once because the shirt’s seams weren’t originally lined up evenly.
Step 3: Glue Binding Tape Around Edges
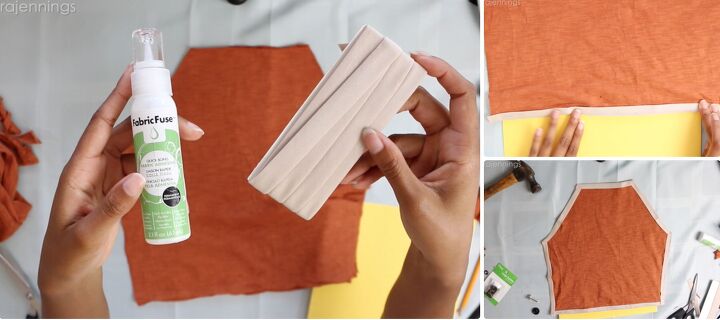
Use the fabric glue to glue the shirt material in the middle of the double-fold binding tape around all edges, creating a nice bordered look on the halter top.
Step 4: Secure Eyelets

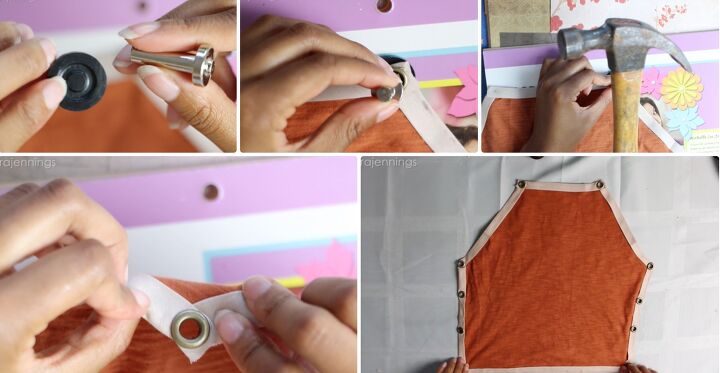
Use your scissors to cut a tiny slit/hole on one side of the top of the shirt. Slip the side of the eyelet with the more narrow opening through the slit, then place the other side on top.
Next, place the base of the eyelet toolkit on the bottom and position the metal piece on top of it all. Now, hammer everything together and your first eyelet will be secure!
Repeat the same process down the sides. I chose to add 4 to each side but you can add more or less, depending on your preference!
*See video for more details on this process
Step 5: Lace It Up
Using a faux suede cord string (I chose beige for this top), start from the bottom of one side and zig-zag your way up to the top. Grab another cord string of the same color and do the same thing to the other side. Be sure the cords are long enough to leave some slack and the bottom and the top on each side so you can tie the cord behind the neck, as well as at the lower back.
All Done!


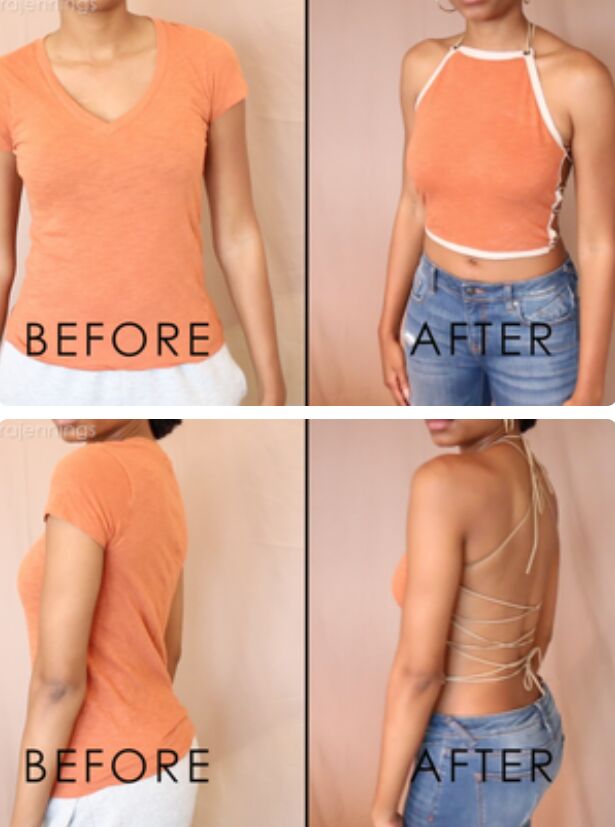
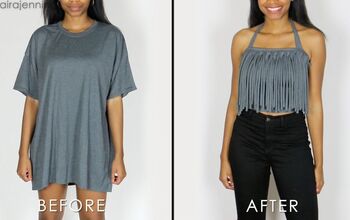
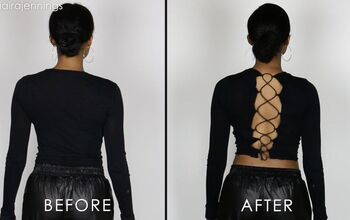
That’s it! Now you’ve got a fun halter top for the summer heat. Isn’t it a relief to not have to sew every clothing DIY project? 🙂 Thanks so much for checking out this tutorial and please let me know if you try it out!
The author may collect a small share of sales from the links on this page.


Comments
Join the conversation