Learn How to Sew a Turtleneck Top

In this tutorial, I’m going to show you how to make a turtleneck bodycon top. This top really shows off your figure and it has a simple yet stylish look about it. If you’ve done some simple sewing DIYs before and are now looking for something a bit more advanced but not too hard, this is a great project for you!
Tools and materials:
- Stretchy fabric
- Paper weights
- Scissors
- Rotary cutter
- Pins
- Sewing machine
- Pattern
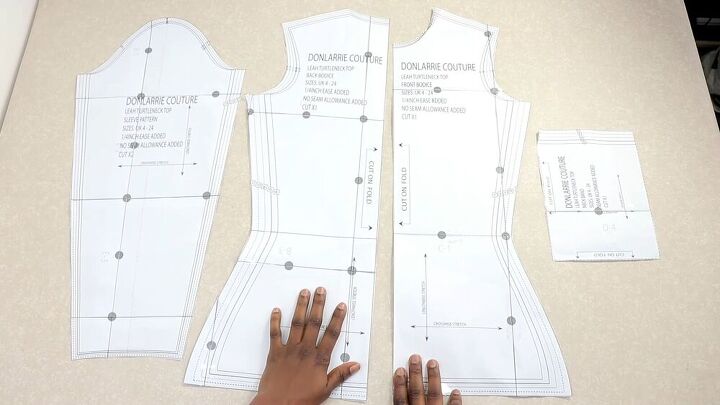
Assemble your pattern pieces
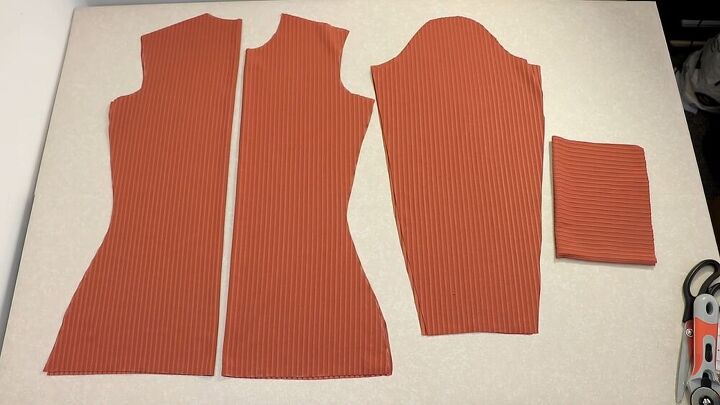
The first thing that you need to do is to print out and assemble your pattern pieces. You will have four pieces like this - the front bodice, the back bodice, the sleeve, and the neckband.
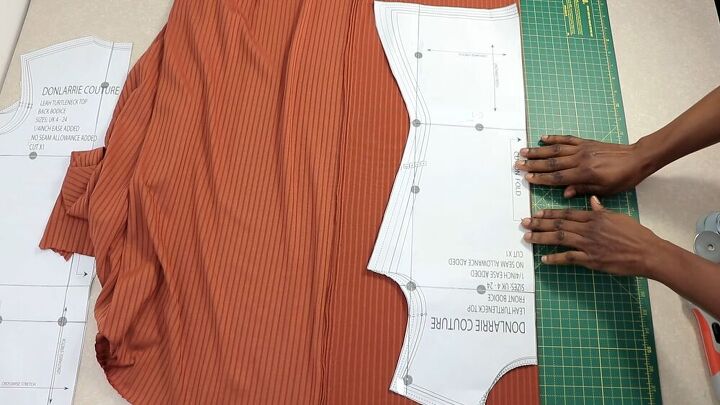
Add a seam allowance and cut out the pieces
Fold the fabric in two with the good sides facing each other. Place your front bodice piece on top, and you can see the arrow that indicates that you need to cut on the fold at the center front.
This pattern doesn’t have any seam allowance added already, so you’re going to be adding a ½ inch seam allowance all the way around except for at the bottom hemline, where you will add a 1-inch seam.
Then go ahead and cut out your front piece and repeat the same process to cut out your back piece.
Tip:
Place paperweights on your pattern pieces to prevent them from moving around.
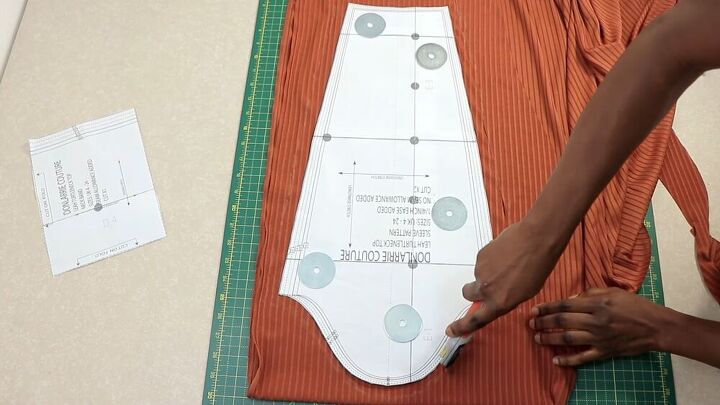
Cut out the sleeves
Now go ahead and add a seam allowance to the sleeve and cut it out. Follow the pattern piece's directions and add notches to the fabric at the top of the sleeve.
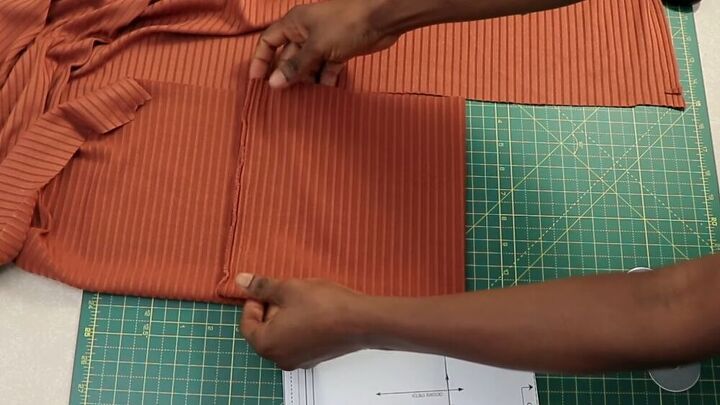
Cut out the neckband
The seam allowance has been added to the neckband, so you don’t need to add it. For the neckband, you need to fold the material and then fold it again. Then cut out the piece. When you open the neckband up, you will have a rectangular shape.
Assemble the pieces
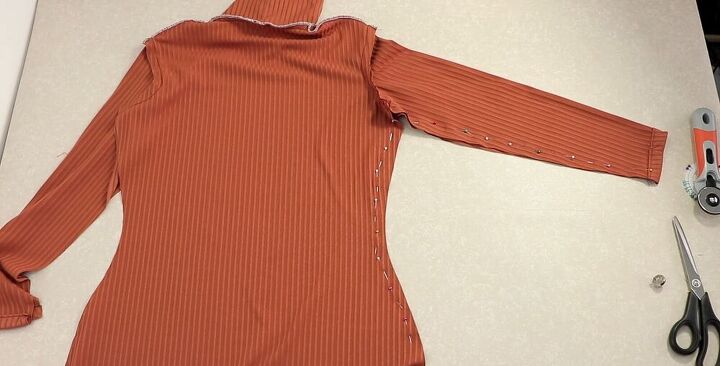
Place the front and the back bodice together, right sides facing each other. Pin the shoulder seam down and then proceed to sew the shoulder seam with an overlock stitch.
For the neckband, you need to fold it in half widthways, with the right sides facing each other. Pin down the long side and then sew it. Once sewn, half-turn the neckband right side out so that it is doubled over. To assemble the neckband to the bodice, you need to fold the back of the top into two, and then across the neckline, you’re going to notch it at the center back. Also, do the same thing for the front.
Find the stitch line in the neckband and place a notch at the other side of the neckband. That end, you will be joining to the center-front of the top. The folded side of your neckband should be facing the table and the rough edges facing up, so you pull up the bodice through this tube and then gently pin it down. Find the center neckline on the top that you notched earlier and align this with the notch on the neckband. The back neckline of the top will be aligned with the stitched line on the neckband. Once you’ve done this, pin all the way around the neckband. On a sewing machine, use an overlock stitch to sew this down.
Attach the sleeves
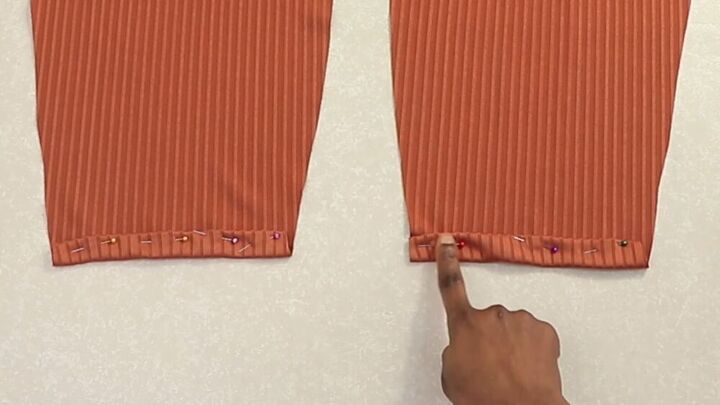
Fold the hemline of the sleeves and pin it down and then stitch. Then line up with the center notch that you made in the sleeve earlier with the shoulder seam line. Pin the sleeve all the way round to the top and then stitch it down.
Finishing stitches
The final things to do are pin the sleeve down to the bottom of the bodice and stitch and sew down the hemline.
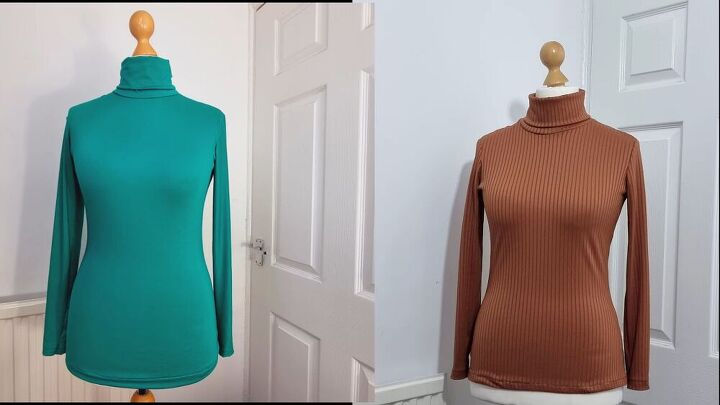
Here is the finished look, as well as another top that I made using a different material. These tops have such a high-quality look about them. I especially like the doubled-over neckband which not only looks lovely but also adds extra comfort and warmth. Enjoy wearing it!
The author may collect a small share of sales from the links on this page.


Comments
Join the conversation
Awesome basic staple!