How to Cut & Sew Chiffon Tops: Making a DIY Chiffon Top With Smocking

This DIY romantic chiffon top with smocked sleeves is stunning! Chiffon is not the easiest fabric to work with so take your time. Follow this tutorial to learn how to cut and sew chiffon tops, how to create the sewing pattern for this chiffon top, and how to do smocking.
Tools and materials:
- Button-down shirt
- Chiffon fabric
- Pattern paper
- Scissors
- Thread
- Shirring elastic
- Sewing pins
- Sewing machine
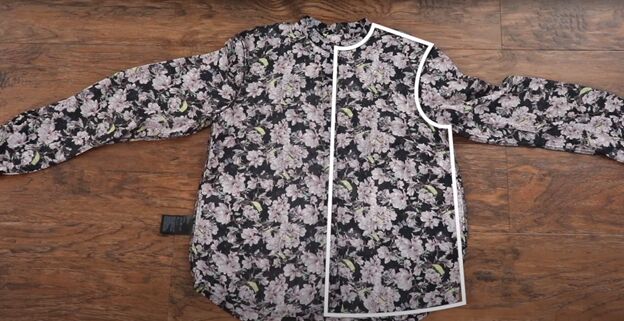
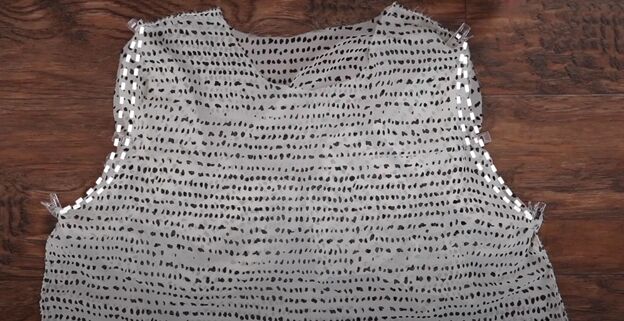
1. Make the bodice
Trace half the outline of any existing button-down shirt you have onto brown paper.
Fold your chiffon fabric in half twice, and place the pattern on the fabric, with the center of the shirt pattern on the fold of the fabric. Do not include the shirt sleeves in this pattern piece.
Cut the shirt piece from the chiffon fabric according to the pattern.
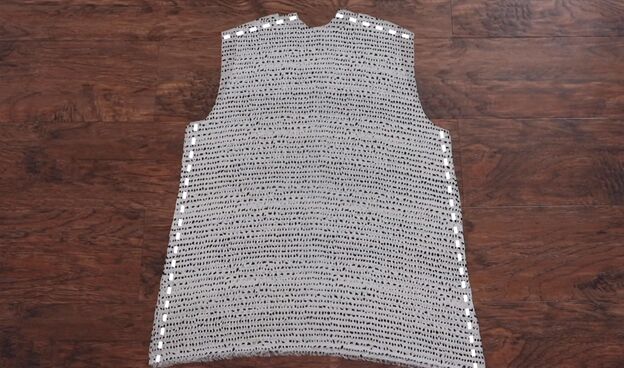
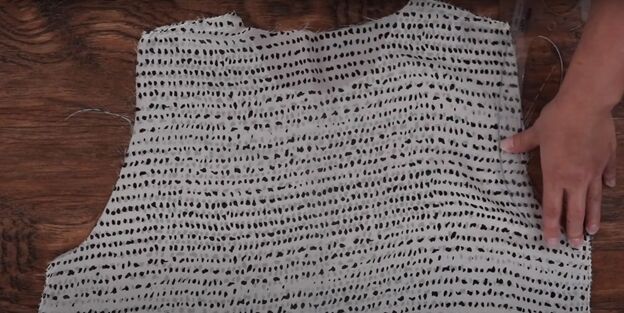
With right sides facing in, sew the two shoulder seams and side seams.
Try it on now, and, if necessary, adjust the size of the neckline in the front.
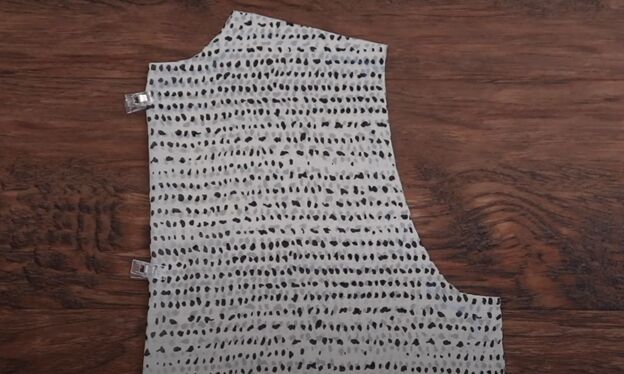
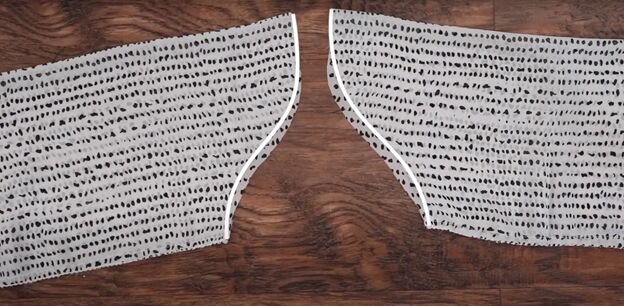
2. Make the sleeves
Lay the sleeve of your button-down shirt smooth and flat on your pattern paper, and trace the outline on your paper.
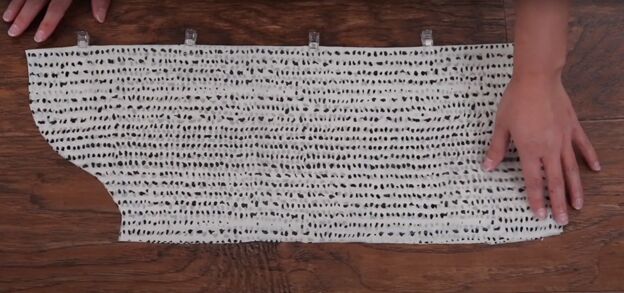
Cut the sleeve from double-folded fabric according to the pattern, widening the sleeve width if you want your chiffon top to have more of a balloon sleeve.
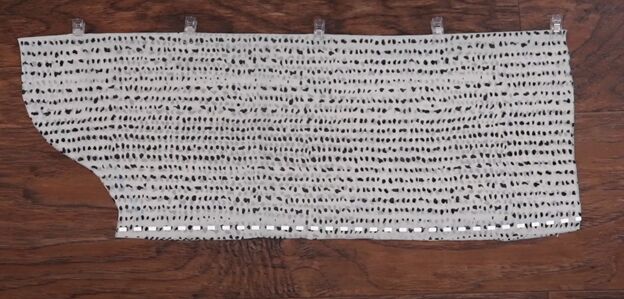
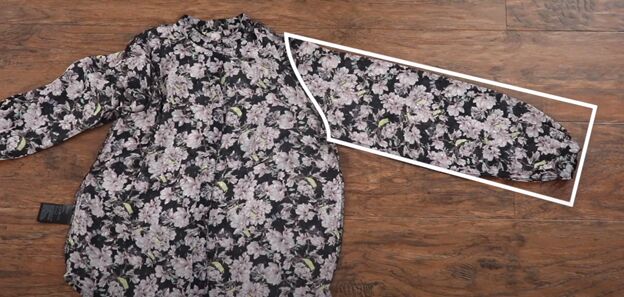
Sew the inside side of each of the two sleeves.
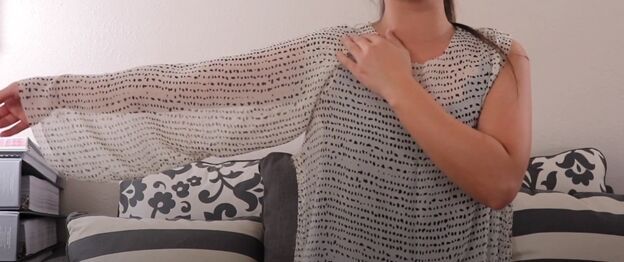
Try the sleeve on your arm to check for length and width and adjust as necessary.
In this tutorial the shoulder of the bodice came down too low for where the sleeve needed to be attached, so the armhole was cut back a little.
In addition, the sleeve at the armhole end was adjusted to match the armhole on the bodice.
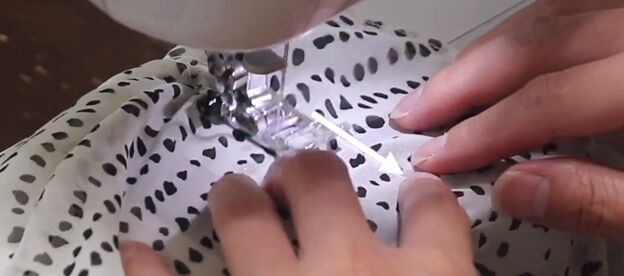
3. Attach the sleeves
With right sides facing together, insert the sleeves into the armhole of the bodice and pin in place. Then sew all around the armholes.
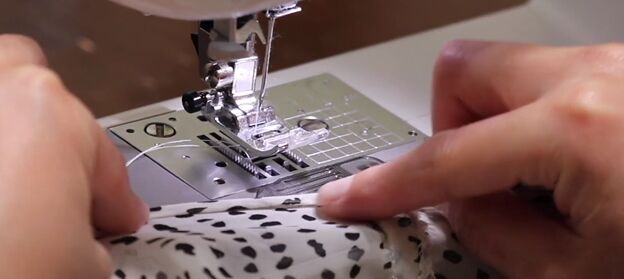
4. Finish raw edges
To finish all the raw edges, fold them under twice and sew them in place, making the edge as narrow as possible. If your sewing machine has a rolled hem presser foot, use that.
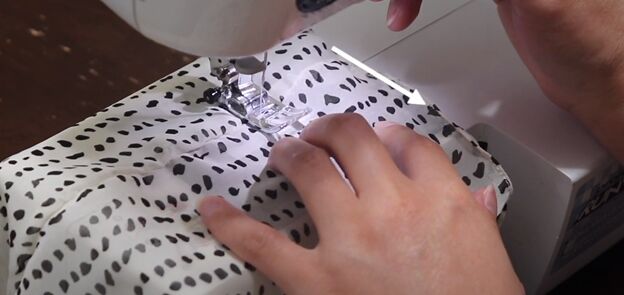
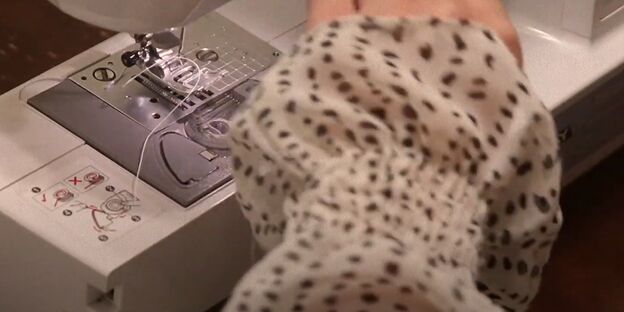
5. Create the smocked sleeves
Replace the bobbin thread in your sewing machine with elastic thread, stretching the elastic thread as you wind it onto the bobbin.
The rows of stitches you are going to create now are called “shirring”. Shirring is a way of gathering fabric by sewing parallel rows with elasticized thread. Shirring is how you create a smocked look.
Line up the edge of the sleeve bottom with the right side of the metal plate guide under the presser foot on your sewing machine. With your elastic bobbin in, sew one line of stitching all around your sleeve.
At the start and end of this stitching, fold the seam allowance up or down as necessary to make sure you don’t catch it in the stitching.
Now, without snipping any threads, move the sleeve over a bit so the stitching you just did is aligned with the right edge of the presser foot on your sewing machine and sew a second row of shirring just to the left of the first row.
Repeat the shirring until you have a total of about 7 rows of stitches each about a half-inch apart. Once you have the complete smocking done, go back and snip off any loose threads.
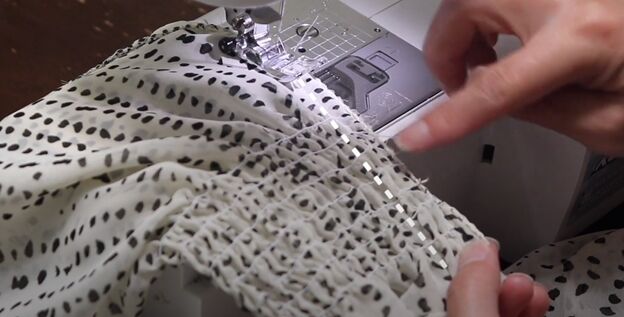
Finally, to secure the shirring rows, sew a new inside seam across the edge of the shirring.
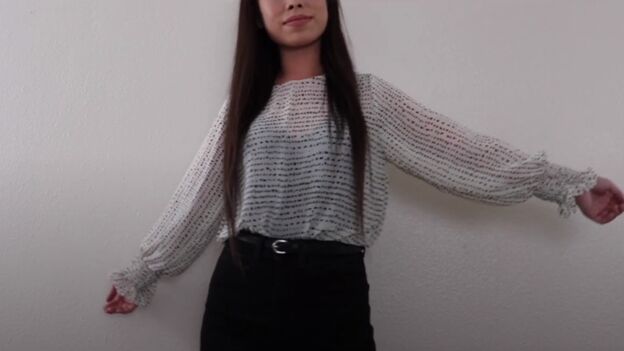
How to cut and sew chiffon tops tutorial
Here is the final look! It is so light and flowy. You can tuck it in or wear it out. However you wear it, you will feel comfortable and pretty. Leave a comment to let me know how your DIY flowy chiffon top turned out and whether this was the first time you attempted shirring!
The author may collect a small share of sales from the links on this page.


Comments
Join the conversation